Creating a GigE Vision camera
The following steps describe how to create a GigE Vision camera object, which can also be used to create a Beckhoff camera object. This requires a GigE Vision camera to be connected to the PC and the TwinCAT RT Ethernet adapter to be installed for the corresponding network port, as described in System configuration.
In addition, the target system must be in Config Mode. Click on the  symbol in the TwinCAT XAE Base toolbar or on Restart TwinCAT (Config Mode) in the Visual Studio menu > TWINCAT.
Alternatively, you can create a File Source Control.
To create a camera, proceed as follows:
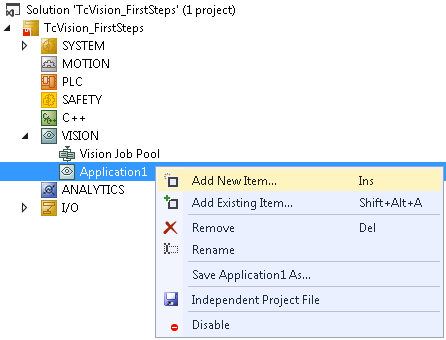
- 1. Click an application under the Vision node you created earlier.
- 2. Right-click and select Add new item...
- 3. Select the device type GigE Vision Camera or Beckhoff camera. If required, adjust the camera name and the GigEVision Camera Options and click Ok.
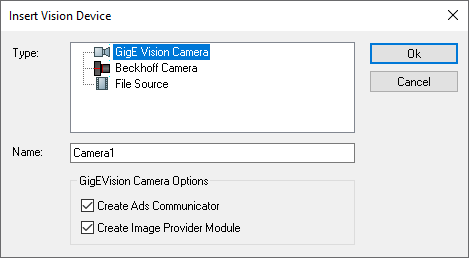
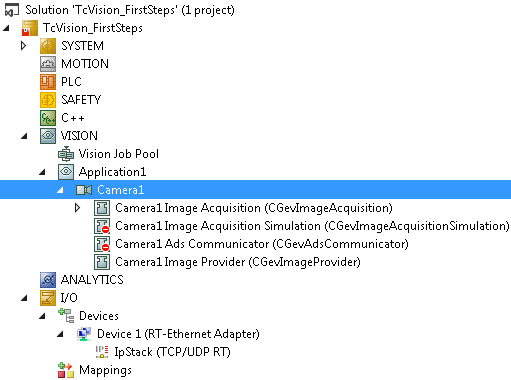
An Image Provider is the interface to the PLC function blocks and is therefore normally always required (see Camera details).
An Ads Communicator is only required for recording streams via the Record/Playback tab in the camera object.
If no streams are to be recorded, this option can be disabled. This eliminates the need for the Ads Communicator module and the corresponding VnTask ADS. - 4. GigE Vision cameras communicate via UDP/IP. A suitable network device with a corresponding IP stack in the I/O node is required for the network port used. Create this by clicking New....
Only one network device with one IP stack may be created for each physical port of a network interface card.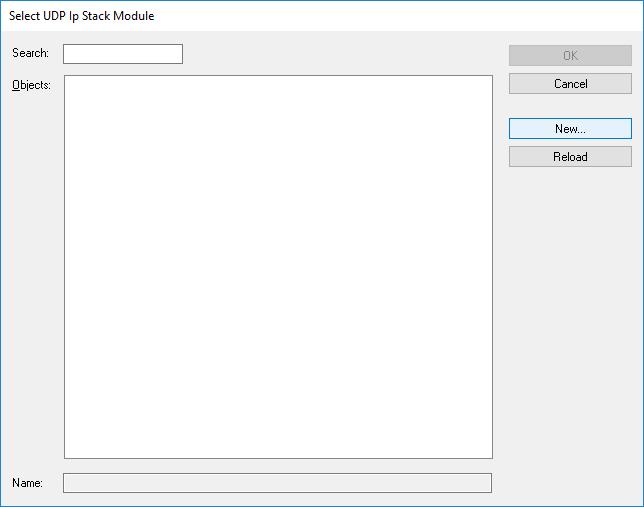
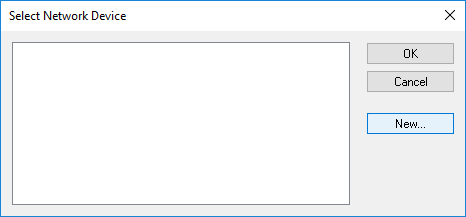
- 5. To create a new network device, click NEW... in the Select Network Device dialog.
- 6. In the Device Found At dialog, select the network port to which the camera is connected and click OK.
Only network ports for which the TwinCAT RT Ethernet driver is installed are displayed.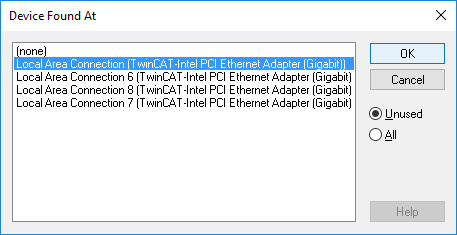
- 7. The network device is now created in the I/O configuration. Select it in the Select Network Device dialog and click OK. This creates an IP stack for the device.
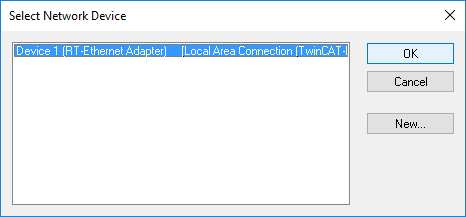
- 8. Select the IP stack and click OK.

- 9. If no IPv4 address has been assigned to the network port yet, answer the question whether you want to assign a fixed IP address.
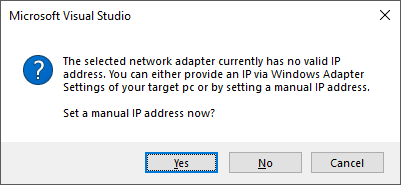
If Yes, set the IP address in the following dialog.
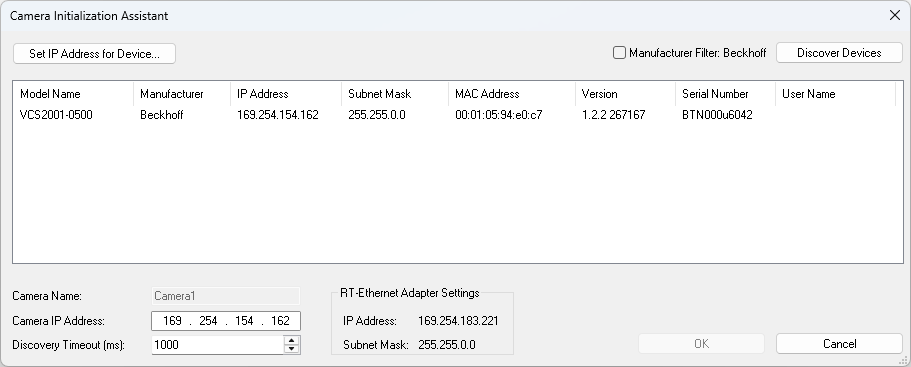
The IP address and subnet mask are then saved in the TwinCAT IP configuration of the network adapter (see Network configuration). - 10. In the Camera Initialization Assistant click Discover Devices. The selected network port is searched for connected cameras.
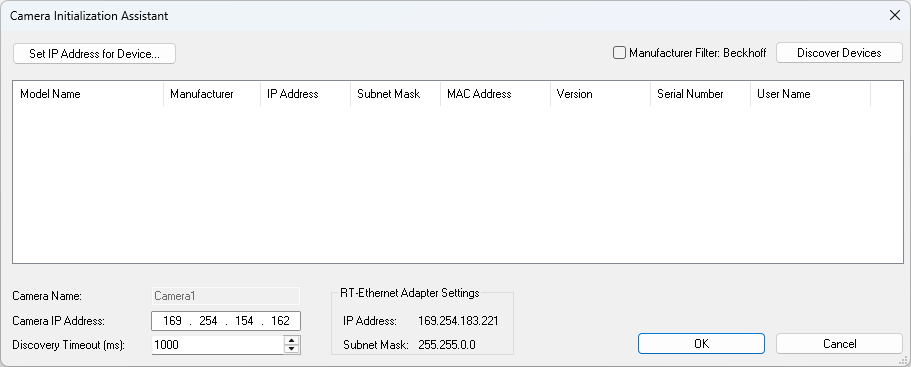
- 11. All cameras found are displayed depending on the Manufacturer Filter setting. Select the desired camera and click OK.
- The camera is now created under the application and can be used.
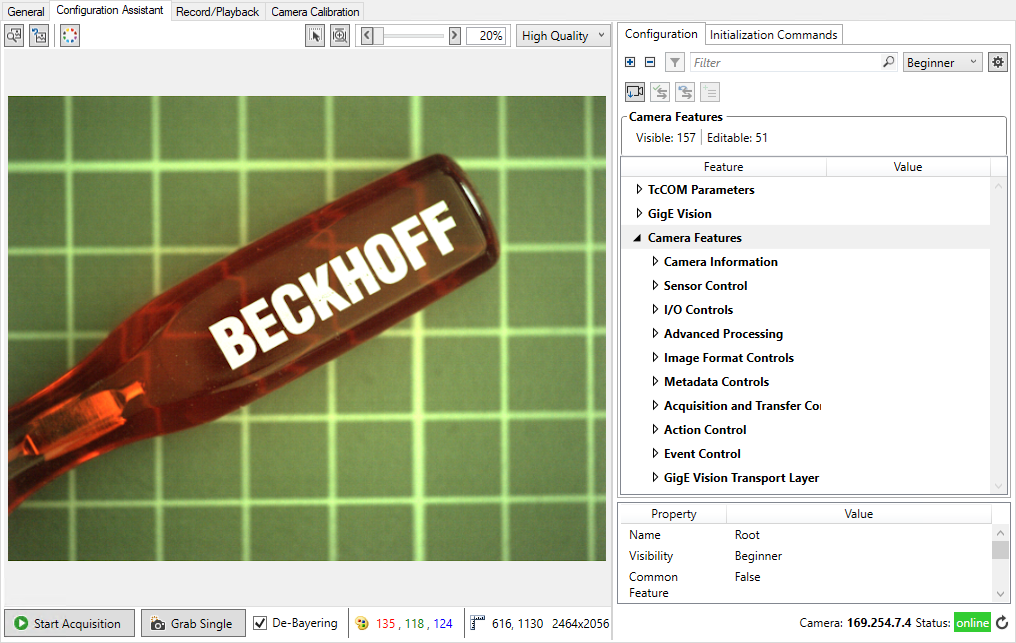
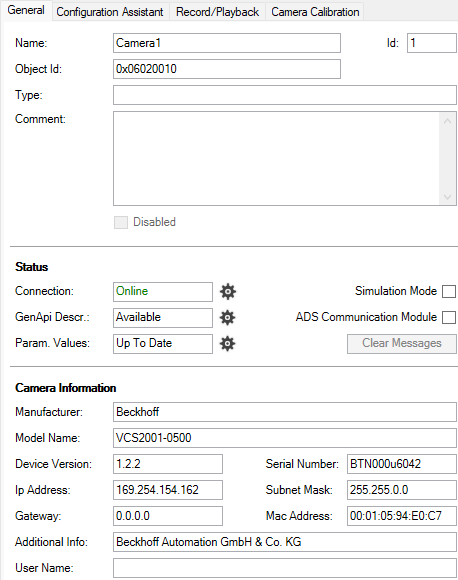
Double-clicking the camera node opens a window in which the connection to the camera can be verified. The General tab provides general information about the camera.
In the Configuration Assistant you can use Start Acquisition to view the live image of the camera and make configuration settings on the camera.
See also: Camera configuration samples
If you want to apply the changed parameters and write them to the camera at every startup, create the Initialization Commands at the end.