Add ShotScope to an existing project
If you have an existing project and would like to add ShotScope, you can follow these steps to integrate ShotScope into your project.
 | Have you already created a plastic application template? If you have created a new Plastic Application project with a version >= v12.16.0, ShotScope may already be included in your project. To make changes to this, follow the steps described in Setting up a ShotScope Project. |
Create ShotScope project
- To create a project, the Project templates must already have been installed as workloads and/or packages via the TwinCAT Package Manager.
- You can skip steps 1–3 if you have already added a Measurement project to your solution.
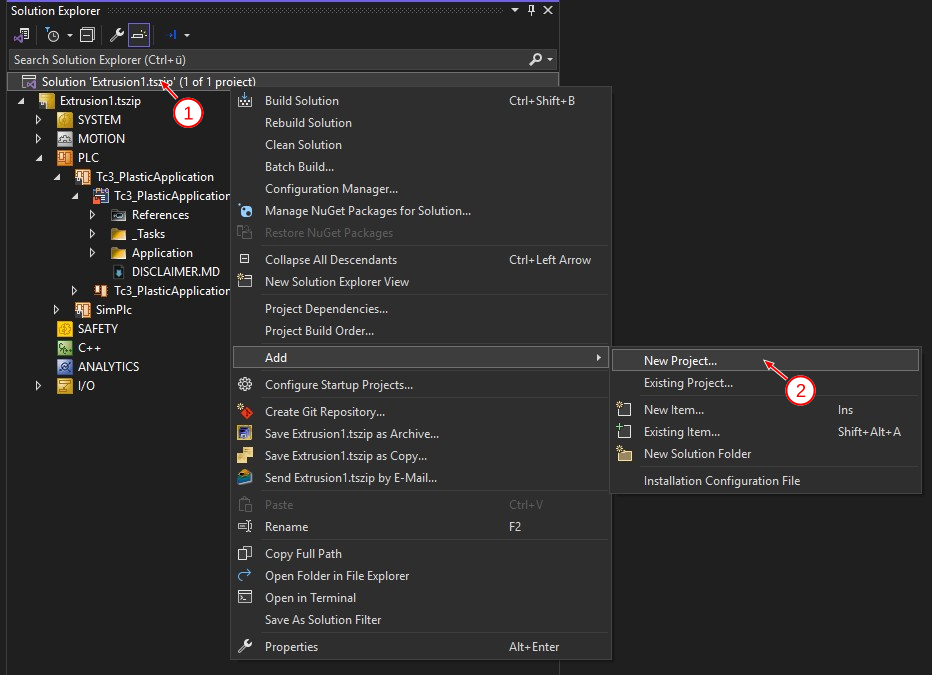
- 1. Create a new Scope project in your solution. To do this, right-click on your solution (1) and add a New Project (2).
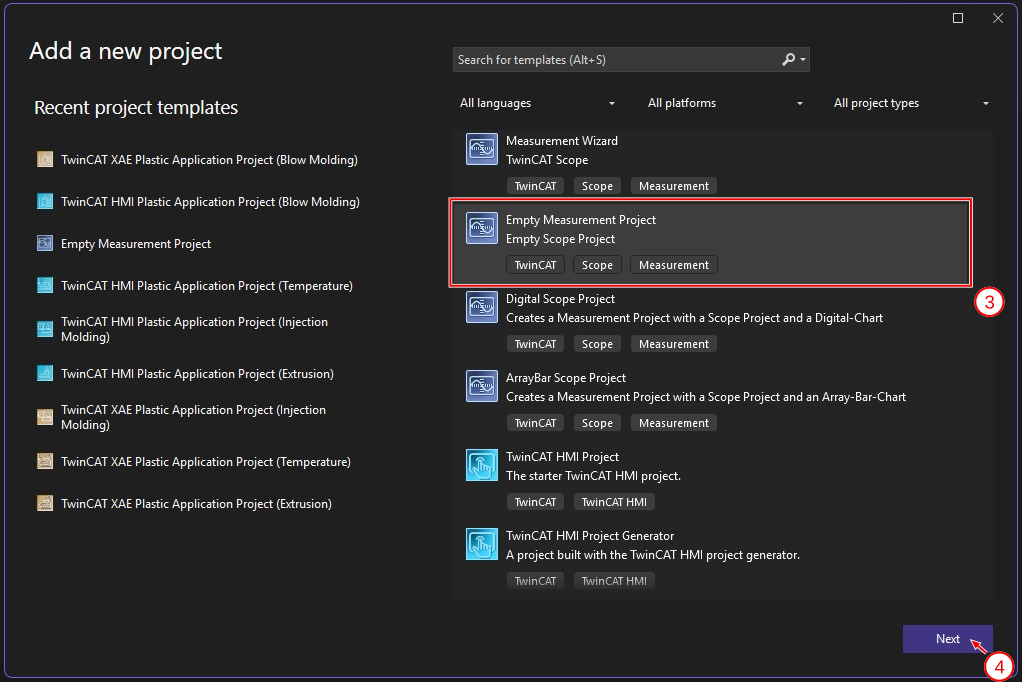
- 2. Select the Empty Measurement Project option (3) and click Next (4).
- 3. Enter a project name (5) and click Create (6) to confirm the creation of the project.
Recommended: For the Location, select the directory of your TwinCAT project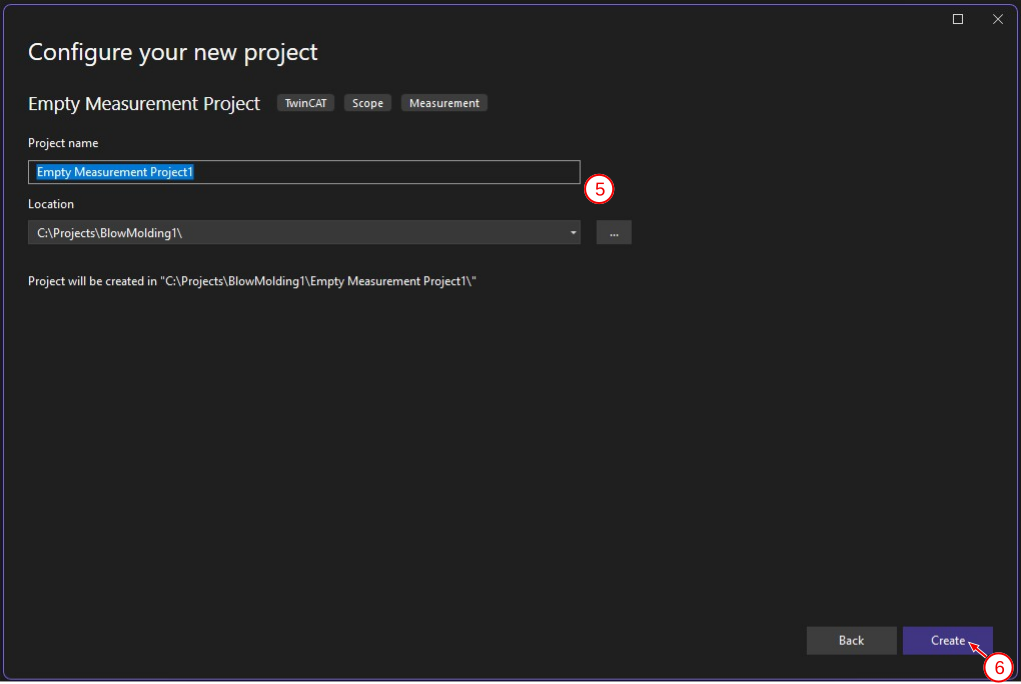
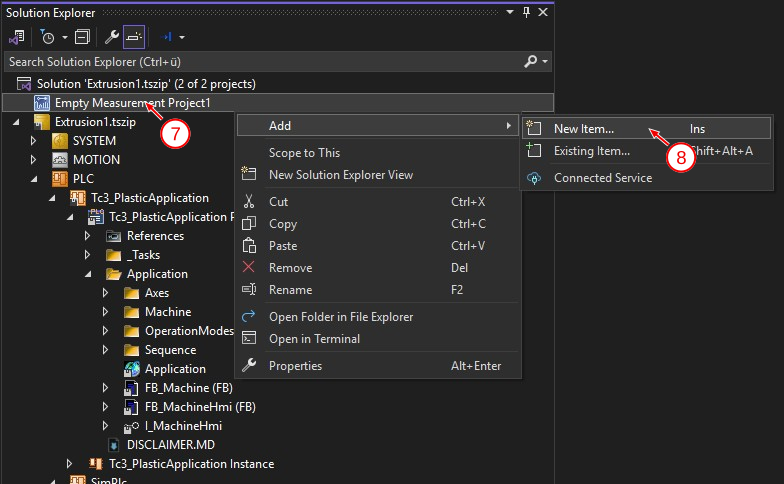
- 4. Right-click (7) to add a New Item (8) to the new Measurement project.
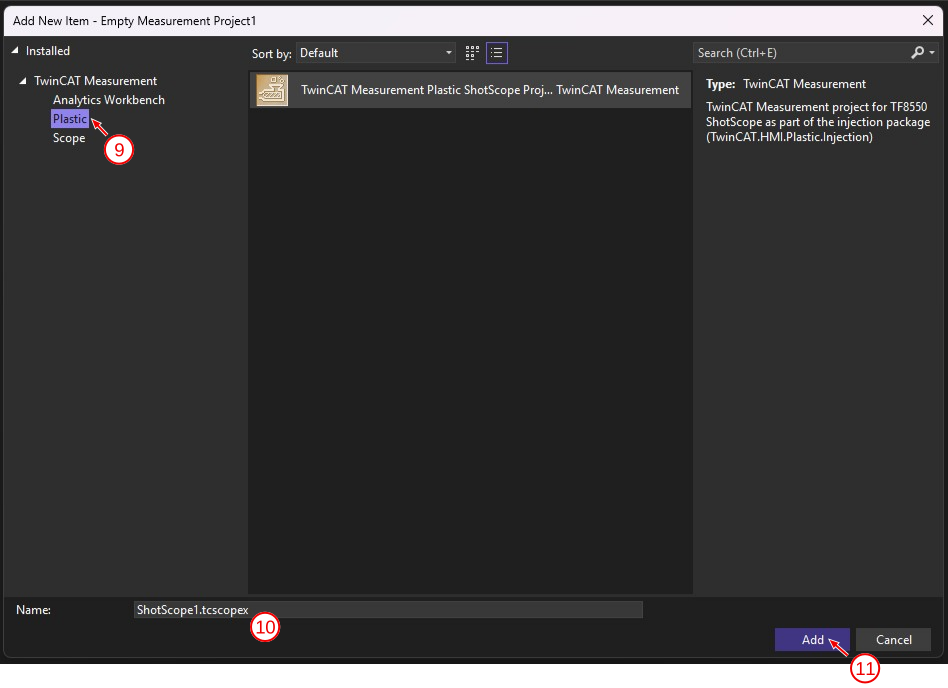
- 5. In the following dialog box, select the Plastic (9) category and then select the TwinCAT Measurement Plastic ShotScope Project.
- 6. After you have entered a name (10), you can close the dialog box by clicking Add (11).
- You have successfully created a ShotScope project with all (analyzable) standard channels.
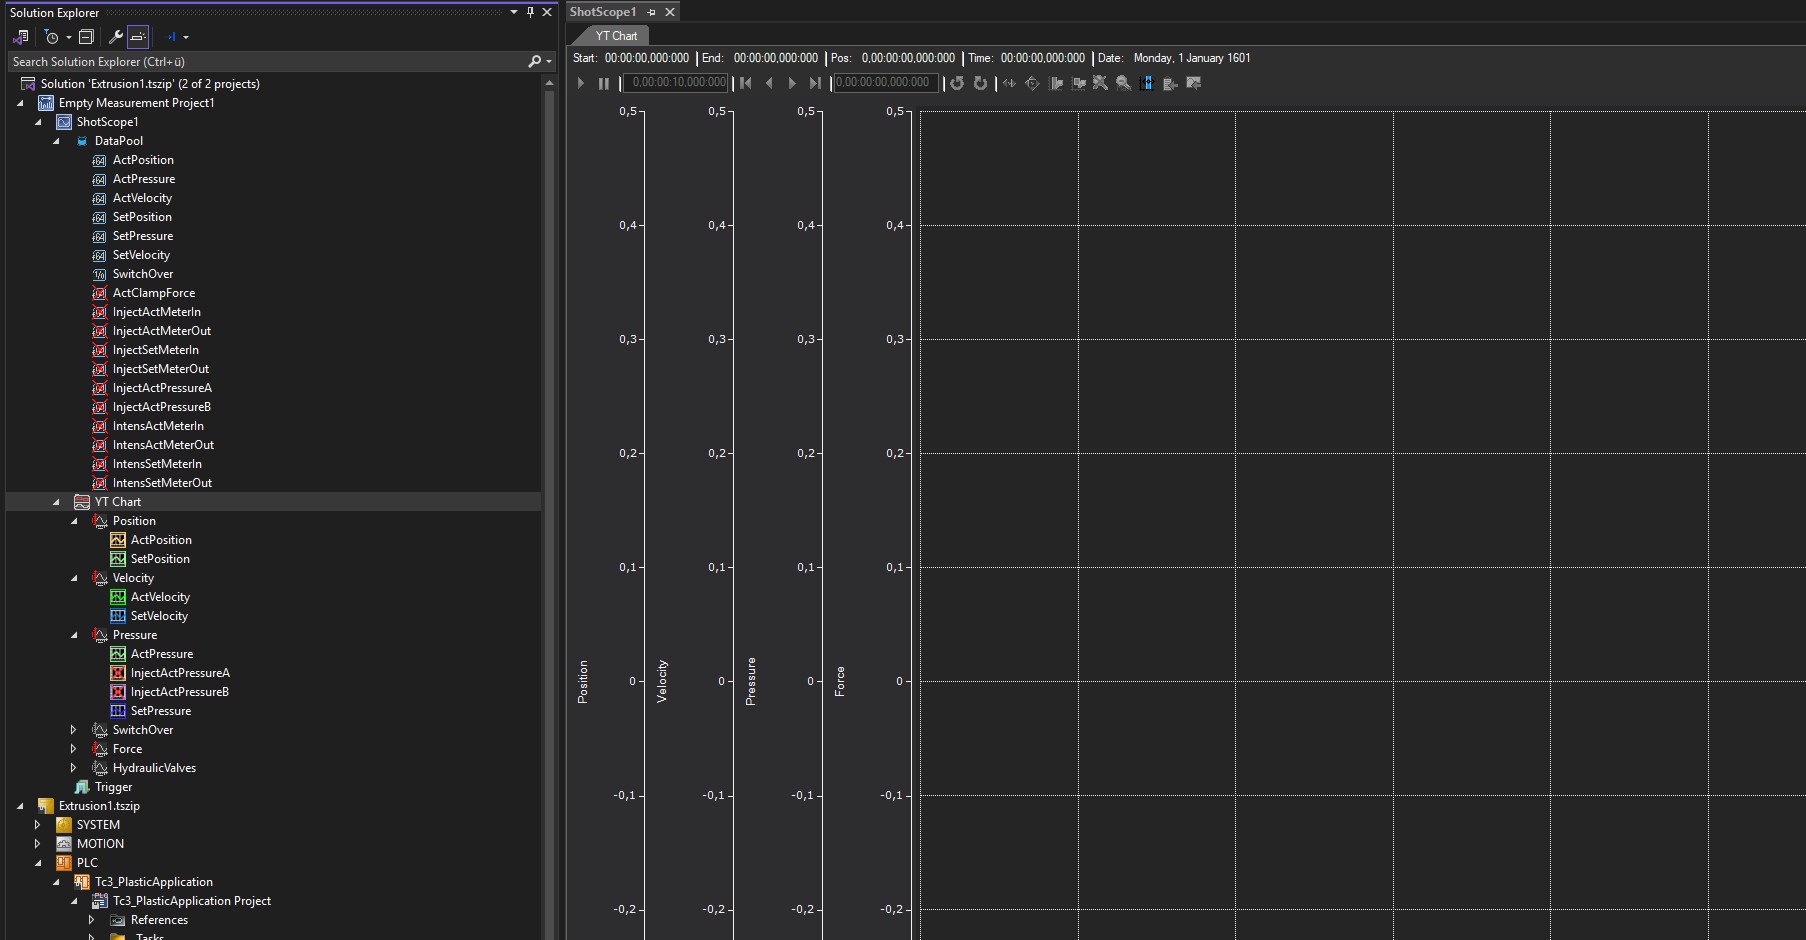
| Target system for new channels When adding new channels to the Data Pool, make sure they are configured for the local target system. If you previously used the Target Browser to make a choice of symbols from your running target system, you can right-click the Scope project (here, ScopeBMM) to set the target system for all symbols to local (127.0.0.1.1.1). |
Configure deployment for the target system
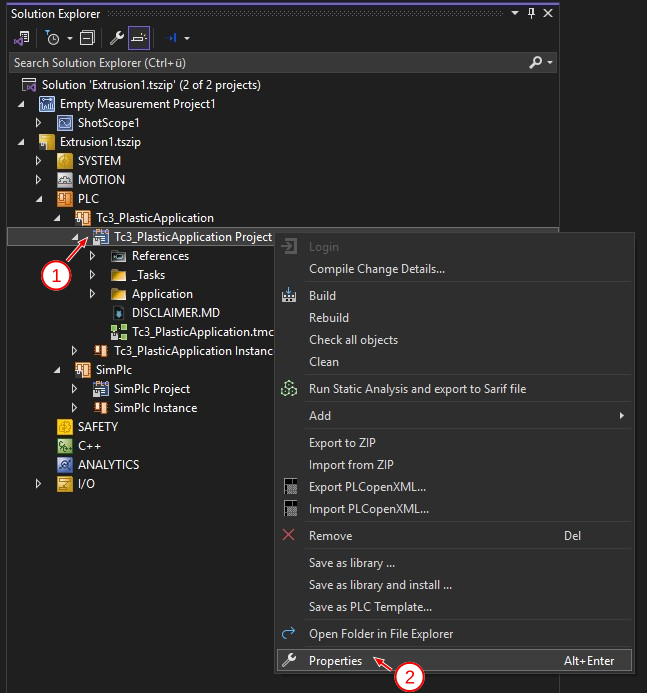
- 1. Open the project properties for your PLC project by right-clicking (1) and then making the choice of Properties (2).
- 2. In the window that opens, select the Deployment category (3).
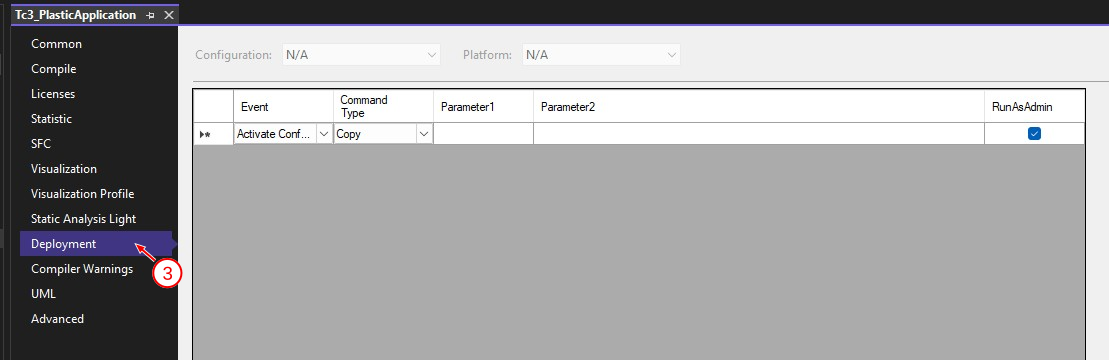
- 3. For Parameter1, set the path in your project, for example:
%SOLUTIONPATH%Empty Measurement Project1\ShotScope1.tcscopex- 4. For Parameter2, set the path on your target system, for example:
C:\Data\Machine\Scope\ShotScope.tcscopex- 5. Activate Configuration (3 and 4) to validate that your entries are correct.
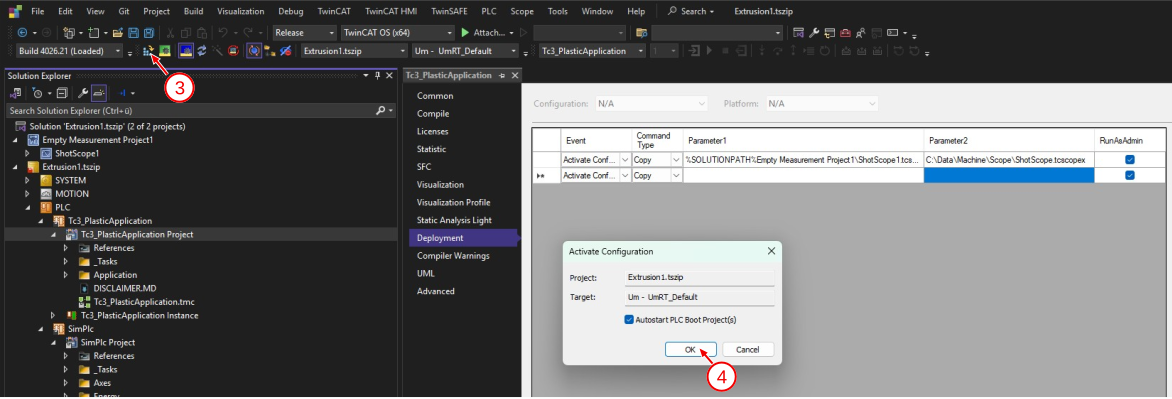
- You have successfully set up the transfer of the ShotScope configuration to the target system.
If you receive an error message (such as the one shown in the following figure), you must check your configured parameters again to ensure they are valid.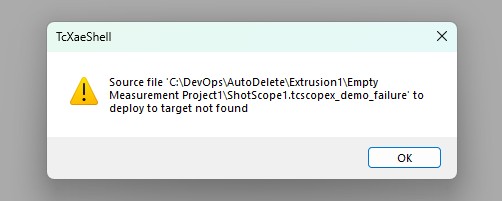
Add FB_ShotScopeHMI to the PLC program
- 6. Create an instance of FB_ShotScopeHmi at an appropriate location in your application.
fbShotScopeHmi: FB_ShotScopeHmi;- 7. Optional: If you have chosen a name other than
ShotScope.tcscopexfor your target system, configure it for your instance.
fbShotScopeHmi.ConfigFilePath := 'MyCustomFileName.tcscopex';- 8. The following options are available for calling the class (FB) on a cyclic basis:
- Recommended: Add this instance to the call stack of your FB_BaseRuntime. This enables consistent management of cycle calls in accordance with the concept described.
fbRuntime.Append(fbShotScopeHmi, 0);- Alternatively: Call the class's cycle method directly. This class (FB), in particular, is capable of initializing itself.
fbShotScopeHmi.Cyclic();- 9. Release the ShotScope as soon as the PLC has completely initialized. For example, you can use the recipe's status for this purpose.
fbShotScopeHmi.DataValidPlc := HmiCommunication.fbPlcStateToHmi.DataValidPlc;- 10. Integrate the start and stop signals into your sequence using the
fbShotScopeHmi.Start()and.Stop()methods.
- You have successfully added ShotScope to your TwinCAT project.