Measuring the valve characteristics
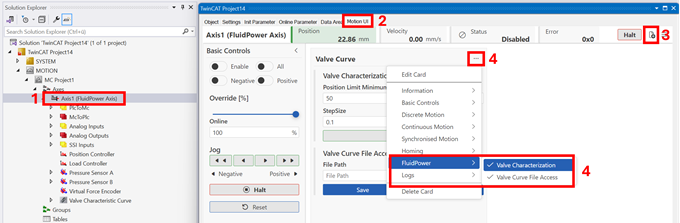
Add a FluidPower card
- The MC3 FluidPower axis was moved during manual operation;
see Move the axis in manual operation using Motion UI.
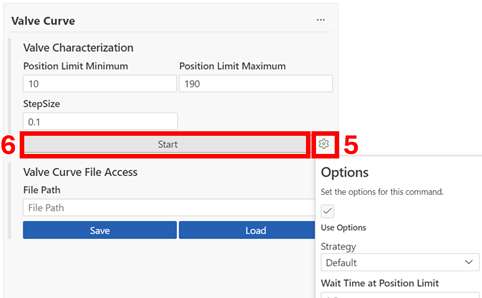
Starting the identification
- 5. Set the appropriate limits for your hydraulic system (see Identification of the valve characteristics)
- 6. Start identifying the valve characteristics by clicking Start
→ The “Start” button changes to “Stop”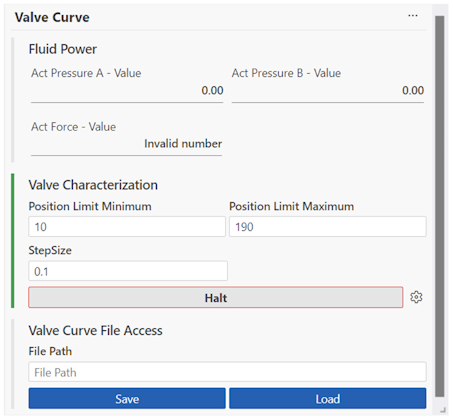
→ Once the valve characteristics have been successfully identified, the button changes back to “Start”.
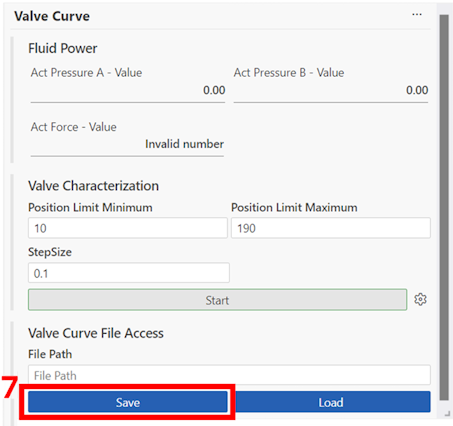
Save Valve Characteristics
- 7. Click Save to save the characteristic curve on the target device (see File access)
Enable Valve Characteristics
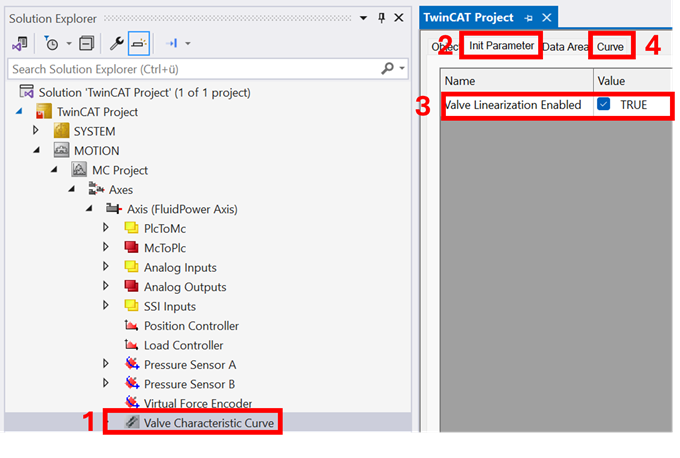
- 8. Double-click the Valve Characteristic Curve object
- 9. Click on Init Parameter
- 10. Activate the valve characteristics
- 11. Click on Curve to view and adjust the characteristic curve.
The next step is to optimize the position controller;
see Set control parameters for position control.