3. Automatic scanning of the IO-Link ports
This part of the documentation describes the configuration of the physically available IO-Link devices in TwinCAT.
During automatic scanning of the IO-Link ports, the steps “WakeUp pulse”, “Baud rate setting”, “Reading of the communication parameters”, plus “Parameter server” and “Cyclic data exchange”, if applicable, are performed, see Establishing the IO-Link communication. The corresponding IO-Link device must be connected to the IO-Link port for this.
The connected devices are automatically detected, configured and a search is performed for the associated IODD.
Finding connected IO-Link devices
- Prerequisite: the master and the devices are connected and powered.
- 1. Click on the “Scan Devices” button (see following figure).
- The connected IO-Link devices are found.
- The connected device is listed for each port in the information window.
Only port 2 of the master is assigned an IO-Link device. - Confirm the information window with the “OK” button.
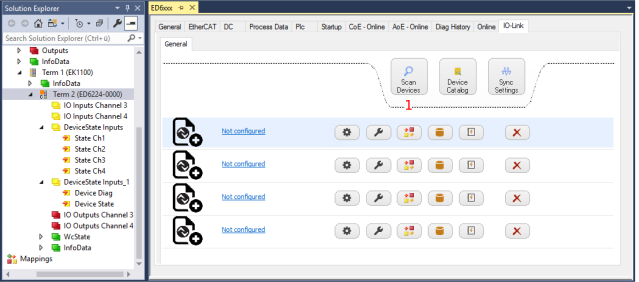 Fig.24: Scan Devices
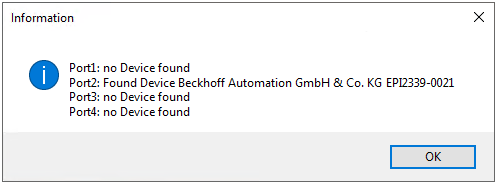 Fig.25: Information “Scan Devices”
- 1. To be able to work with the devices, the button “Reload Devices” must be clicked.

The IO-Link devices are now entered in the “General” tab. To the right of the port display, further tabs can be opened for information and settings for the IO-Link device.
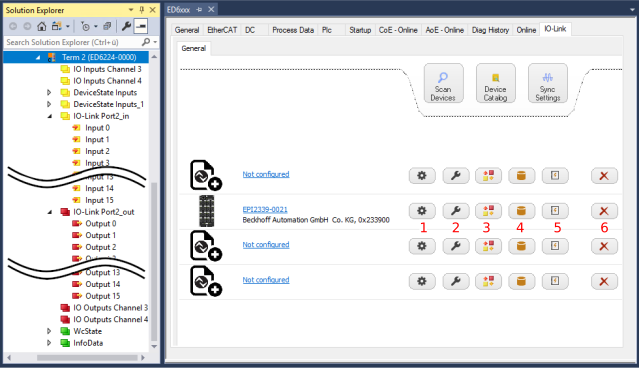 Fig.26: Device on port 2, settings and information on the IO-Link device via buttons 1 - 6
1: “Settings” | Viewing and changing the settings of the IO-Link device |
2: “Properties” | Viewing and changing the parameters of the IO-Link device |
3: “Process Data” | Process data of the IO-Link device |
4: “Data Storage” | Displaying data stored in the parameter server |
5: “Event log” | Displaying errors and warning messages |
Removing IO-Link devices from port n |
Displaying Device Settings
- 1. Open the “Settings” tab via the “Settings” button.
- 2. If necessary, change the settings in the “Settings” tab as described in the chapter Settings of the IO-Link devices.
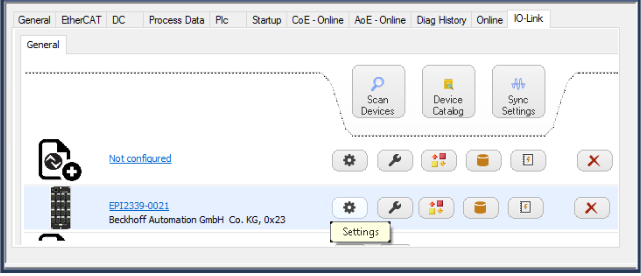 Fig.27: Open the “Settings” tab for port 2
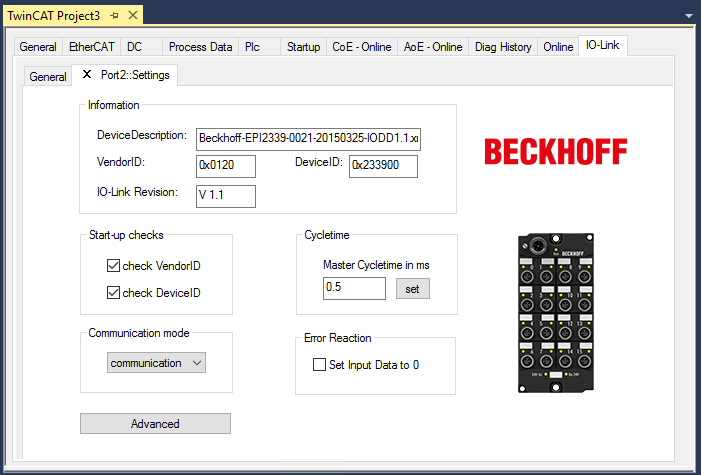 Fig.28: Device port 2 settings
Displaying Device Parameters
- 1. Open the “Parameters” tab via the “Properties” button.
- The parameters of the respective IO-Link device are listed.
- 2. Parameterize the device as described in chapter EPIxxxx, ERIxxxx - Setting the IO-Link device parameters.
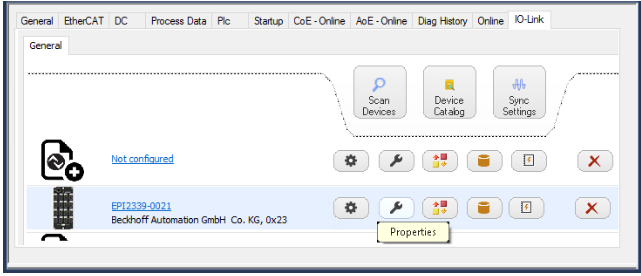 Fig.29: Open the “Parameters” tab for port 2
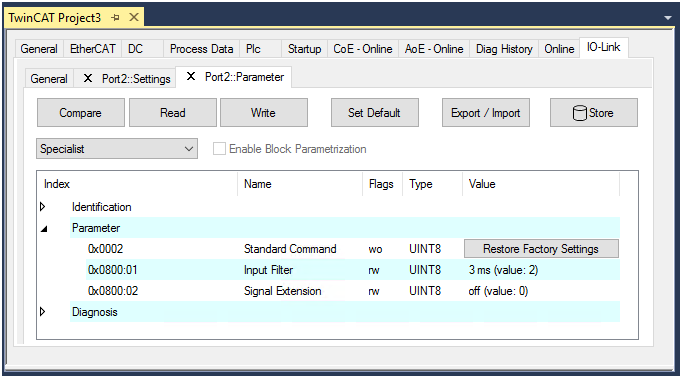 Fig.30: Parameter device port 2