Getting started
This chapter describes step by step how to work with the Symbol Explorer and is intended to provide an overview of its functions.
Connecting to a controller
The Symbol Explorer communicates with a controller via the ADS communication interface. So that communication with a controller can be successfully established, the following conditions must be satisfied:
- The controller can be reached via the network.
- TwinCAT is in Run Mode.
- An AMS route to the controller has been set up.
- A PLC runtime has been activated and started.
If the criteria are fulfilled, a connection can be established and the symbols read out. It is only possible to read out symbols that have been declared as persistent and symbols that contain persistently declared symbols.
Starting the connection to a controller
- 1. Start the Symbol Explorer and click the Connect button on the start page.
- 2. In the Choose Route dialog, select the Ams Route belonging to the controller to which you wish to connect.
- If you were able to successfully connect to the controller, the online window opens, showing you the read-out symbols in a list.
Taking a snapshot
- 1. Start the Symbol Explorer and connect to a controller.
- 2. Click the Take Snapshot button in the online window in order to take the snapshot.
- 3. You will then be requested to select a location to save the snapshot file. Select a folder and confirm with OK.
- All values of the symbols in the list are synchronized with the PLC and written to the file.
Loading a snapshot
- 1. Open the Symbol Explorer and click the Snapshot button on the start page.
- 2. You will then be requested to select a snapshot file. Select a snapshot file to be loaded and confirm with OK.
- The snapshot window then opens, showing you the loaded symbols in a list.
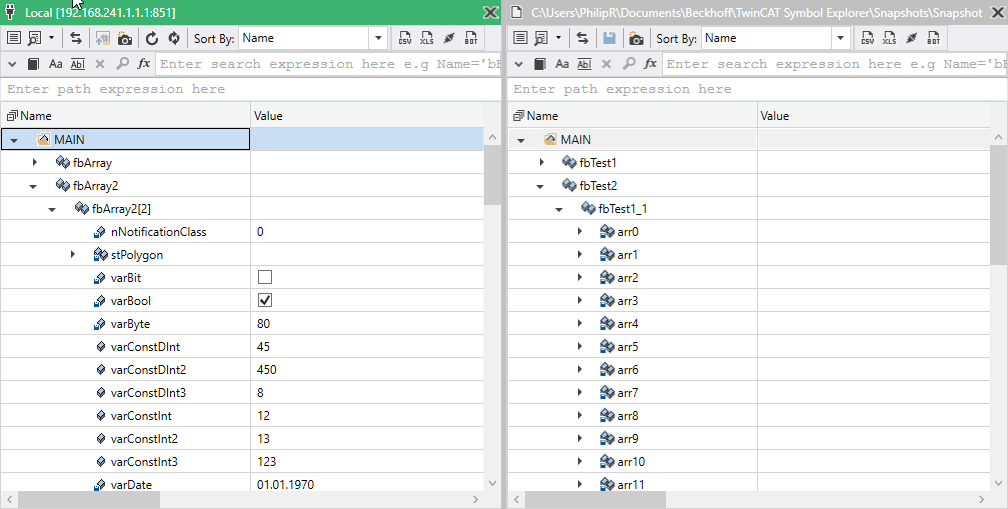
Viewing and editing symbol lists in parallel
The Symbol Explorer can display two symbol lists in parallel. It is thus possible, for example, to place the current symbols (online) and symbols from a snapshot next to one another and to edit symbol values between these two lists. Simply connect to a controller and then open a snapshot. A different order of opening/connecting is also possible.
Copying a snapshot to a controller
- 1. Open and connect the Symbol Explorer to a controller.
- 2. Then open a snapshot. You can now see the Online and Snapshot windows side by side.
- 3. Press the Copy Symbols button in the snapshot window. The Symbol Transfer Protocol dialog then opens:
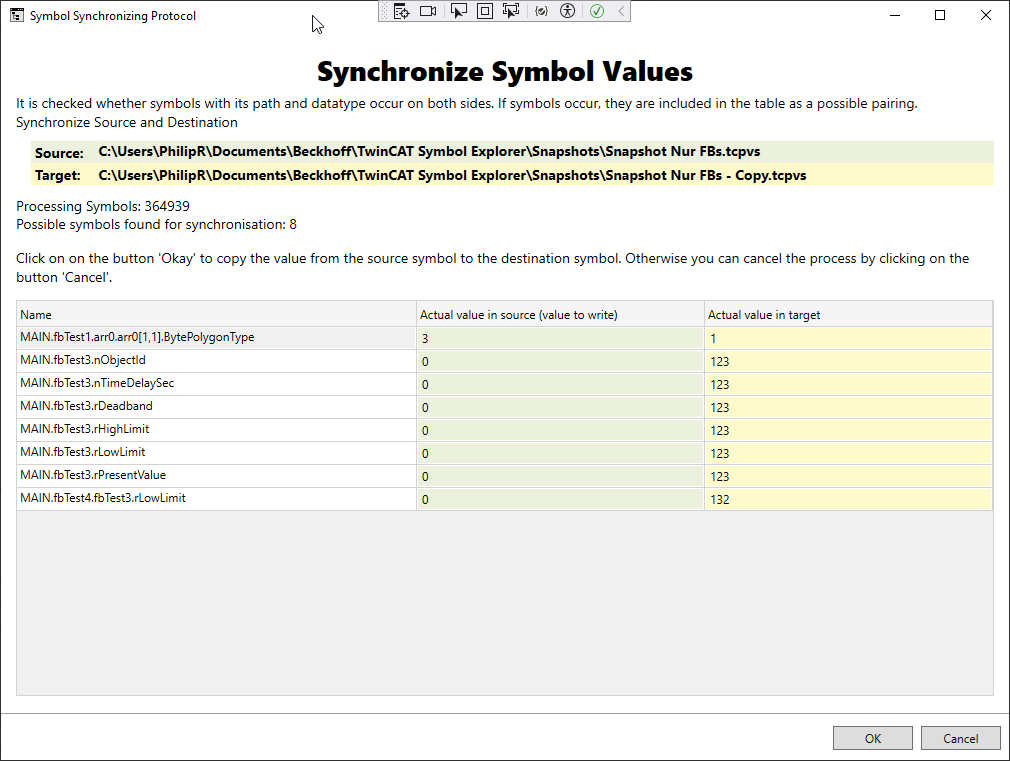
- The dialog informs you in detail about the copying procedure.
- 4. If the symbol values are correct, confirm the copying procedure by clicking OK, otherwise select Cancel. If you have confirmed the copying procedure, the symbol values from the snapshot are copied into the online symbol list.
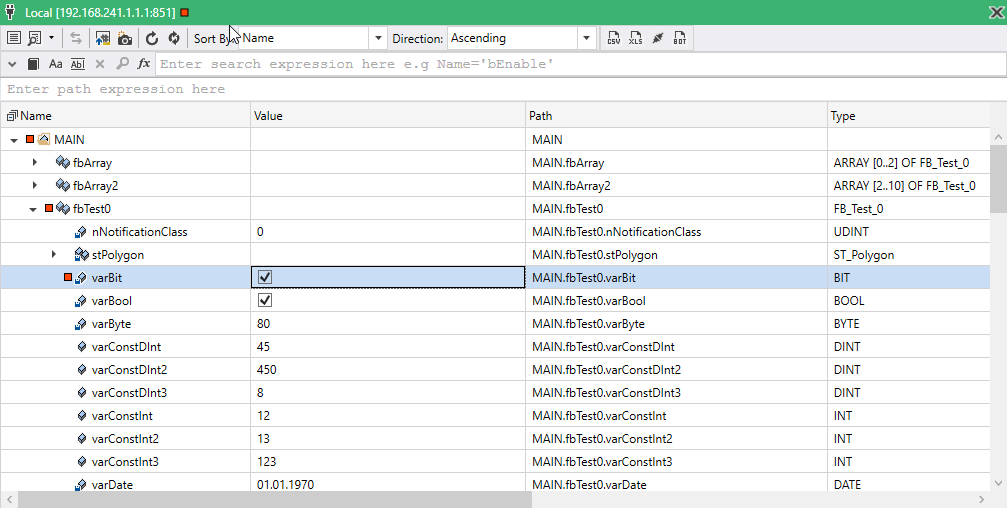
- Once the copy procedure is completed, the symbols with changed values are highlighted by a red square in front of the symbol name.
- 5. You can now load the changes from the Online window into the controller. To do this, press the Upload Symbol button in the toolbar.
Comparing symbols and synchronizing differences
With the Symbol Explorer it is possible to compare two lists of symbols. You can thus compare online symbols with symbols from a snapshot and check for differences.
Starting a comparison
- 1. Connect to a controller or load a snapshot.
- 2. Repeat the procedure so that two symbol lists stand side by side.
- 3. Then press the hotkey [F8] or select Compare Symbols in the Tools menu.
- The comparison window then opens.
Synchronizing differences
During synchronization, differences are copied from one symbol to another, either from left to right or from right to left. This procedure differs from the direct editing of a symbol via the Online or Snapshot window.
Synchronization functions
The synchronization functions can be applied implicitly to differences on the basis of a row selection. For example, if you click a row with a difference and then the right arrow button on the central toolbar, the symbol value is copied from the left into the symbol on the right. This allows the easy merging of many small differences.
