Configuration
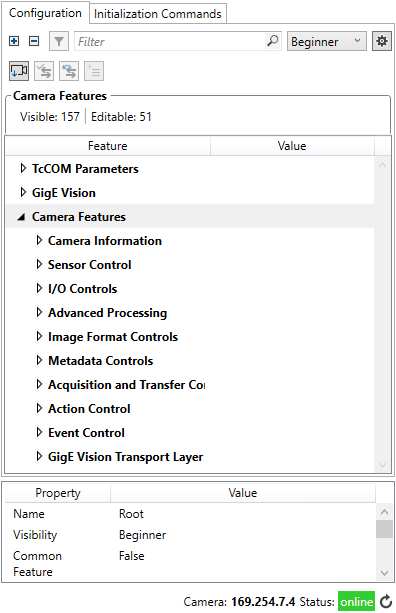
The Configuration tab consists of 3 areas, which are described individually below:
- Filter and controls
- Configuration tree
- Properties window
Filter elements

With the help of filter elements, features can be found quickly and easily in the configuration tree and in the Initialization Commands list:
- Click on the
 symbol to expand all tree elements. All parameters are visible.
 - Click on the
 -symbol to collapse all tree elements. Only the main groups are visible.
 - Clicking the
 icon will filter the tree items and display only the lines with a change. The button is only enabled when changes are displayed.
 - The search line
 filters the parameters by specific character strings or (hexadecimal) addresses. When entering a string, the background of the text box is white and an additional button for deleting or resetting the filter appears. If an entry has been confirmed by pressing Enter or clicking the filter button, the text box is also highlighted in green. This indicates whether the current string corresponds to the active filter and therefore the view of the tree elements.
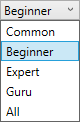
- In accordance with the GenICam standard, the three visibility levels Beginner, Expert and Guru can be selected. The visibility level of each feature is stored in the GenApi file of the camera. In addition, there is the All entry, which displays all entries, including invisible features. There is also the Common entry, which only displays the predefined or self-defined features.
Common Features List
The Common Features List is a predefined list that contains the most common or most frequently used features for configuring a camera. The name from the GenICam Standard Features Naming Convention (SFNC) is used for the predefined registers. Therefore, the number may differ depending on which features the respective camera basically supports and whether the standard name was used.
The list of included features can be individually expanded or reduced. To add a camera feature, select an entry and click the  button to add it. If the feature is already included in the list, it can be removed using the
  button . All changes are saved in the TwinCAT project. Categories and selectors cannot be added.
The list can be reset to the predefined state via the "Reset Common Features configuration" entry in the action menu. The "Common" list can be selected as a filter for both configuration and initialization commands.
Controls

The functions of the buttons from left to right are:
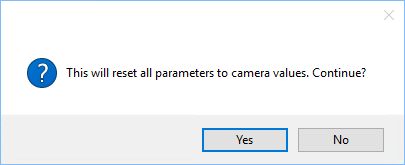
Read Camera Parameters | All parameter values are read from the camera and written to the configuration tree. This must first be confirmed by the following dialog:
|
Write Local Changes | All local parameter values that deviate from the camera values (marked in orange in the configuration tree), are written to the camera. |
Revert Local Changes | Any local changes in the feature tree that have not yet been written to the camera will be reset. |
Configuration tree
The configuration tree contains three main groups:
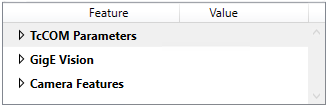
- TcCOM Parameters: Parameterization of the communication behavior between TwinCAT and the connected camera. An explanation of these parameters can be found in chapter TcCOM parameters.
- GigE Vision: Information about the camera according to the GigE Vision standard, and IP configuration option. Depending on the camera, the settings may also be available in the Camera Features tree.
- Camera Features: Camera parameterization based on the GenICam standard. The description of all camera features is read automatically from the GenAPI file by the camera. A feature can be an executable command, a (changeable) parameter or an organizational element. For some settings (e.g. image acquisition/trigger, binning, exposure time, etc.), see Camera configuration samples.
For details on the parameters of a particular camera, please refer to the corresponding vendor documentation. In addition, the GenICam standard describes how the Camera Feature tree is structured.
Camera Features Information
Three pieces of information about the Camera Features are displayed above the configuration table:
- Visible: Number of all currently visible or displayed features, depending on the active filter settings.
- Editable: Number of "Visible" features that can be edited. The number generally depends on the current camera parameterization and therefore varies.
- Changes: Total number of changes within the Camera Features tree. This number is only displayed if there are changes, regardless of the active filter settings.
If you click a feature in the configuration tree, the properties of the feature will be displayed underneath the tree.
Setting of parameters
Changeable features can be changed via a text box, a slider, a combo box or a checkbox. Read-only features are grayed out. The following buttons are available for every changeable configuration element:
 Write Value
Writes the local change to the camera.
 Reset Value
Deletes the local change if there is a difference between the local and camera value.
 Load Value
Loads the current value of the parameter from the camera.
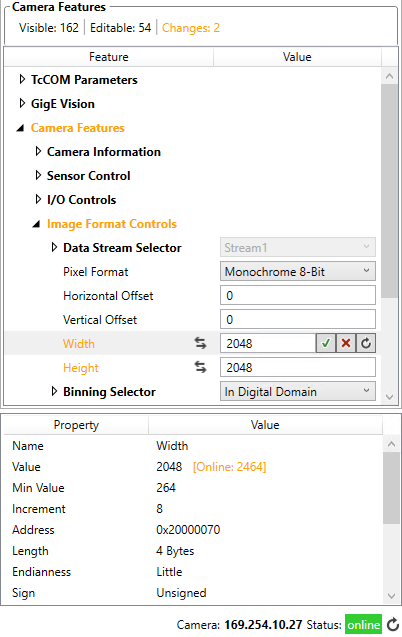
If the set parameter value deviates from the actual value on the camera, the parameter and higher-level elements in the configuration tree will be marked in orange. In addition, the lines with changes are marked with an icon and the deviation is displayed in the properties window. An orange "Changes" note above the table generally indicates changes in the list.
Offline changes
The parameters in the configuration tree are also changeable if the camera is offline or if the target is in Run mode. In this case the parameters are not written directly to the camera, but only saved in the project. As a result of this, it is possible to make offline parameter changes that can be synchronized with the camera at a later time.
Feature properties
The properties of the individual features are displayed underneath the configuration tree. This includes the size and address of the respective camera register, access rights and a description.
Property | Description |
|---|---|
Name | Name of the parameter. |
Beckhoff Tooltip | Contains additional information and is only displayed in special cases. For example, the Acquisition commands are disabled, as only the controls for starting / stopping the preview should be used. |
Value | Local value of the parameter. If the local value deviates from the camera value, the camera value is additionally displayed in orange. |
Min Value | Minimum set value. Only displayed if a minimum value has been specified for the feature in the GenApi. |
Max Value | Maximum set value. Only displayed if a max. value has been specified for the feature in the GenApi. |
Increment | Increment of the value change. Only displayed if a minimum value has been specified for the feature in the GenApi. |
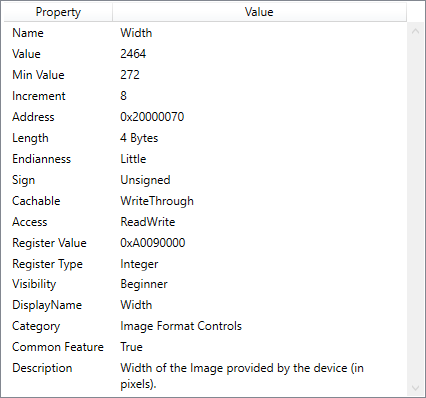
Address | Hexadecimal address of the parameter on the camera |
Length | Size of the parameter in bytes |
Endianness | Byte sequence of the parameter. This property must be observed when using the function blocks FB_VN_ReadRegister and FB_VN_WriteRegister. |
Sign |
|
Cachable | Specifies whether the parameter value is cached when no camera is connected.
|
Access | Access rights for reading and writing this parameter on the camera. |
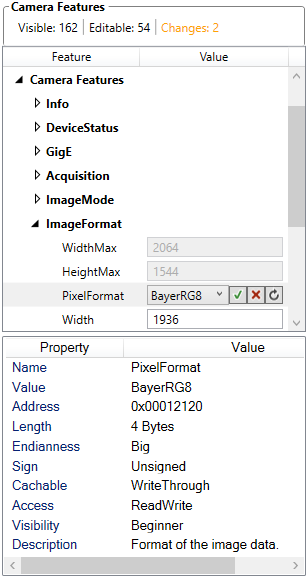
RegisterValue | Register value of the parameter. This can deviate from the displayed value if it is a known type. Example: Name: PixelFormat Value: BayerRG8 RegisterValue: 13 |
Bitmask | Bit mask used, only displayed for masked registers. |
RegisterType | Data type of the register. This type indicates which of the read / write function blocks is to be used. |
Visibility | Visibility level of the parameter. Possible values: Beginner, Expert, Guru and All The visibility of parameters can be set with the filter elements. |
DisplayName | Name of the feature to be displayed. |
Category | Name of the category in which the feature is sorted. |
Common Feature | Indicates whether the feature is included in the Common Feature List. |
Description | Meaning of the parameter |
These properties are required, for example, if a parameter is to be read or changed from the PLC. Essentially, attention must be paid to Address, Length, Endianness and RegisterValue. The corresponding function blocks can be found in the API reference under Camera Register Access.
Depending on the data type of a register, further properties such as Min/Max/Increment may be added.
Selectors
Selectors are parameters that are used for the grouping and selection of several sub-features. In order to use a sub-feature, the Selector parameter must first be set to suit (both in the configuration assistant and in the PLC).
If a Selector parameter has no address property, it does not point to a camera register. It then serves merely to provide a clearer display in the configuration assistant. In this case the sub-parameters can be changed directly from the PLC.
In order to take into account all sub-parameters of a Selector when creating the Initialization Commands, iteration takes place automatically over all sub-features. A corresponding setting can be found in Actions & settings. An example of a Selector is the Trigger Selector:
