SysMeasCs4 - Align plane cycle
Automated alignment of a plane by measuring three points on the workpiece surface.
The cycle calculates a machining coordinate system (CS) to modify the angle position to a plane. The translatory shift of the calculated coordinate system causes a shift to the first measuring point on the plane. The calculated rotary shift causes an angle compensation related to the measured plane.
Forming a new coordinate system
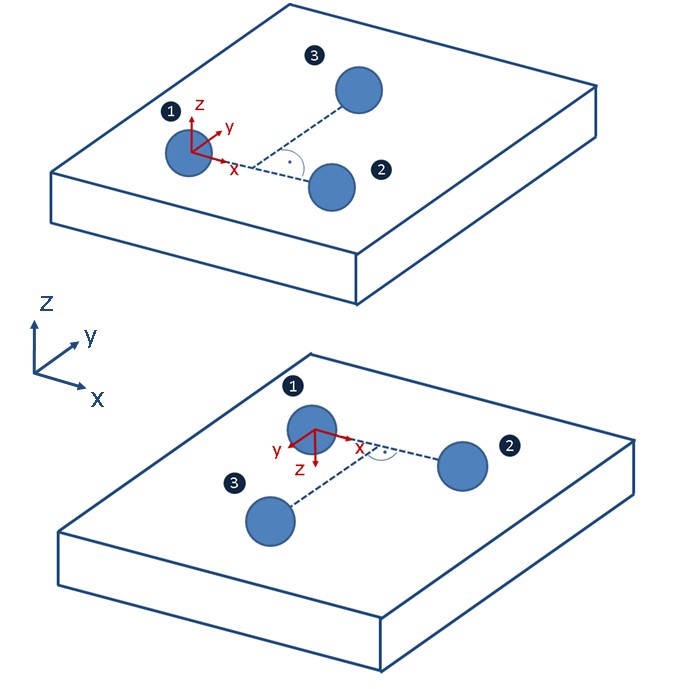
The first point measured on the plane determines the relative shift of the coordinate system. The system can also be further shifted by the cycle input parameters @P9@P11.
The rotation of the new coordinate system is calculated so that its X axis runs through the vector from the first to the second measured point (irrespective of the shift by the input parameters). The Y axis is obtained by the vertical projection of the line to the third measured point on the new X axis. The Z axis is defined in order to retain the original rectangular system representation.
The graphic below describes the measurement of a horizontal XY plane. The measured points therefore have the same height in the original coordinate system.. This clearly shows that the selection of the pre-positions has an influence on the resulting coordinate system.
