Chart context menu
Context menu
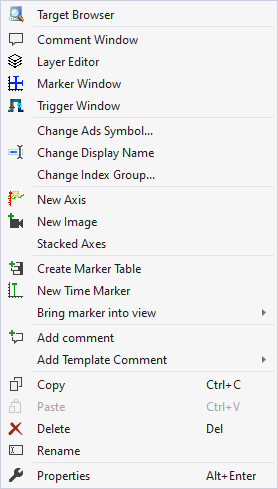
The first two groups contain the functionalities for opening various Windows tools. These include firstly the Target Browser, the Comment Window, the Layer Editor, the Marker Window and finally the Trigger Window.
In the following group, the existing configuration can be reconfigured with just a few clicks.
"Change Ads Symbol..."
If the symbol names have changed in several ADS acquisitions, parts of the name can be exchanged using this function.
"Change Display Name"
The "Change Display Name" function can be used to set the level of detail to be displayed for the names of the channels and acquisitions.
"Change Index Group..."
This function can be used to change the Index Group of all ADS variables. Either an offset can be calculated or a new value can be entered.
Elements below the chart can be added in the fourth group.
"New Axis"
A new axis group is added below the chart with this function.
"New Image"
If no image has yet been created below the chart, a new image can be created here.
"Stacked Axes"
Here you can change the setting that allows you to select whether the axes of a chart should be next to each other. If no tick is visible on the left, the axes are next to each other and the values of the added channels are displayed within the same area. If the tick is visible, the axes are displayed one above the other and each axis has its own presentation range.
The following group offers various functions for interacting with the markers.
"Create Marker Table"
This menu entry can be used to add a table in the Maker Window, which is automatically filled in with all the information from the chart.
"New Time Marker"
Creates a new Time Marker and adds it to the selected element.
"Bring marker into view"
This function can be used to move a time marker that is fixed to an axis to the center of the currently visible area of the chart.
"Add comment"
To write additional information to the selected node, this function can be used to add a new comment, which is displayed in the comment window.
"Add Template Comment"
In this submenu, new templates can be created or selected in order to add them.