Quick start
 | The following chapter only explains operation from TwinCAT 3.1 Build 4026 onwards. The functions themselves are also available in older TwinCAT versions. |
The following chapter explains how to create new projects and clone existing ones. The following quick start guide is based on XAE Shell 64 or Visual Studio 2022 and using Git as the source control client.
Setting up a project with a project that already exists on the server
- 1. Select Git as the source control client. See Configuration of the Source Control Client.
- 2. Select the option Git -> Clone Repository....
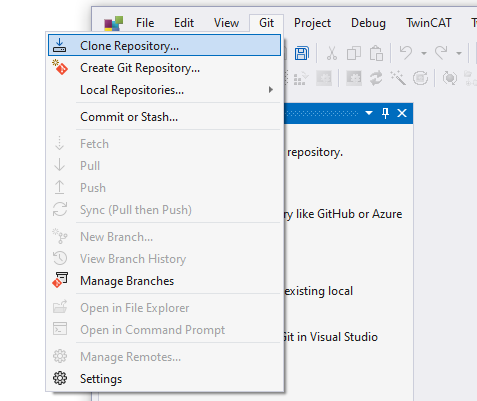
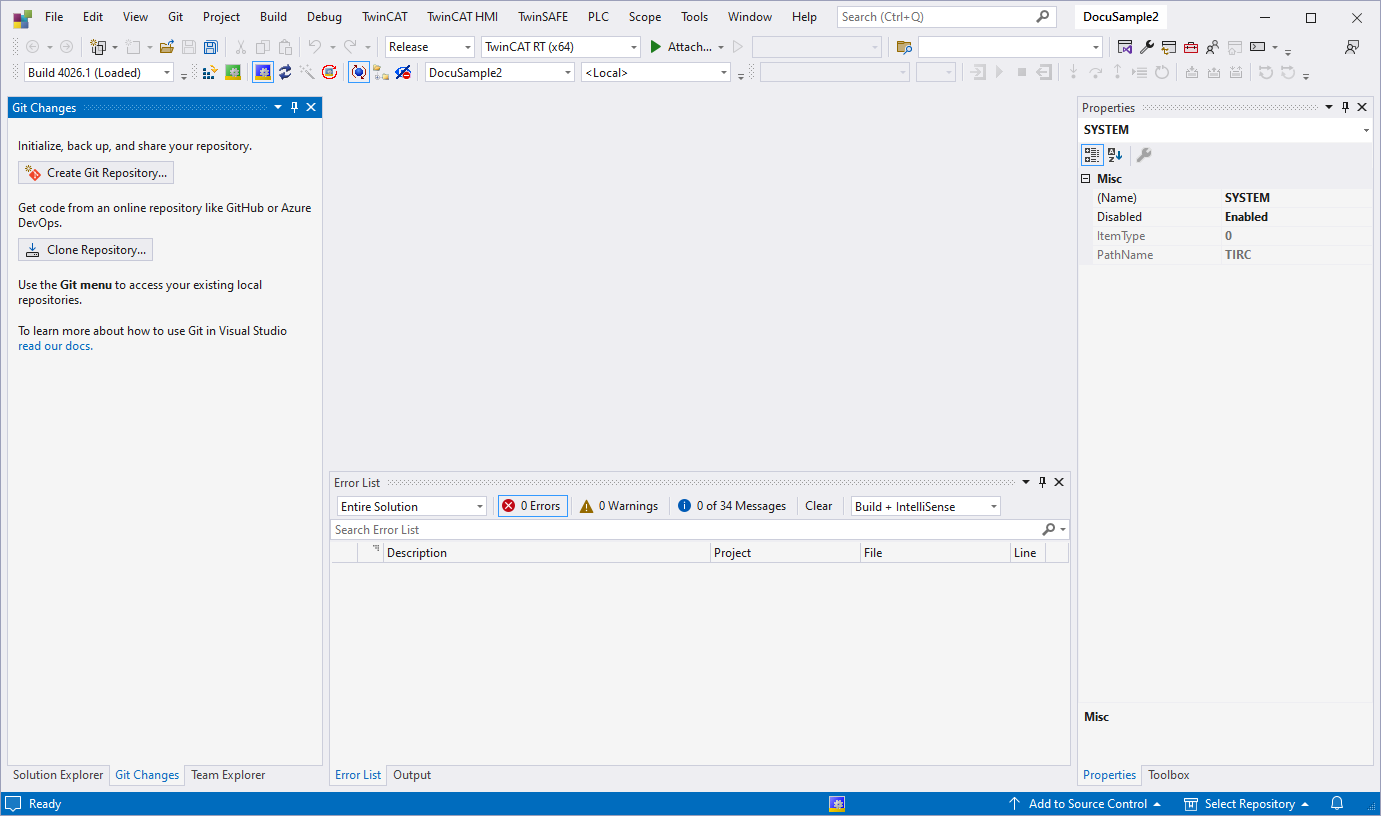
- 3. If you have reopened this instance of the XAE Shell, you can also go to or open the Git Changes window (View -> Git Changes) and select the Clone Repository... option.
- The following window opens:
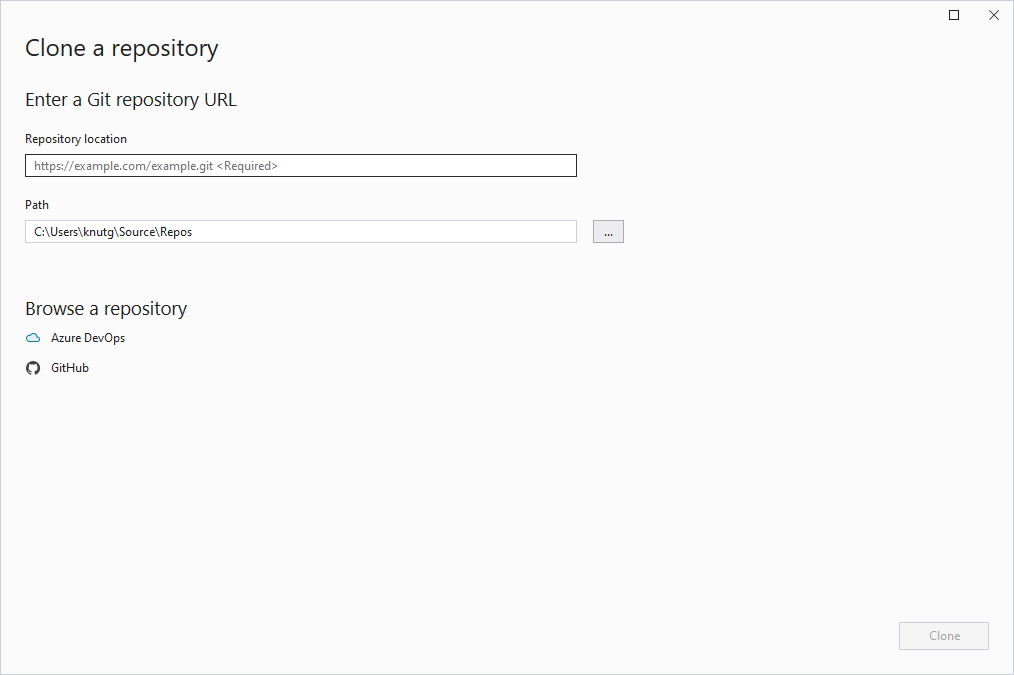
- 4. Enter the path to the Git repository on the server being cloned here, under Repository location.
- 5. Under Path, select the folder on your local system that the project will be stored and edited in.
- 6. Select Clone to start cloning.
- After cloning the project, it is automatically opened and the Source Control Management is active.
| If there are no global Git settings that define the TwinCAT Project Compare Tool as the default compare and merge tool for TwinCAT files on your system yet, set them before you start working on the project. See Selection of the Compare Tool. |
Setting up a project that is not yet under Source Control Management
The procedure depends on the Git server that is to be used. For example, while AzurDevops allows you to also push a local repository if a remote does not already exist on the server, most other servers require you to create a remote repository on a Git server first.
- 1. Create a Git repository on the remote server to be used.
- The repository exists on the server, but is still empty.
You now have the following two options:
You don't have an existing project and are starting from scratch:
- 1. Clone the empty repository to the desired working directory (see paragraph Quick start) and then paste the desired .gitignore file (see .gitignore).
- 2. If not already done on your system, configure the TwinCAT Project Compare Tool as default compare/merge tool. See Selection of the Compare Tool.
- Afterwards you create a new TwinCAT project in the working directory and start working.
You have an existing project that is not yet under Source Control Management and you just want to push it to a Git server.
- 1. Store the .gitignore file that will be used in the top project directory. See .gitignore.
- 2. Create a local Git repository in your working directory. To do this, use the option Git -> Create Git Repository....
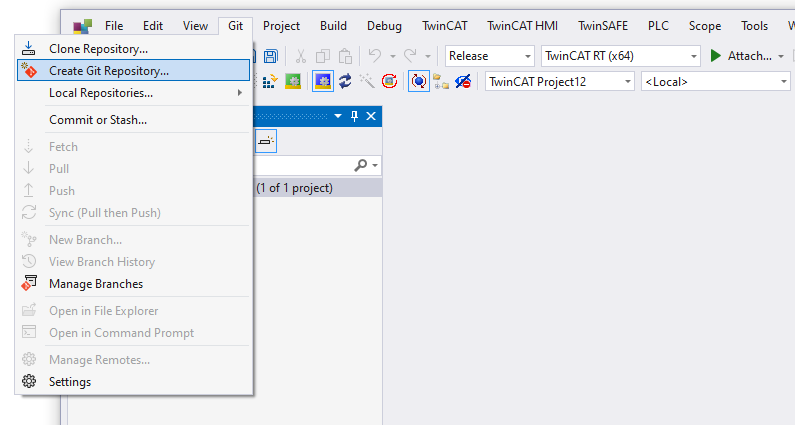
- The following window opens:
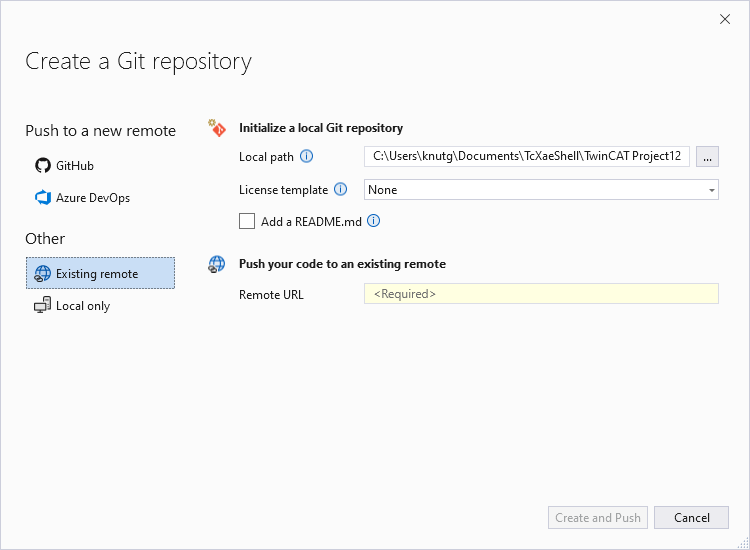
- 3. In the Remote URL text box, specify the path to the Git repository on the remote server
- 4. Press the button Create and Push.
| If you have not placed a .gitignore file in the top project directory, you will get another entry in the dialog shown above, where you can select a gitignore template that is deposited on Github. Since none of the templates on Github are sufficient for a TwinCAT project, deposit the .gitignore file before this step. Otherwise, all data will be transferred to the remote repository and must be removed manually afterwards. |