Integration into the NC configuration
(Master: TwinCAT 2.11)
 | EtherCAT XML Device Description The display matches that of the CoE objects from the EtherCAT XML Device Description. We recommend downloading the latest XML file from the download area of the Beckhoff website and installing it according to installation instructions. |
| Required firmware (FW) version and TwinCAT version At least the firmware version 07 is required for the integration of the EL2522 in the NC; TwinCAT versions:
|
- The terminal must already have been inserted manually under I/O devices or have been scanned in by the system (see EtherCAT – System Manual section “online/offline configuration creation”).
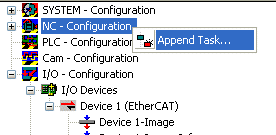
- Add a new task.
- To do this, click with the right mouse button on NC Configuration and
- select “Append Task...” (see “Append Task…” figure).
- Rename the task if required and confirm with “OK”.
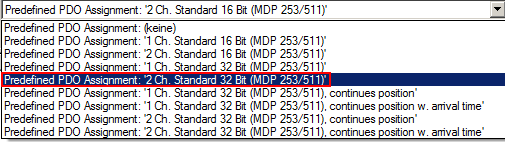
- Select the operation mode of the terminal in the selection box “Predefined PDO Assignment” on the register tab “Process data”.
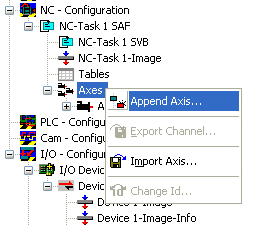
- Adding an NC axis
- Right-click on “Axes”, then add a new axis (see Fig. “Adding an NC axis”).
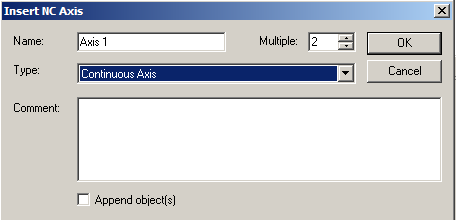
- Adding a new axis
- “Name”: Change the axis name if necessary
- “Multiple”: Enter the number of channels here in case of multi-channel operation. The corresponding number of axes will then be inserted.
- “Type”: Select continuous axis type and confirm with “OK” (see fig. “Selecting and confirming the axis type”).
- Linking the non-referenced axes to the terminal
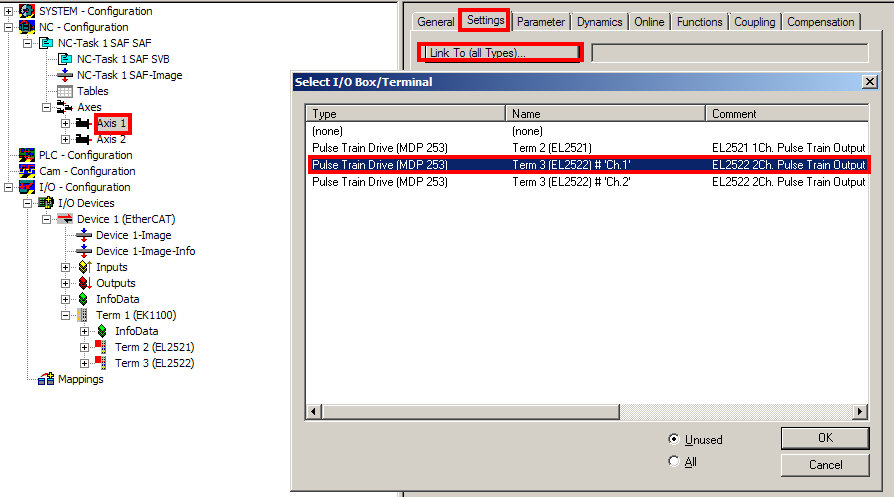
- Left-click your axis to select it.
- Under the “Settings” tab select “Linked To...” (see fig. “Linking the axis with the terminal”).
- In the dialog “Select I/O Box/Terminal”, select the desired terminal (e.g. terminal 3 (EL2522) #Ch.1 and confirm with “OK”.
- In the case of 2-channel operation, also link the second axis with channel 2 of the EL2522.
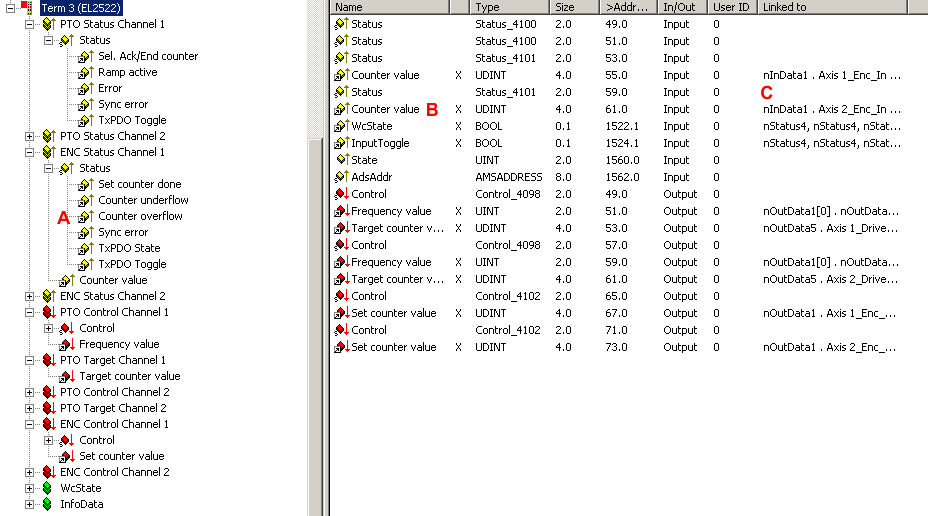
- All important links between the NC configuration and the terminal are thus carried out automatically for the selected channels. The links are illustrated in the tree (A) and in the online view (B and C) (see fig. “Automatic linking of all main variables”).
- “Target counter value”, “Automatic direction” and “Target arrival time” are not automatically linked under the following conditions. Observe the following chapters here:
- EL252x - when using the predefined PDO Assignments “n Ch Standard 16 Bit (MDP 253/511)”
- EL2522 - when using the predefined PDO Assignments “n Ch Standard 32 Bit (MDP 253/511) continues position w. arrival time”
- EL2522 - when using older firmware or older TwinCAT versions with “Continues Position” mode
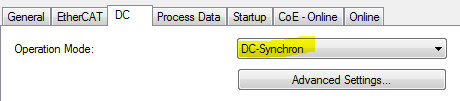
- Distributed Clocks Settings: “DC-Synchron” under the “DC” tab
- Set the frequency of the terminal in order to achieve the required velocity
- Channel 1: Index 0x8000:12
- Channel 2: Index 0x8010:12