Addressing sensors
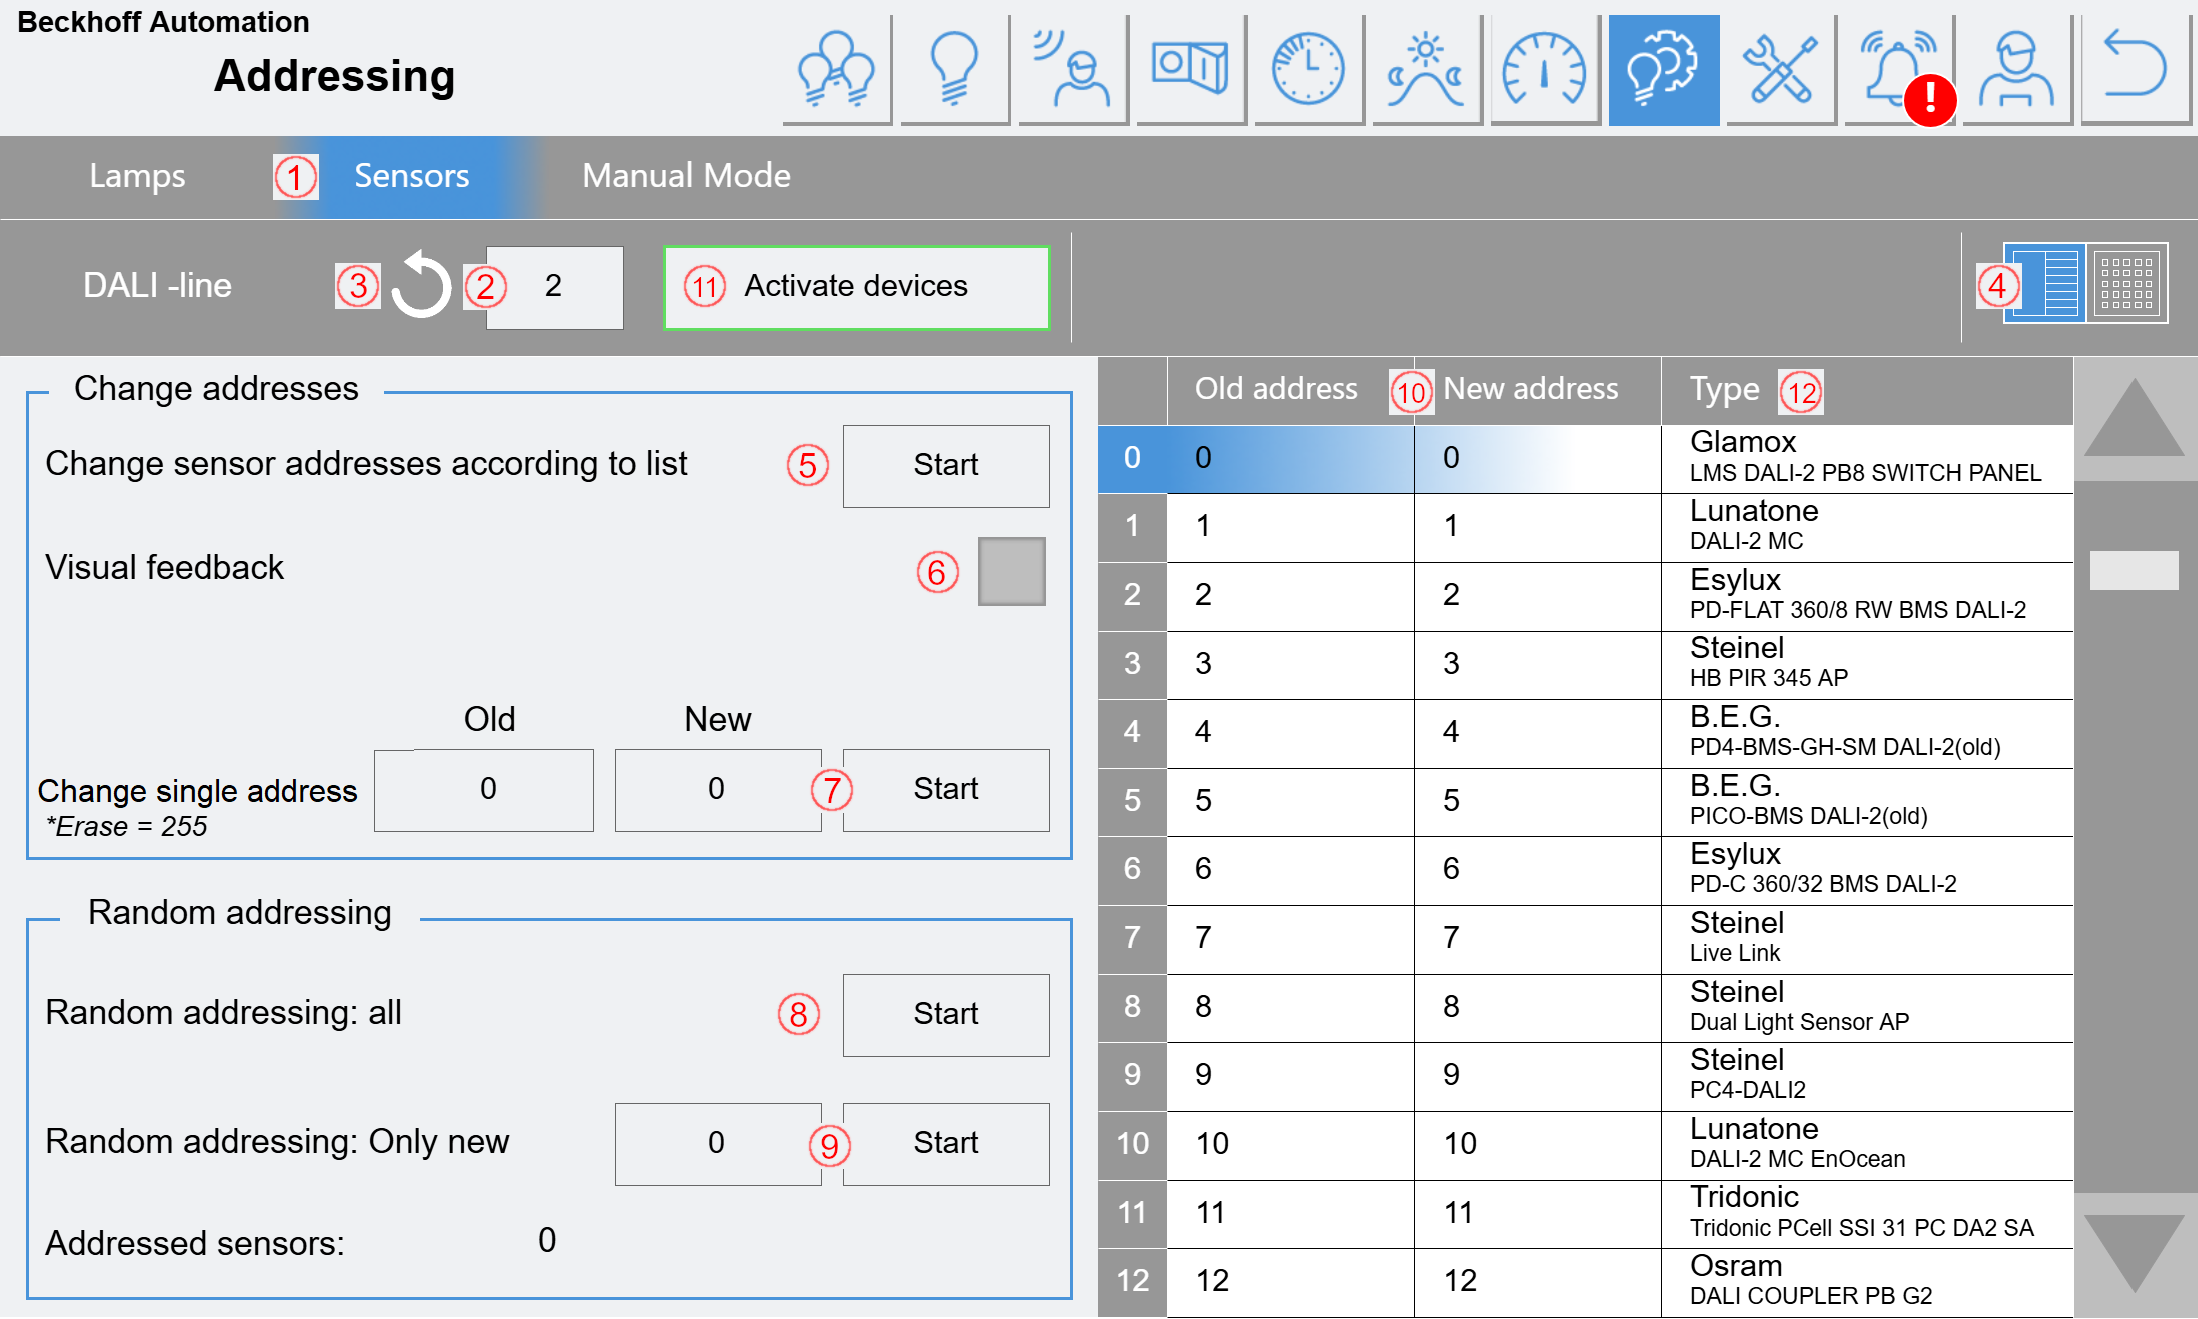
(1) Selection of whether lamps or sensors are to be addressed. Under Manual Mode, all or individual lines can be overridden.
(2) Specification of the DALI line to be addressed
(3) Button to search for already addressed devices on the selected line. This updates the table (10).
(4) Button for switching the view (see "Alternative view").
(5) Button for changing the addresses according to the table.
(6) Selection of visual feedback to identify the selected device. The selected sensor flashes approximately once per second. With push button couplers, the corresponding line lights up green when pressed.
(7) Input fields and button for changing a single address. This function does not provide any feedback and the table should be updated with (3) to check this.
(8) Button for readdressing all connected sensors. All existing addresses will be deleted in the process.
(9) Input field and button for addressing new (unaddressed) sensors. In the input field, you can enter an address to start with. In the course of addressing, all sensors found (only new ones) are given free addresses (starting with the specified start address). If there are not enough free addresses, the process ends with an error message.
(10) Table showing all sensors found after a search run (3). The line selected here provides the visual feedback. The desired address for each sensor can be entered under New address. Once the complete list has been adjusted as required, the readdressing process can be started with (5). If an address in the table is assigned twice, the process is aborted and a corresponding error message is displayed.
(11) When the button is pressed, all devices found are activated/deactivated according to the list. This means that individual devices do not need to be activated later. Before use, check that all devices are found and displayed in the list. If a sensor has previously been activated as "External Input" or "KNX", it will not be affected, even if one of the sensors found has its address. The button is only enabled if a search has been performed recently and no changes have been made since then.
(12) During the search process, the GTIN number is read for each device and compared with the internal database. If the device is known, the manufacturer and product name are displayed in this column. If the device is unknown, "Unknown" is displayed. An unknown sensor can also work later, only the automatic detection does not work and a similar model must be selected manually.
Alternative view:
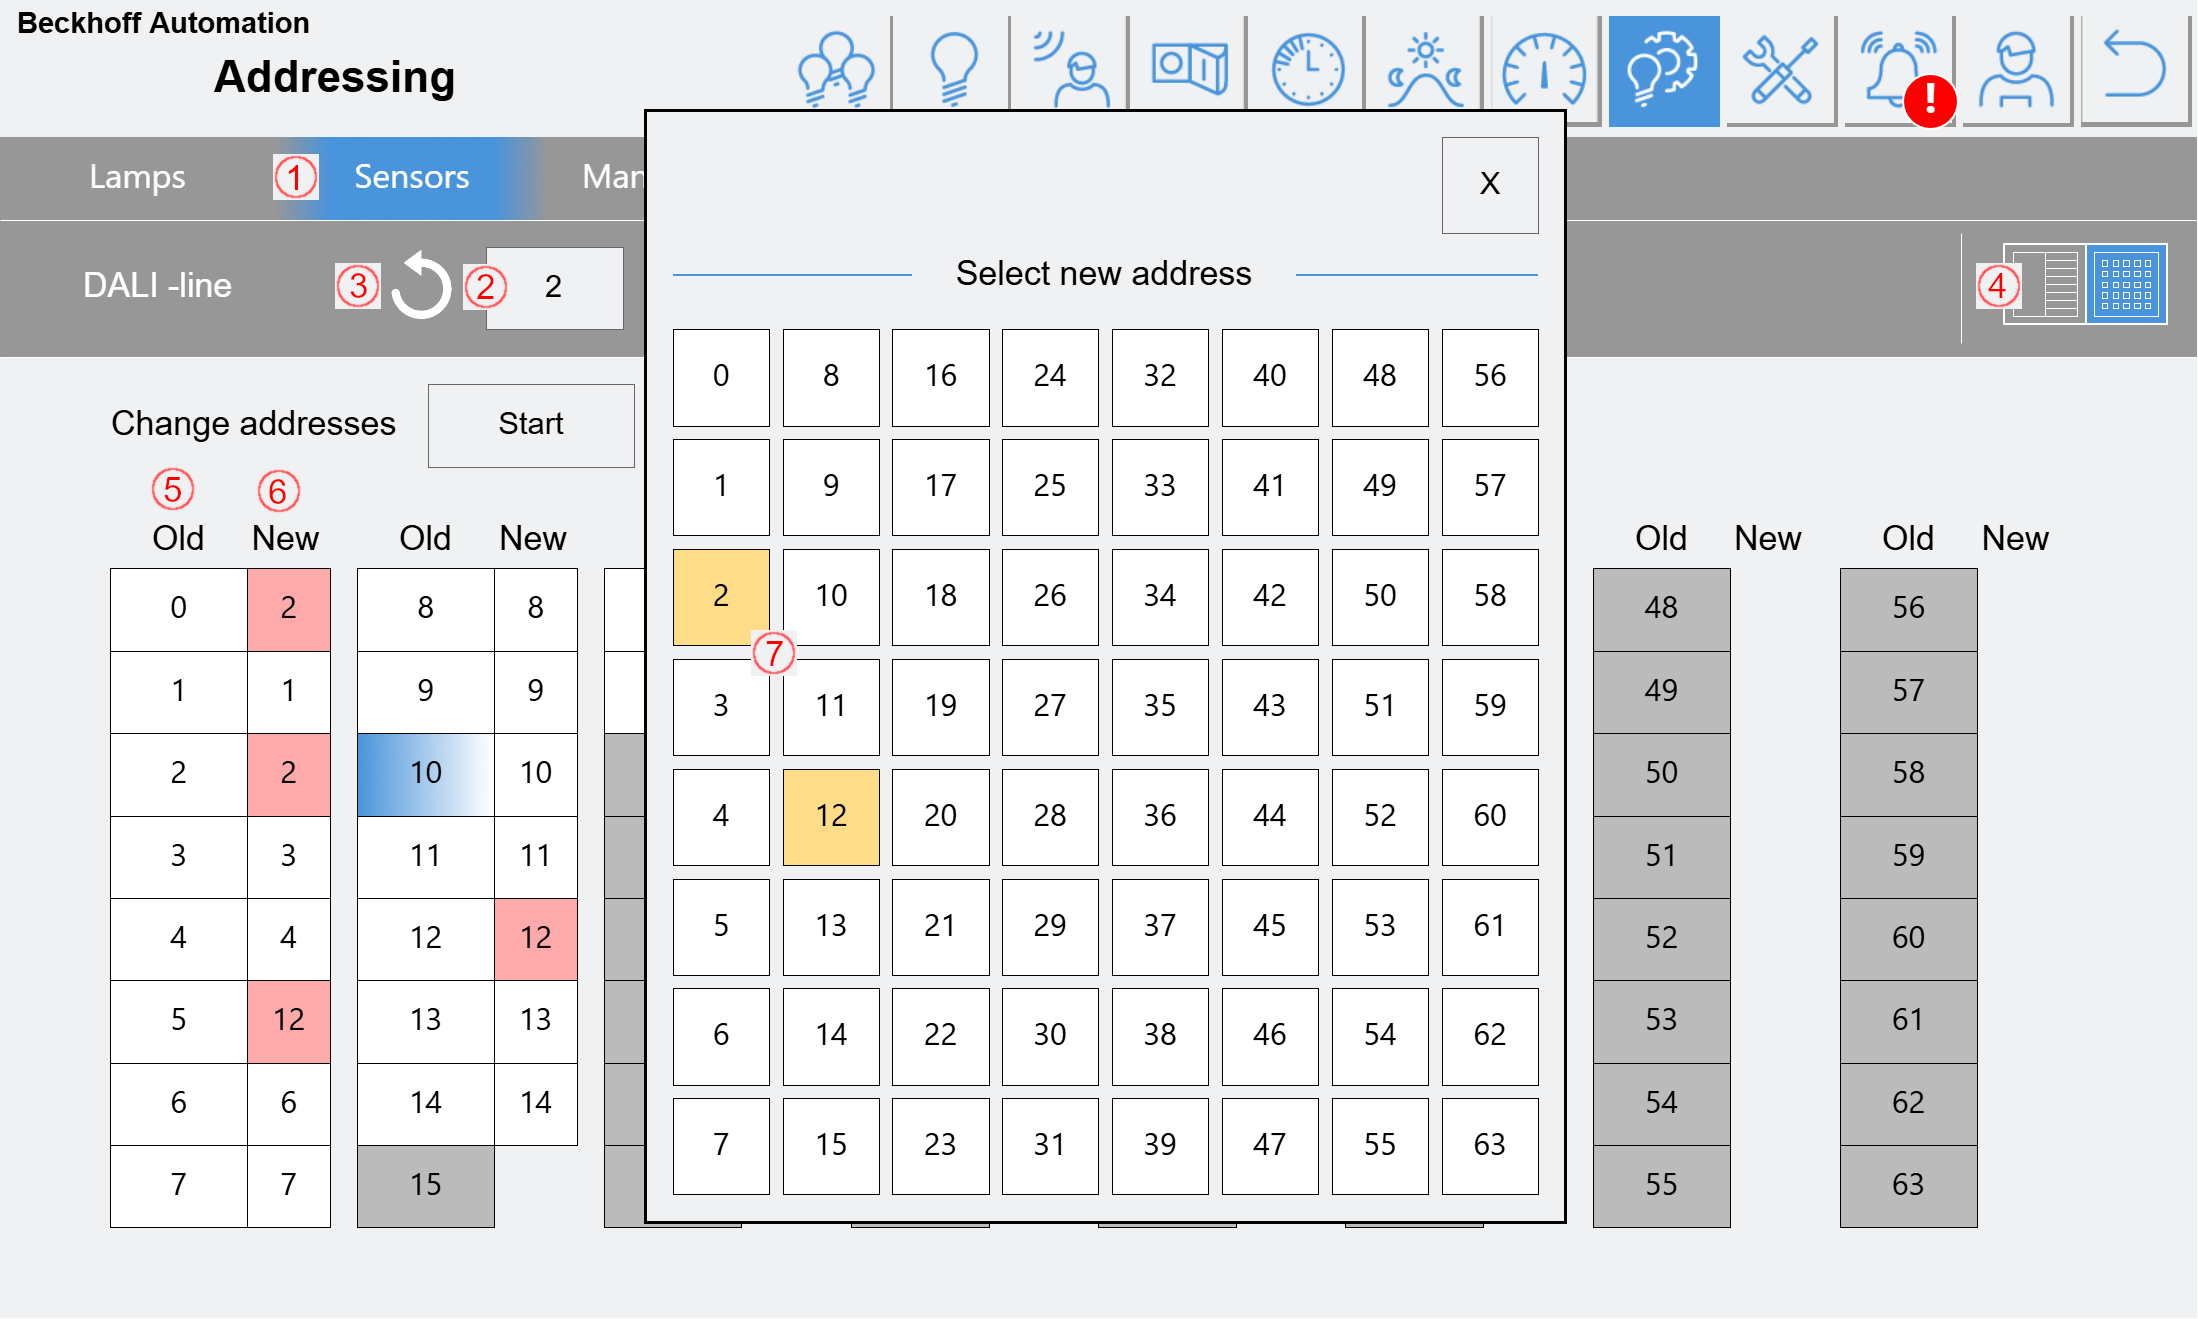
In this view (lamps or sensors are almost identical) you have a simultaneous overview of all 64 possible devices. A device was found for all white addresses, but not for the gray ones. If you click on a field under New, the visual feedback for the device is activated and a dialog opens.
In the dialog box, you can select the desired address with a single click and the dialog box closes (no keyboard input required). Addresses that have already been selected are highlighted in yellow here.
Duplicate "new" addresses are highlighted in red on the page. It is common for several addresses to be temporarily marked in red during the sorting process.