"Sensors" submenu
The submenu can be opened by clicking on the name in the table. The selected row is highlighted in blue in the table. All settings for the respective sensor can be adjusted in the menu that opens.
General (DALI-2):
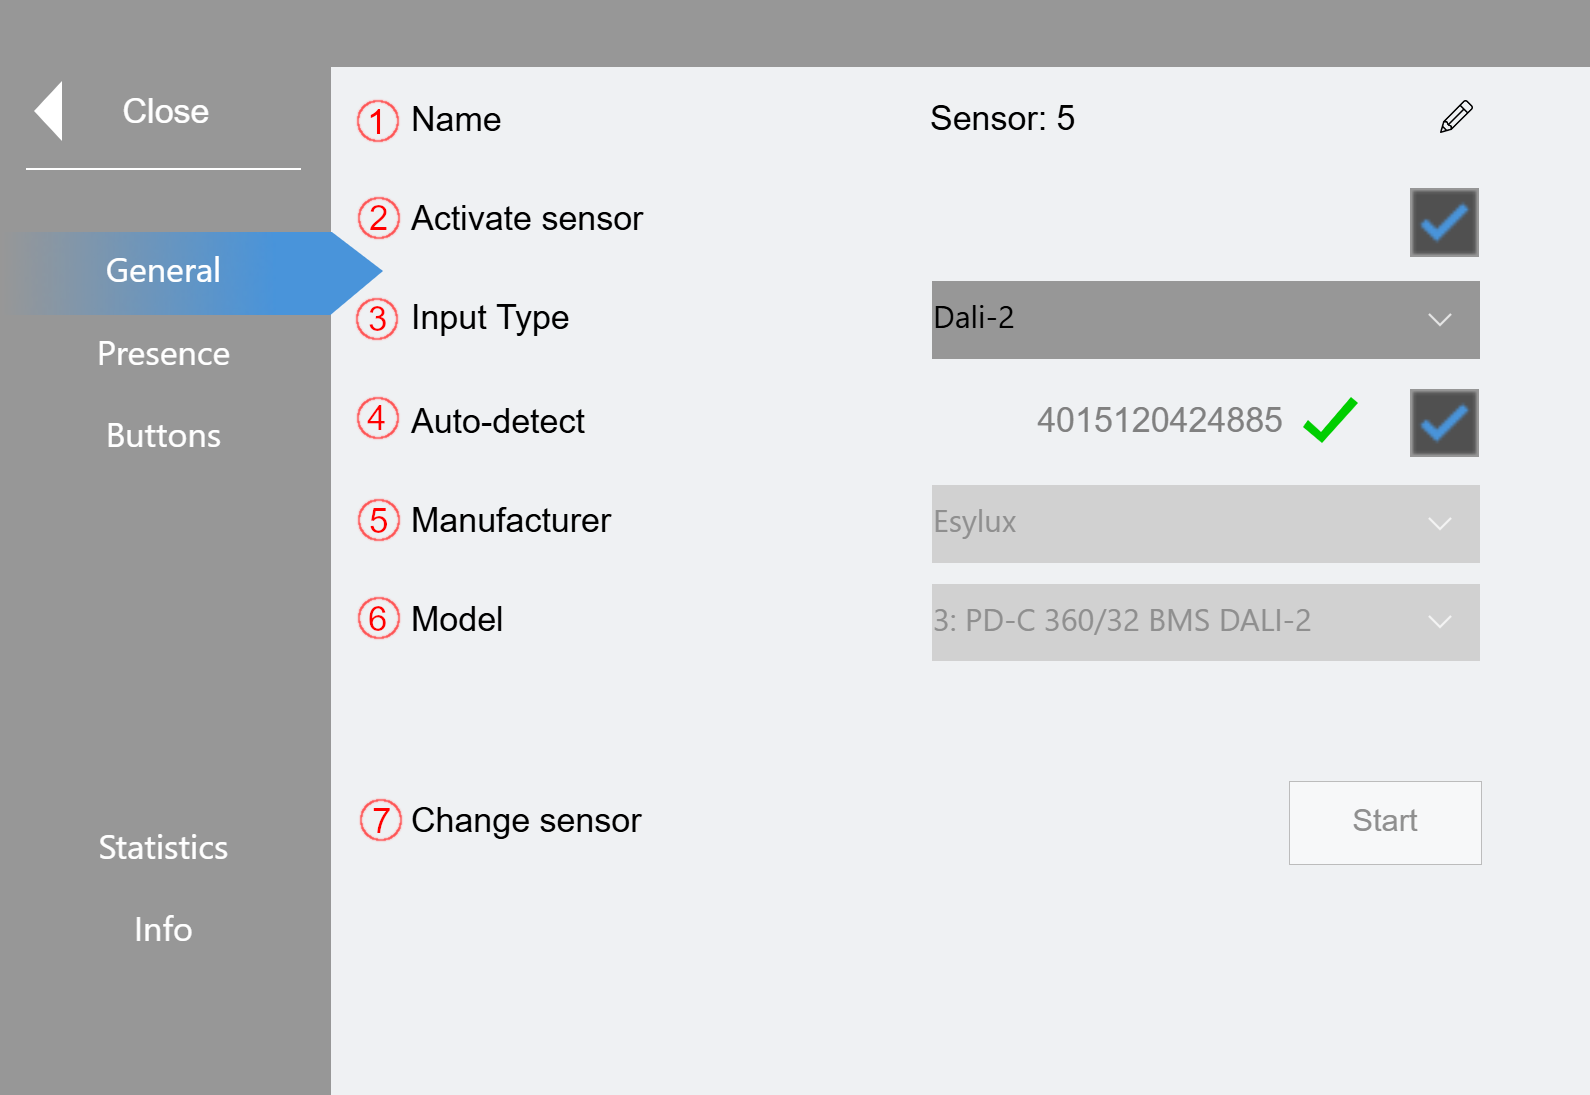
(1) The displayed name can be edited here.
(2) Activate sensor. Only active sensors are processed by the program.
(3) You can select "Dali-2", "External Input" or "KNX" here. If External Input is selected, the corresponding variables must be written externally ("GVL_LS_IO.bInSensor_Presence[x,y]" and ("GVL_LS_IO.nInSensor_Brightness[x,y]").
(4) Auto-detection of the DALI-2 sensor can be activated here. If the function is activated, the GTIN number of the sensor is read and compared with an internal database. The read number is displayed and supplemented with a green check mark or a red "X". If the check mark is displayed, the device is included in the database and the sensor is ready for operation. If the device is not known ("X"), a similar device can be selected at (5) and (6).
(5) Specification of the manufacturer of the sensor
(6) Specification of the model name of the sensor
(7) Click on Start to search for and address an unaddressed device. To avoid double addressing, the selected sensor must return an error, otherwise the button is disabled.
If the number of addressed devices is 1 after addressing, then the process has worked, and the sensor is ready for operation:

If more than one device has been addressed, the sensor must be assigned manually (see Addressing).

General (KNX):
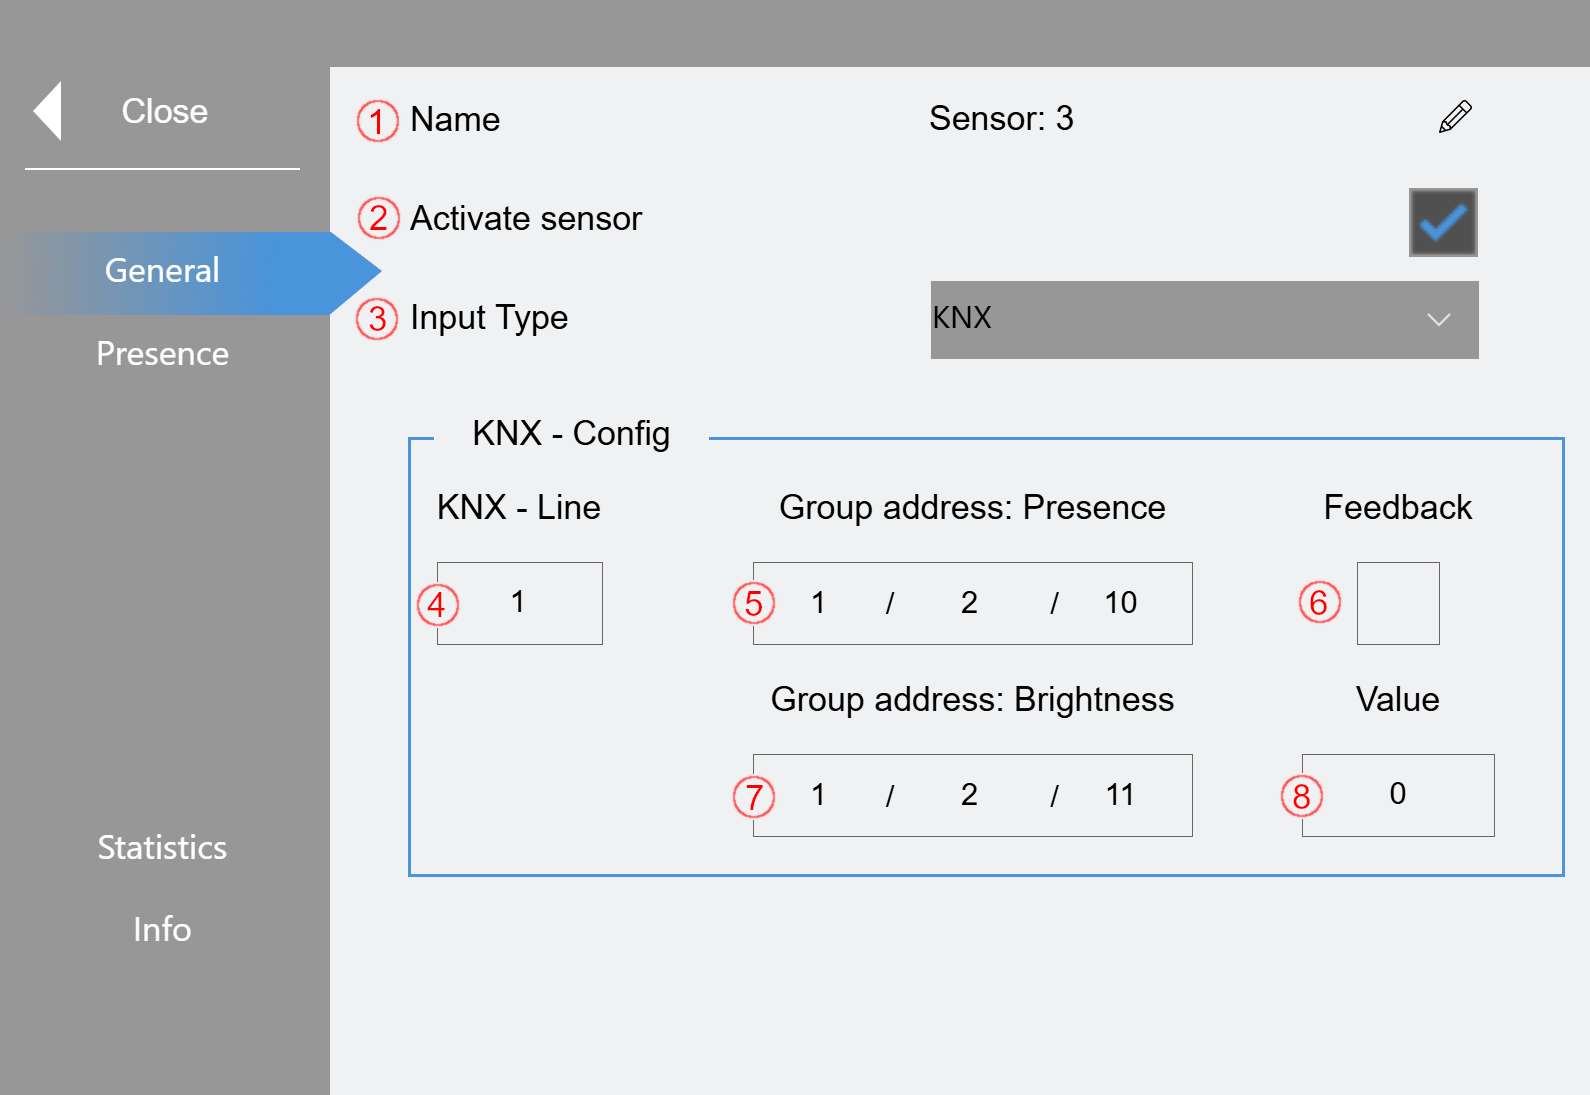
(1) The displayed name can be edited here.
(2) Activate sensor. Only active sensors are processed by the program.
(3) You can select "Dali-2", "External Input" or "KNX" here. (here KNX)
(4) Specification of the KNX line.
(5) Specification of the KNX group address for presence
(6) Feedback from the presence sensor
(7) Specification of the KNX group address for brightness
(8) Current brightness value of the sensor
Presence:
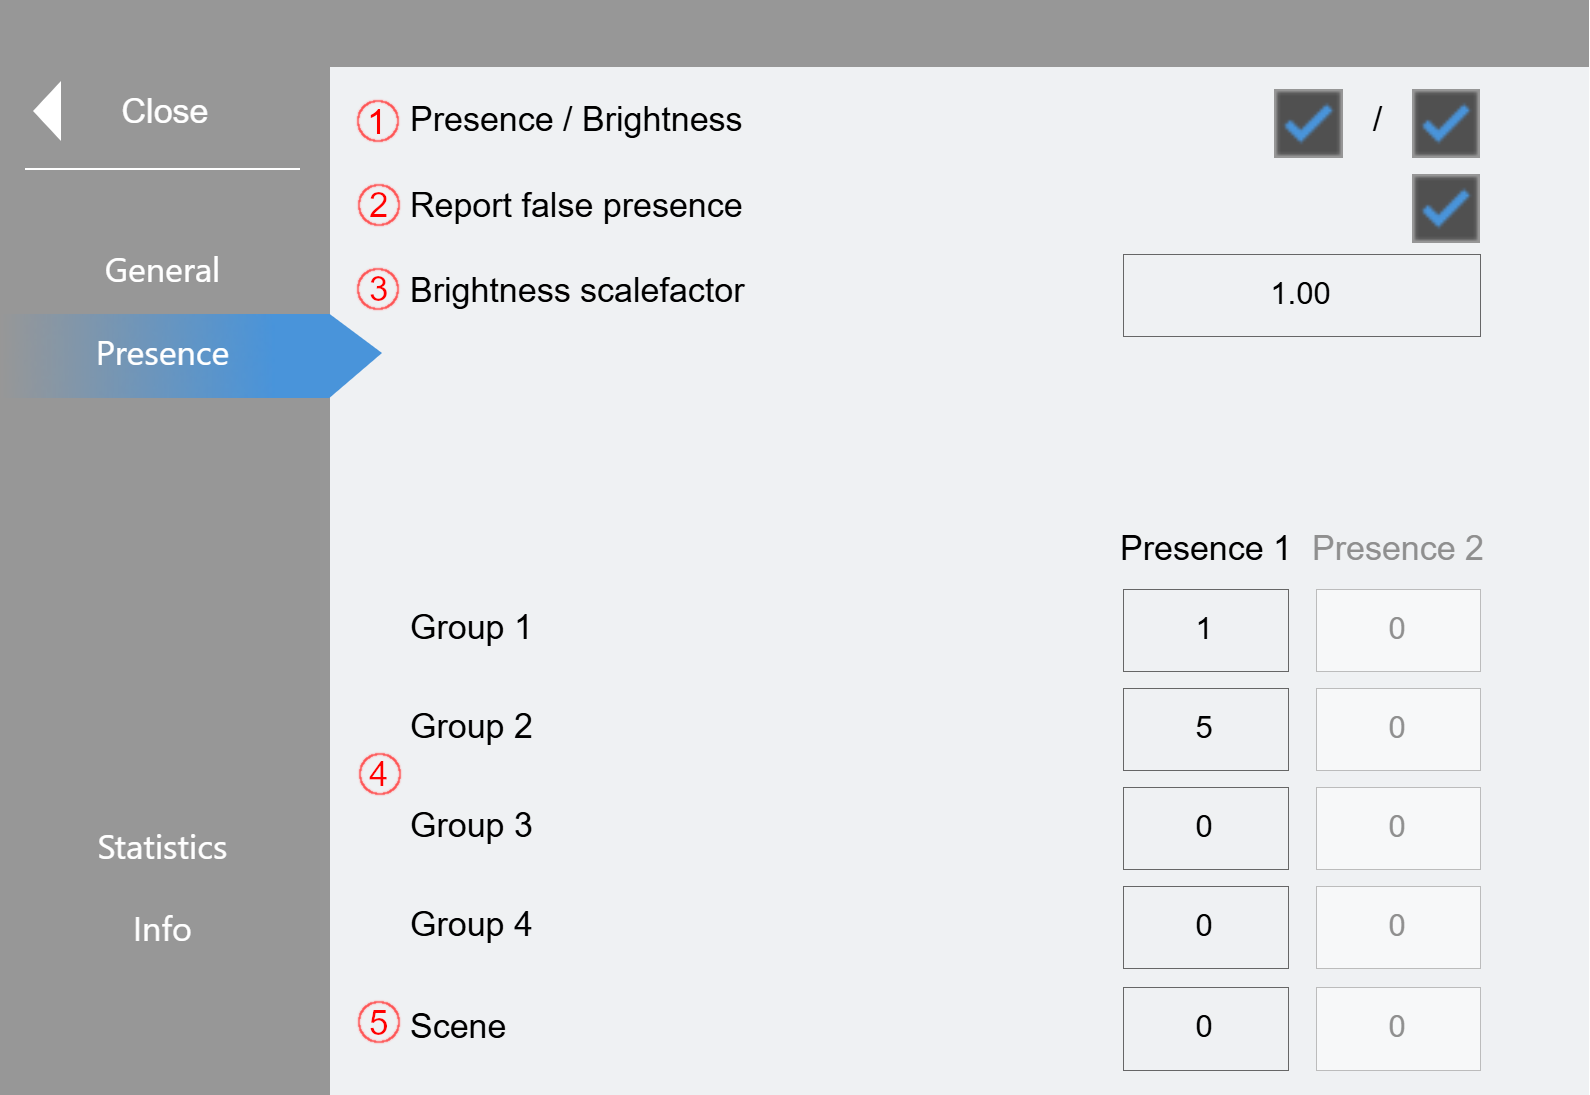
(1) The presence and brightness evaluations can be disabled here.
(2) The function that checks the sensor for possible errors can be disabled here. (see chapter Error analysis)
(3) Factor for scaling the brightness value, can be set from 0.1 - 10.
(4) Specification of 1-4 groups that the sensor switches (0 = no function). "Presence 2" is prepared for future sensors that can detect in two directions.
(5) Specification of a scene that the sensor should switch (0 = no function)
Buttons:
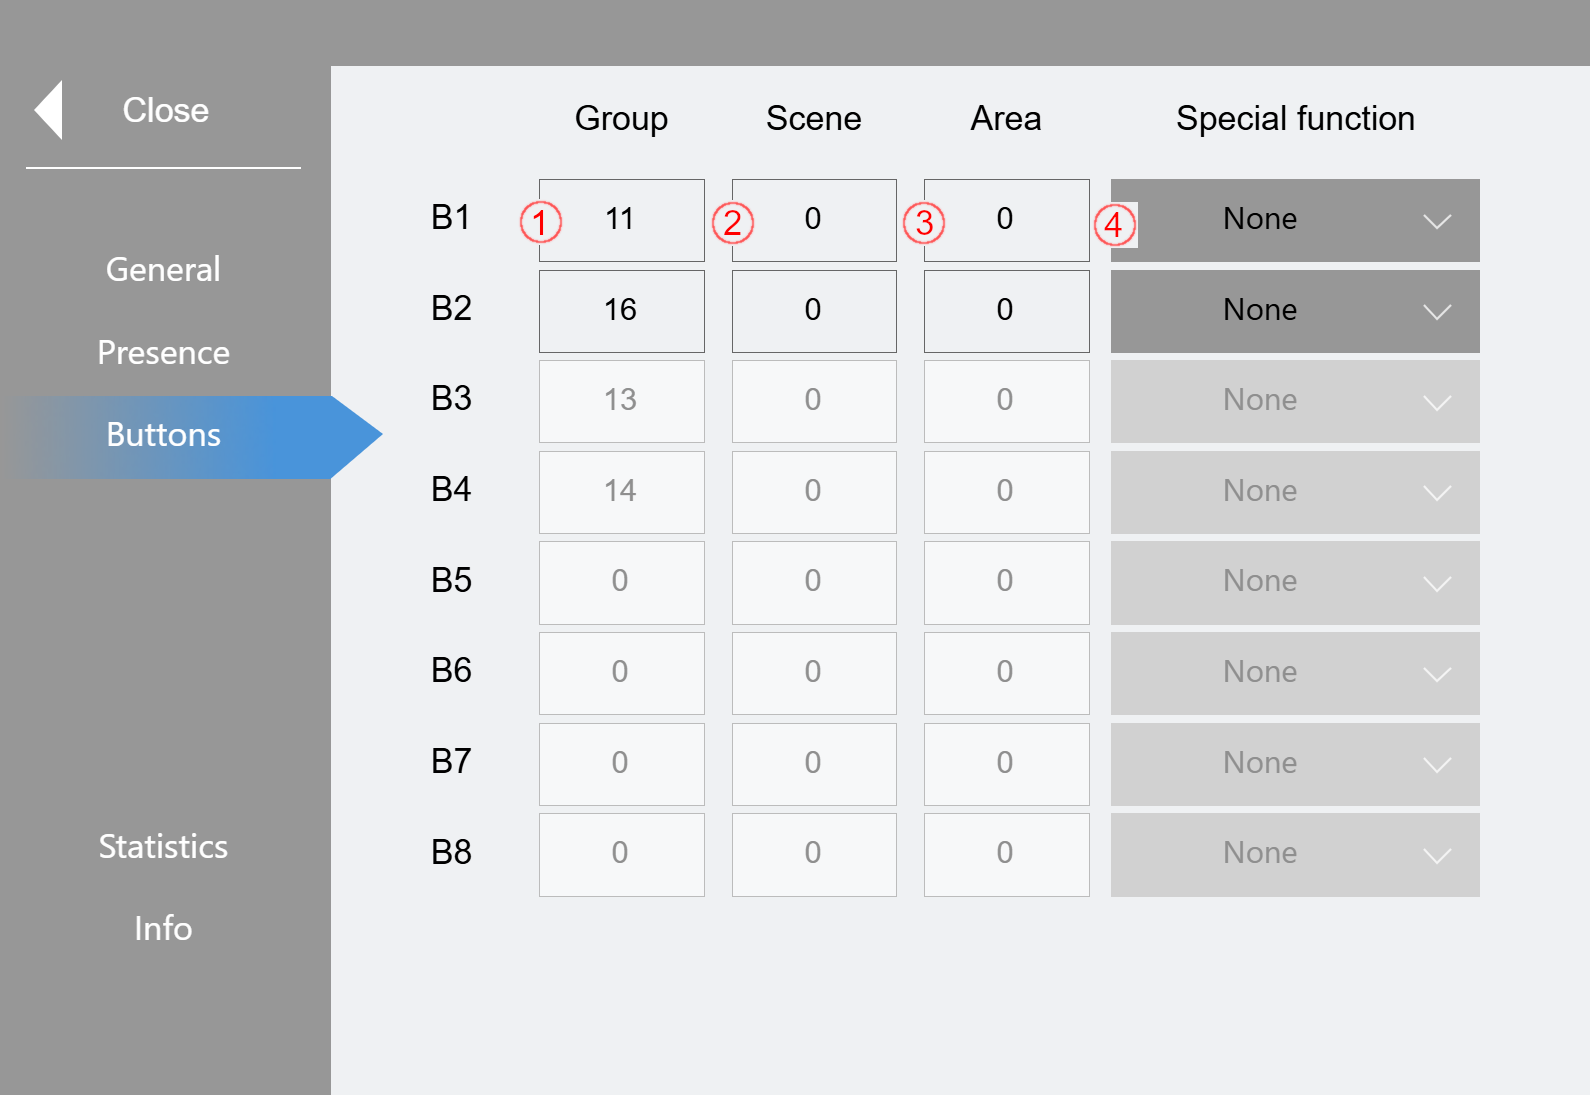
If the selected sensor has button inputs, this menu item is displayed and each available input can be configured. The designations "B1"-"B8" are highlighted in green when the button is pressed.
(1) Selection of the group to be switched ( 0 = no function)
(2) Selection of scene to be switched ( 0 = no function)
(3) Selection of the area to be switched ( 0 = no function)
(4) Either a "Central off" function or a "Reset manual mode" can be activated in the drop-down menu. The Central off function applies globally to all groups and switches them off. Resetting the manual mode resets the group specified under (1) to automatic mode.
Statistics:
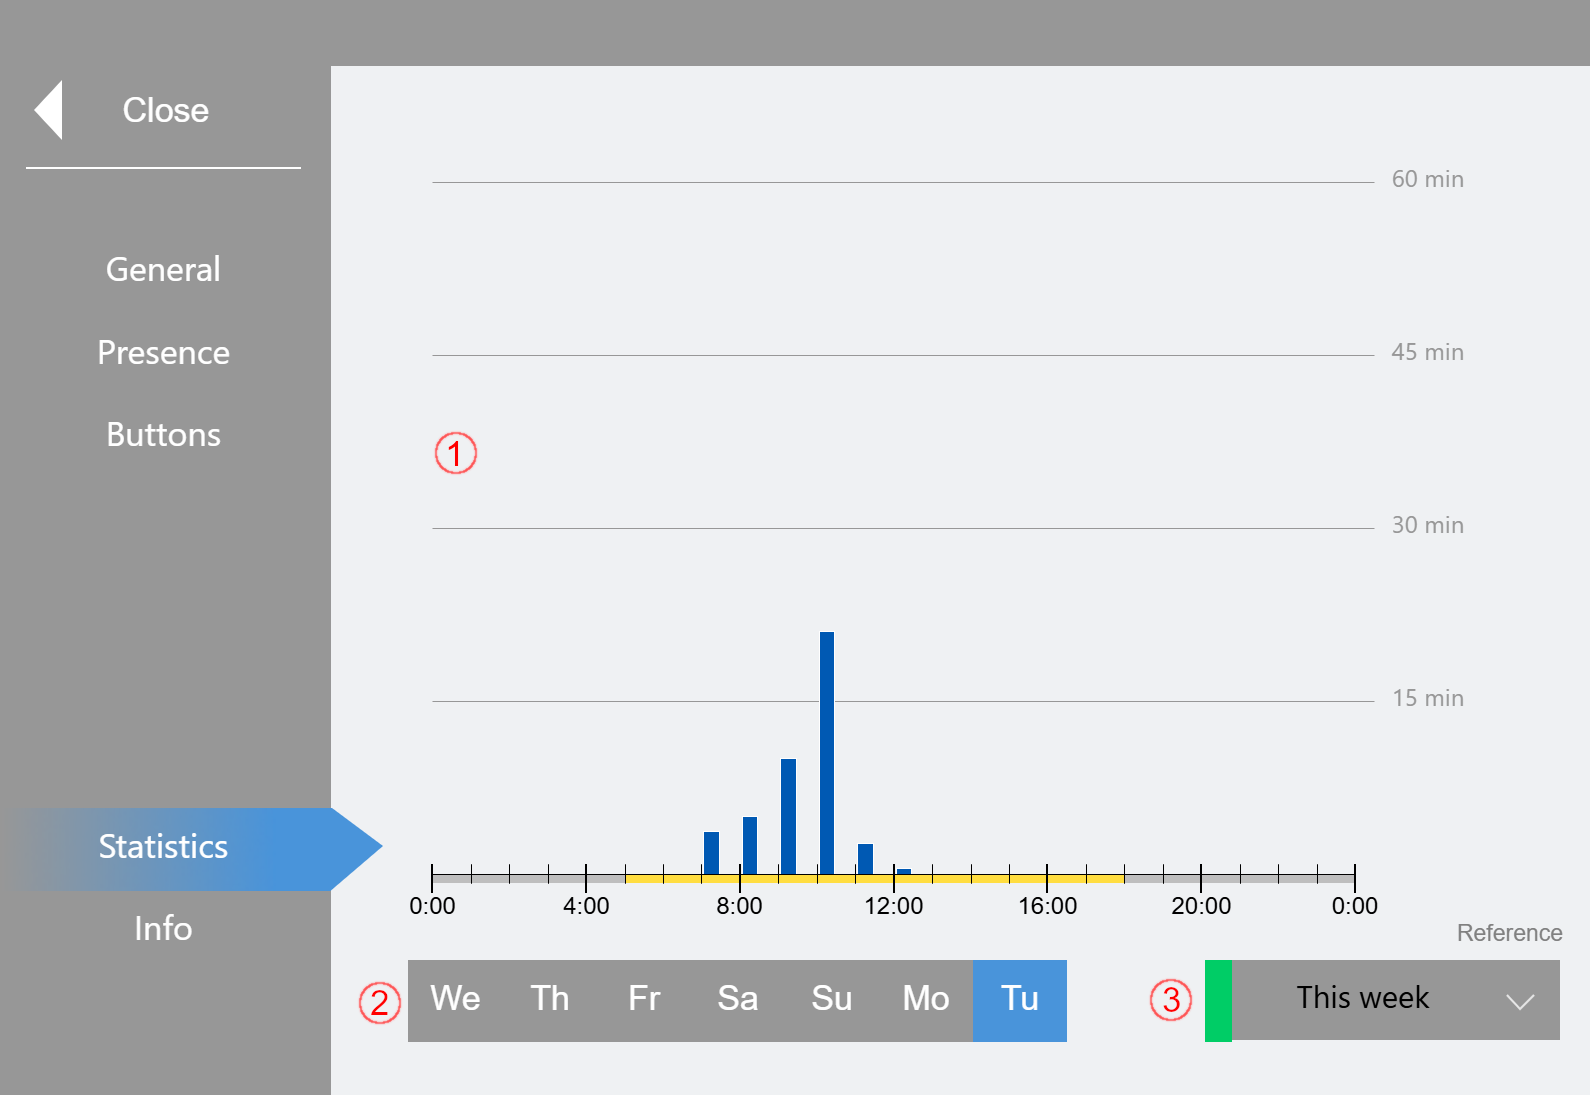
(1) Bar chart showing the total presence time per hour. The set operating time is displayed in yellow on the time axis (see Settings). Areas outside of operating hours are shown in gray. Blue bars show the data of the selected day of the last week. The settings for the comparison period (3) are shown in green.
(2) Selection of a day of the week (always the current day on the right)
(3) Selection of a past week for comparison
Info:
On the Info page, you can check which functions are supported by the sensor selected at General.