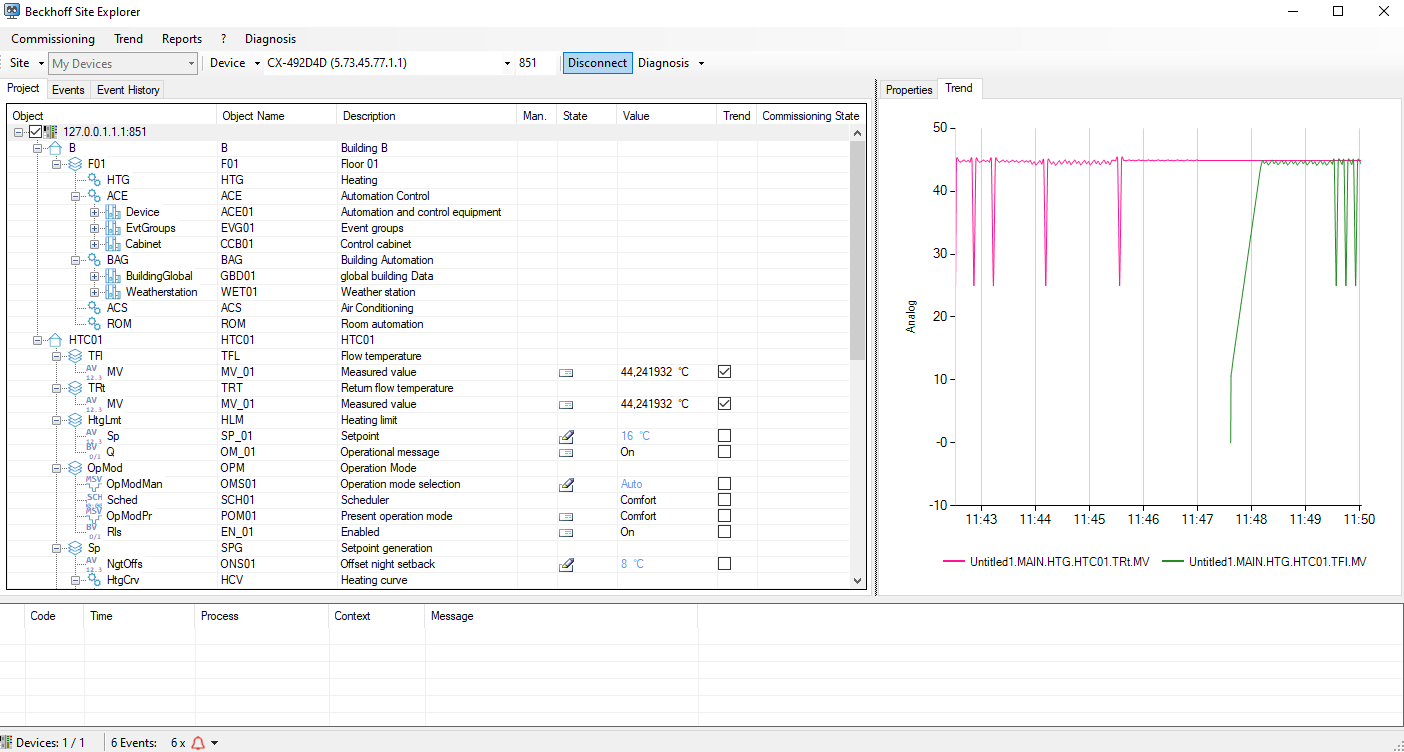
Building Automation Site Explorer
The Building Automation Site Explorer maps all objects clearly in the project structure.
He assists in the commissioning and adjustment of plants.
System requirements
Microsoft:
- Windows 10 or higher
- .NET Desktop Runtime > v8.0
The current version of the .NET Runtime can be checked in the Control Panel under Programs and Features.
Beckhoff:
One of the following components must be installed to use the Building Automation Site Explorers:
Application
Access rights
During the first application, the user is prompted to apply a role. In this way, the access rights are firmly fixed.
Dialog boxes
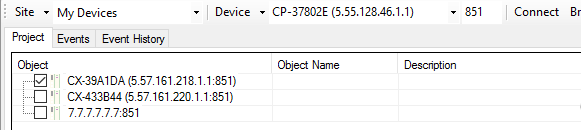
Project
Columns
- Object
- Object name
- Description
- State
The following states are displayed: - Value source
Indicates a setpoint or display value. - Active event
- Overridden
- Out of service
- Active priority
- Manual override
- Current value
- Trend
- Commissioning condition
Properties
Displays the properties of the selected entry.
- Control
Among other things, the properties of a control list components (such as services or supplements) that are executed at runtime.
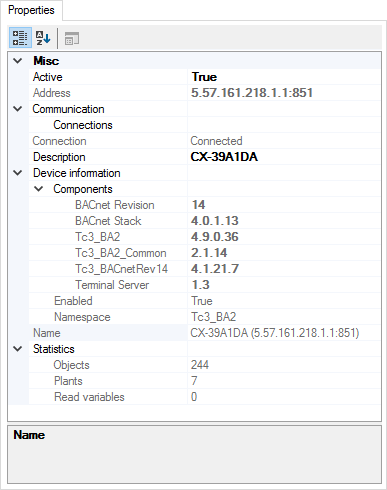
Example: Properties of a control
- Objects
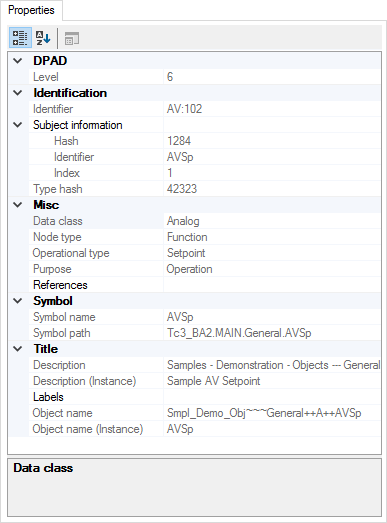
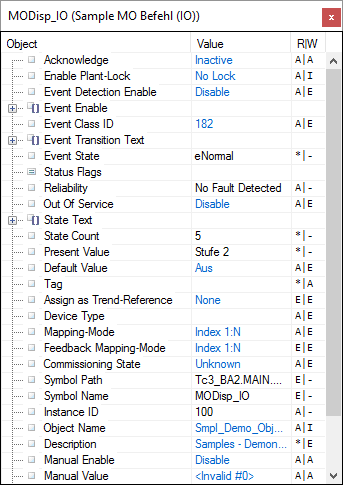
Example: Properties of an analog object.
Events
Active events are listed in the event overview:
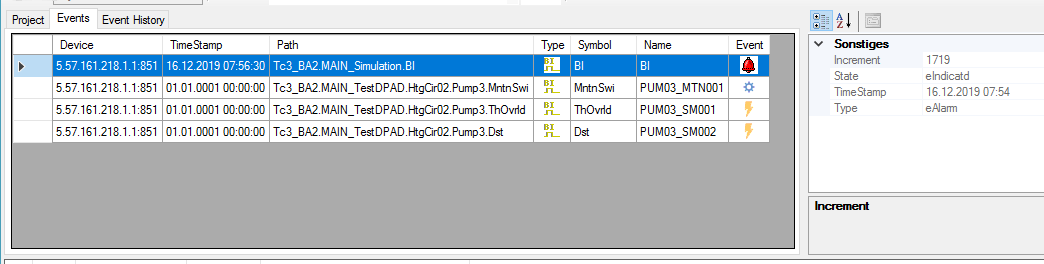
In addition, a summary of all active events is displayed in the status bar at the bottom.
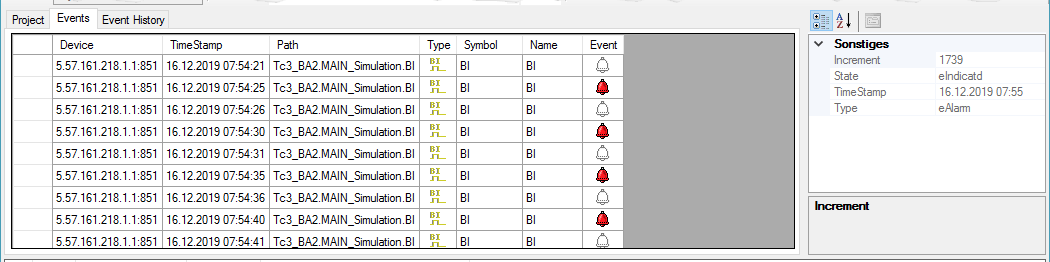
For each event type, the highest priority event symbol is indicated:

Individual states of the combined events can be viewed via the drop-down menu:

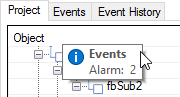
In the project view, a summary of all active events of a view can also be displayed by moving the mouse over the entry:
Event history
All occurred events of a view are listed in the event history:
Functions
Acknowledge
Events can be acknowledged from different views via the context menu:

Example: Acknowledge fault in the project view.

Example: Acknowledge alarm in the event overview.
Navigate to an object
The context menu can be used to navigate directly to the selected object (in the project view):
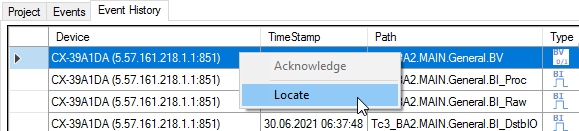
Example: Navigation to the selected object from the event history.
Commissioning:
Commissioning states of individual objects can be adjusted in the corresponding column:

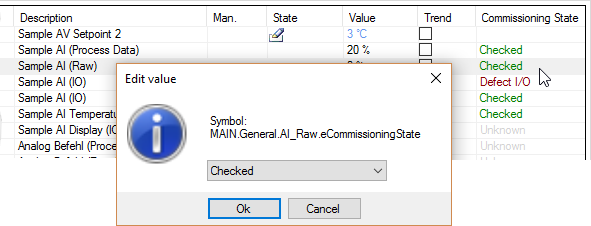
Example: Interface for entering the commissioning state of an object.
Details
Commissioning details of selected objects are displayed in the properties.
 | Subsequent editing is possible for some details. |
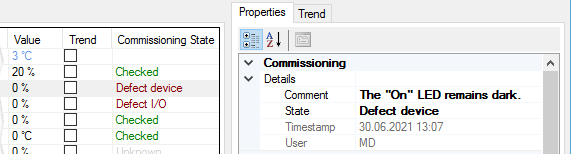
Example: Commissioning details of a defective field device.
- Online
The following details are stored online (per object) in the controller. - State: Current commissioning state.
- Offline
The following details are stored offline (per object) in the site settings. - Timestamp: Time of the last change to the commissioning state (if the change was made using Building Automation Site Explorer).
- Comment: Optional comment.
Menu
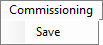
Save: Saves the commissioning details of all connected devices.
| At the latest when the connection to a device is terminated, the commissioning details are automatically saved. |
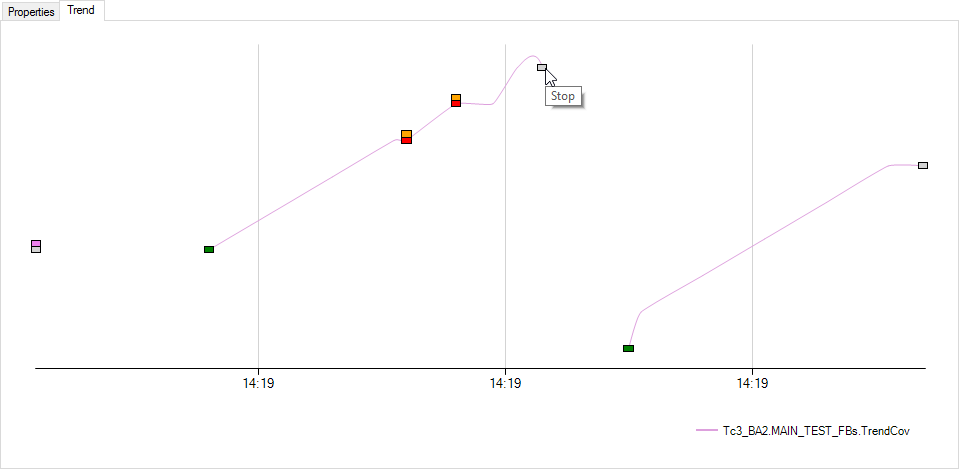
Trend
Various information can be read in the project view:
- Indication of a referencing Trend object.
- Current number of data sets of the referencing Trend object.
- Start or stop recording the current value of an object (Online trend).
- Display or remove the log buffer of a Trend object (Offline trend).
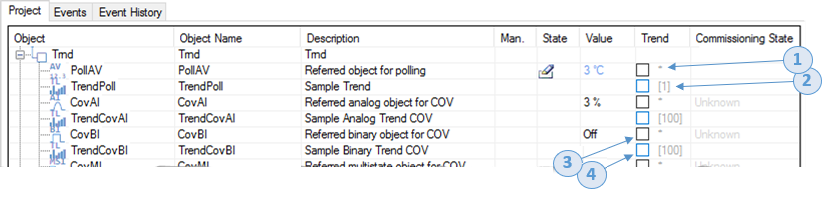
Example: Representation of different trends.
Offline trend
The offline trend reads the log buffer of a Trend object and displays it in the Trend view.
| Entries are not updated automatically! |
Online trend
The online trend records the current value of an object in the Trend view.
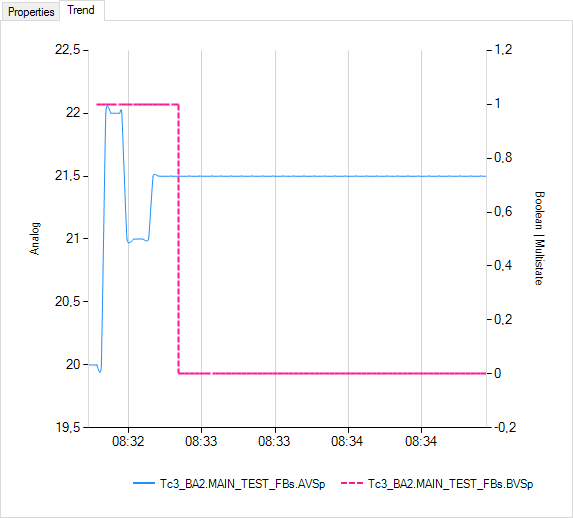
Notice | |
Loss of data Recorded values are not saved after ending the recording or closing the trend view! |
Menu
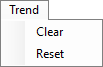
Name | Description |
|---|---|
Cleaning | Removes all entries from the trend view (equivalent to restarting the current recordings). |
Reset | Not only removes all entries from the Trend view, but also stops recording all objects. |
Referencing
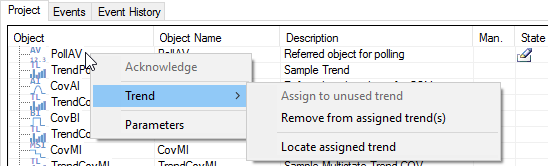
Name | Description |
|---|---|
Assign free trend | Assigns an object to the next, unused Trend object. |
Remove reference from assigned trend object(s) | Removes the Objects reference from all referencing Trend object(s). |
Navigate to assigned trend | Navigates to the assigned Trend object (in the project view). |
Referencing trend objects
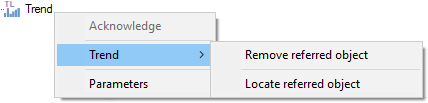
Name | Description |
|---|---|
Remove referred object | Removes the current object reference. |
Locate referred object | Navigates to the assigned bject (in the project view). |
Editing values
Current values (if writable) can be edited directly in the project view.

Editing parameters
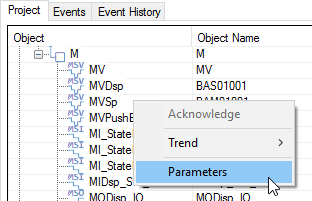
Access rights: The column R|W (Read, Write) lists the required access rights per parameter.
Role | Abbreviation |
|---|---|
Default | * |
Advanced | A |
Expert | E |
Internal | I |
Locked | - |
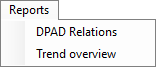
Reports
Reports are intended to provide a general overview of a project. Furthermore, the following requirements can also be met:
- Project documentation for the operator
- Project status tracking
All reports can be exported to the following formats:
- *.csv
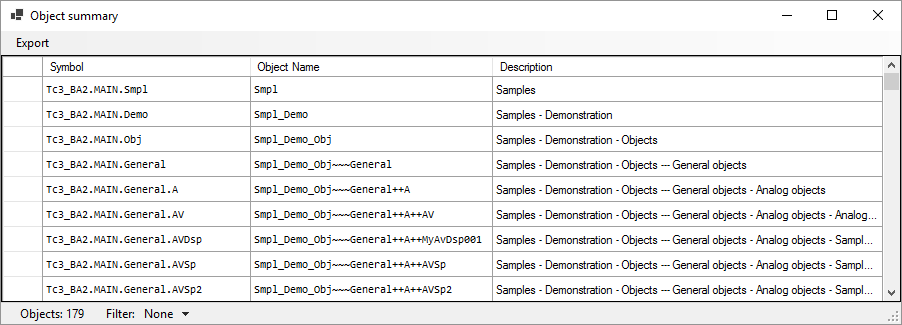
Object summary
Overview of all objects located in the connected site.
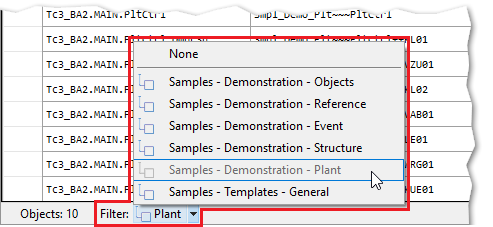
Filter
To increase the overview, the view can be filtered according to plants:
Trend overview
Overview of available trends and recorded or referred objects.

DPAD Relations
Create a comparison to show DPAD relations.

Included information per object:
Symbol path
Properties
- ObjectName
- Description
Label (if used)
- Aggregate information
- Name
- Description
- Function information
- Name
- Description
Discovered devices
Each time a connection to the Site is established, connection information of all available devices is updated.
If there are connections to unknown devices among them (which are not part of the current Site configuration), they are listed as discovered devices at the bottom of the application:

To add a discovered device to the Site configuration, just click on the corresponding menu item.
| Discovered devices are possible suggestions. |
Log and status
Messages and states are displayed in the log or in the status bar at the bottom of the application:

Log entries may contain additional information ( ).
).
These can be called by moving the mouse pointer over the *.
The following functions can be called via the context menu:
- Copy selected entries: Copies selected entries to the clipboard.
- Copy all entries: Copies all entries to the clipboard.
- Export: Copies all entries to a file.
- Clean: Removes all entries from the view.
Version
Details of versions are output in the log when the application is started:

- Terminal Explorer
[OL52] Started TerminalExplorer v1.0.11.2- Terminal Client API
Loaded terminal client API v1.2.2.1 (Compatible to terminal server v1.0.12.0)The entry contains two pieces of information to be distinguished:
- Version of the loaded Terminal Client API DLL
- Version of the Terminal Server to which the loaded Terminal Client API is compatible.
Notice | |
Observe version Only connections to ADS devices working with this version can be established! |
- TwinCAT ADS
Loaded TwinCAT ADS v4.4.0.0Toolbar
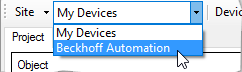
Sites
Selection of configured Sites.
Use cases
You can choose between two use cases for Site deployment:
- Local: For own purposes (e.g. for tests) Site and device configurations can be stored locally (in the application directory).
- Reference: To improve collaboration in teams, references allow saving Site and device configurations in arbitrary directories (e.g. network drives or Git repositories).
Involved persons thus work on the same basis and avoid side effects such as: - Different selection and configuration of devices
- Inconsistent commissioning states
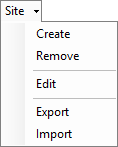
Site management
Name | Description |
|---|---|
Create | Creates a new Site. |
Remove | Removes an existing Site. |
Edit | Displays the Site properties for editing. |
Export | Exports a Site to a specific directory for referencing. |
Import | Imports a Site for use as a reference. |
Connection
When the Site connects, communication is established to all selected devices:
Manage devices

Name | Description |
|---|---|
Add | Adds a new device to the active Site. Adding devices by manually entering the AMS NetID is possible. All prerequisites (such as setting up the ADS route) must be met before a connection can be established.
|
Remove | Removes a selected device from the active Site configuration. |

Manage routes
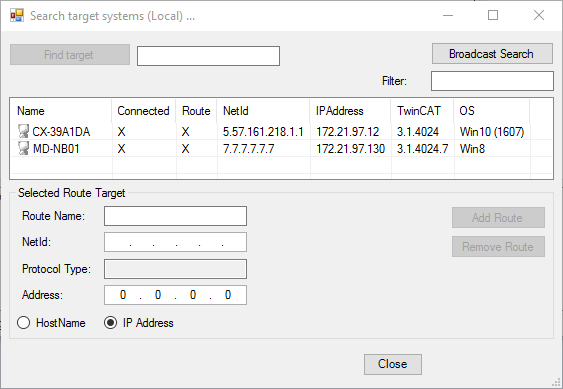
- Select route: The selection box can be used to select routes that have already been created:
- Create new route: The dialog box for searching devices can be opened via the Browse button:


Diagnose
Diagnostic functions are accessible for configured devices of the active Site via the menu:
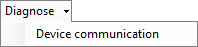
Device communication
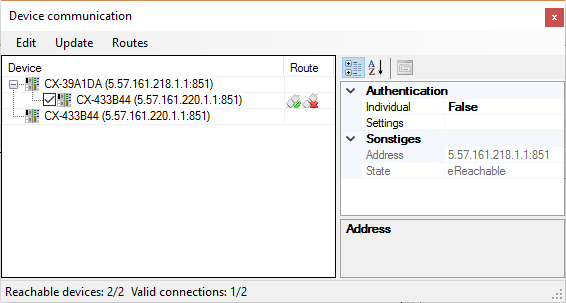
Connections and states
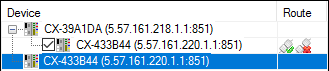
Displays a list of all configured devices to visualize the communication of individual devices with each other.
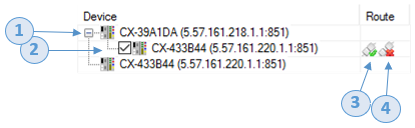
If a device (1) is designated for communication (using remote subscriptions), all target devices (2) will each appear as a connection under the source device (1).
| It also displays target devices (2) that are not part of the active Site configuration. |
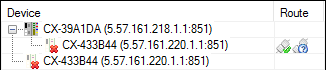
The individual states of the routes on the respective devices are indicated by corresponding symbols:
- The left symbol (3) represents the state of the route on the source device (1).
- The right symbol (4) represents the state of the route on the target device (2).
Key
- Devices
Graphic | Description |
|---|---|
| Device unreachable. |
| Device reachable. |


- Routes
Graphic | Description |
|---|---|
| Route unknown if the state could not be determined (e.g. if the device is unreachable). |
| Route missing. |
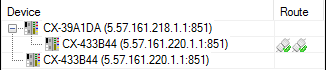
| Route valid. |


Create route
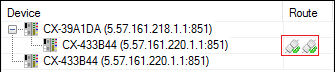
Communication within a site is functional when the routes of all communicating devices are established with each other.
Example1: Routes valid on source and target device:
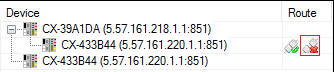
Example 2: Route valid on source device but not on target device:
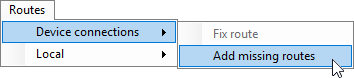
Missing routes (both of all and for selected devices) can be configured at once:
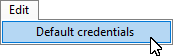
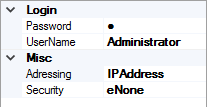
- Provide credentials: In most cases, uniform credentials are used across all devices.
- 1. Open the properties for default credentials:
- 2. Make adjustments via properties:
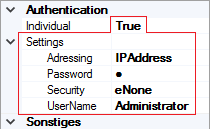
- If individual credentials must be stored for different devices, the default credentials can be overwritten as follows:
- 3. Select device:
- 4. Activate and edit the individual credentials:
- Select devices for route configuration
- 5. Devices with invalid route settings are automatically selected for configuration at the beginning:

- 6. If devices should not be provided for configuring the route, they can be deselected:

- Apply configuration:
- 7. The route configuration of the selected devices can be rolled out via the menu:
- All configuration operations are logged in the log:

- For unavailable devices (e.g. not reachable or route not configured) neither route states can be displayed nor route configurations can be adopted:
Fix connection
Despite existing route configuration, the connection between two devices may be faulty.
In this case, routes are set up on both sides, but with incorrect parameters (for example, if an IP address has changed).
Example: Display of a valid connection due to routes set up on both sides.
A (highlighted) connection can be repaired via the menu.
This reconfigures the routes on both devices.

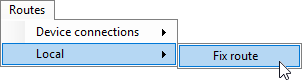
Fix local route
Despite existing route configuration, the local connection to a target device may be faulty.
In this case, the route is set up, but with faulty parameters (e.g., if the IP address of the target device has changed).

Routes to unreachable devices can be fixed via the menu: