Starting a project
This chapter describes how to start a project.
Procedure
The procedure described here includes all settings that are relevant for a functioning project.
 | When using the TF8040 PLC project templates individual steps are already prepared accordingly. |
Updating the runtime
If the runtime on the target device is not up-to-date, it should be updated accordingly:
XAR
Install current XAR on full Windows systems.
Image
Install current image on the other systems (e.g. Windows Compact 7).
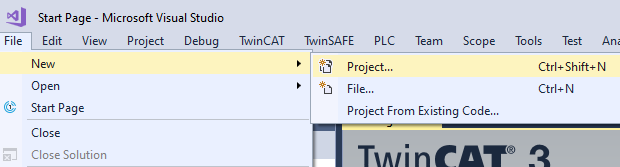
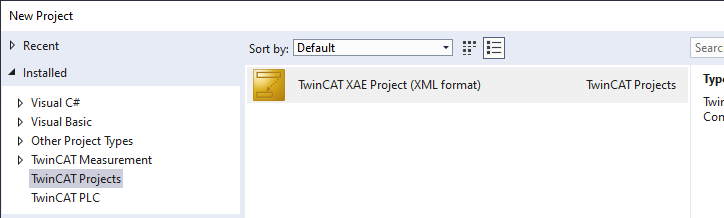
Creating a TwinCAT project
- Create new Solution.

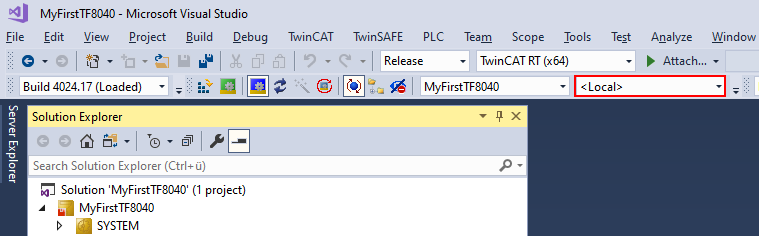
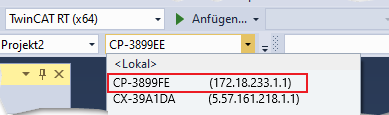
Choose Target System
- To proceed with the project settings, you must first select a controller as the target system.
| For more information refer to the chapter Choose Target System. |
Project settings
After the target system is selected, you can proceed with the project settings.
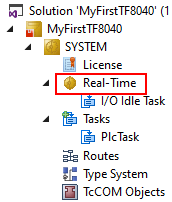
System
Real-time
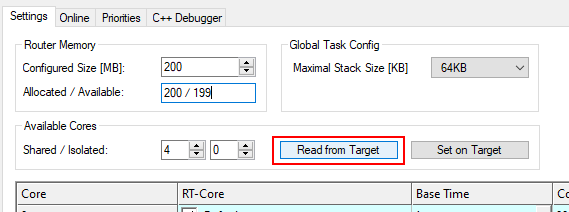
- Reading the existing hardware configuration:
- Selecting a core:
If there are several cores to choose from, the last core is recommended, since the load generated by the operating system tends to be small there.
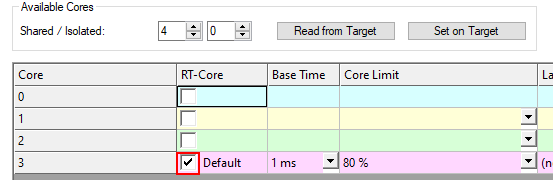
Notice | |
Do not use isolated cores. |
- Configuring the router memory
The memory should generally be set to 200 MB:
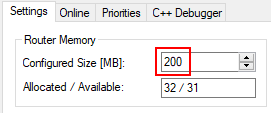
| A restart of the operating system (on the target device) is required to apply the setting. |
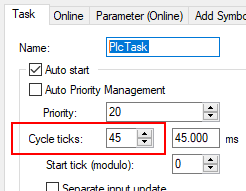
Tasks
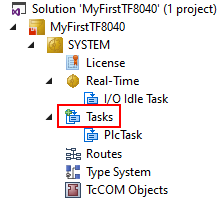
Settings for the PLC task:
- Recommended cycle time: 45 ms
PLC
| The settings described below are not necessary if a PLC project template is used. |
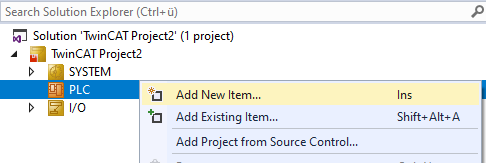
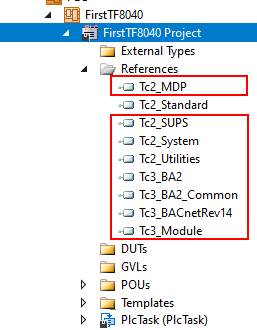
Libraries
If no template is used, the following libraries must be added to the PLC project.
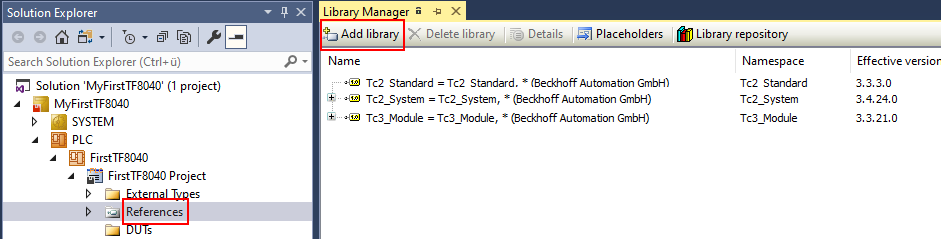
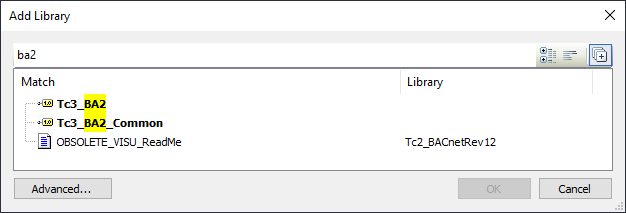
|
In the standard PLC-BA template all necessary libraries are already loaded automatically. |
I/O
The procedure proposed here refers to the steps required to make the TF8040 function operational in combination with BACnet on the desired hardware.
| Further steps for setting up the hardware are not be discussed in detail here. |
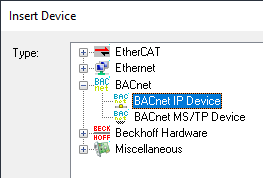
BACNet
- Add BACnet device:
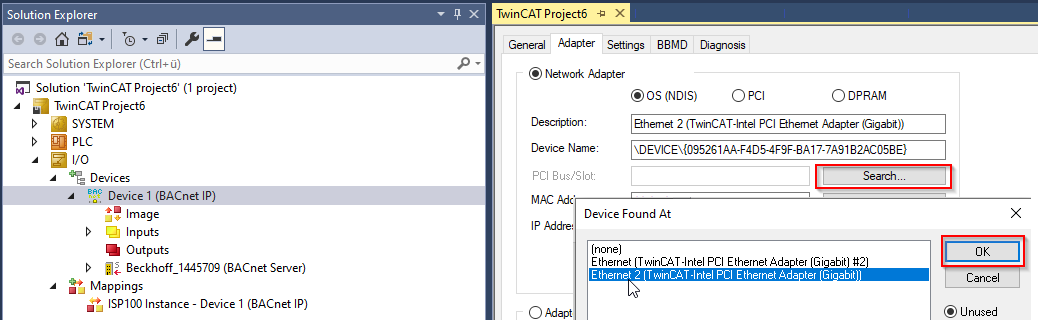
- Select the appropriate network adapter:

The adapter is set in the BACnet device under the Adapter tab:
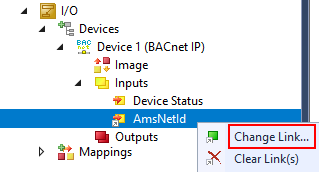
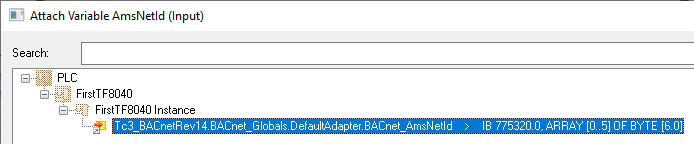
- Linking the BACnet adapter with the AMS NetID:
| This step is only possible once the project has been compiled without errors. |
Selection of the BACnet adapter to be used:
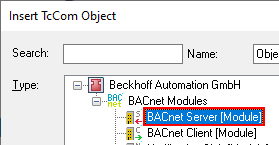
- Adding the BACnet server:

License
TwinCAT 3 standard licenses are tied to a unique system ID of a TwinCAT 3 license dongle (or IPC).
Standard licenses are chargeable: The license price depends on the hardware platform level.
More detailed information is described in the information system (see Licensing).
- Determine the license status.
- To start it is possible to activate a trial license. This unlocks all functions for 7 days.
Continue
The PLC project is now set up and project planning can be started.