Create AX5000 and NC axis manually
After you have familiarized yourself with a simulation axis (Create simulation axis), you can now deal with an axis that is linked to real drive hardware. Here, the example of an AX5000 is used to explain how the drive hardware can be created manually in TwinCAT Engineering and linked to an NC axis.
Requirements
- TwinCAT is in ConfigMode
Create Devices
 | The AX5000 communicates via EtherCAT. |
- 1. Click the path I/O > Devices > Add New Item...
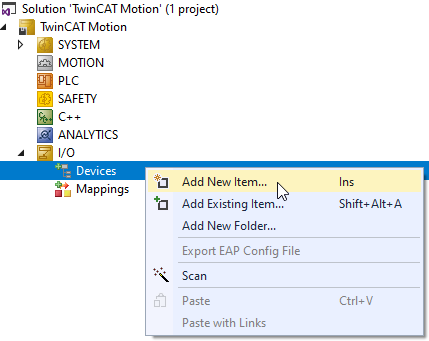
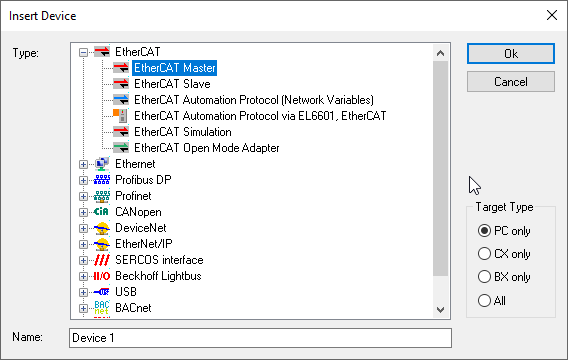
- 2. Open the dialog Insert Device.
- 3. Select an EtherCAT Master.
- 4. Confirm your selection with OK.
- The EtherCAT master is added.
- 5. Click the path Devices > Device 1 (EtherCAT) > Add New Item...
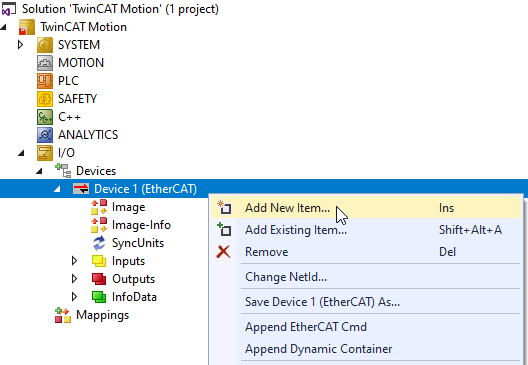
- The dialog Insert EtherCAT Device opens.
- 6. In the Insert EtherCAT Device dialog, select the AX5000 actually used and confirm with OK.
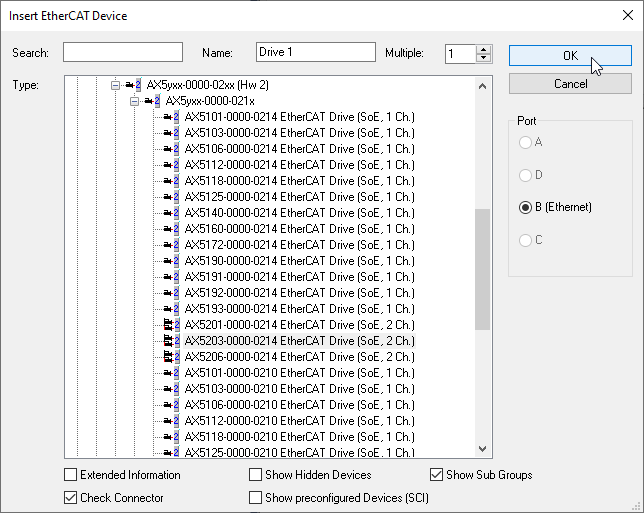
- An EtherCAT master with the AX5000 used is created under I/O.
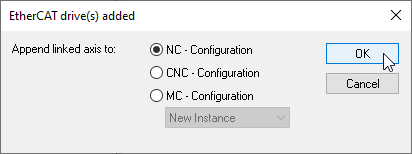
Append link axis to NC automatically
| Linking the axis automatically When the AX5000 is created, TwinCAT asks whether the axis should be linked to the NC configuration. By confirming this message with OK this step is done automatically. This has the advantage that the objects are correctly linked and settings such as the Axis Type are automatically set correctly. |
What happens after the confirmation of the NC configuration?
- If there was no NC configuration in the project yet, it was created.
- Axis objects were automatically created in the NC configuration according to the drive.
- The axis objects were automatically linked to the drive scanned under I/O.
Append link axis to NC manually
If you have acknowledged the query with Cancel, you can create and link the NC configuration and axis objects manually.
- 1. To do this, first carry out the steps as for Creating a simulation axis.
- 2. At Axis > Settings > Axis Type, select SERCOS Drive.
- 3. The NC axis must be linked to the channel of the AX5000 under I/O. To do this, click Axis > Settings > Link To I/O....
- The dialog Select I/O Box/Terminal opens.
- 4. Select the channel of your AX5000 to which you want to link the NC axis.
- The NC axis is linked to the drive channel.
Select feedback and motor
- A digital name plate is required for this purpose.
- 1. To add a feedback system and motor, go to I/O > Devices > Drive Manager Channel > Configuration > Motor and Feedback.
- 2. Via Scan feedback 1 / motor* you can scan the feedback system and the motor as described at Create AX5000 and NC axis automatically and thus add them automatically.
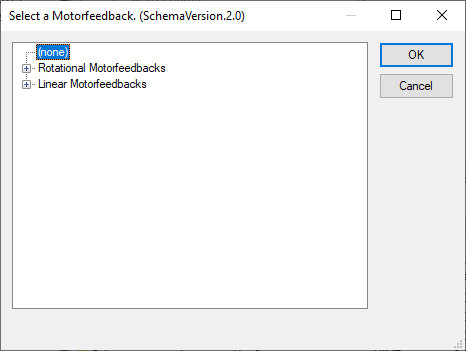
- 3. Alternatively, you can select the feedback system via Select feedback 1* using the following dialog and confirm with OK.
- 4. Confirm the following hint.

- The feedback system has been selected.
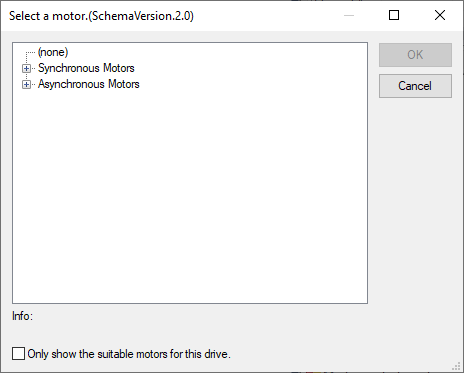
- 5. Via Select motor* you get to the following dialog. Select the motor and confirm with OK.
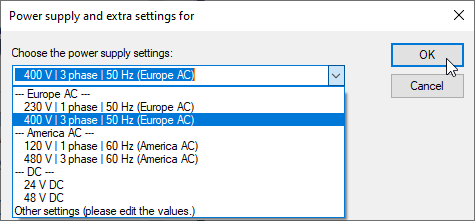
- 6. Select the power supply of the motor and confirm with OK.
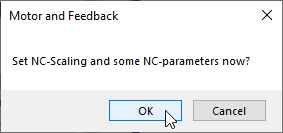
- 7. Confirm the following query with OK.
- Now adjustments can be made automatically to the NC axis. Please note the points mentioned at Axis configuration.
- Feedback system and motor are configured.