TwinCAT 3 Autotuning - First steps
The first essential steps for tuning a TwinCAT compatible axis with TwinCAT 3 Autotuning are explained below. A new project for tuning is created as an example and all necessary (and recommended) settings are made. These can also be implemented analogously in existing projects.
| |
Risk of injury due to the drive axis starting up automatically To create the Bode plot, the drive axis performs a movement sequence that depends on the settings. At the start of the recording the drive axis starts up automatically in accordance with the set motion profile and can endanger people and material. During the recording the drive axis remains integrated in the application context (e.g. releases, monitoring, etc.).
|

Create TwinCAT project
- 1. Open a new TwinCAT XAE project (XML format) via File > New > Project.
- A new project folder is then created and opened.
Registering the classes
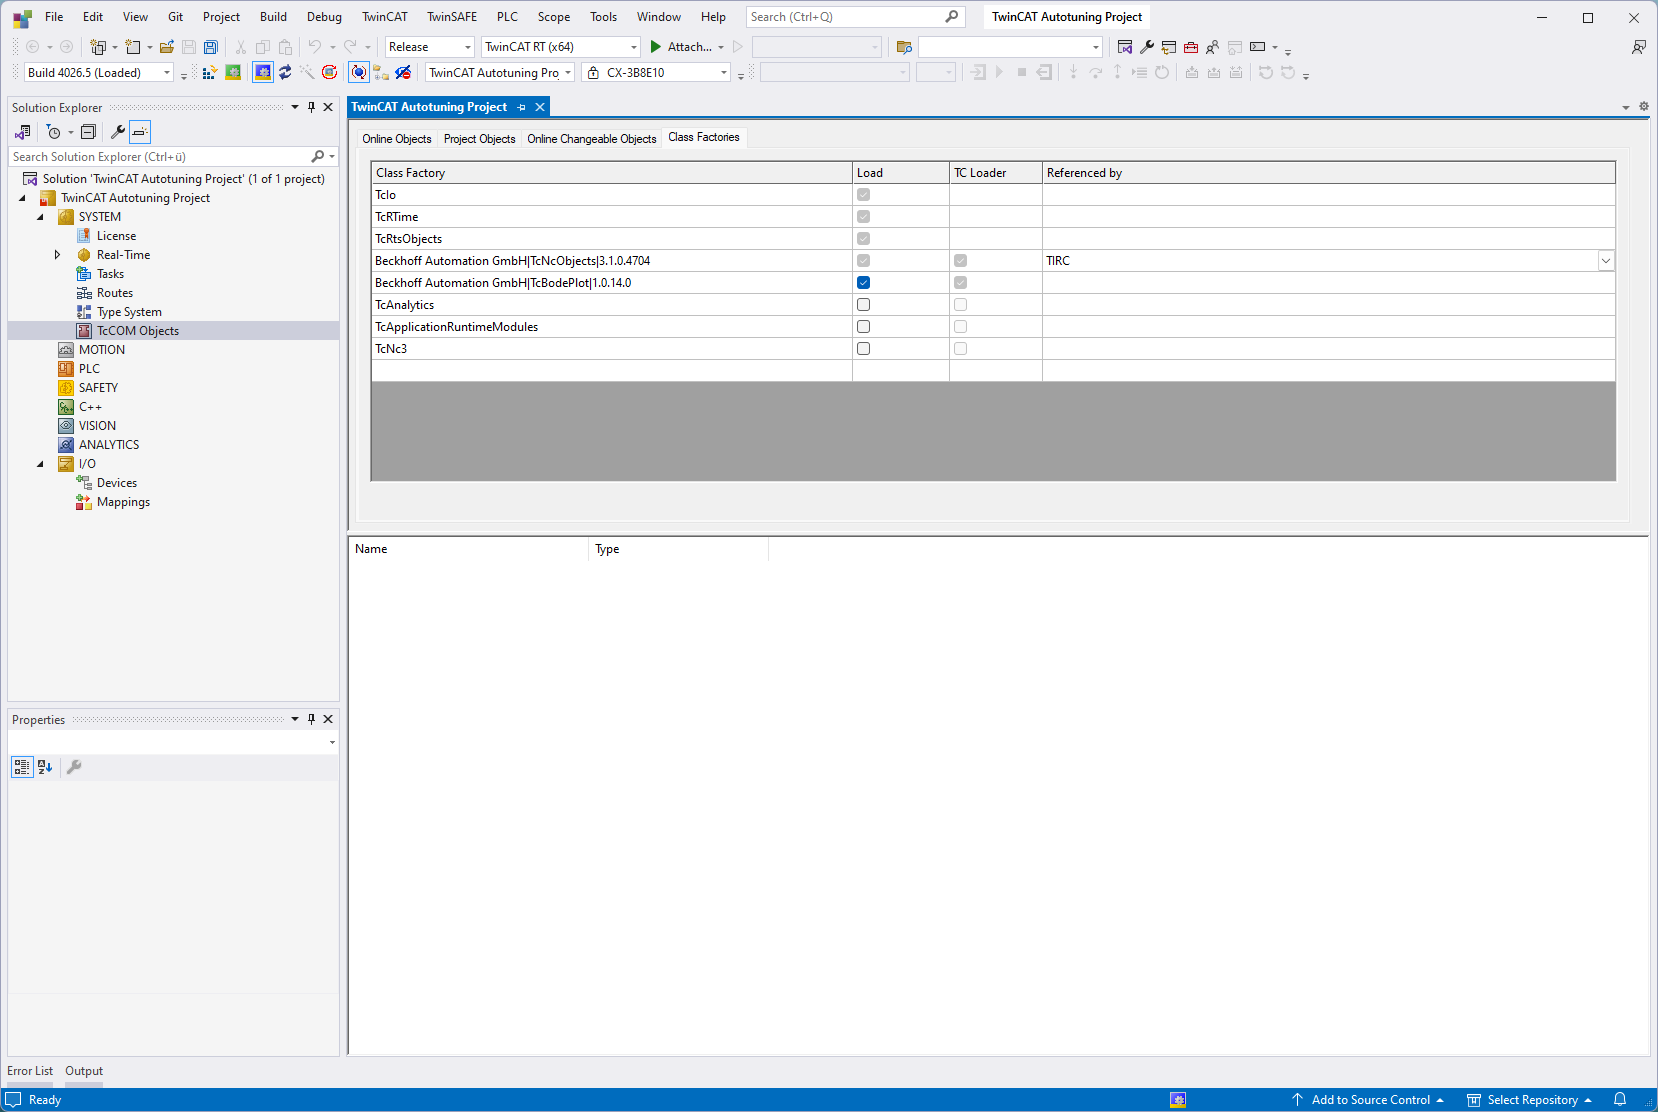
- TwinCAT 3 Autotuning is based on the TwinCAT 3 Bode Plot. This is performed in the TwinCAT system by a TcCOM object, which is generated automatically. Therefore, it is necessary to make the associated class descriptions for TcBodePlot (and TcNcObjects) known for the subsequent recordings of the frequency response.
- 1. You do this under the TcCOM Objects project node in the Class Factories tab.
Scanning drives and creating dynamic memory
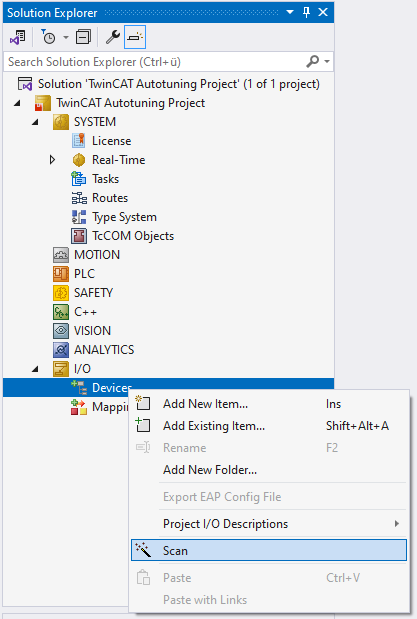
- 1. Search for available axes in the project tree under I/O > Devices on the selected target system by selecting Scan.
- Associated elements are automatically created for the available axes under the MOTION node.
- Communication between the TcBodePlot and the NC / CNC takes place via the TcNcObjects and requires a dynamic memory area for oversampling in the drive.
- 2. You add this to the associated device via the context menu using Append Dynamic Container.
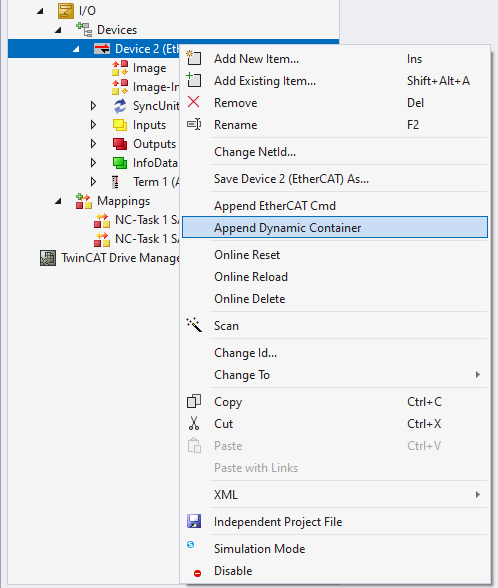
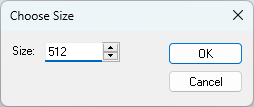
- 3. In the window that opens for setting the size of the Dynamic Container, you must set a size of 512.
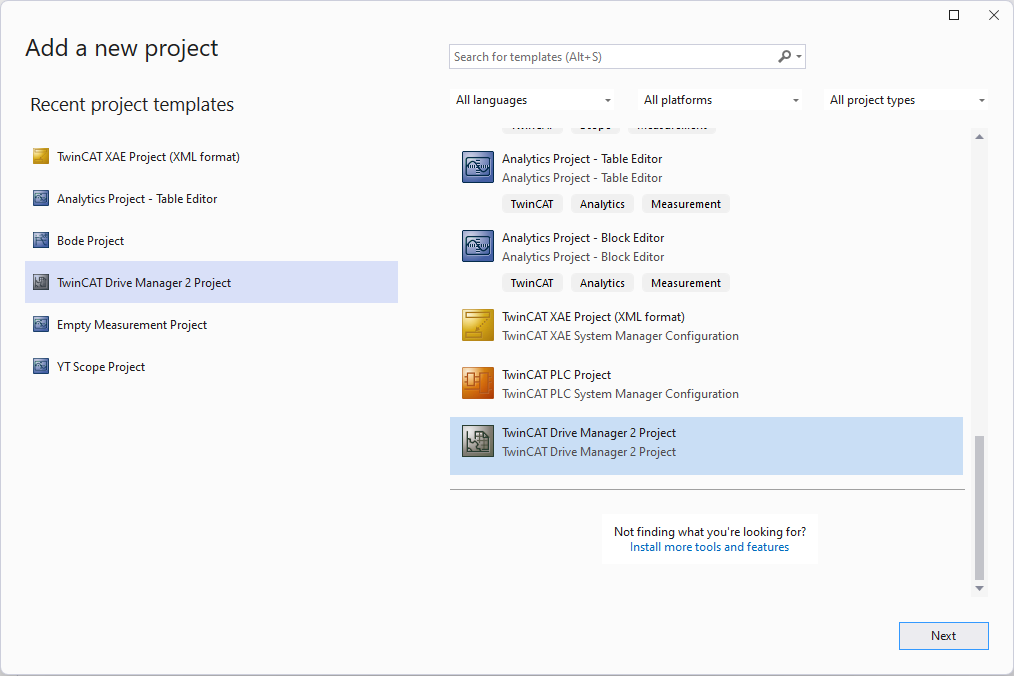
First, a Drive Manager 2 project must be added to the TwinCAT Solution.
- The parameterization and execution of TwinCAT 3 Autotuning is carried out via the TwinCAT 3 Drive Manager 2.
- 1. To do this, add a new project to the Solution:
- 2. Open the project you have created and search for drives. If necessary, adjust the parameters of the detected drives.

Configuration in TwinCAT Drive Manager 2 (recommended)
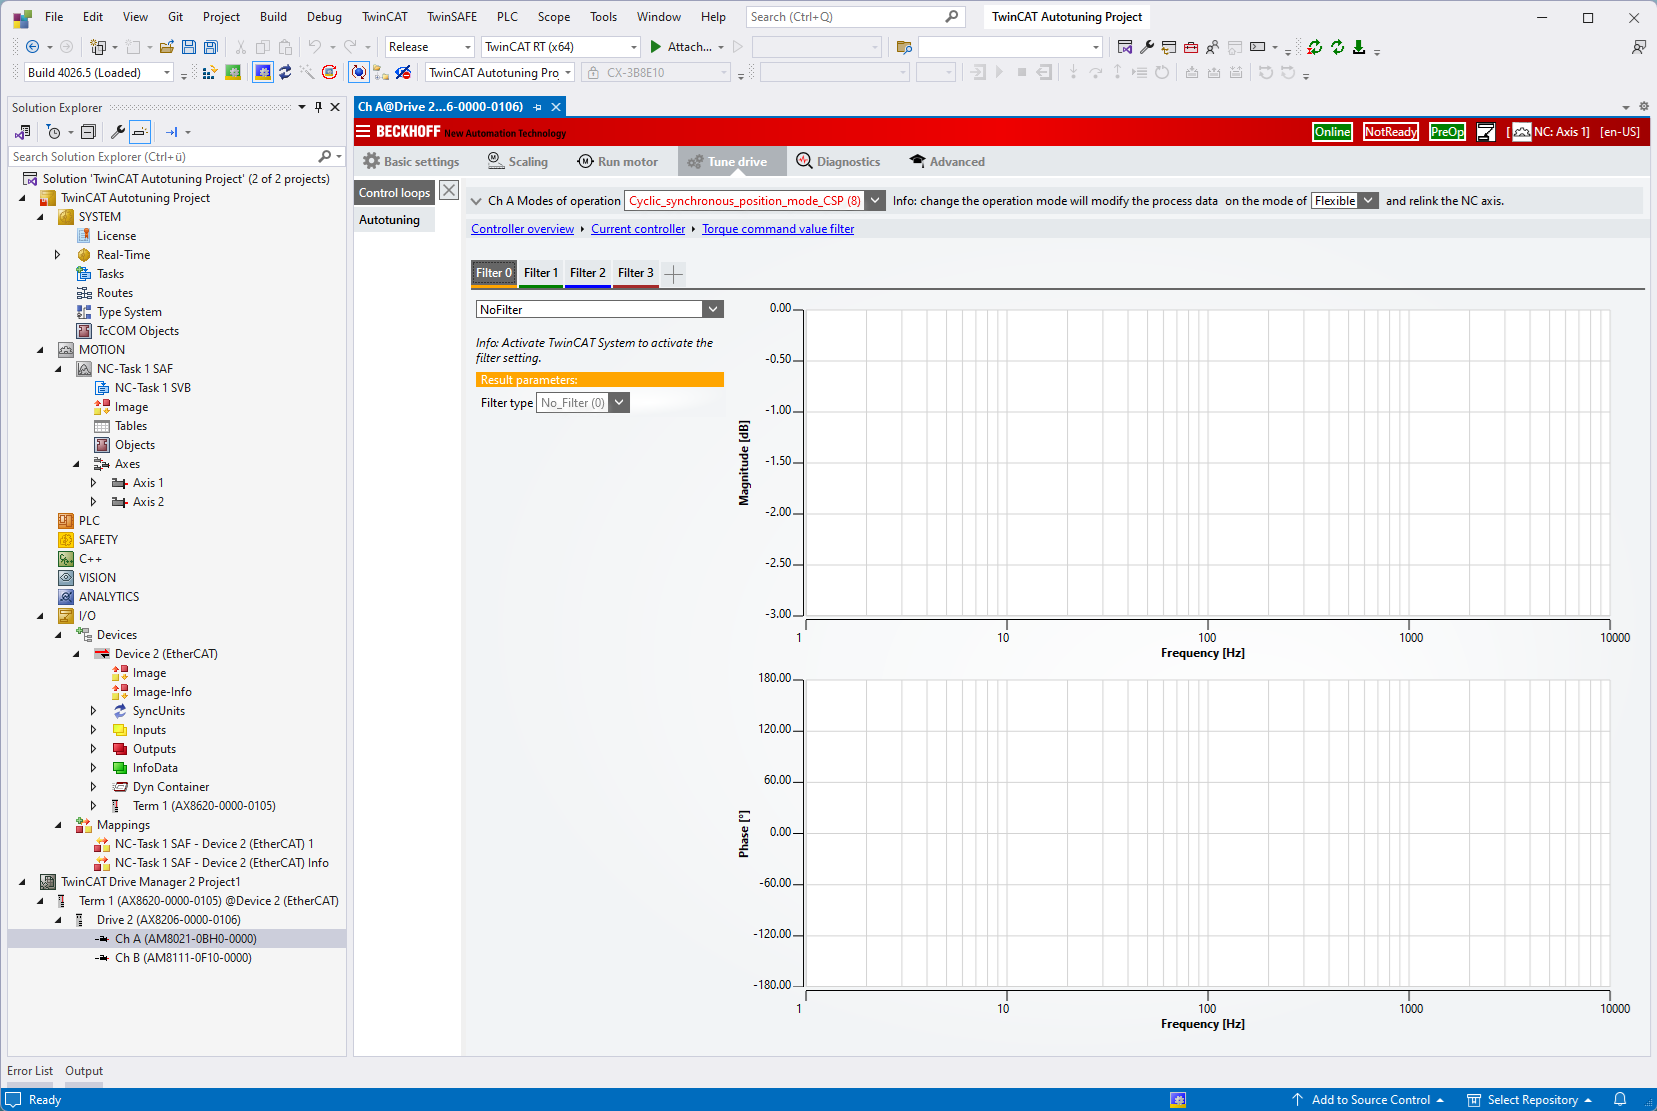
- For the best possible tuning result, it is recommended to enable the use of current command value filters for the selected drive.
- 1. In the Drive Manager 2 project, select the Tune drive tab for the desired drive.
- 2. In the window that opens (Controller overview), select the Current controller.
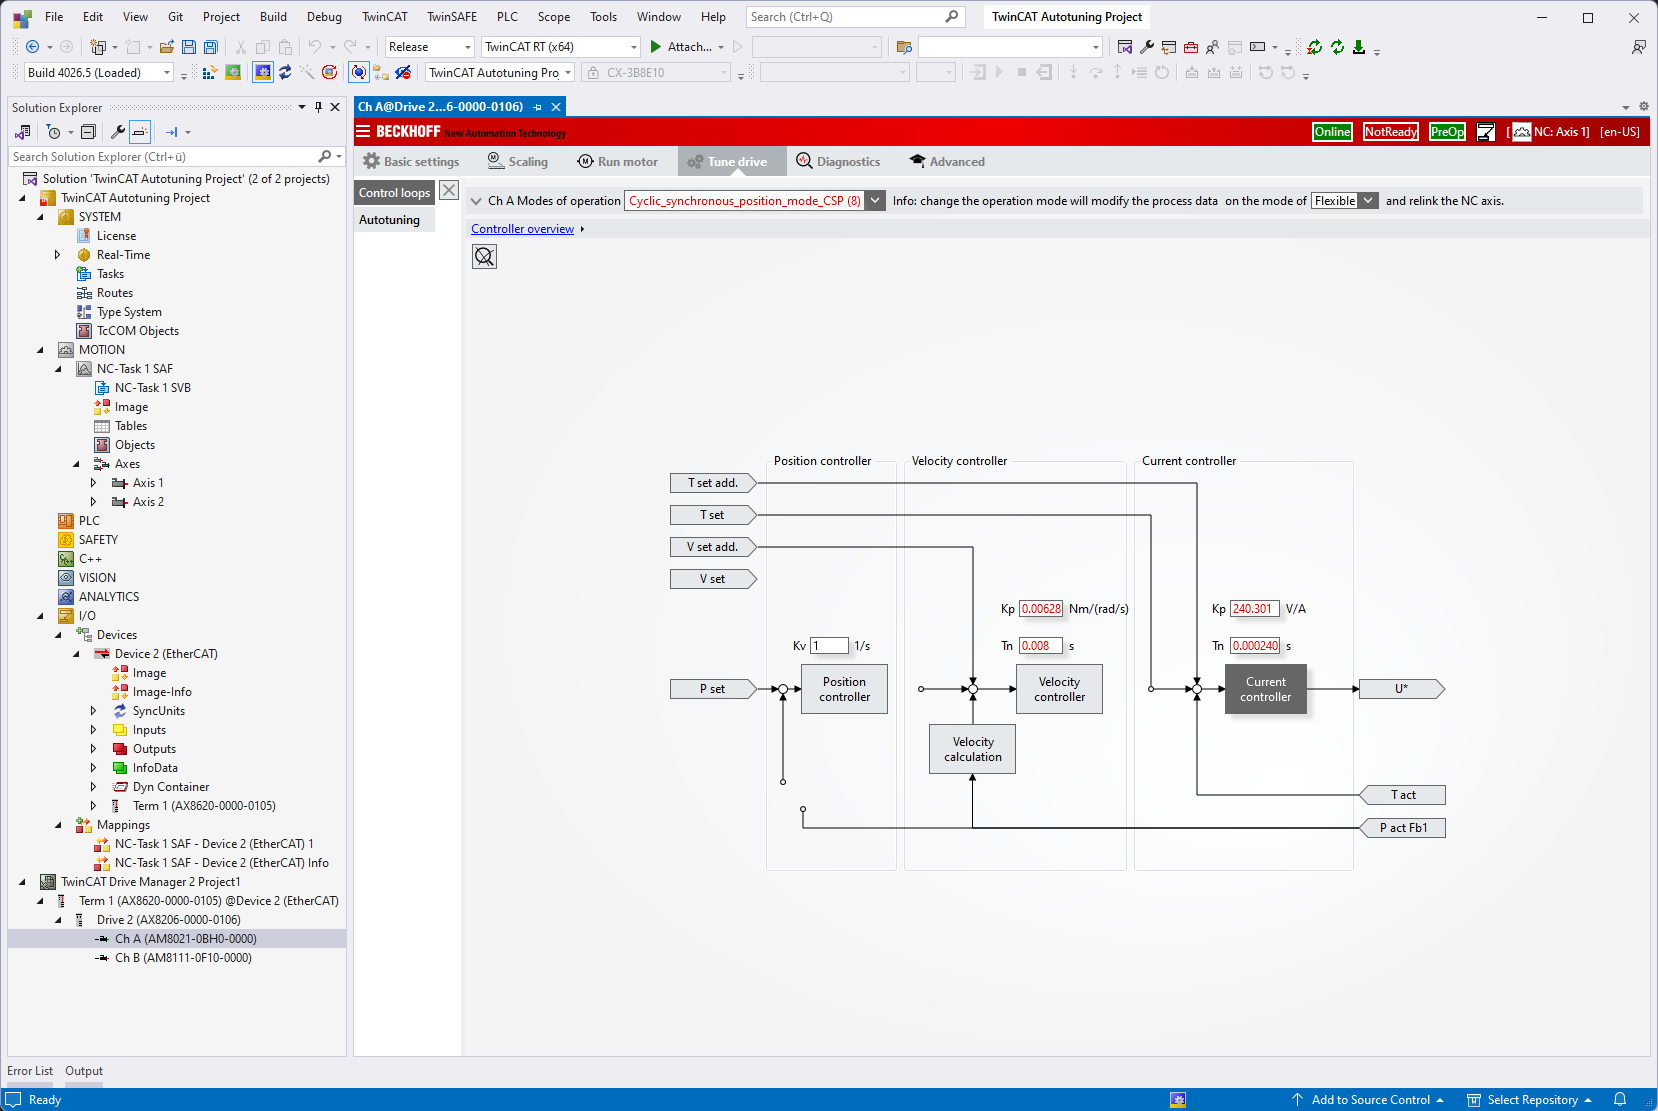
- 3. Then open the Torque command value Filter menu.
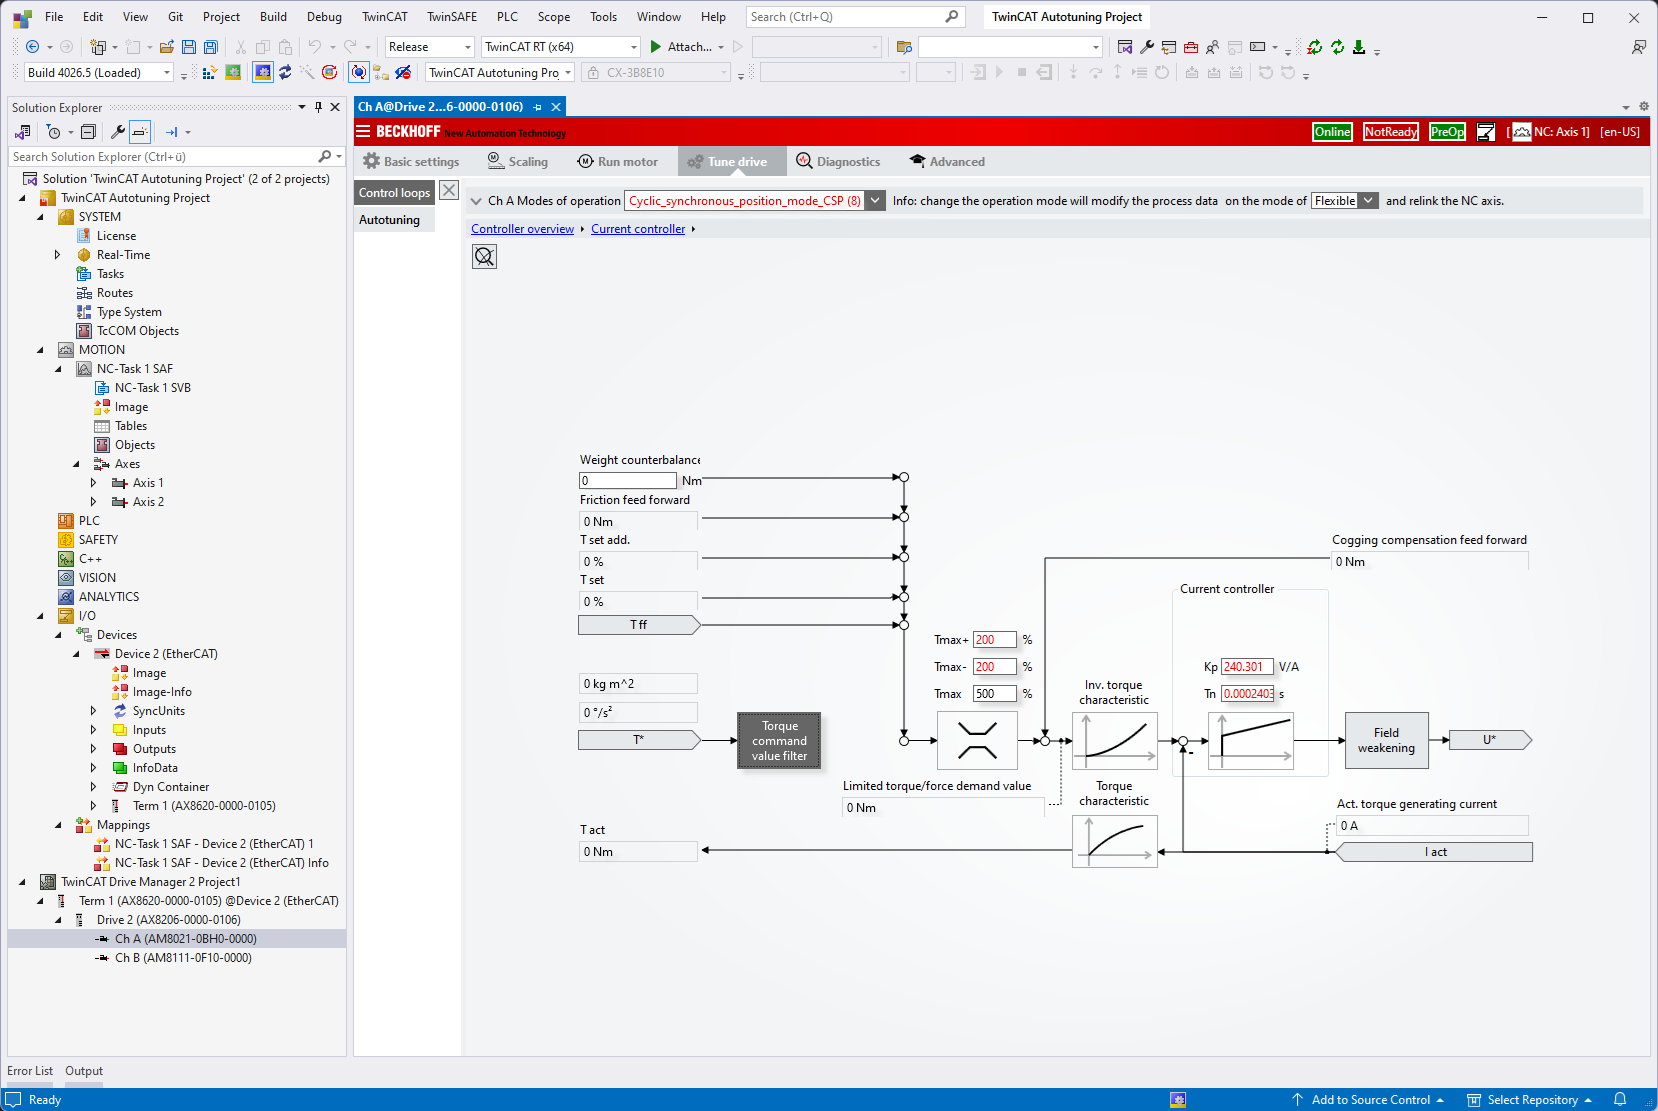
- 4. If possible, add one or more unconfigured filters (NoFilter).
- If necessary, these are automatically parameterized accordingly in the following tuning.
- 5. After (re-)activating the Solution, the changes made are available.
- 6. Follow the instructions in the Drive Manager 2 project.
- 7. Carry out this step again if necessary.
Starting the tuning
- During the tuning process, the axis is set in motion so that you have to activate the controls for this.
- 1. Select the Run motor tab under the properties of the NC and enable the controller under Enable controller.
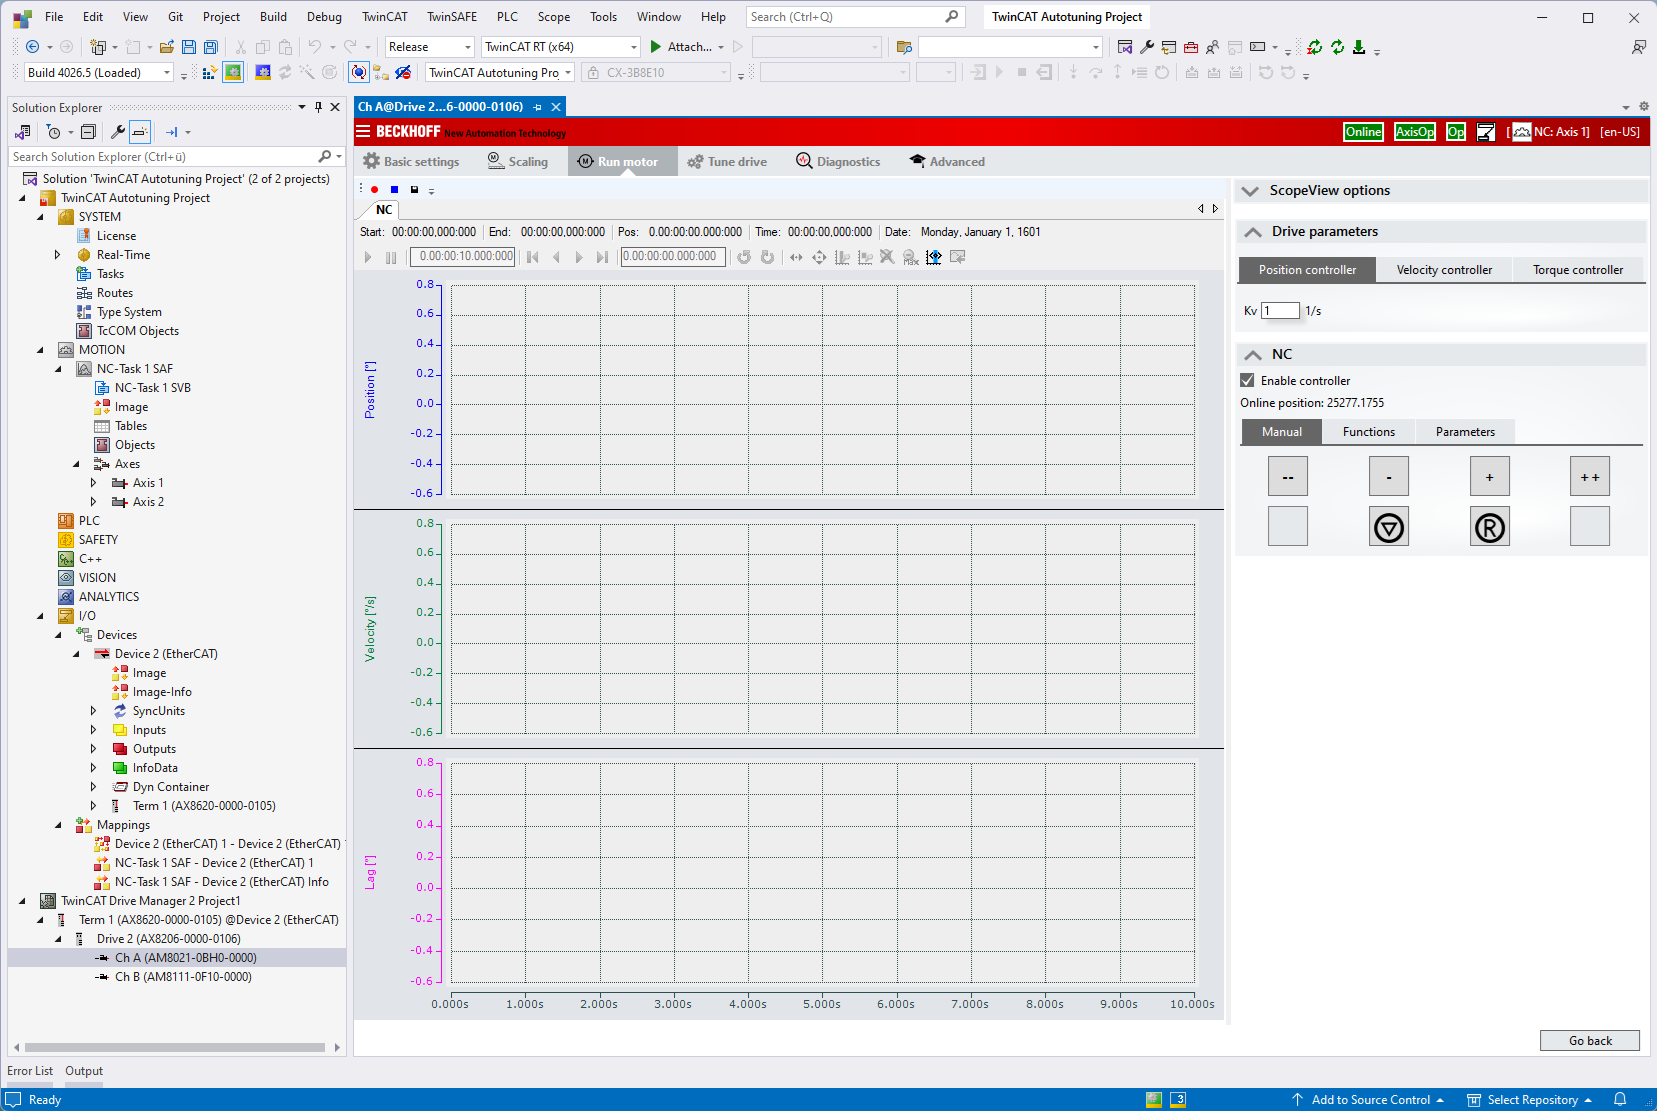
- 2. With the axis armed, select the Autotuning menu item in the Tune drive tab and start the process by clicking on the Start button.
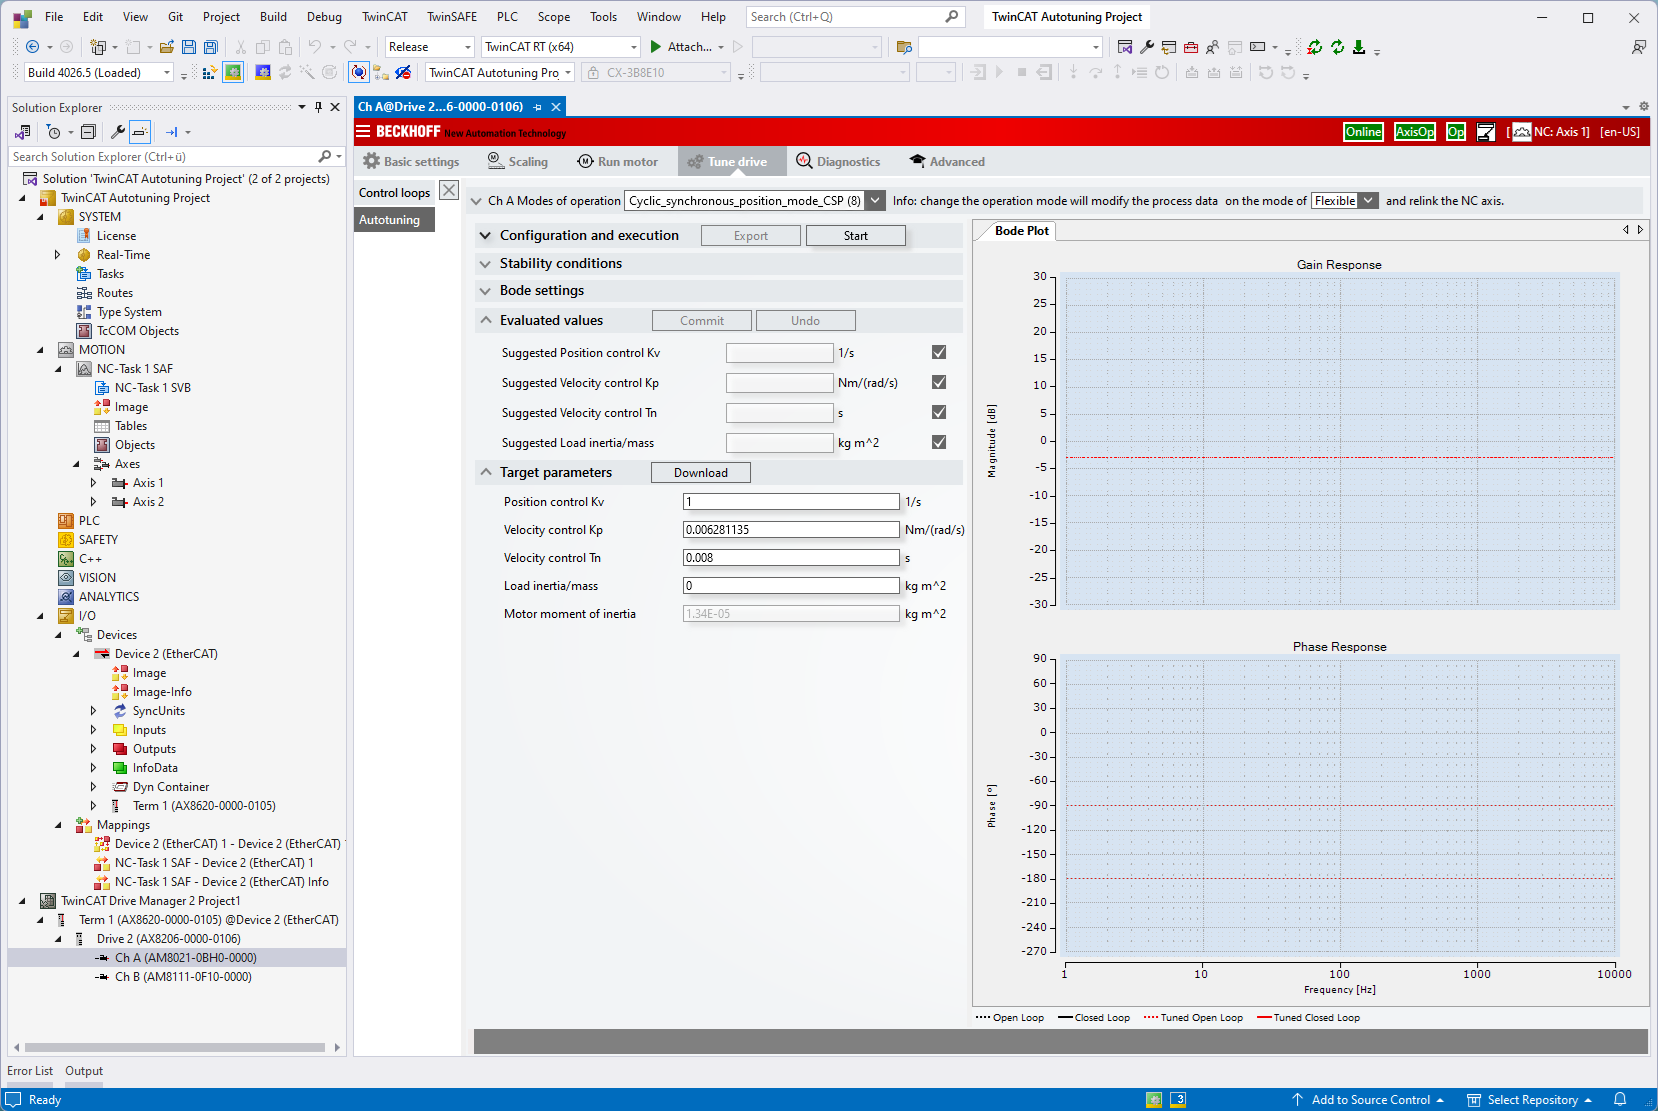
- 3. After successfully calculating the drive parameters and performing a validation measurement, you have the option of accepting the proposed values (Commit) and then downloading them to the drive (Download).
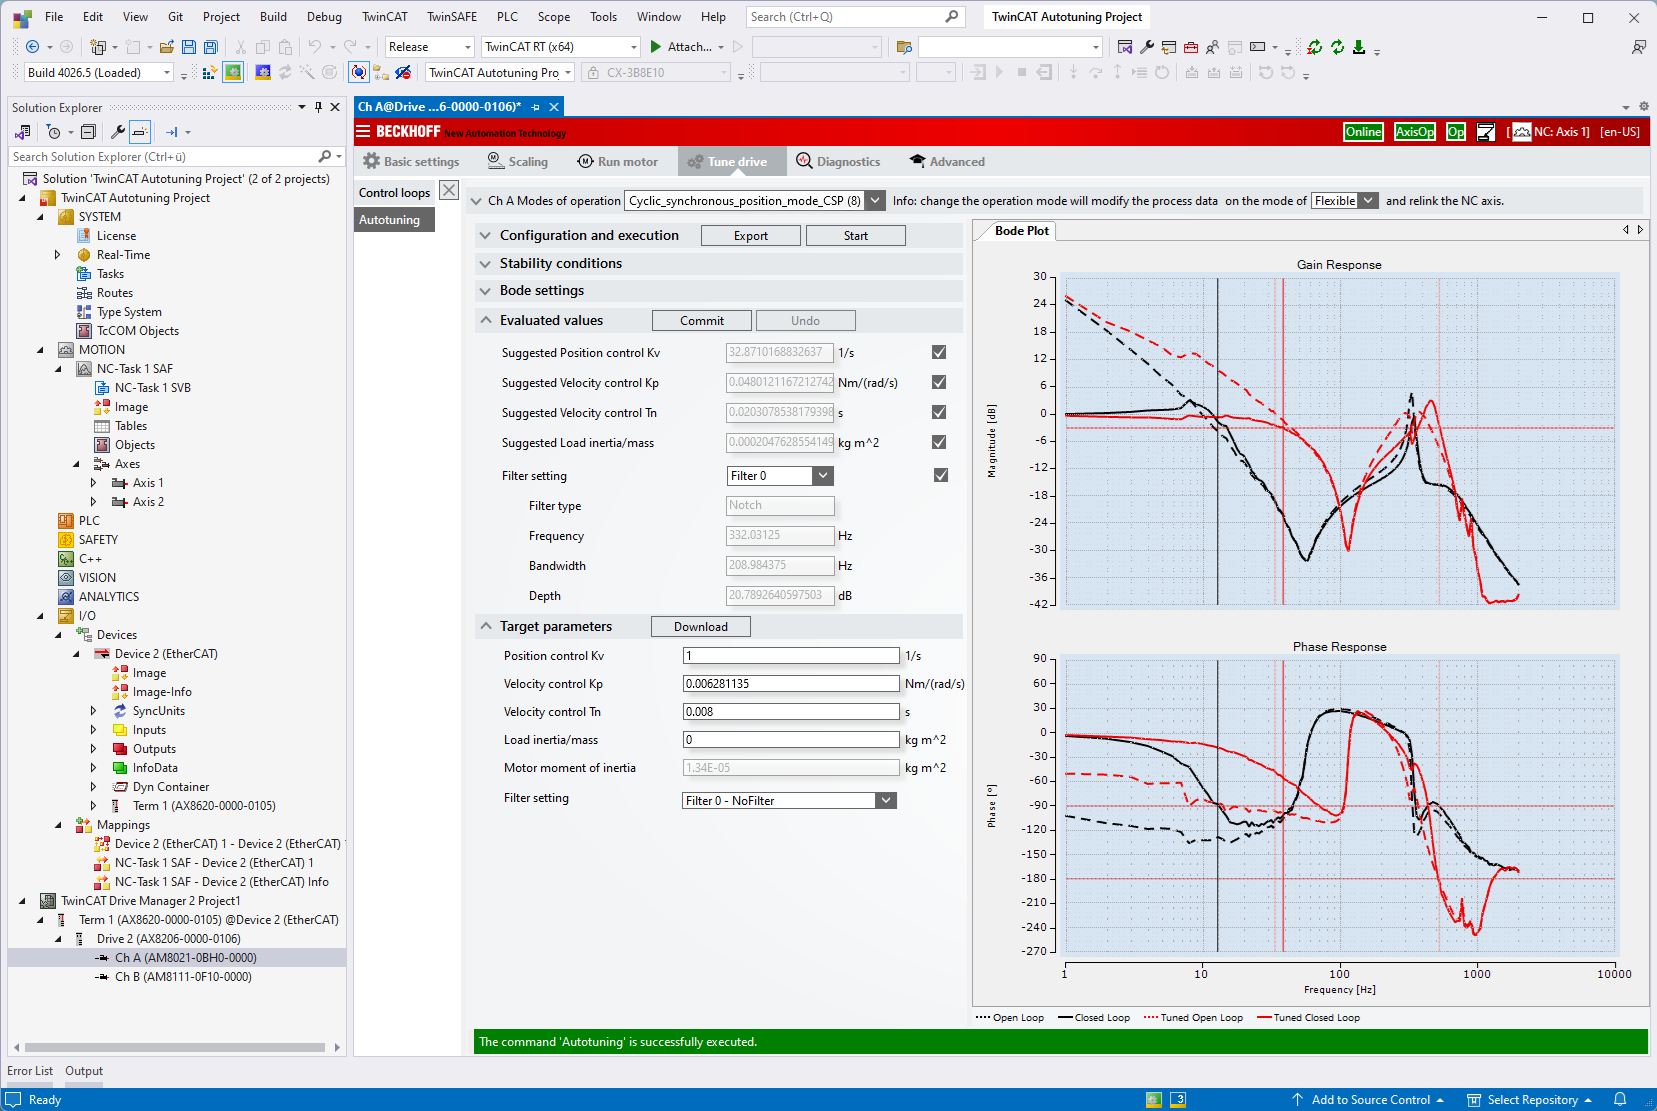
- For a detailed analysis, further processing of the results or for troubleshooting, the generated data can be exported to a TwinCAT 3 Bode Plot project.
Further details can be found in the section Exporting the tuning results.