Use customized and own controls
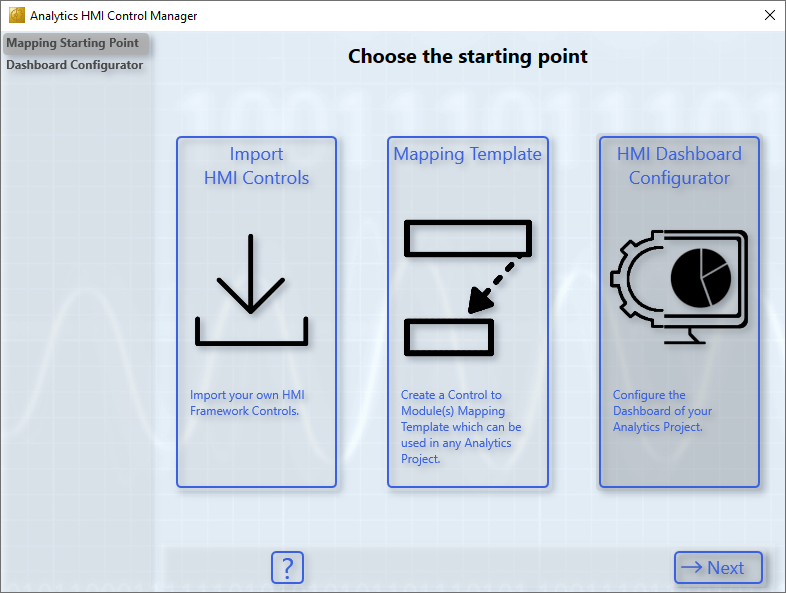
HMI Control Mapping Wizard
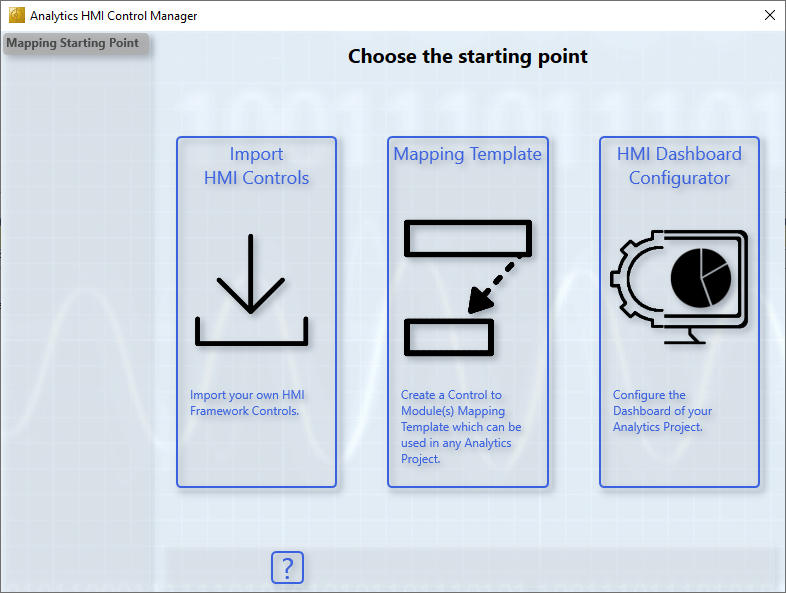
The HMI Control Mapping wizard enables the following:
1. Adding your own controls.
2. Mapping controls to module classes or changing existing mappings.
3. Mapping controls to module instances or virtual inputs (Analytics project must be open)
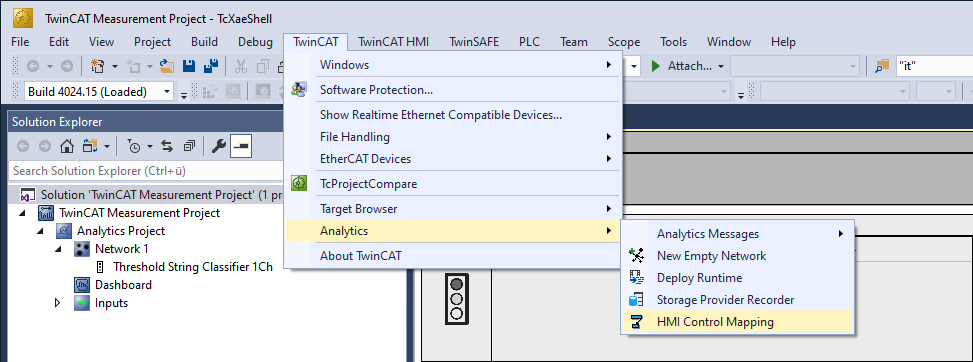
Open the wizard via the tab TwinCAT > Analytics > HMI Control Mapping.
 | Additional help is offered via the question mark ? in the wizard. |
1. Adding your own Controls
The TwinCAT 3 HMI allows you to create your own HMI Framework controls and export them as a NuGet package.
- 1. To assign your own framework controls to the Analytics modules, click Import HMI Controls
- 2. Select the NuGet package via Browse.
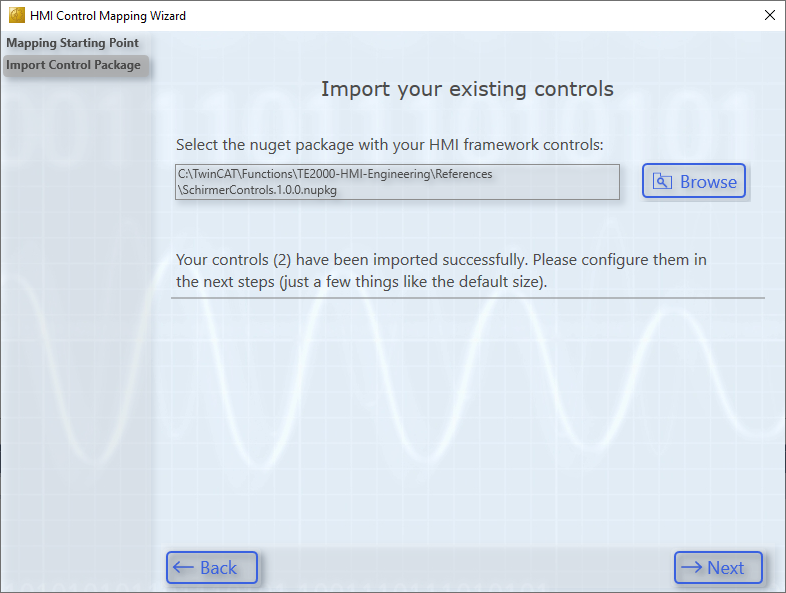
- 3. Next, choose a name, size and image for your control. Then click Next and for the last control click Create.

- You will automatically be redirected so that you can create a mapping between your controls and Analytics modules.
2. a) Mapping of controls to modules (further to 1.)
| Under 2. b) this step is explained in more detail using "Binary State" control. |
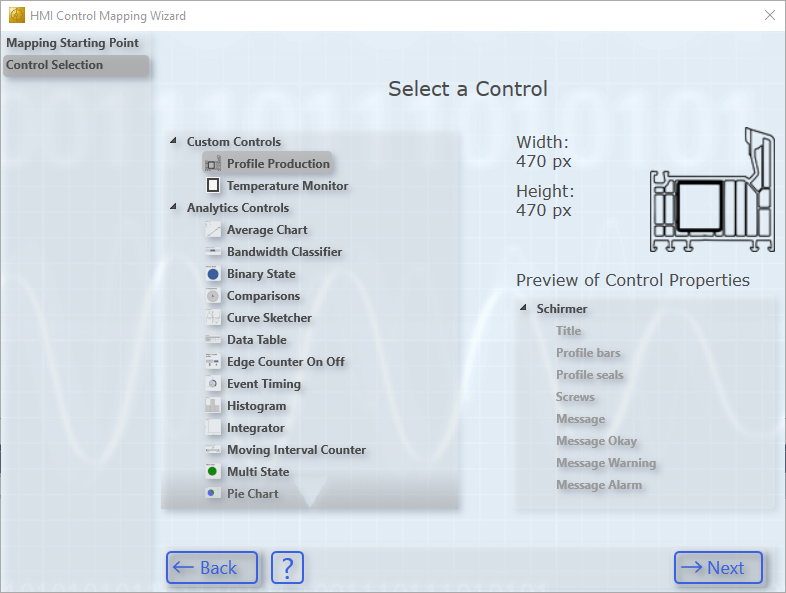
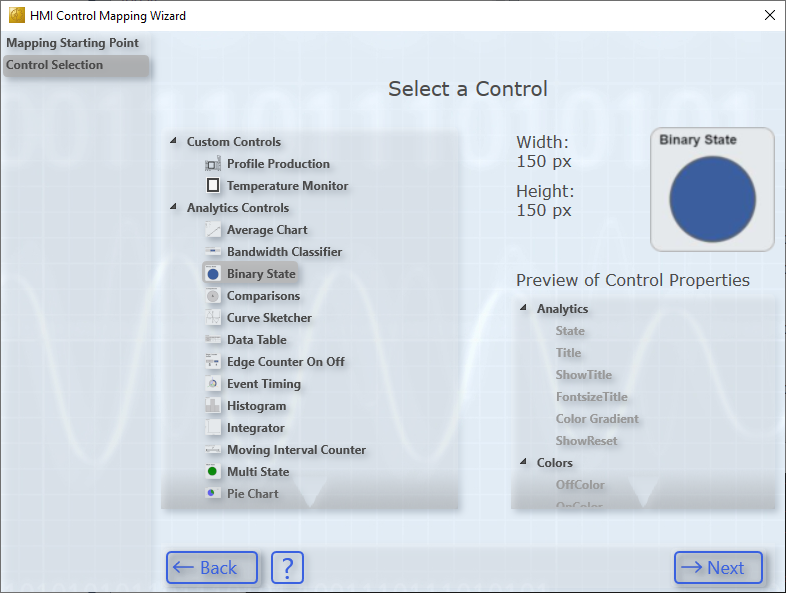
- 1. Now select your control.
- 2. Now select the module to which you want to assign the control.
- 3. Select Continue with Mapping.
- 4. In the next steps, connect the control inputs to the module data.
- 5. Last, click Create to add the mapping to the Analytics workbench.
- 6. You can now close the wizard and the mapping will automatically be available for the module. Select it and generate your dashboard.
- The dashboard is ready.
2.b) Mapping controls to modules (without own controls)
Analogous to 2.a), this section describes how to perform a mapping between a control and a module. An existing Analytics Control is used as an example. You can try this example directly.
- 1. To do this, select the item Mapping Template.
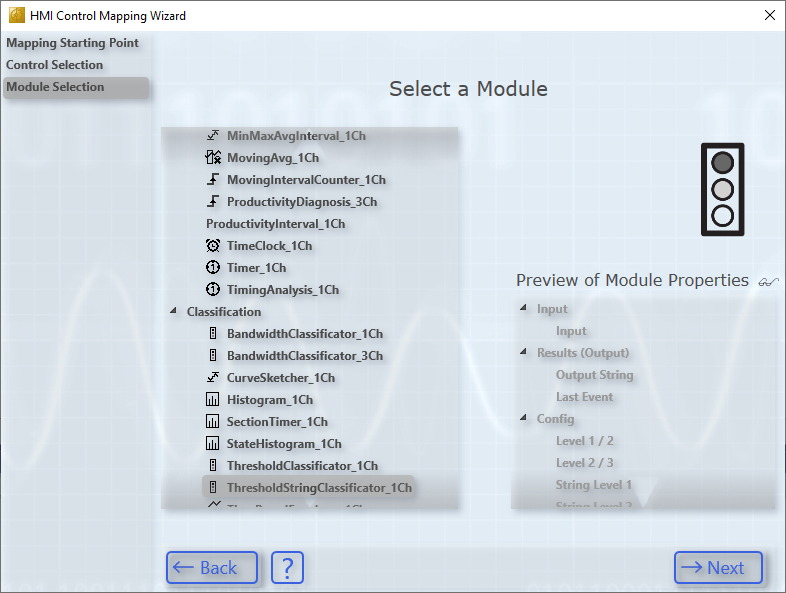
- 2. Select a control. The properties of the control are displayed on the right. It also shows how big the control will be on the dashboard.
- 3. Select the module from which you want to display the data. The inputs, outputs and parameters are displayed as a preview, which can then be linked to the properties of the selected control.
Modules that have already been mapped are underlined. These mappings can also be edited.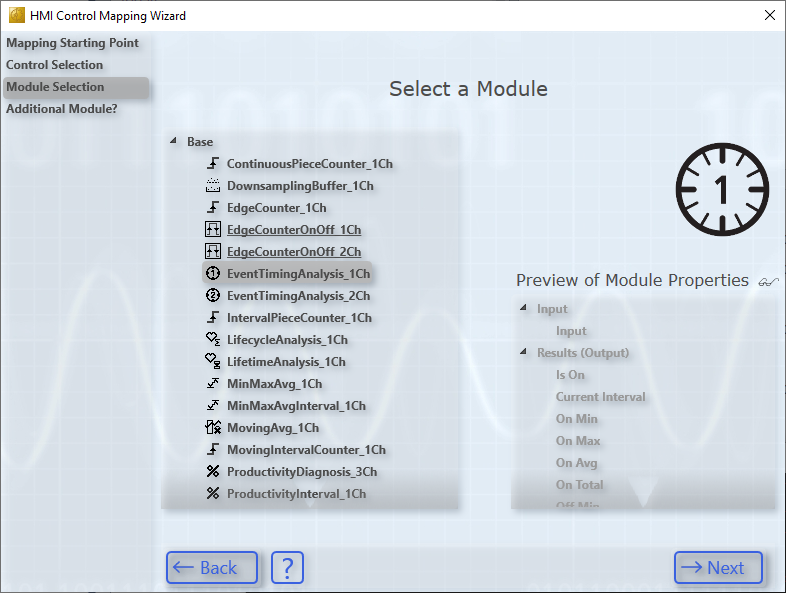
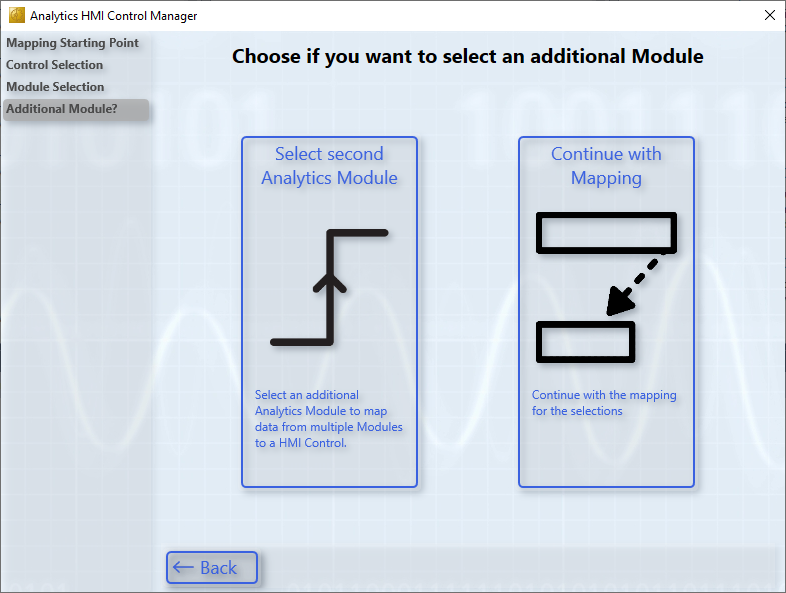
- 4. In the future, a control will be able to display data from different modules. Since this is not currently possible, select Continue with Mapping.
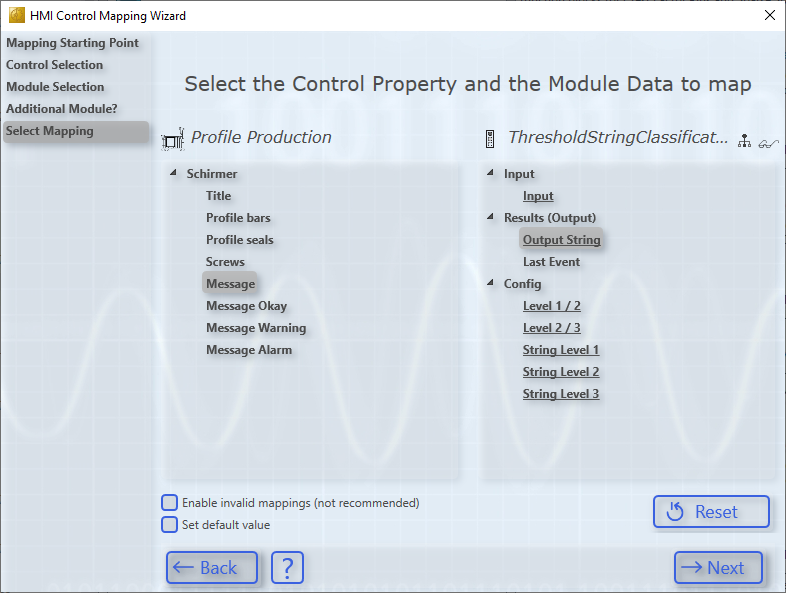
- 5. Next, select a control property to be mapped. All impossible variables that cannot be assigned due to their data type are grayed out. All others can be mapped.
Now select the module variable you want to map with the control property.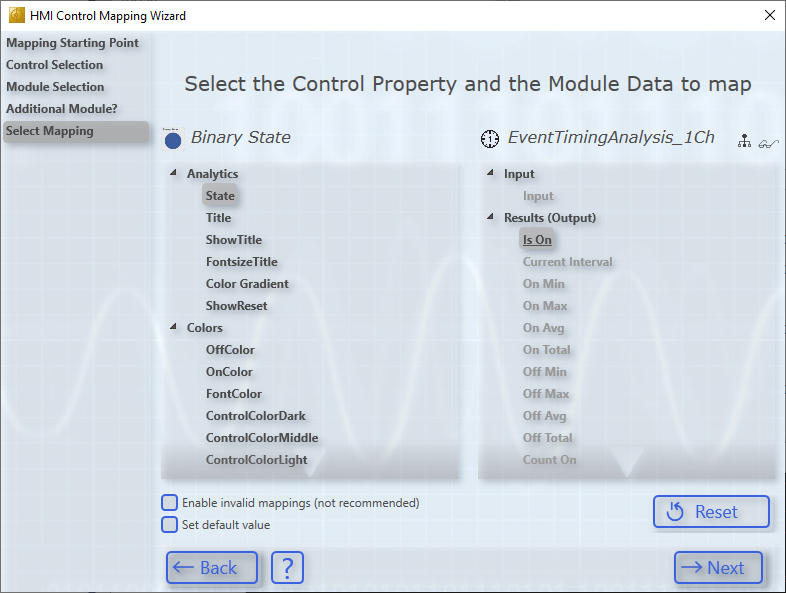
- 6. Likewise, you can check the Set default value checkbox to assign a default value to the control. This can be used, for example, to change default colors or to set Boolean values such as "ShowTitle" to "False" if no title is to be displayed in the Analytics control.
In this example, the "OnColor" is changed. Based on the data type, a specific selection option is provided.
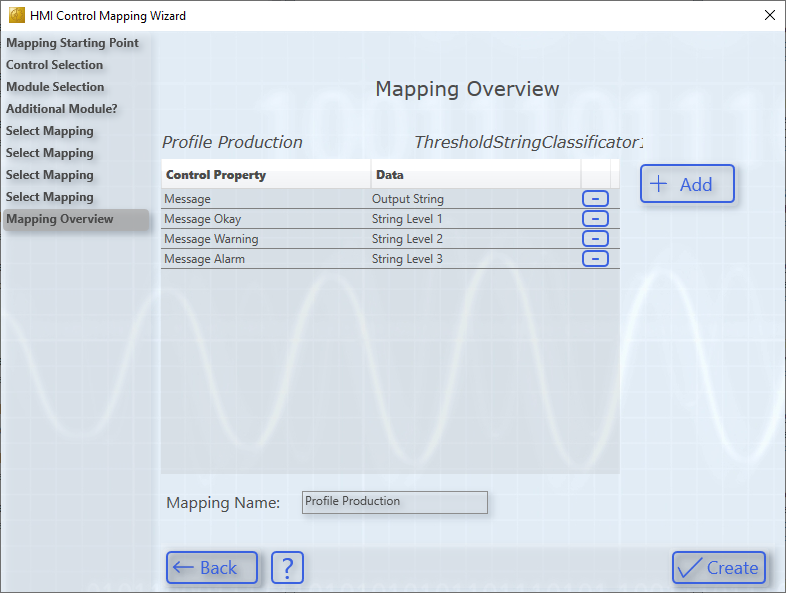
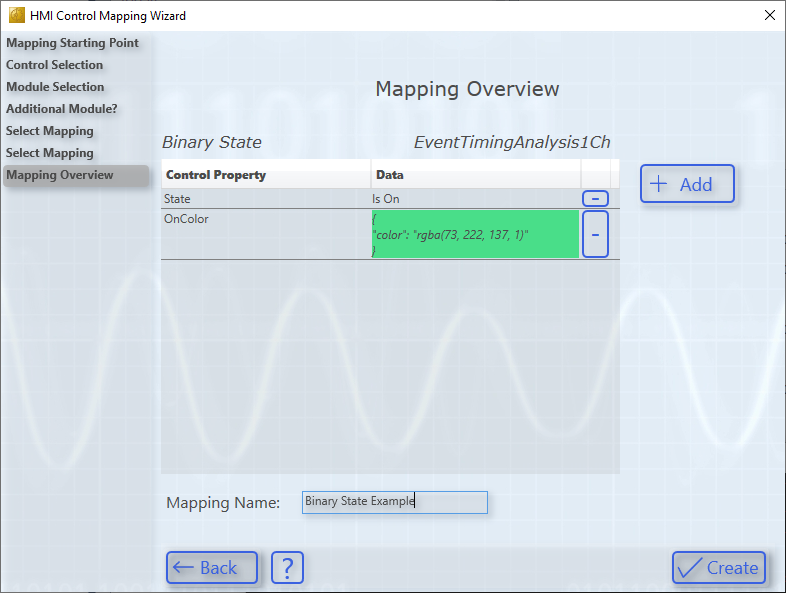
- 7. As far as you do not want to add any more entries via Add, you can complete the mapping via Create. It is recommended to assign a meaningful mapping name.
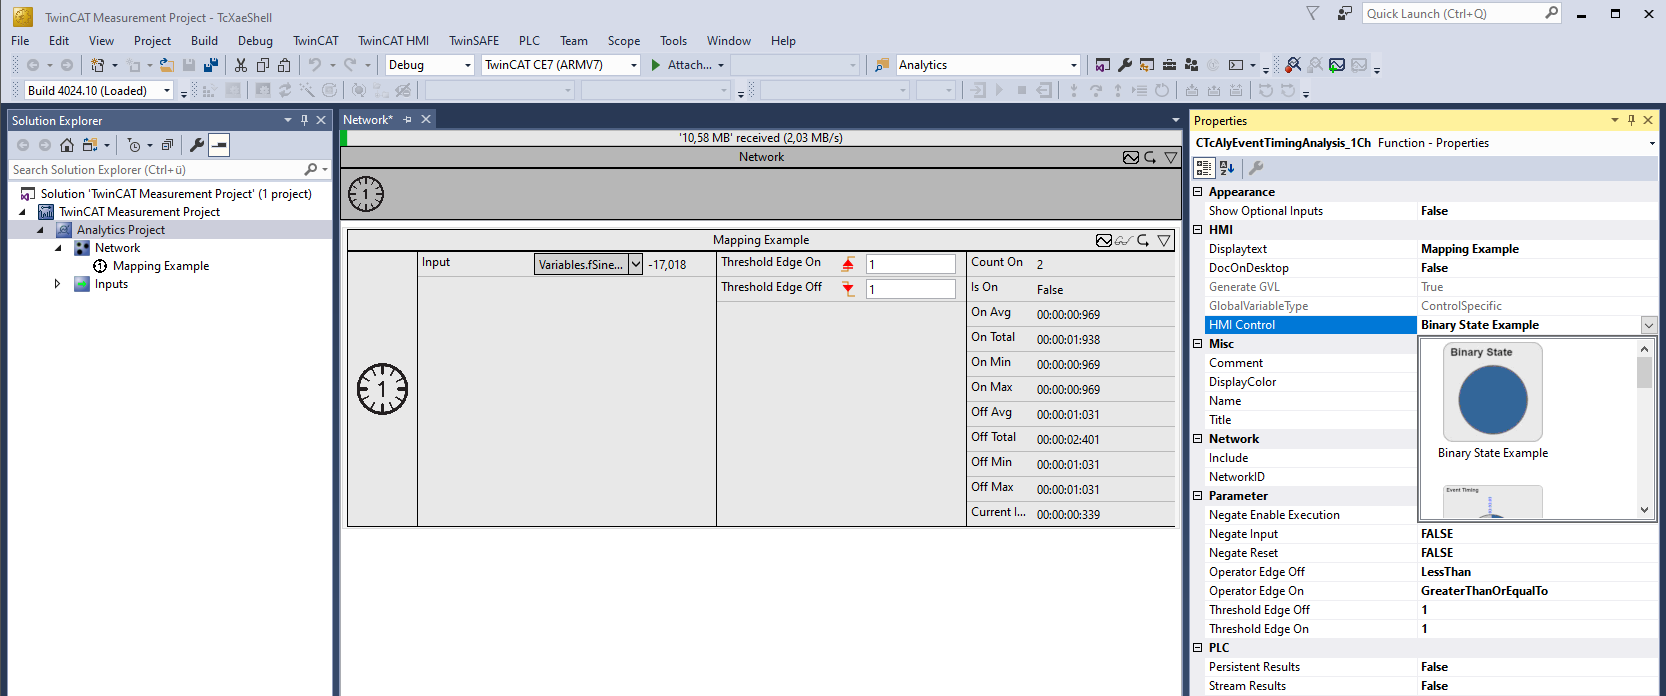
- 8. You can close the wizard and the mapping will automatically be available for the module. Select it and generate your dashboard.
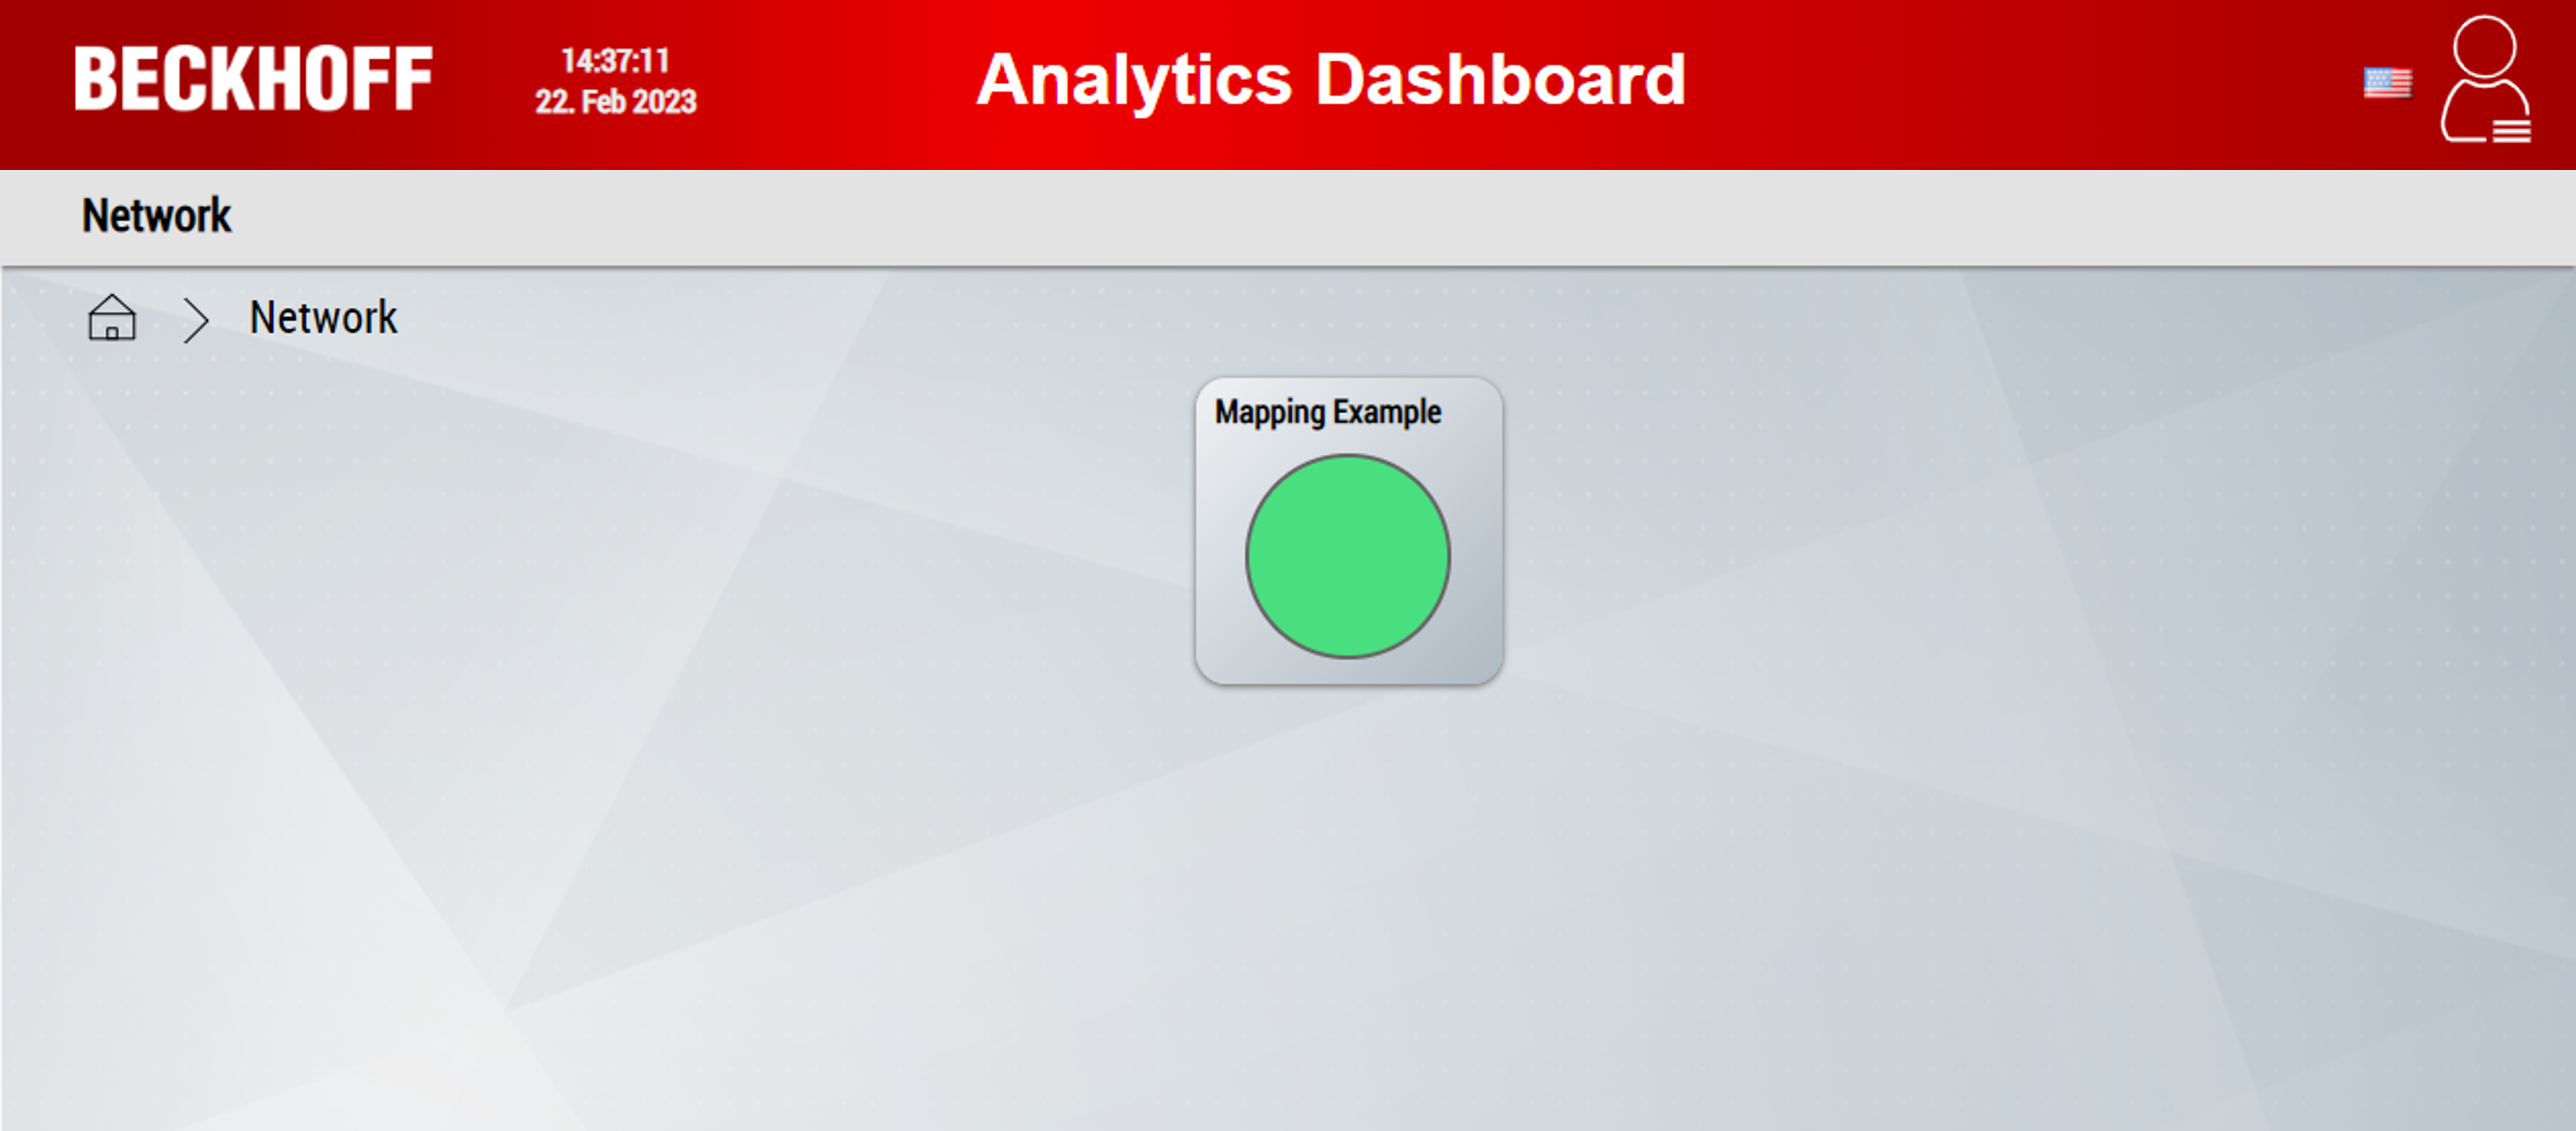
- The dashboard is ready.
3. Mapping of controls to module instances
In addition to mapping controls to module classes, the module instances of a project can also be directly linked to controls. This is possible via the Manage dashboard structure and content in Analytics project as well as via the wizard.
- 1. At the beginning of the wizard, click HMI Dashboard Configurator.
- 2. There you have several choices.
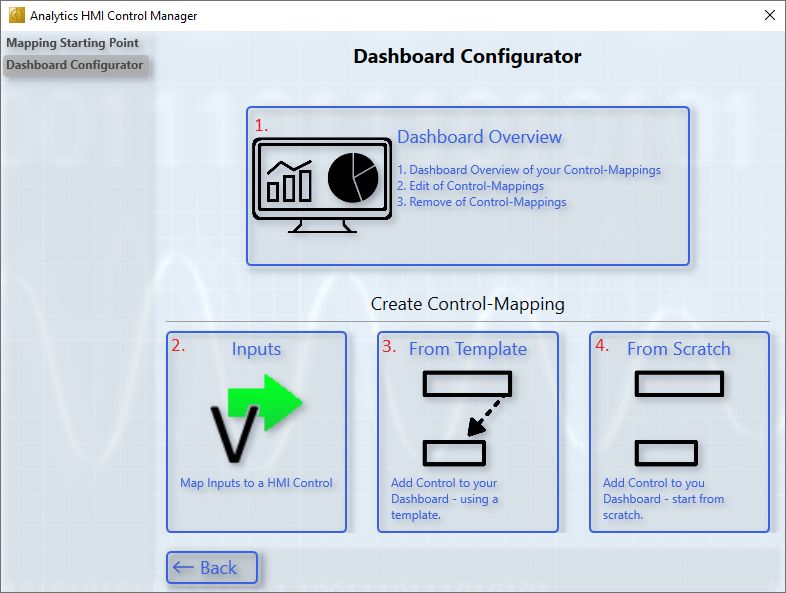
- Overview and editing options for all controls
- This function is also available by double-clicking a control in the Solution Explorer.
- Adding a control that displays your input data
- This function is also possible via the Manage dashboard structure and content in Analytics project.
- Adding a control that displays module data (selection via a template)
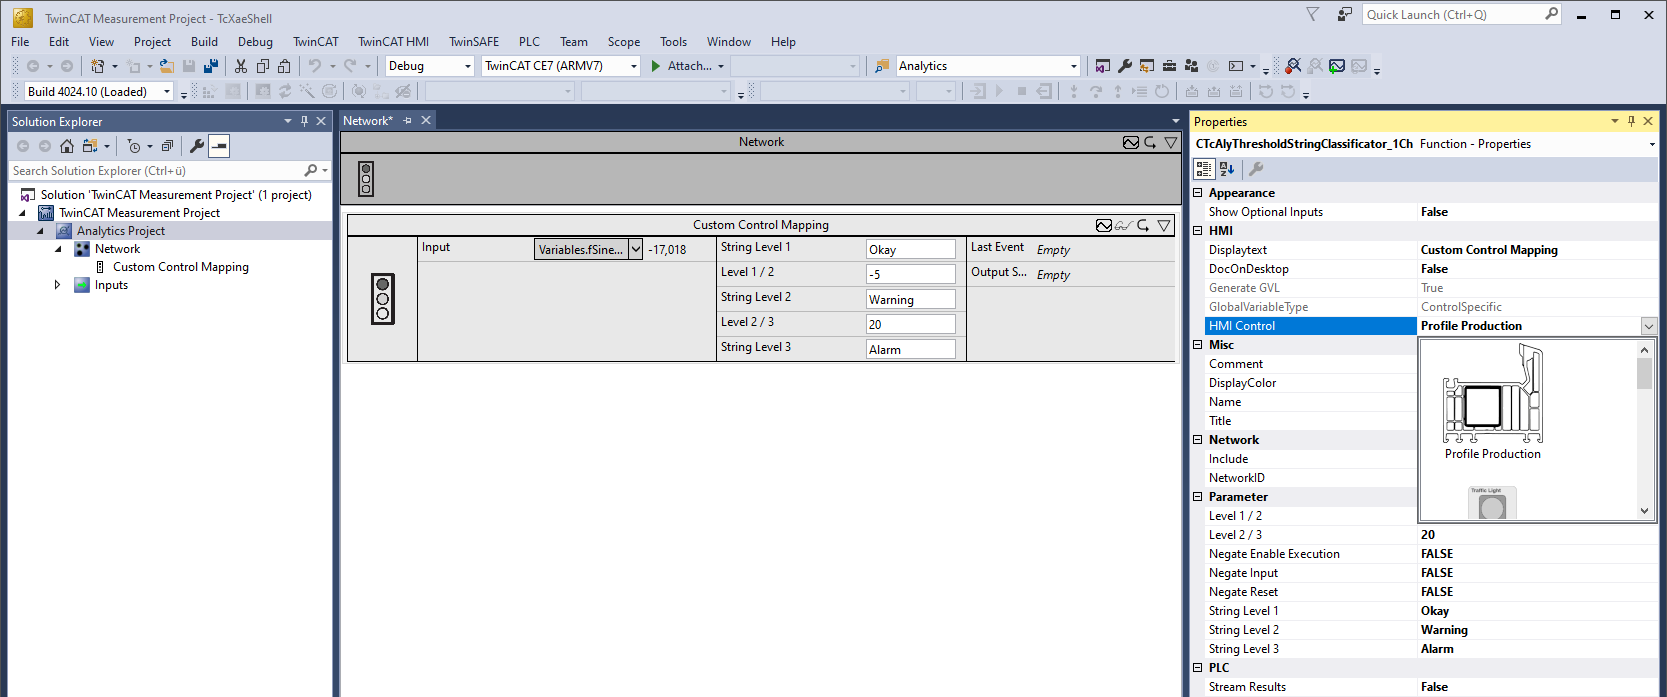
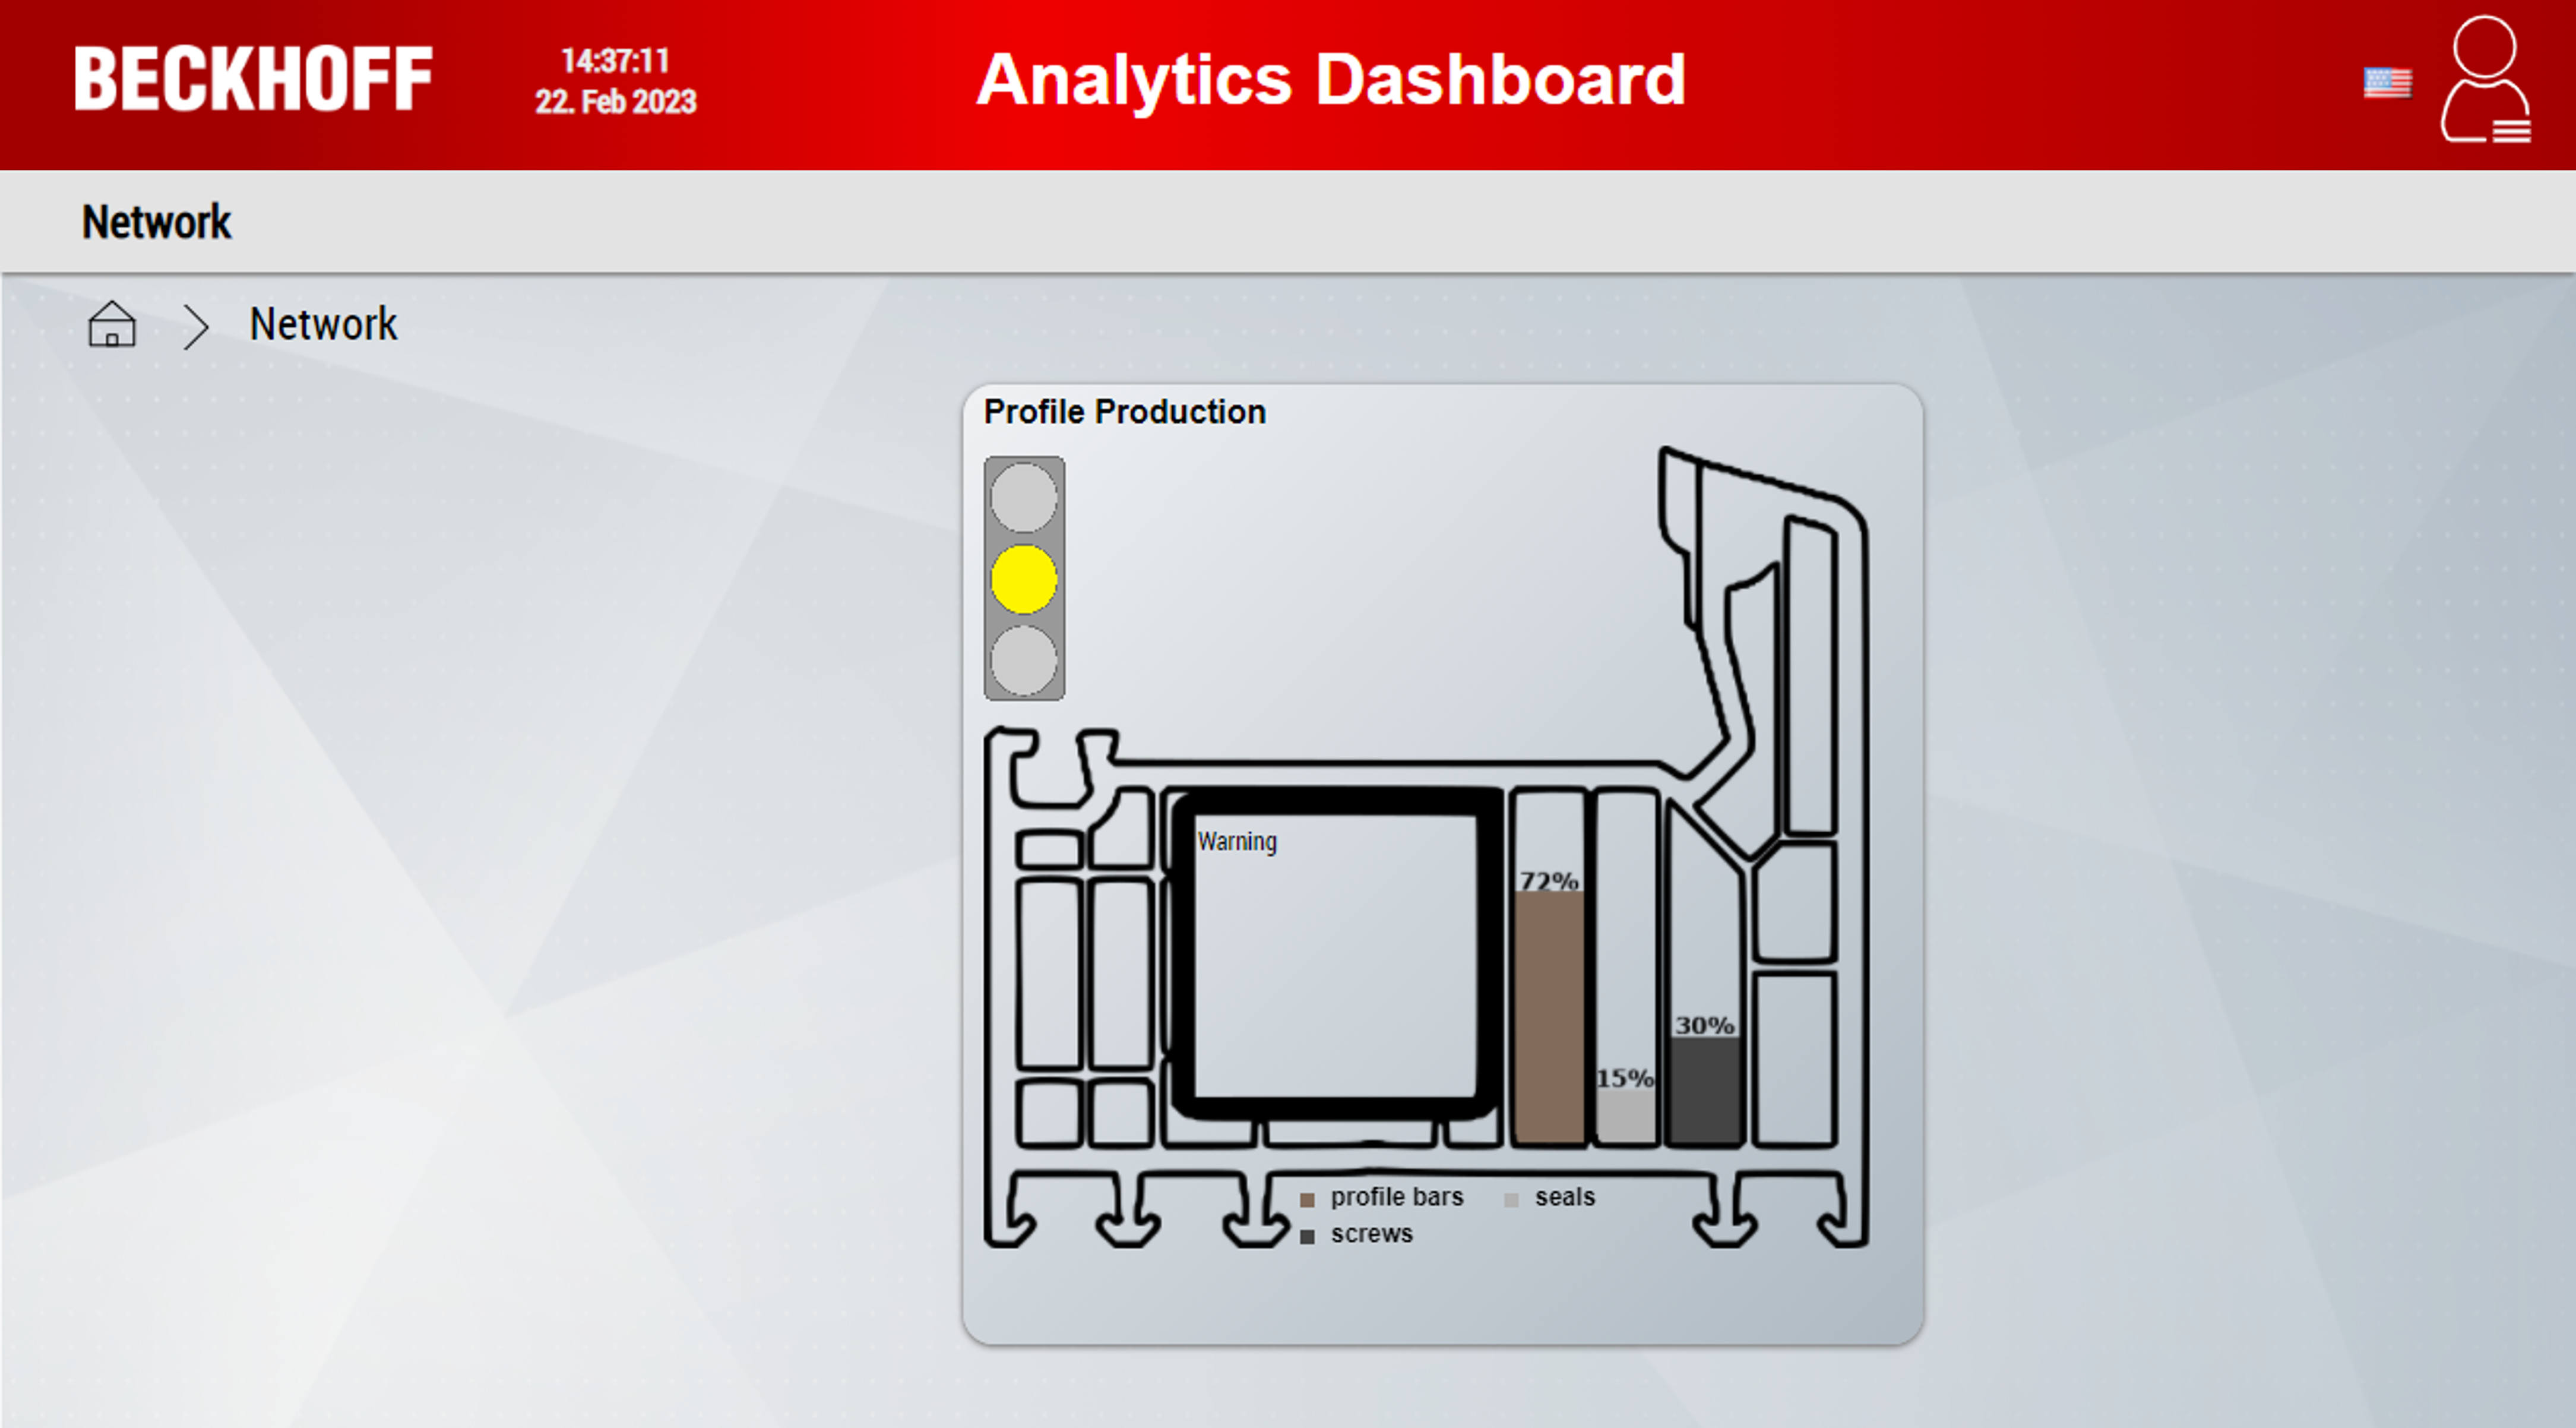
- This function can also be set for an individual module via the Properties window. This is the only way to display data from several modules.
- You can see directly which data from the template are linked and can adjust them directly.
- Adding a control that displays data from modules (fully manual)
- This function is also possible via the Manage dashboard structure and content in Analytics project.
For the individual points you have to follow the steps of the wizard. The steps are the same or very similar to section "2. Mapping of controls to modules".