Quick start
The following chapter is intended to provide an introduction to using the TwinCAT 3 Real-time Monitor.
- The starting point is a project running on a TwinCAT 3.1 runtime version 3.1.4024.0 or later.
- 1. Open the Real-time Monitor.
- 2. Create a new project.
To do this, use the New Project option in the Project menu of the TwinCAT 3 Real-time Monitor. The project name can be changed via the project properties (see Project node). - 3. Now select the target system that you want to analyze. This is done via the toolbar of the TwinCAT 3 Real-time Monitor.
- 4. A prompt appears asking whether you want to load the configuration from the target system. Confirm with "Yes“
- The active configuration of the target system has been loaded and the contexts are displayed hierarchically as a tree.
- 5. Select the tasks that you want displayed in the TwinCAT Real-time Monitor
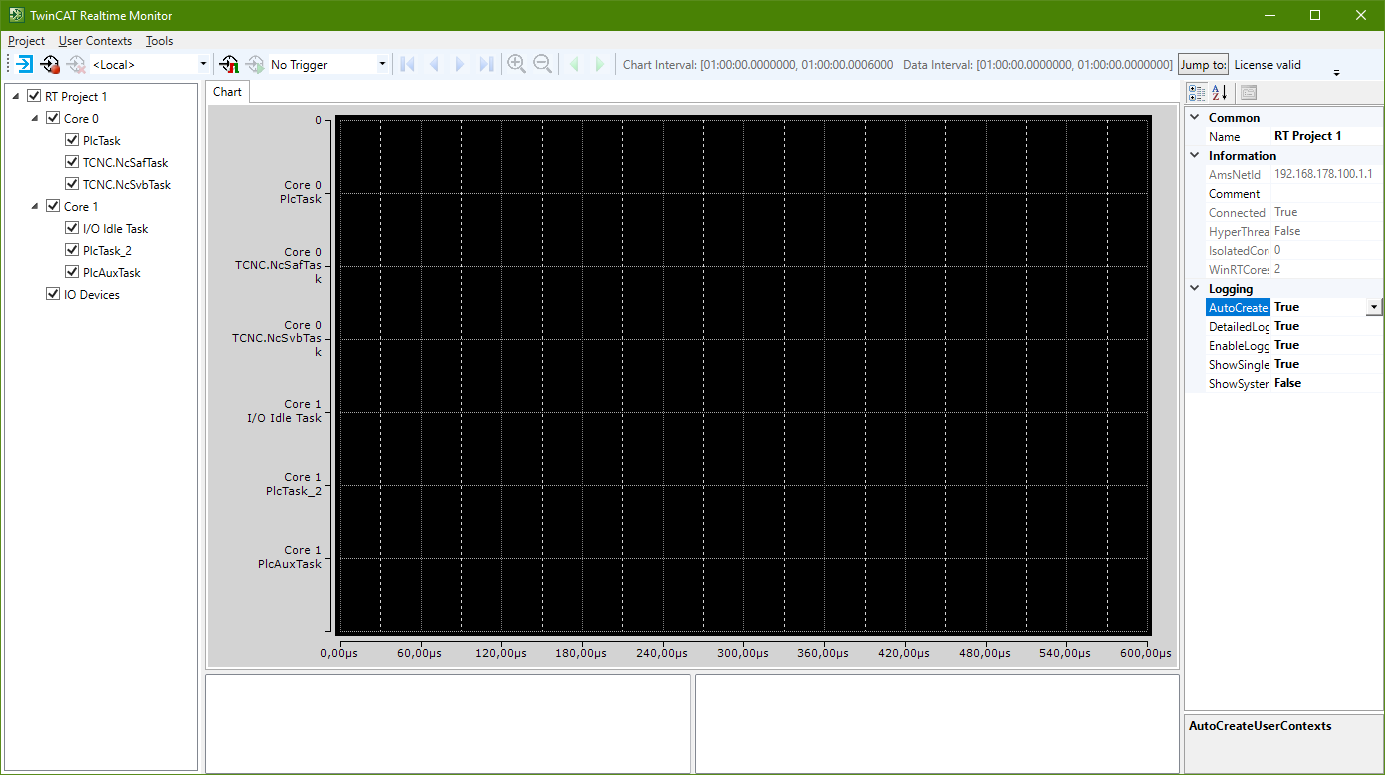
- 6. Select the project in the tree view and set the Detailed Logging option in the Properties window to "True" (see also Marker group element).
- 7. If you also want to automatically read the user contexts that may have been set in an application program, set the AutoCreateUserContexts option to "True" as well.
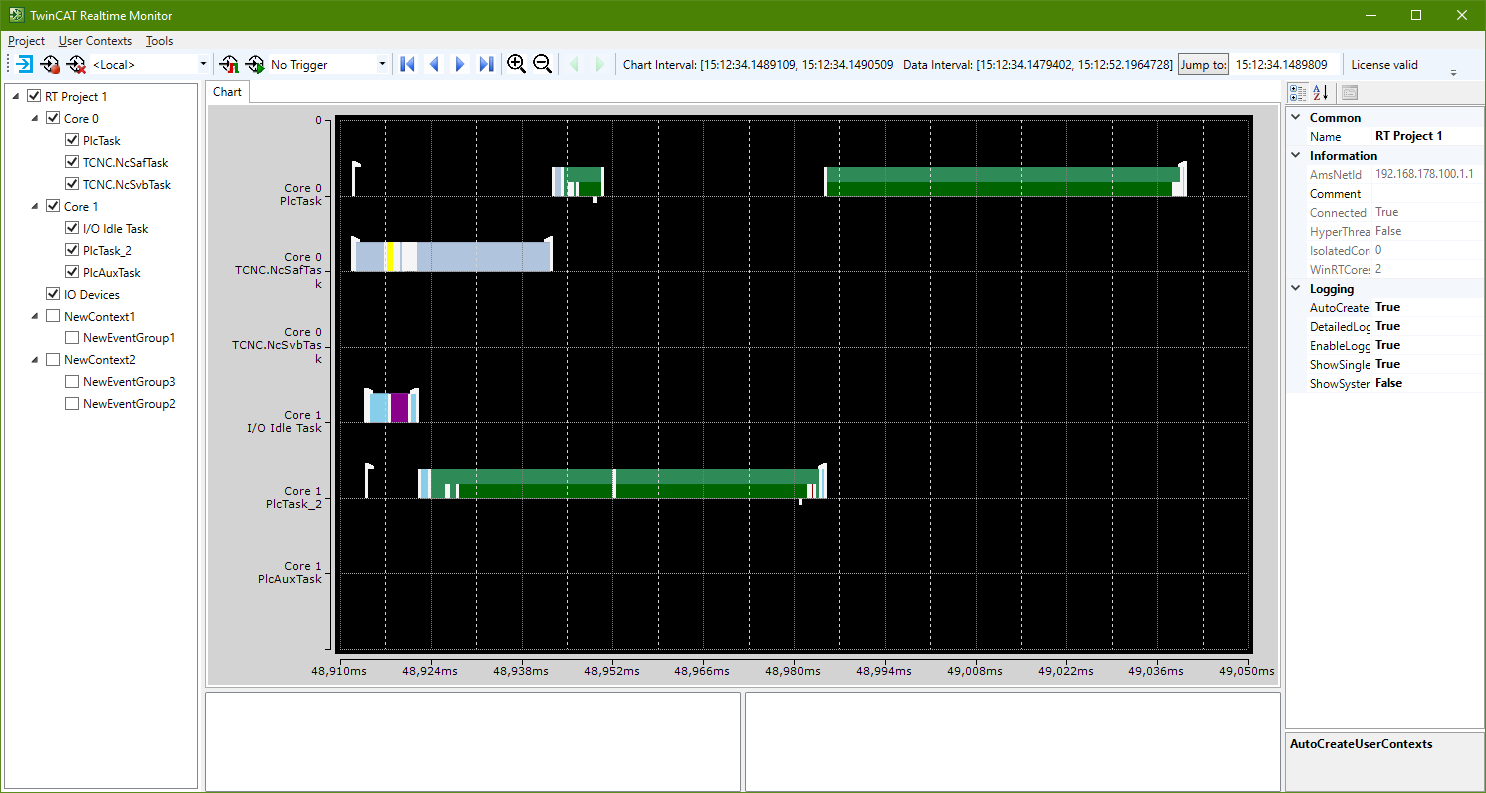
- 8. Click the Start Log button in the toolbar of the TwinCAT 3 Real-time Monitor.
- Recording of the real-time behavior begins.