Configuration of the event table
- 1. To add the visualization element "Event table" to a visualization page, select the corresponding extension for the element under the "Visualization Profile" category in the PLC project settings.
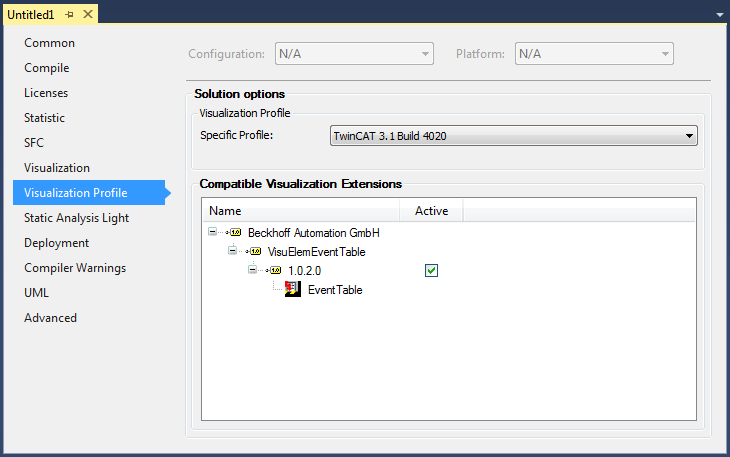
- 2. Restart the TwinCAT project after activating this setting.
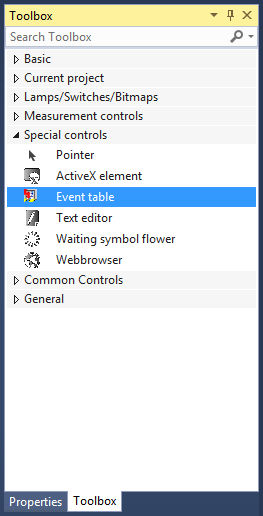
- The element is then available in the toolbox in the "Special controls" category and can be used on the visualization page.
The visualization element "Event table" works in combination with the function block "FB_AdsReadEvents" (TcEventLogger) or "FB_ReadTc3Events" (TwinCAT 3 EventLogger).
FB_AdsReadEvents and TcEventLogger
The function block "FB_AdsReadEvents" is contained in the "Tc2_Utilities" library. In this sample, the function block is declared and called in the program "MAIN". Since the messages of the local TcEventLogger are to be read, an empty string can be entered at the input "sNetId".
PROGRAM MAIN
VAR
    fbAdsReadEvents      : FB_AdsReadEvents;
    bReadEvents          : BOOL;
END_VAR
fbAdsReadEvents (
sNetId := '',
bReadEvents := bReadEvents,
nLanguageId := 1031,
eDateAndTimeFormat := E_DateAndTimeFormat.de_DE,
tRefreshTime := T#1S,
tTimeout := T#5s);FB_ReadTc3Events and TwinCAT 3 EventLogger
The function block "FB_ReadTc3Events" is contained in the "VisuElemEventTable" library, which is automatically added to the project when the event table is activated. To use the event table with FB_ReadTc3Events and the TwinCAT 3 EventLogger, you must add a TargetVisualization or WebVisualization object to the project. In this sample, the function block is declared and called in the program "MAIN".
PROGRAM MAIN
VAR
    fbReadTc3Events      : FB_ReadTc3Events;
    bReadEvents          : BOOL;
    bClear               : BOOL;
END_VAR
fbReadTc3Events (
bReadEvents := bReadEvents,
nLanguageID := 1031,
eDateAndTimeFormat := E_DateAndTimeFormat.de_DE,
bClearTable := bClear,);Next steps:
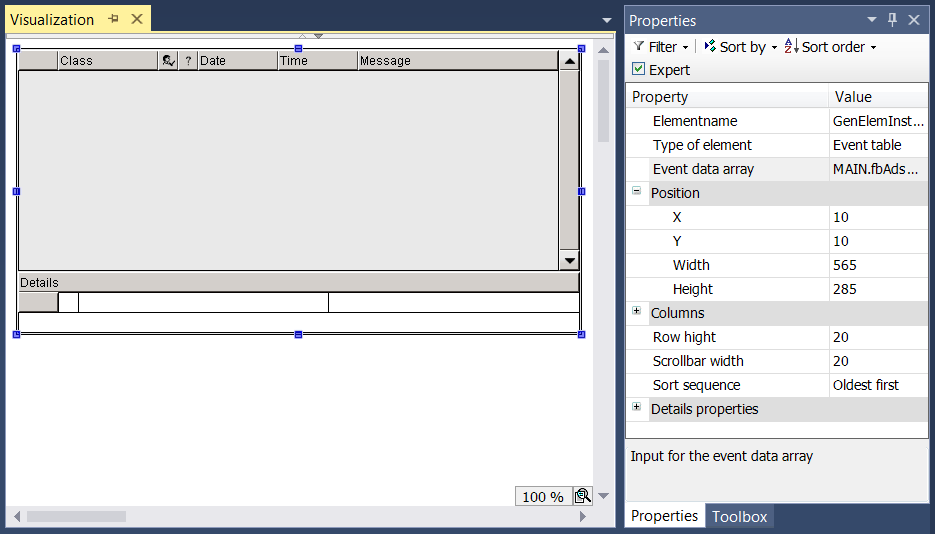
- 1. After the EventTable element has been added to the visualization page, in the properties, enter the "aEvents" array of the "fbAdsReadEvents" or "fbReadTc3Events" instance in which the events are saved.
- 2. Set the size to 565x285 pixels.
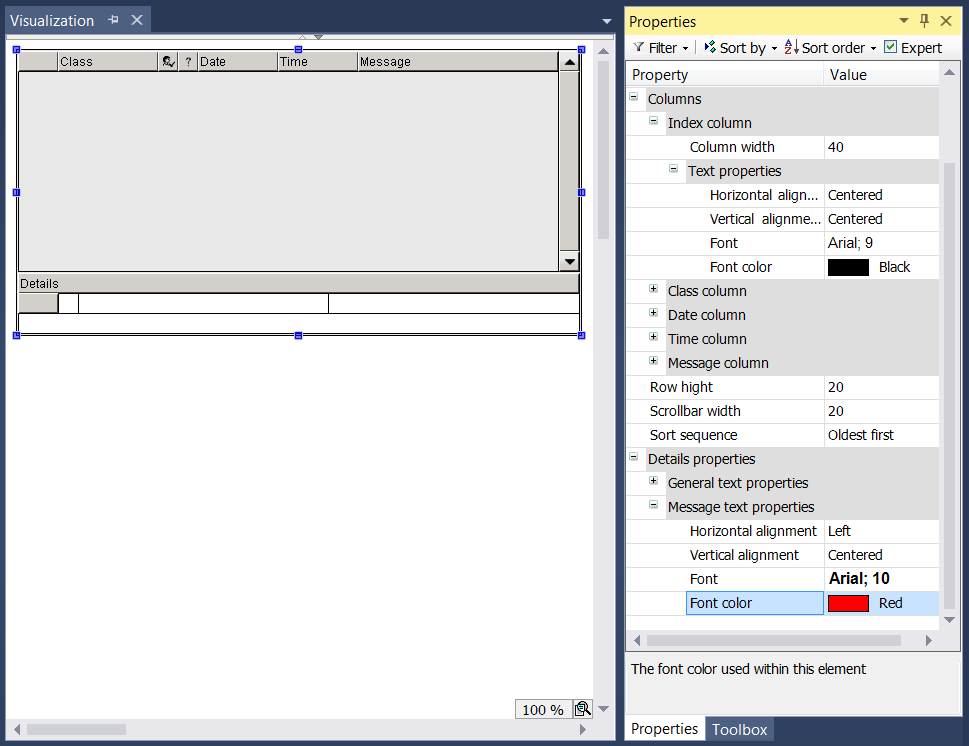
- 3. To center the text of the index column, change the text properties "Horizontal alignment" to "Central" in the "Columns" → "Index column" category.
- 4. The font size and color of the message text is adjusted in the "Detail properties", in order to distinguish it from the other information.
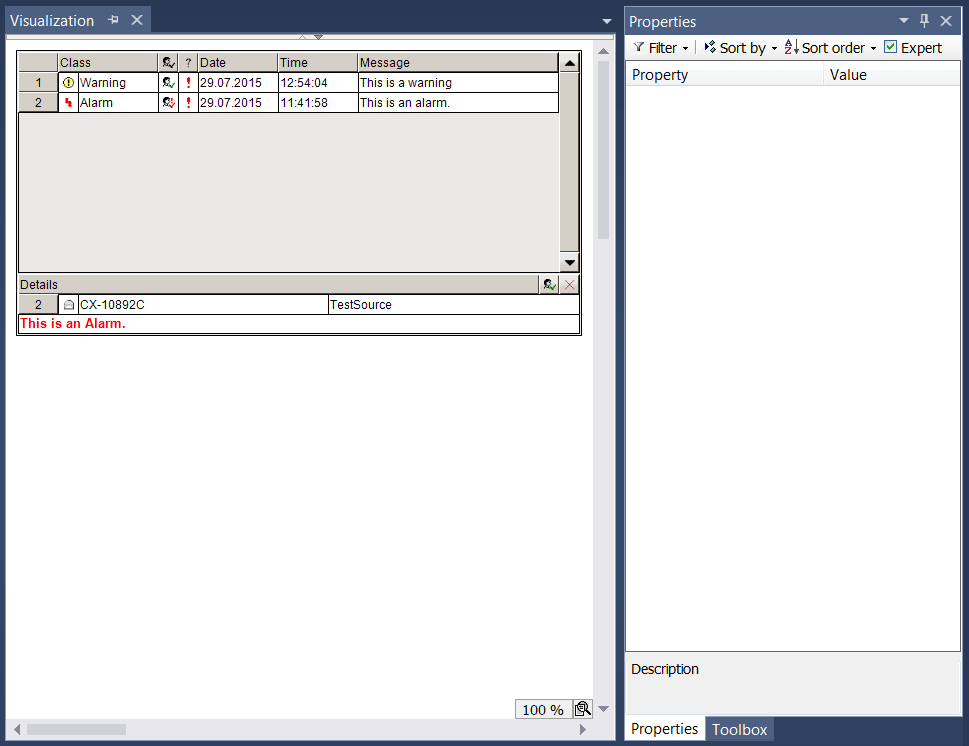
- At runtime, the visualization element looks as follows when two example messages (from the TcEventLogger) have been triggered: