Coupling distributed clocks – EtherCAT master
This chapter shows how two or more EtherCAT masters can be coupled and synchronized. The first EtherCAT master is changed to master mode in the DC settings during this process. The first DC-capable EtherCAT slave connected to this EtherCAT master continues to set the reference clock. The TwinCAT real time of this clock is synchronized based on frequency.
 Fig.11: Settings for EtherCAT master in master or slave mode.
The other EtherCAT masters are synchronized with the first master and are switched to slave mode for this. These EtherCAT masters still keep their local reference clock for synchronization of the subsequent devices. During the EtherCAT startup and continuously afterwards, this reference clock itself is synchronized based on the TwinCAT time and is referred to as "tracking reference clock".
 Fig.12: Example configuration with coupled EtherCAT masters.
For more information, please visit: https://download.beckhoff.com/download/Document/io/ethercat-terminals/ethercatsystem_en.pdf
Proceed as follows:
- 1. Activate the distributed clocks for all EtherCAT masters that you want to synchronize with each other (see: Enabling Distributed Clocks).
- 2. Activate a reference clock for each of these EtherCAT masters.
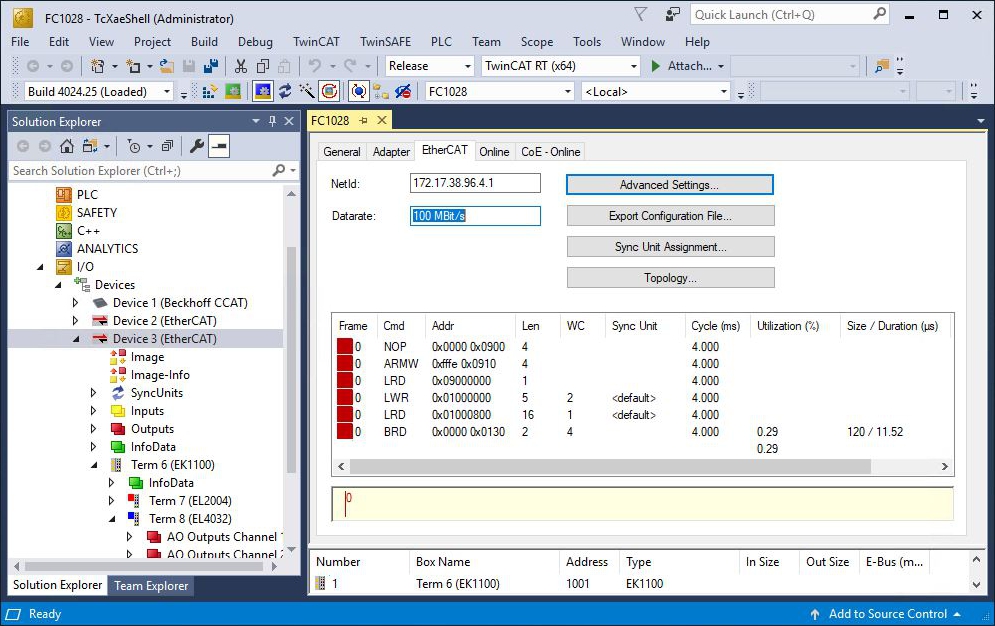
- 3. Click on the EtherCAT master at the first EtherCAT master on the left side in the tree view and then on the button Advanced Settings under the EtherCAT tab.
- 4. Deactivate the Automatic DC Mode Selection option.
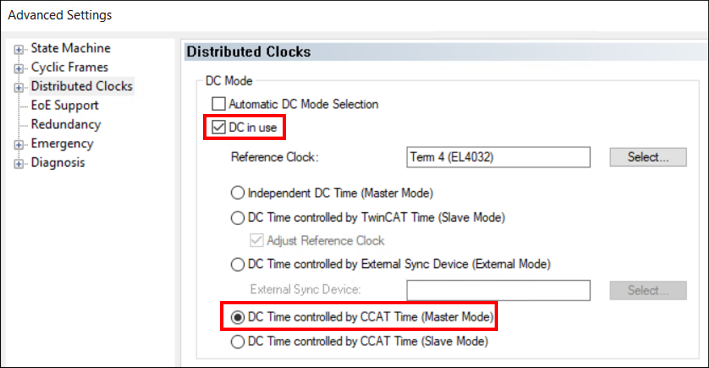
- 5. Activate the option DC in use in Distributed Clocks and also the option DC Time controlled by CCAT Time (Master Mode)
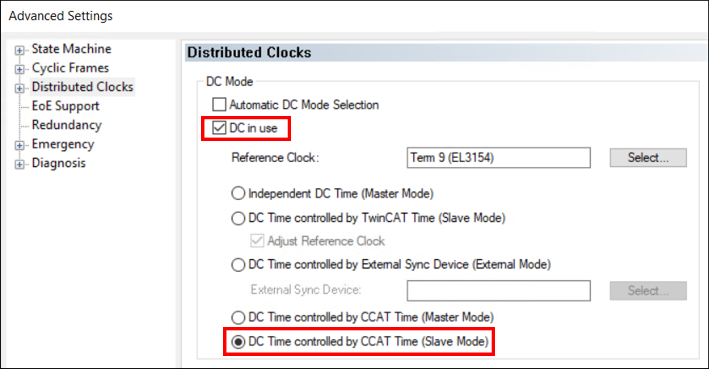
All following EtherCAT masters are synchronized with this EtherCAT master. - 6. For all following EtherCAT masters that you want to synchronize with the first master, activate the option DC in use in Distributed Clocks and then the option DC Time controlled by CCAT Time (Slave Mode).
- 7. Repeat this setting for all further EtherCAT masters.
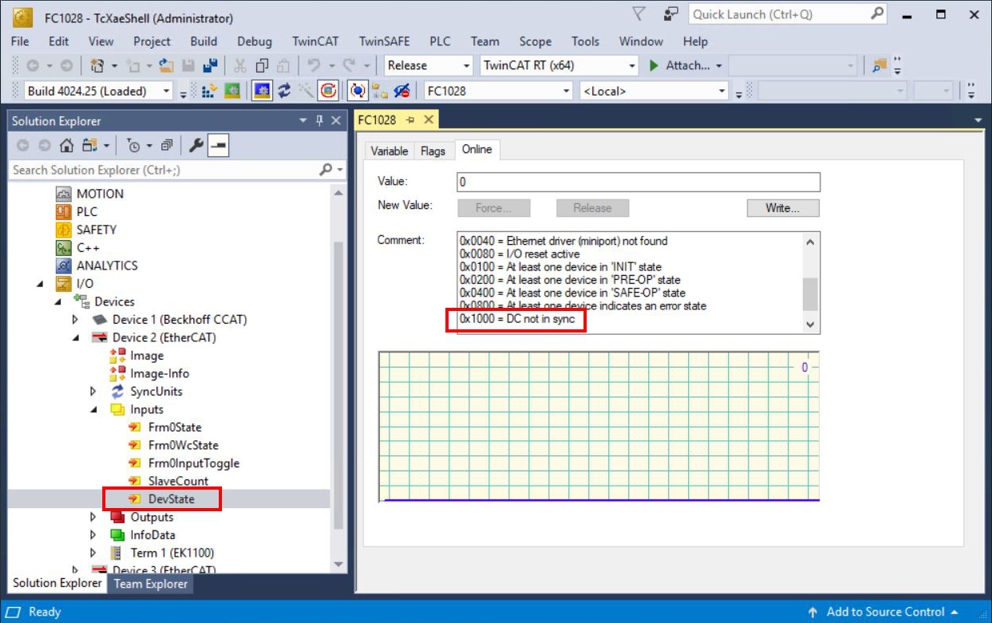
- Synchronization is successful when the distributed clocks devices in the lower-level systems change to OP state. In addition, the DevState variable shows the state of the distributed clock communication.