Quick start: Commissioning of the EL922x without EtherCAT
To commission the EL922x quickly without EtherCAT, proceed as follows
- Mounting
Mount the EL922x as described in the chapter Mounting and wiring - Terminal wiring
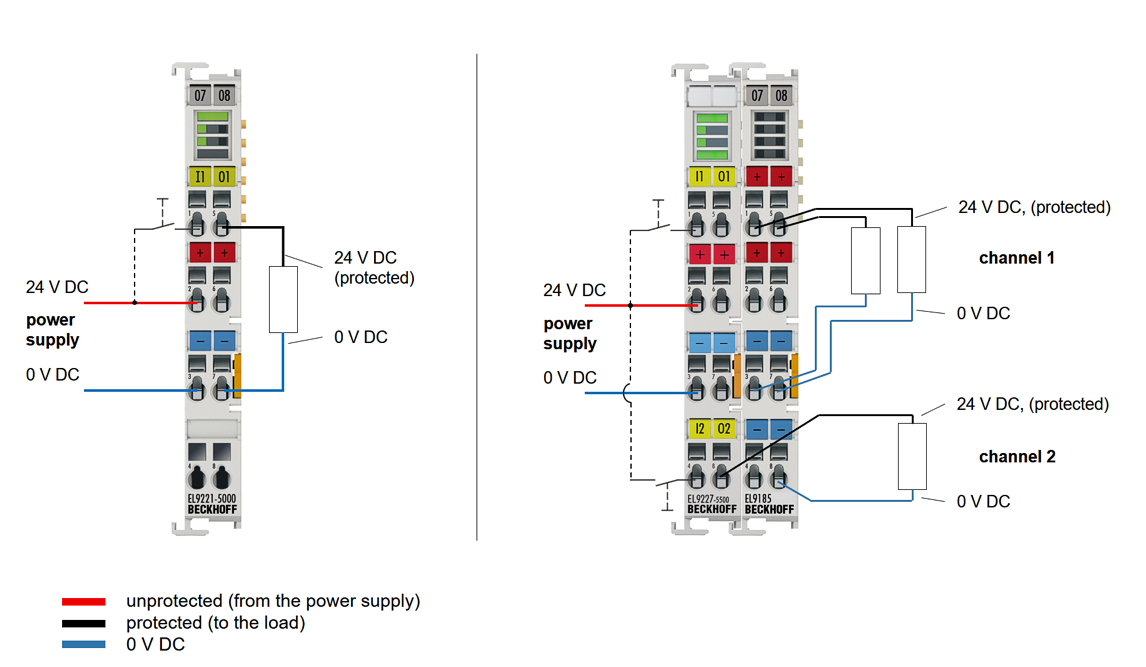
Power supply
Connect the 24 V DC power supply to the respective terminal contacts. Supply 24 V DC to terminal contacts 2 or 6 and 0 V to terminal contacts 3 or 7. The maximum permissible input current, in case of forwarding the input voltage, can be found in the technical data.
(Input current = forwarding current + current of the own terminal)
Protected outputs
Connect output 1 to terminal point 5 and/or use the power contact. Output 2 is tapped via terminal point 8 (no further power contact is available here)
Digital inputs
Connect the digital inputs (for switching and resetting the outputs) to terminal point 1 for switching output 1 and terminal point 4 for switching output 2.
A negative edge of 24 V DC is required (same 0 V reference as input voltage).
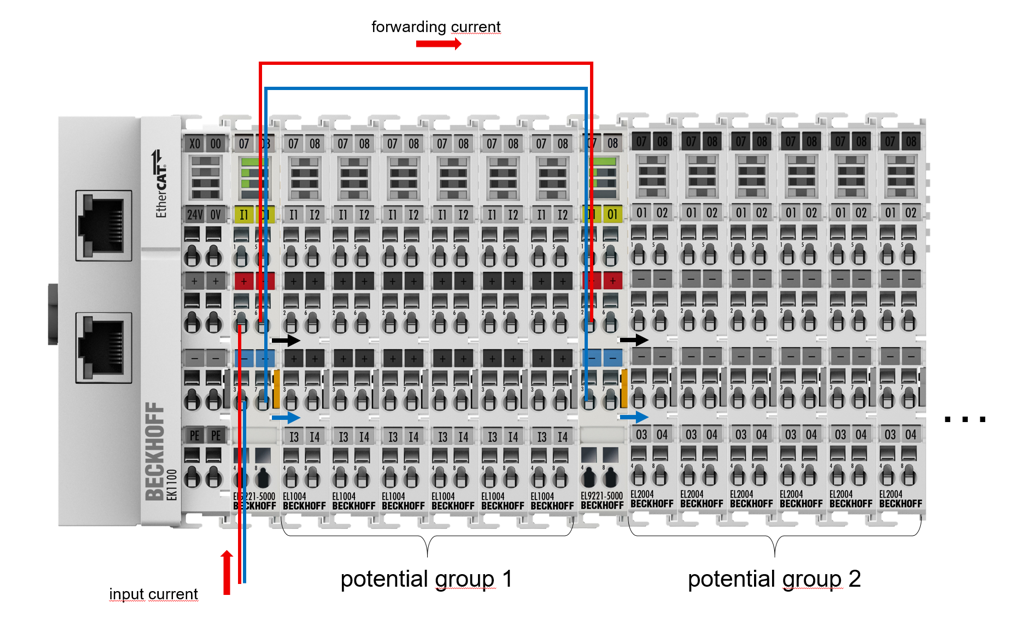
 | Observe maximum input current! The maximum input current is the sum of the forwarding current and the current of the other terminals connected via the spring contacts. This must not exceed the value specified in the Technical Data. |
- Nominal current setting
Use button LED 1 or button LED 2 to set the desired nominal current.
Programming sequence:
Press one of the LED buttons for ≥3 seconds. Press button LED 1 as many times as you require the nominal current for output 1. Press once = 1 A, press twice = 2 A, ...., press 10 times = 10 A, press … ≥11 times = OFF; (in the 4 A variant, press ≥5 times = Off). For output 2, use button LED 2. Press one of the LED buttons for ≥3 seconds to save your entries. See also chapter LEDs and connection, programming with LED buttons. - Commissioning
The EL922x is ready for operation when the green Ready LED lights up after successful nominal current setting and initialization.
| Checking of the process data (hardware protection) and the Diag messages Check the process data (hardware protection) and the Diag messages for warnings that could indicate a wiring error. Also check the Ready LED and the Button LEDs for flickering. The terminal must not be operated in such a condition as this could destroy the electronics. |