Notes regarding assembly of POF cables with the connector set ZS1090-0008
|
Table of contents |
|---|
|
• Step-by-step instructions for assembling the POF cable |
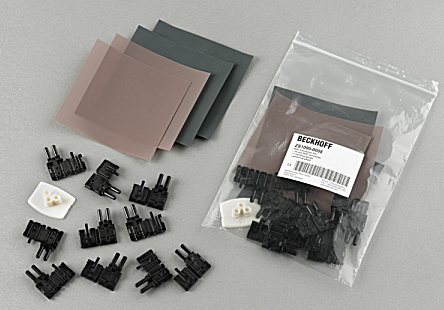 Fig.35: Duplex connector set ZS1090-0008
The duplex connector set ZS1090-0008 from Beckhoff consists of 10 duplex Versatile Link connectors and several sheets of abrasive paper and polishing paper.
Step-by-step instructions for assembling the POF cable
The following step-by-step guide describes the correct assembly of a POF cable with a Versatile Link duplex connector. The connectors are attached to the cable ends with standard tools such as cutter knife or wire strippers. Polish the assembled cable with the polishing set provided with the connector set, consisting of a plastic sanding gauge, sheets of abrasive paper with grain size 600 and pink polishing sheets. Once assembled, the connector can be used right away.
Materials required:
1. POF cable (Polymeric Optical Fiber, e.g. Z1190 from Beckhoff)
2. Cutter knife or shears
3. Wire strippers
4. Polishing set (included with connector set ZS1090-0008 from Beckhoff)
5. Versatile Link duplex connector (included in connector set ZS1090-0008 from Beckhoff)
1. Stripping the POF cable
The cable should be split over a length between 100 and 150 mm from the cable end, so that the following steps can be carried out properly.
Once you have shortened the cable to the required length, use the wire strippers to remove approx. 7 mm of the external sheathing of the individual wires. The two cable ends should be stripped over approximately the same length. (Fig. POF cable stripped over the same length).
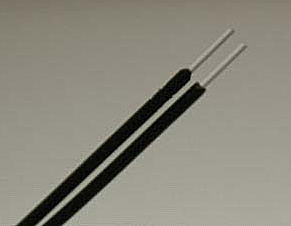 Fig.36: POF cable stripped over the same length
 2. Attaching the connector
Push the two cable ends into the connector and the connector back until it stops. The fibers should now protrude no more than 1.5 mm out of the front openings (Fig. Cable inserted in the connector).
Close the connector by folding the upper and lower halves together until they engage (Fig. Closed connector).
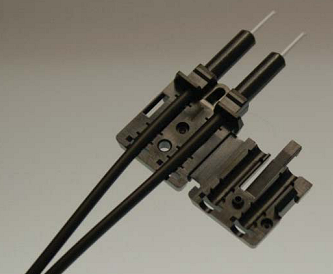 Fig.37: Cable inserted in the connector
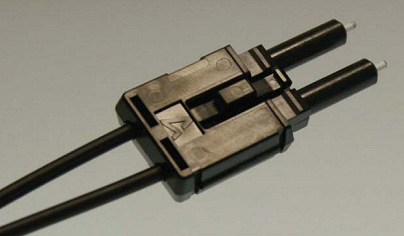 Fig.38: Closed connector
When inserting the wires into the connector ensure the optical channels are crossed (Tx1 --> Rx2; Tx2 --> Rx1). The 'nose' at the connector hinge can be used as a guide (Fig. Correctly connected optical channels).
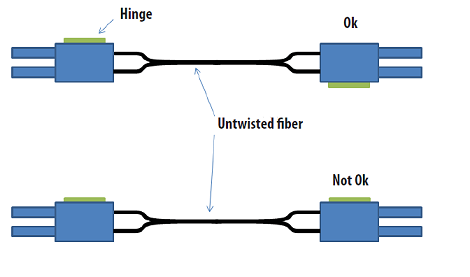 Fig.39: Correctly connected optical channels
3. Grinding and polishing
Any fibers protruding more than 1.5 mm from the connector should be shortened with a cutter knife or a pair of scissors.
Now push the connector fully into the sanding gauge, so that the ends to be polished protrude from the lower side (Fig. Sanding gauge with protruding fiber ends). The sanding gauge is suitable for polishing one or two simplex connectors or a duplex connector.
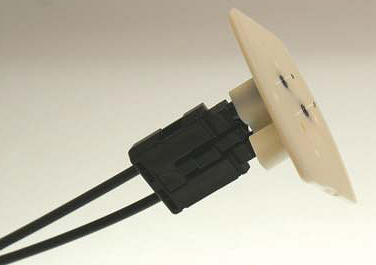 Fig.40: Sanding gauge with protruding fiber ends
 | Wear indicator The wear indicator of the sanding gauge consists of four points on the underside. The sanding gauge should be replaced when one of these points is no longer visible. |
Now press the sanding gauge onto the abrasive paper with uniform pressure and as perpendicular as possible. In order to achieve a uniform result, use the abrasive paper in the form of a figure of 8 (Fig. Polishing in the form of a figure "8"), until the fibers are flush with the sanding gauge. Then clean the sanding gauge and the connector from below with a soft, dry cloth.
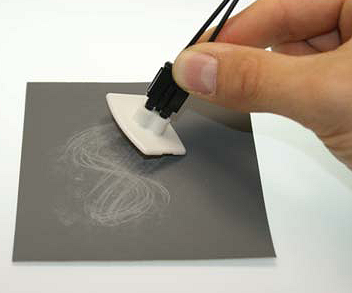 Fig.41: Polishing in the form of a figure of "8"
4. Fine polishing
Now use the pink polishing sheet for fine polishing in the same manner. Apply the connector with the sanding gauge to the matt side of the polishing sheet with slight pressure and polish in the form of a figure of 8 up to 25 times. After the procedure the fiber end should be flat, smooth and clean.
| Improving the transfer performance by fine polishing Fine polishing with a polishing sheet can improve the transfer performance between the transmitter and the receiver or in the cable joint by up to 0.5 dB compared with to treatment with abrasive paper alone. For short transfer distances the polishing step can be omitted. |
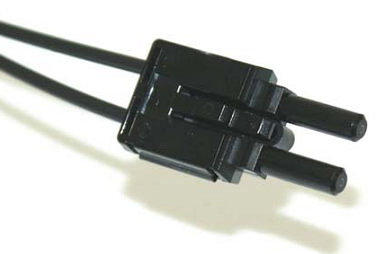 Fig.42: Fine-polished fibers in the connector