Configuration assistant
The Assistant tab is displayed under Groups. This function helps to set up the groups and assign lamps and sensors.
In order to use the function efficiently, the necessary templates for groups and lamps should have been created beforehand.
During the configuration of a group, the progress or the current step is displayed at the top:

Start:
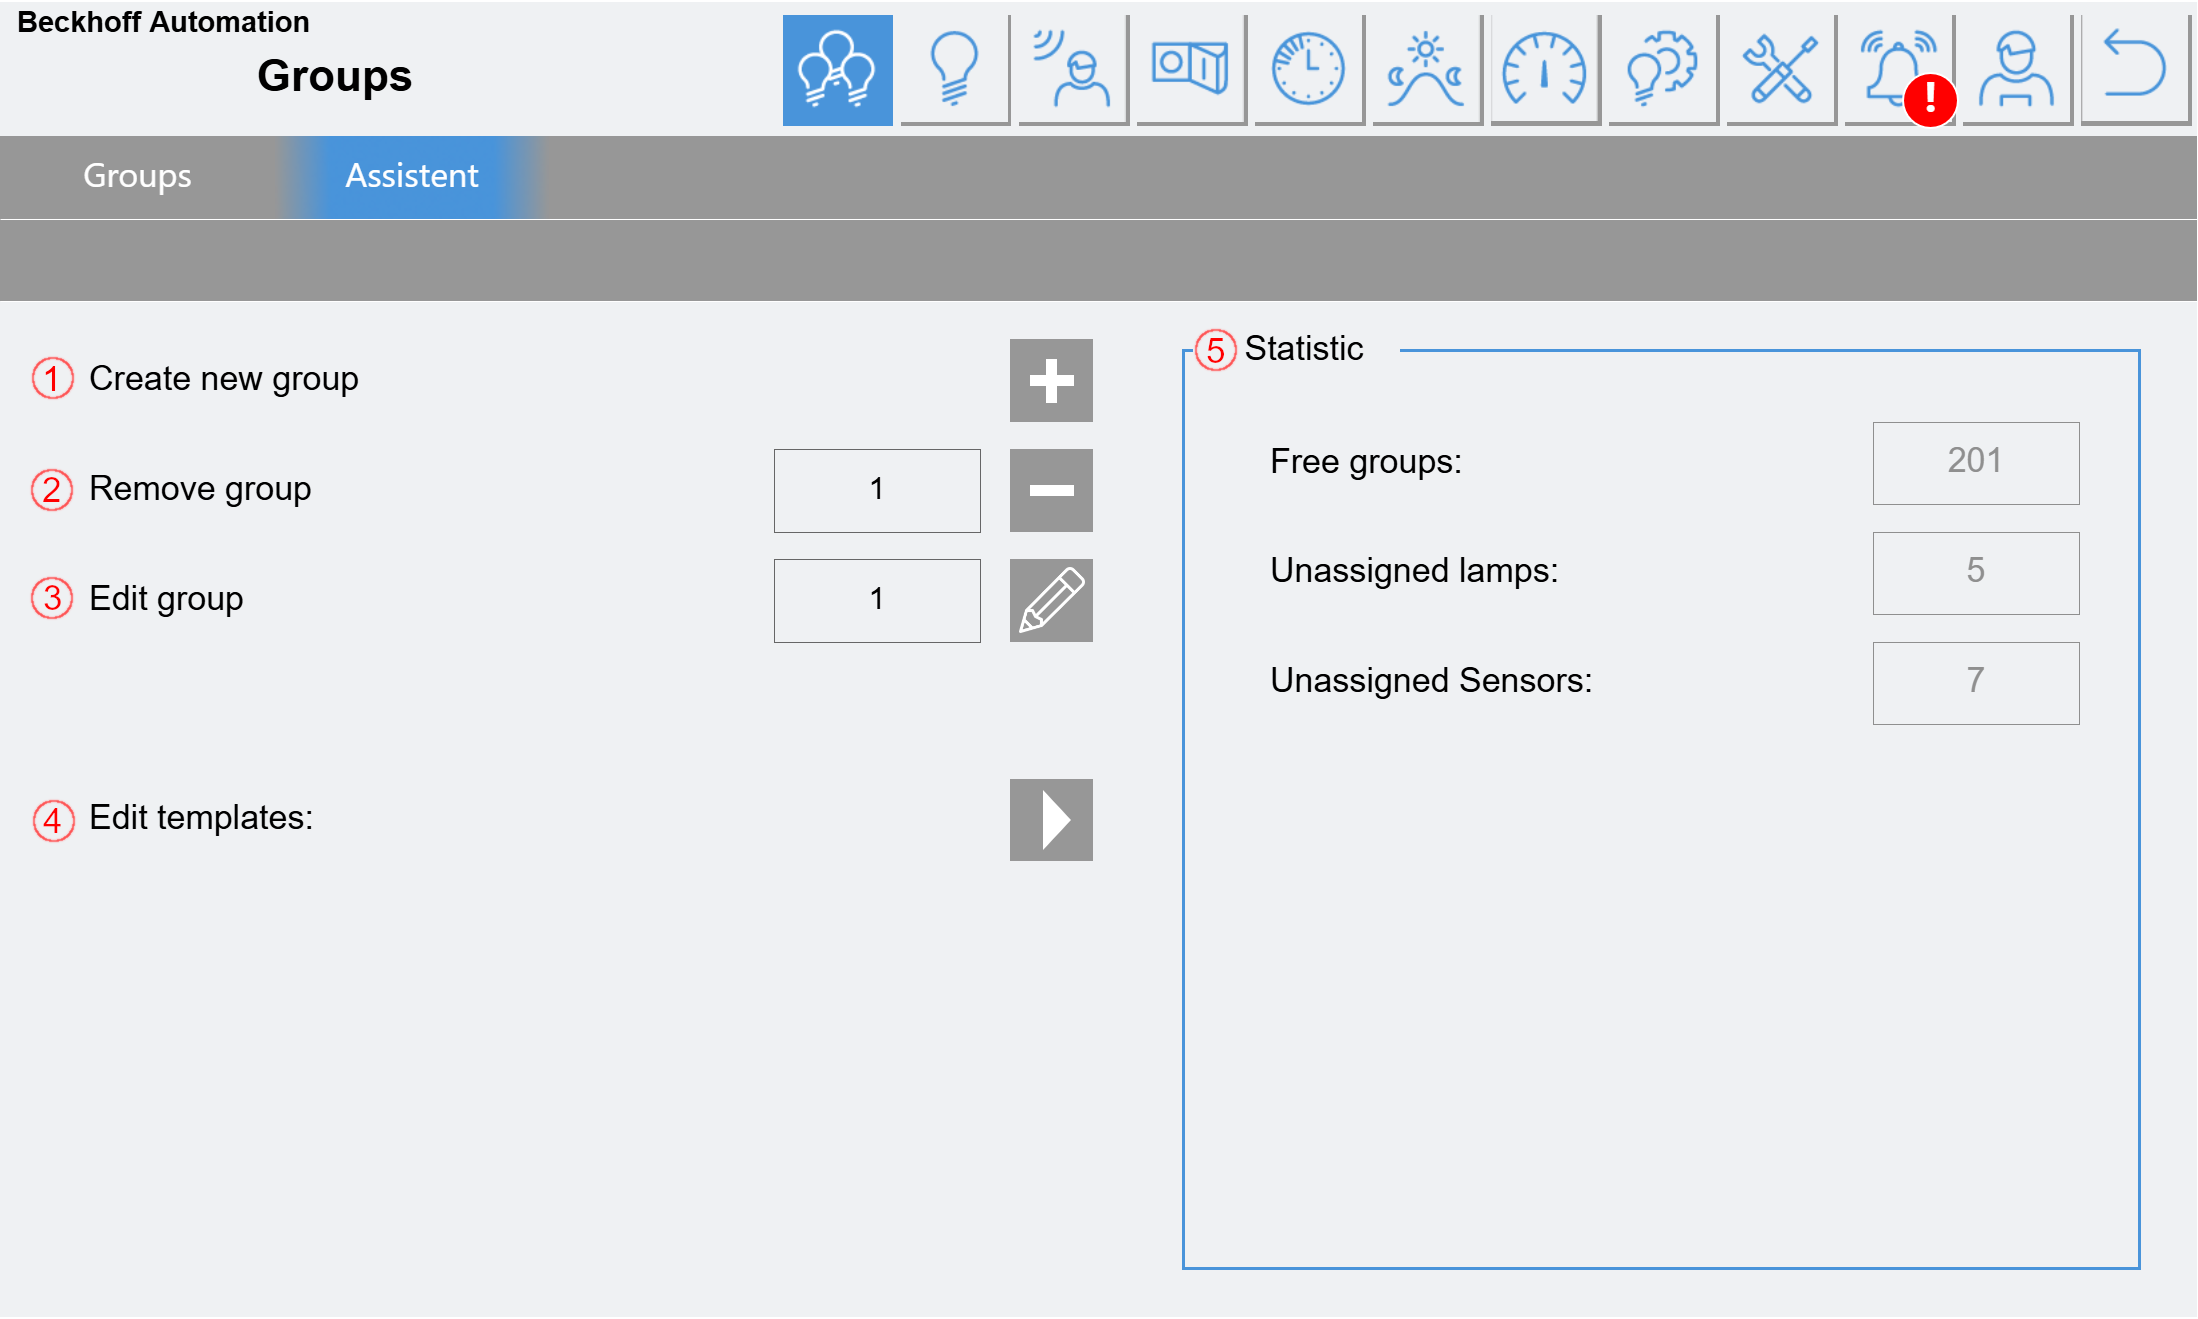
(1) A new group can be created by clicking on +. A free entry is then searched for and suggested in the following dialog. This can be confirmed or another one can be searched for.
(2) Click on the - to delete the group entered in the text field. All links are also deleted in the process. The deletion must be confirmed once again.
(3) Click on the pencil to edit the group entered in the text field.
(4) Here is a shortcut to the templates
(5) Statistics can be found here to quickly see whether there are still devices that have not been configured (provided the devices have been activated beforehand).
Step 1: Group configuration
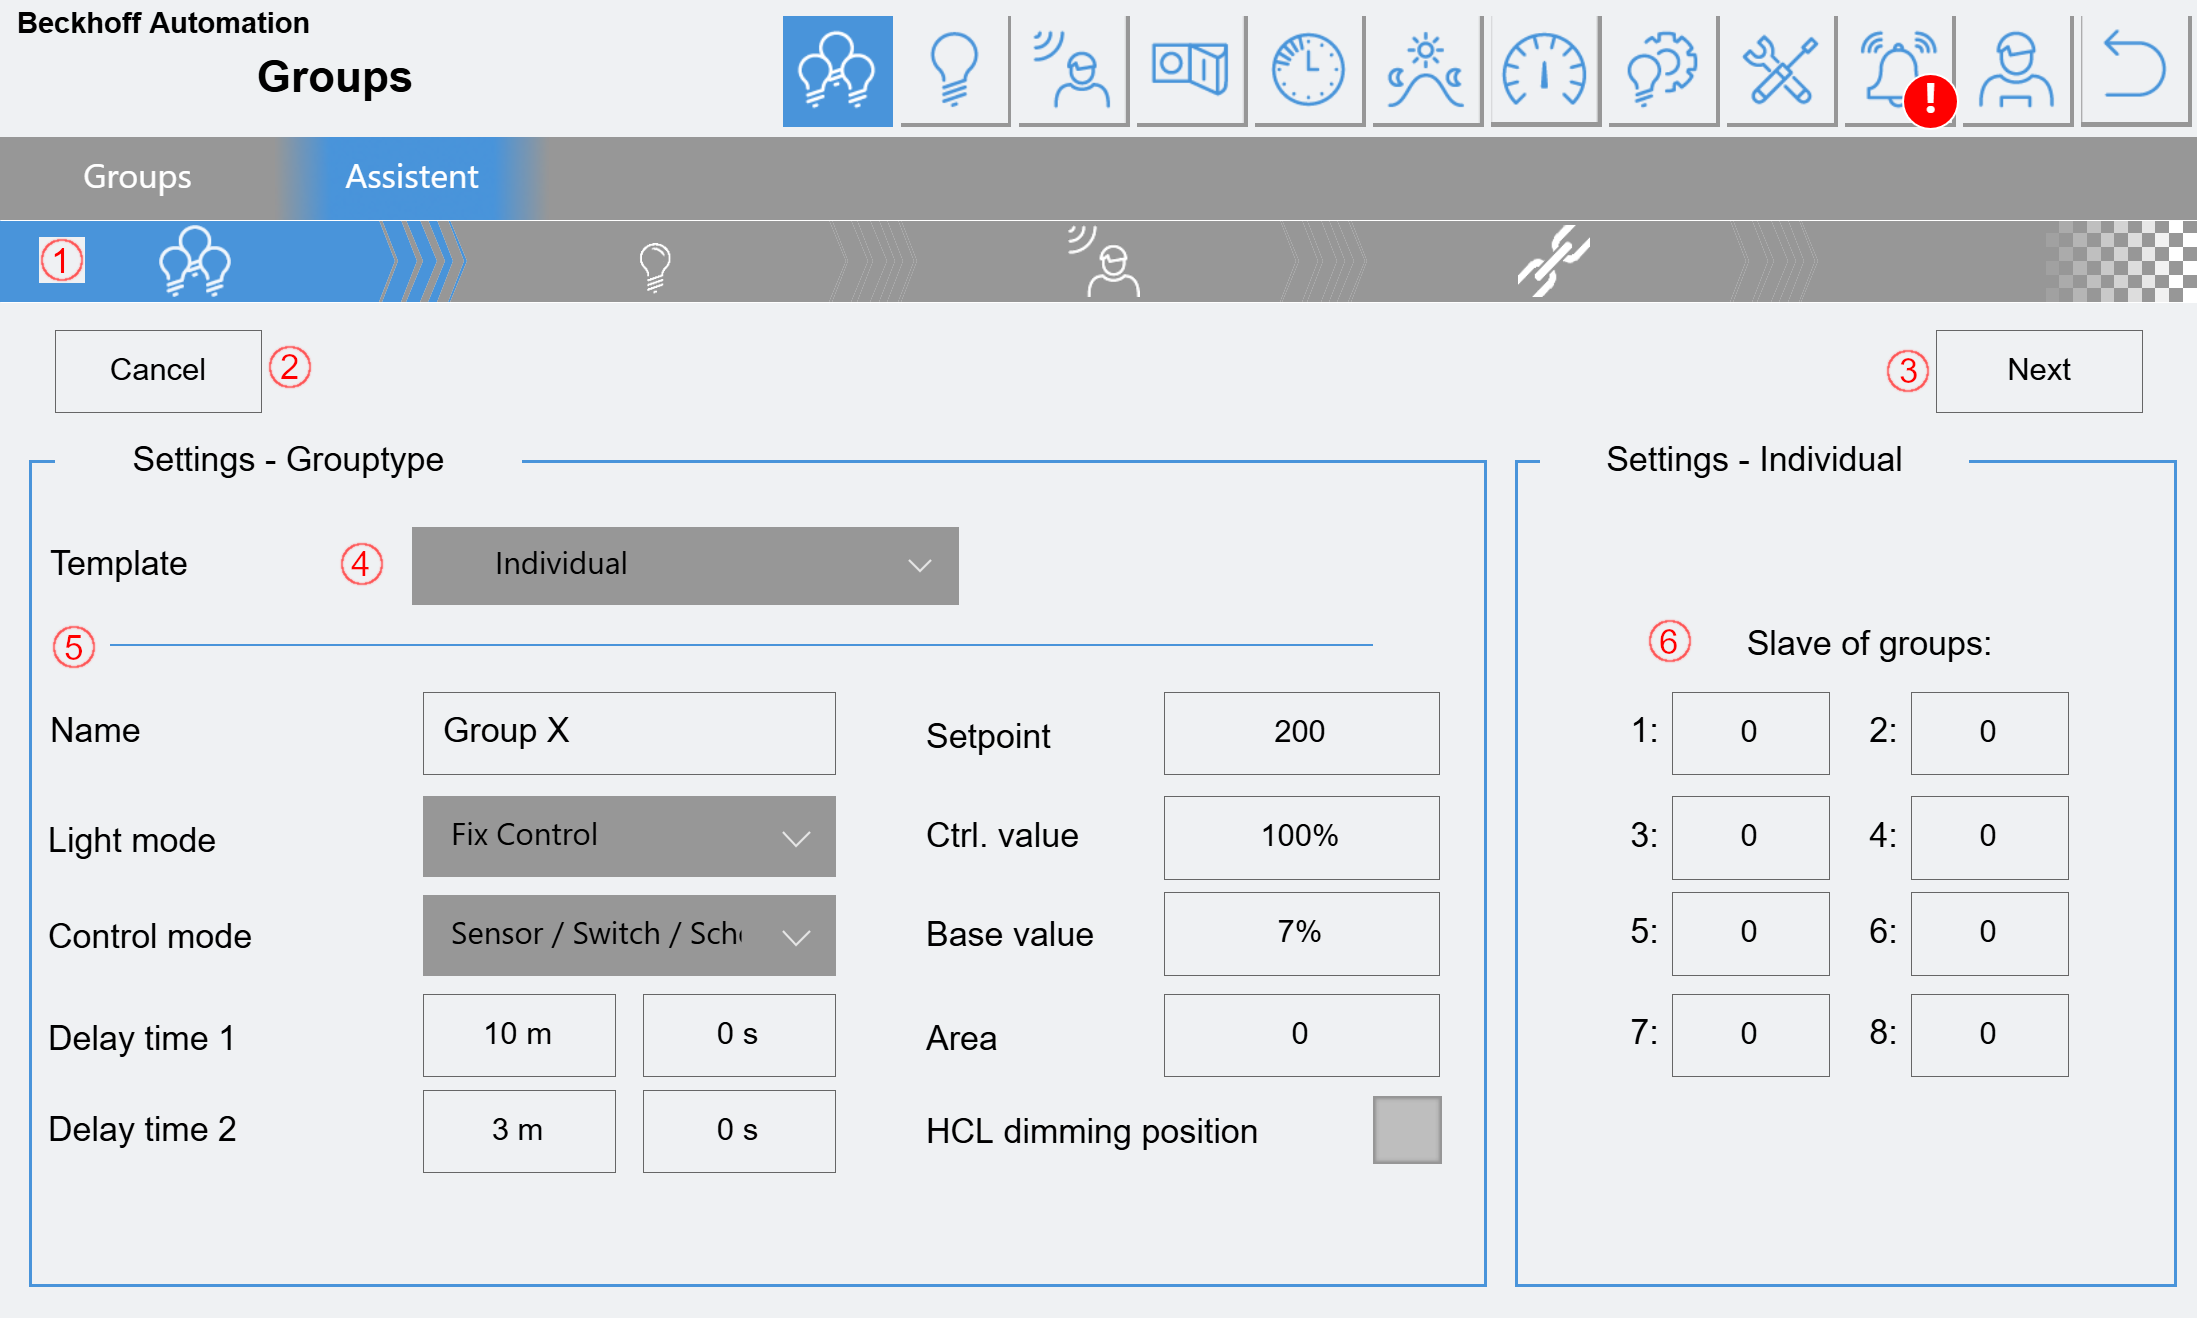
(1) Display of the current step.
(2) Cancel the process.
(3) Continue to the next step.
(4) Selection of a group template. If "Individual" is selected, all parameters under (5) can be changed. If a template is selected, a corresponding number of parameters are locked.
(5) Setting the group parameters. The name of the group is predefined after the selection of a template (4) and can then be edited. The area can also be defined separately.
(6) Here you can enter which other groups should be master groups for this group. Up to 8 master groups can be entered. If one of the master groups is active, the slave group is also switched on with the default value.
Step 2: Assigning the lamps
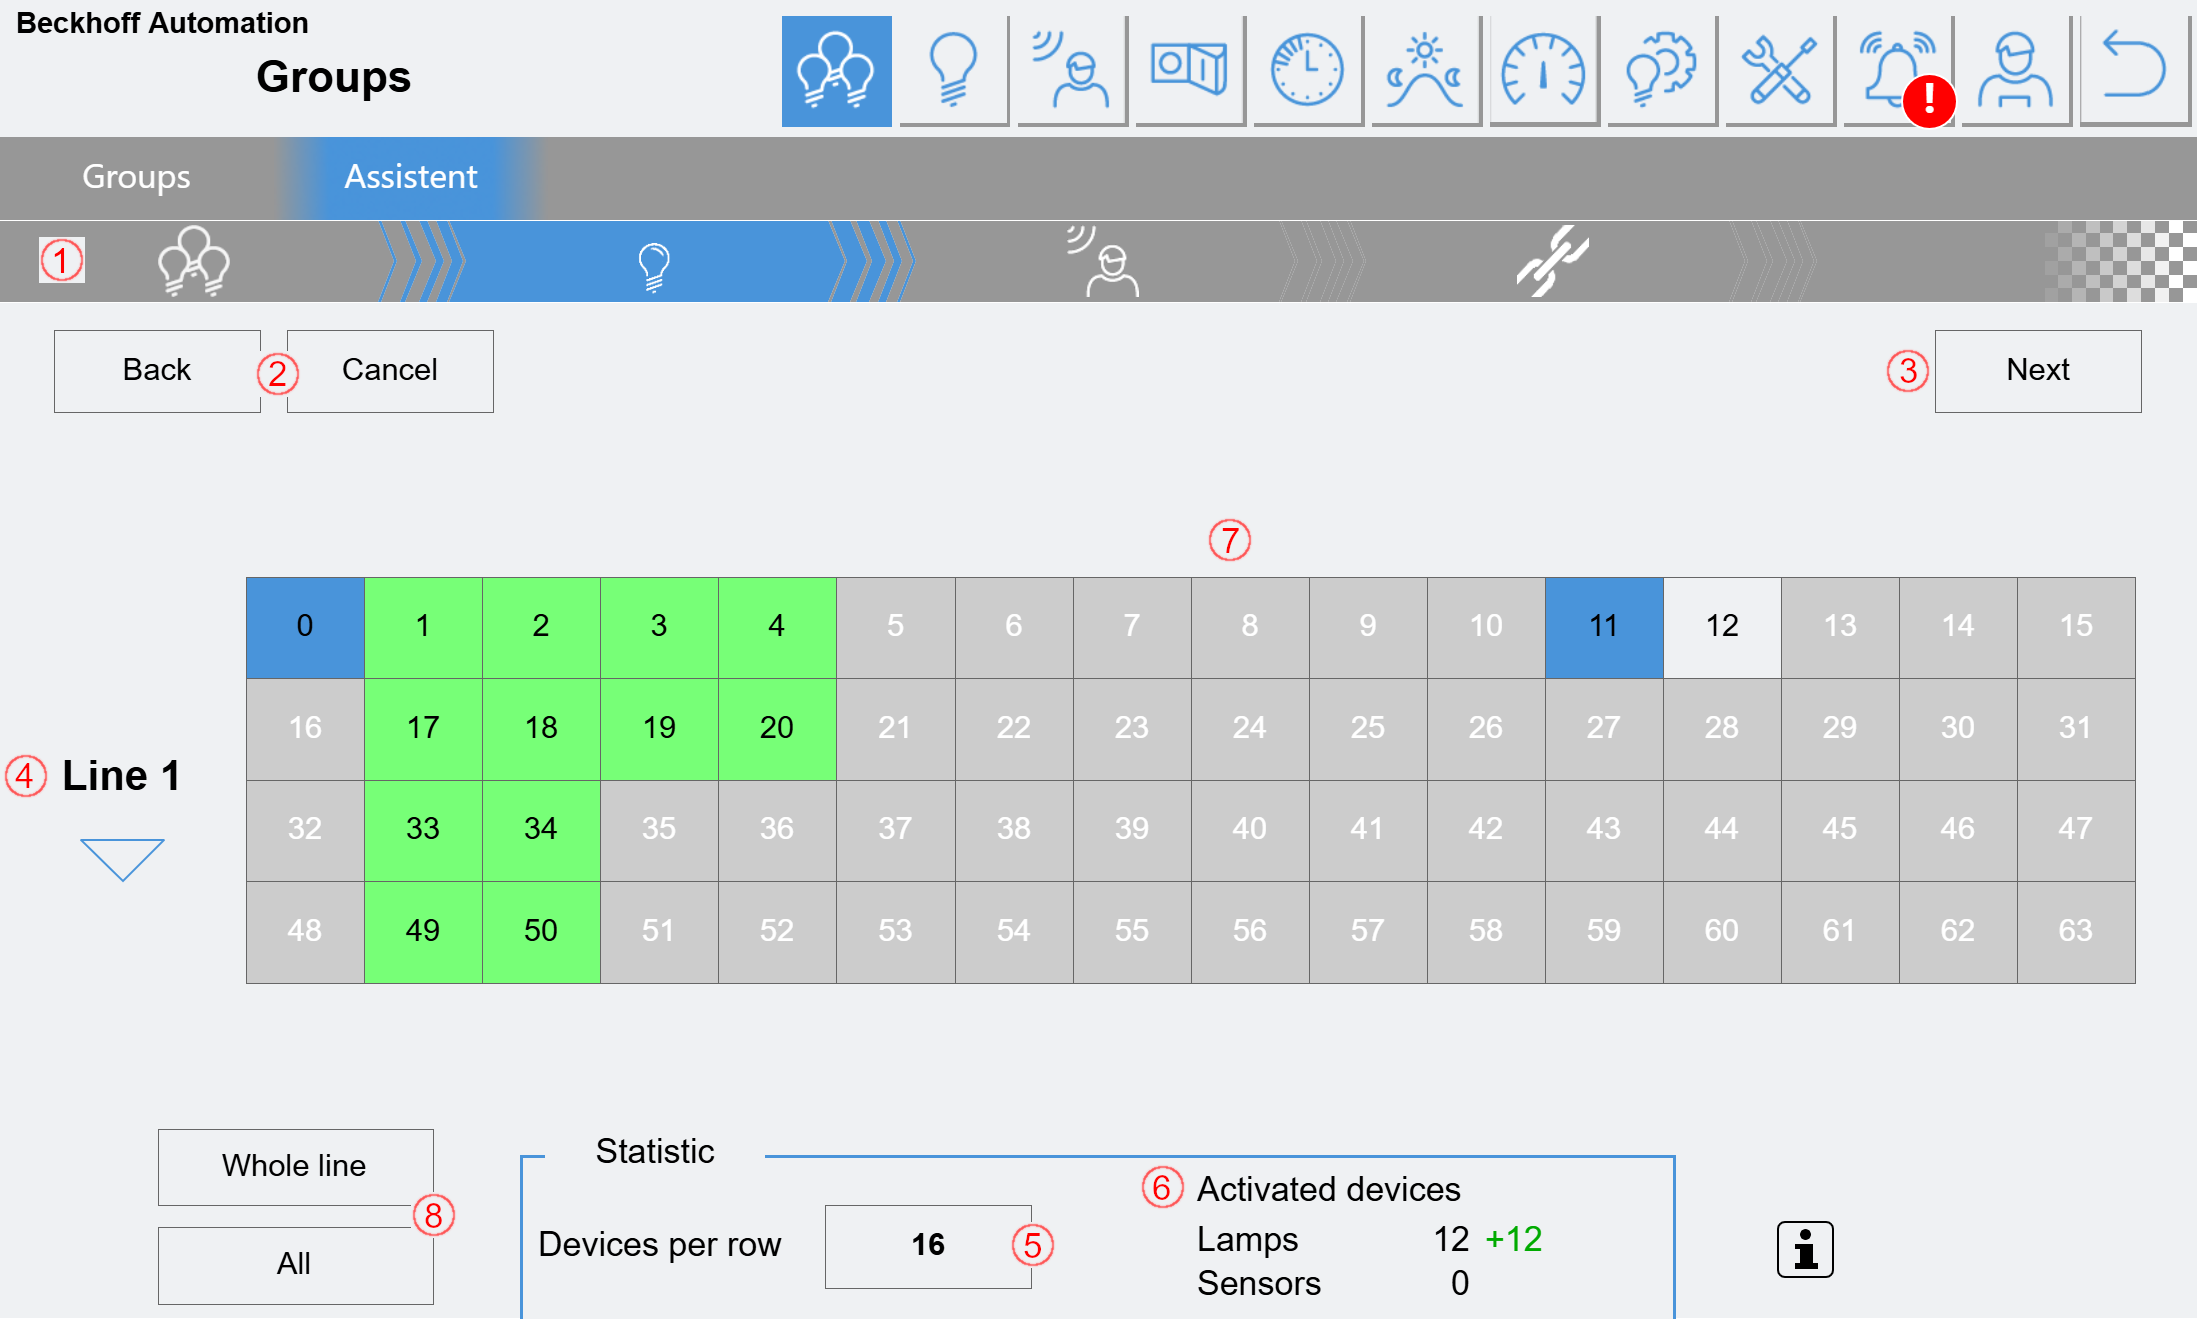
(1) Display of the current step.
(2) Cancel the process.
(3) Continue to the next step.
(4) Selection of the active DALI line.
(5) Here you can specify how many devices are to be displayed in a row. For easier grouping, this value can be set to match the number of lamps in a light-band.
(6) Display of the number of devices assigned to this group (black).
Display of changed devices (green/red, only if a group is being edited).
(7) The corresponding lamps can be added to or removed from the group with a simple click. The individual fields are highlighted in color:
Gray: The device is deactivated.
White: The device is activated but not in use.
Blue: The device is already assigned to another group.
Green: The device is assigned to the current group.
Red: The device is already assigned to 8 other groups (max.)
(8) All lamps of an entire line or all lamps of all lines for the group can be activated/deactivated here.
Step 3: Assigning the sensors
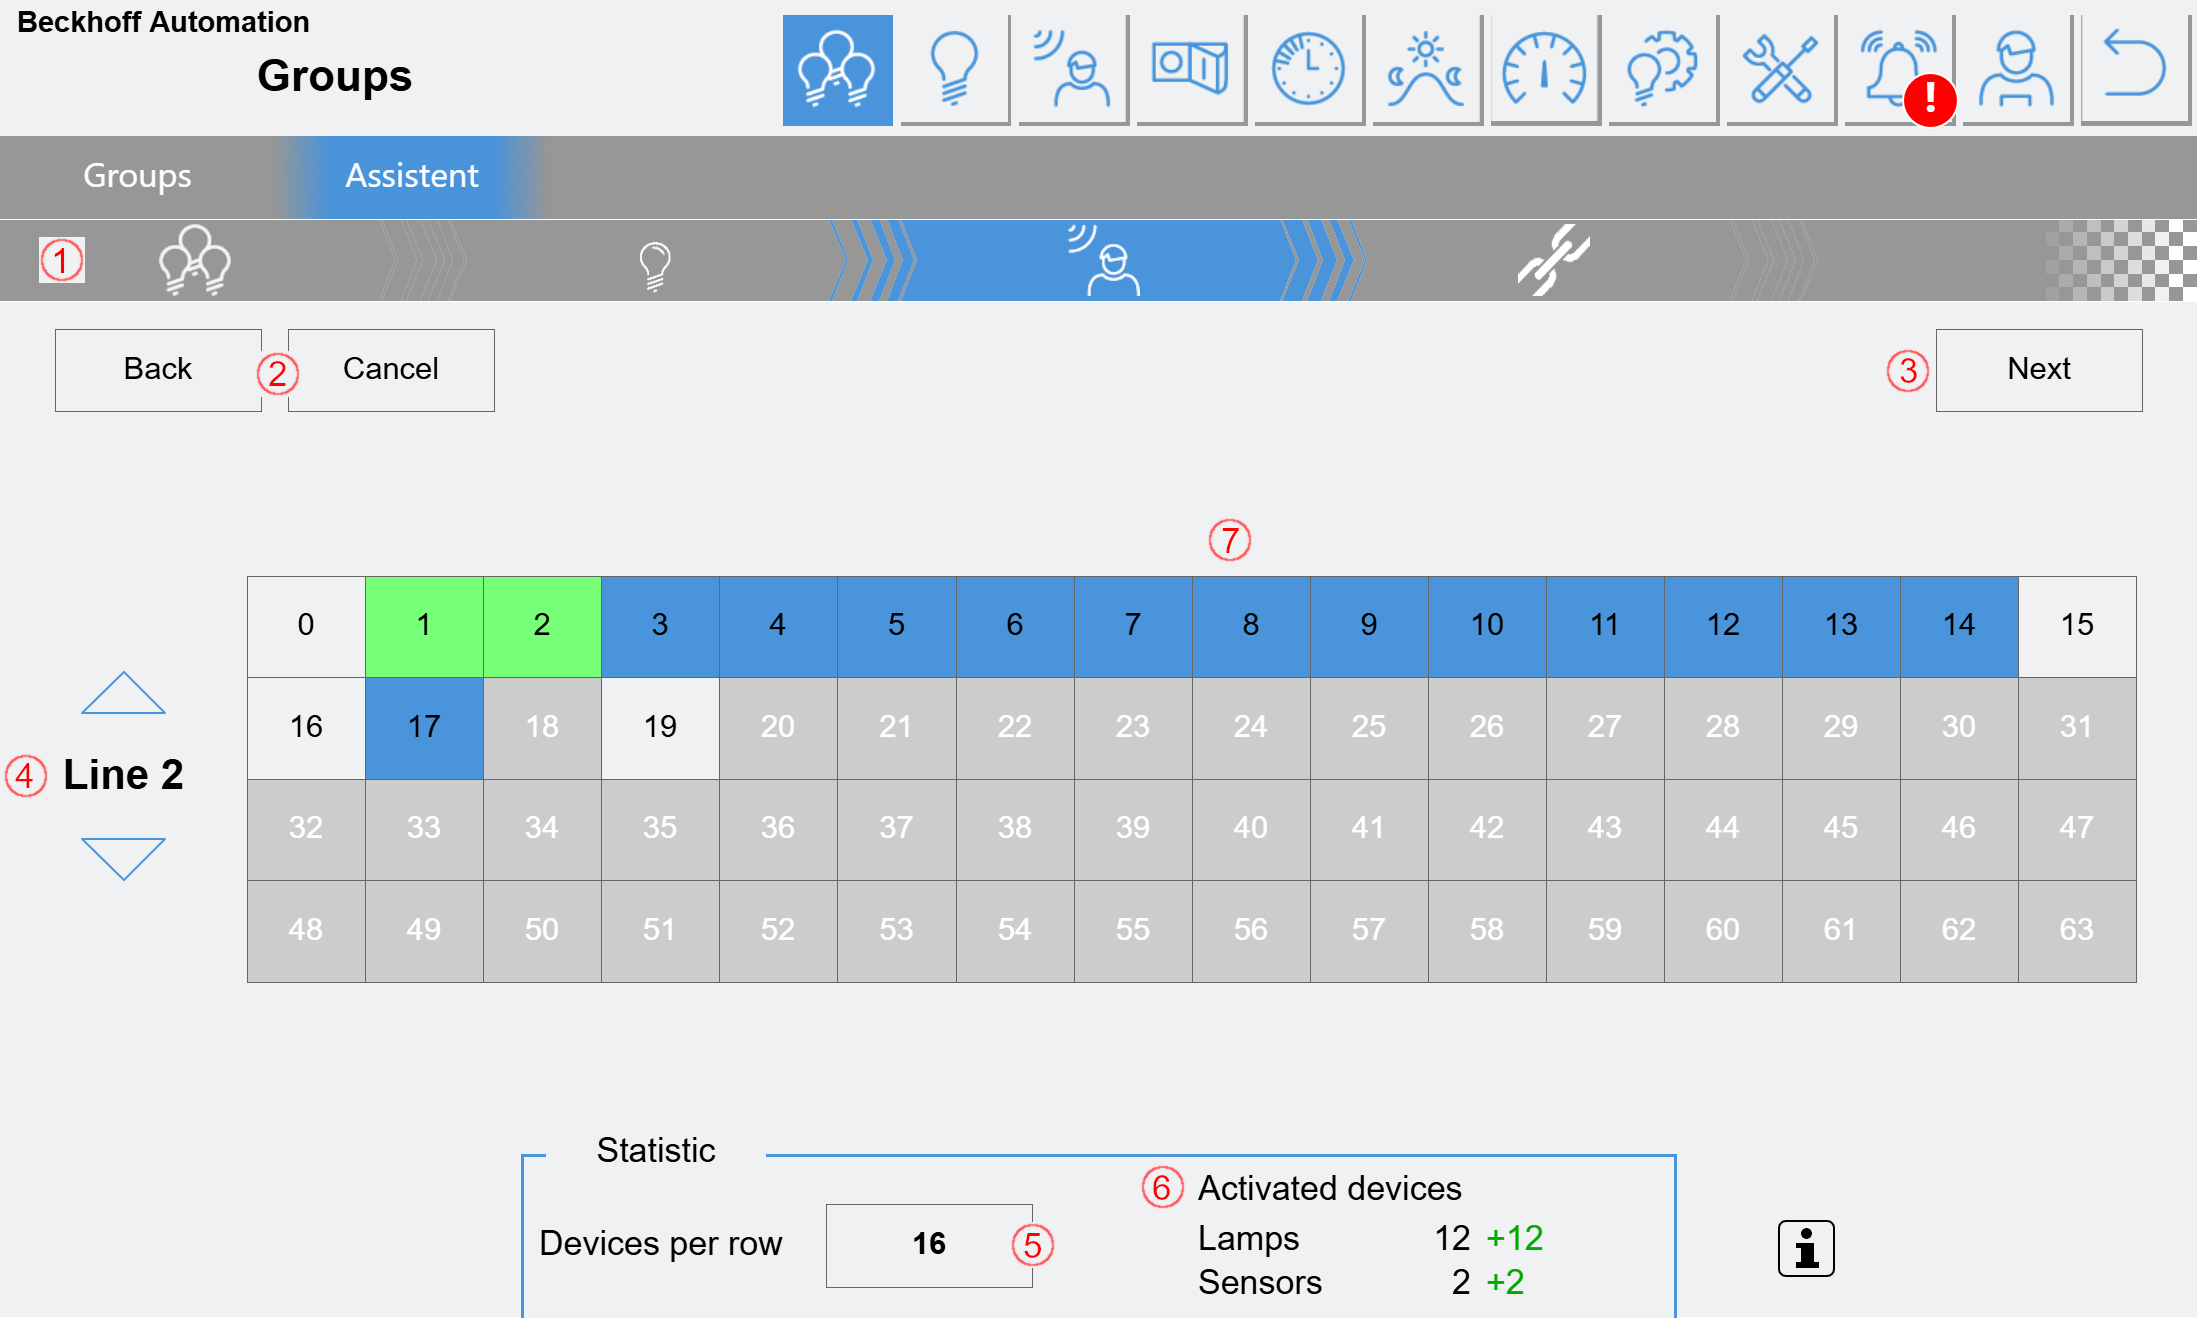
(1) Display of the current step.
(2) Return to the previous step or cancel the process.
(3) Continue to the next step.
(4) Selection of the active DALI line.
(5) Here you can specify how many devices are to be displayed in a row. For easier grouping, this value can be set to match the number of sensors in a light-band.
(6) Display of the number of devices assigned to this group (black).
Display of changed devices (green/red, only if a group is being edited).
(7) Here, the corresponding sensors can be added to or removed from the group with a simple click. The individual fields are highlighted in color:
Gray: The device is deactivated.
White: The device is activated but not in use.
Blue: The device is already assigned to another group.
Green: The device is assigned to the current group.
Red: The device is already assigned to 4 other groups (max.).
Step 4: Activating the DALI devices
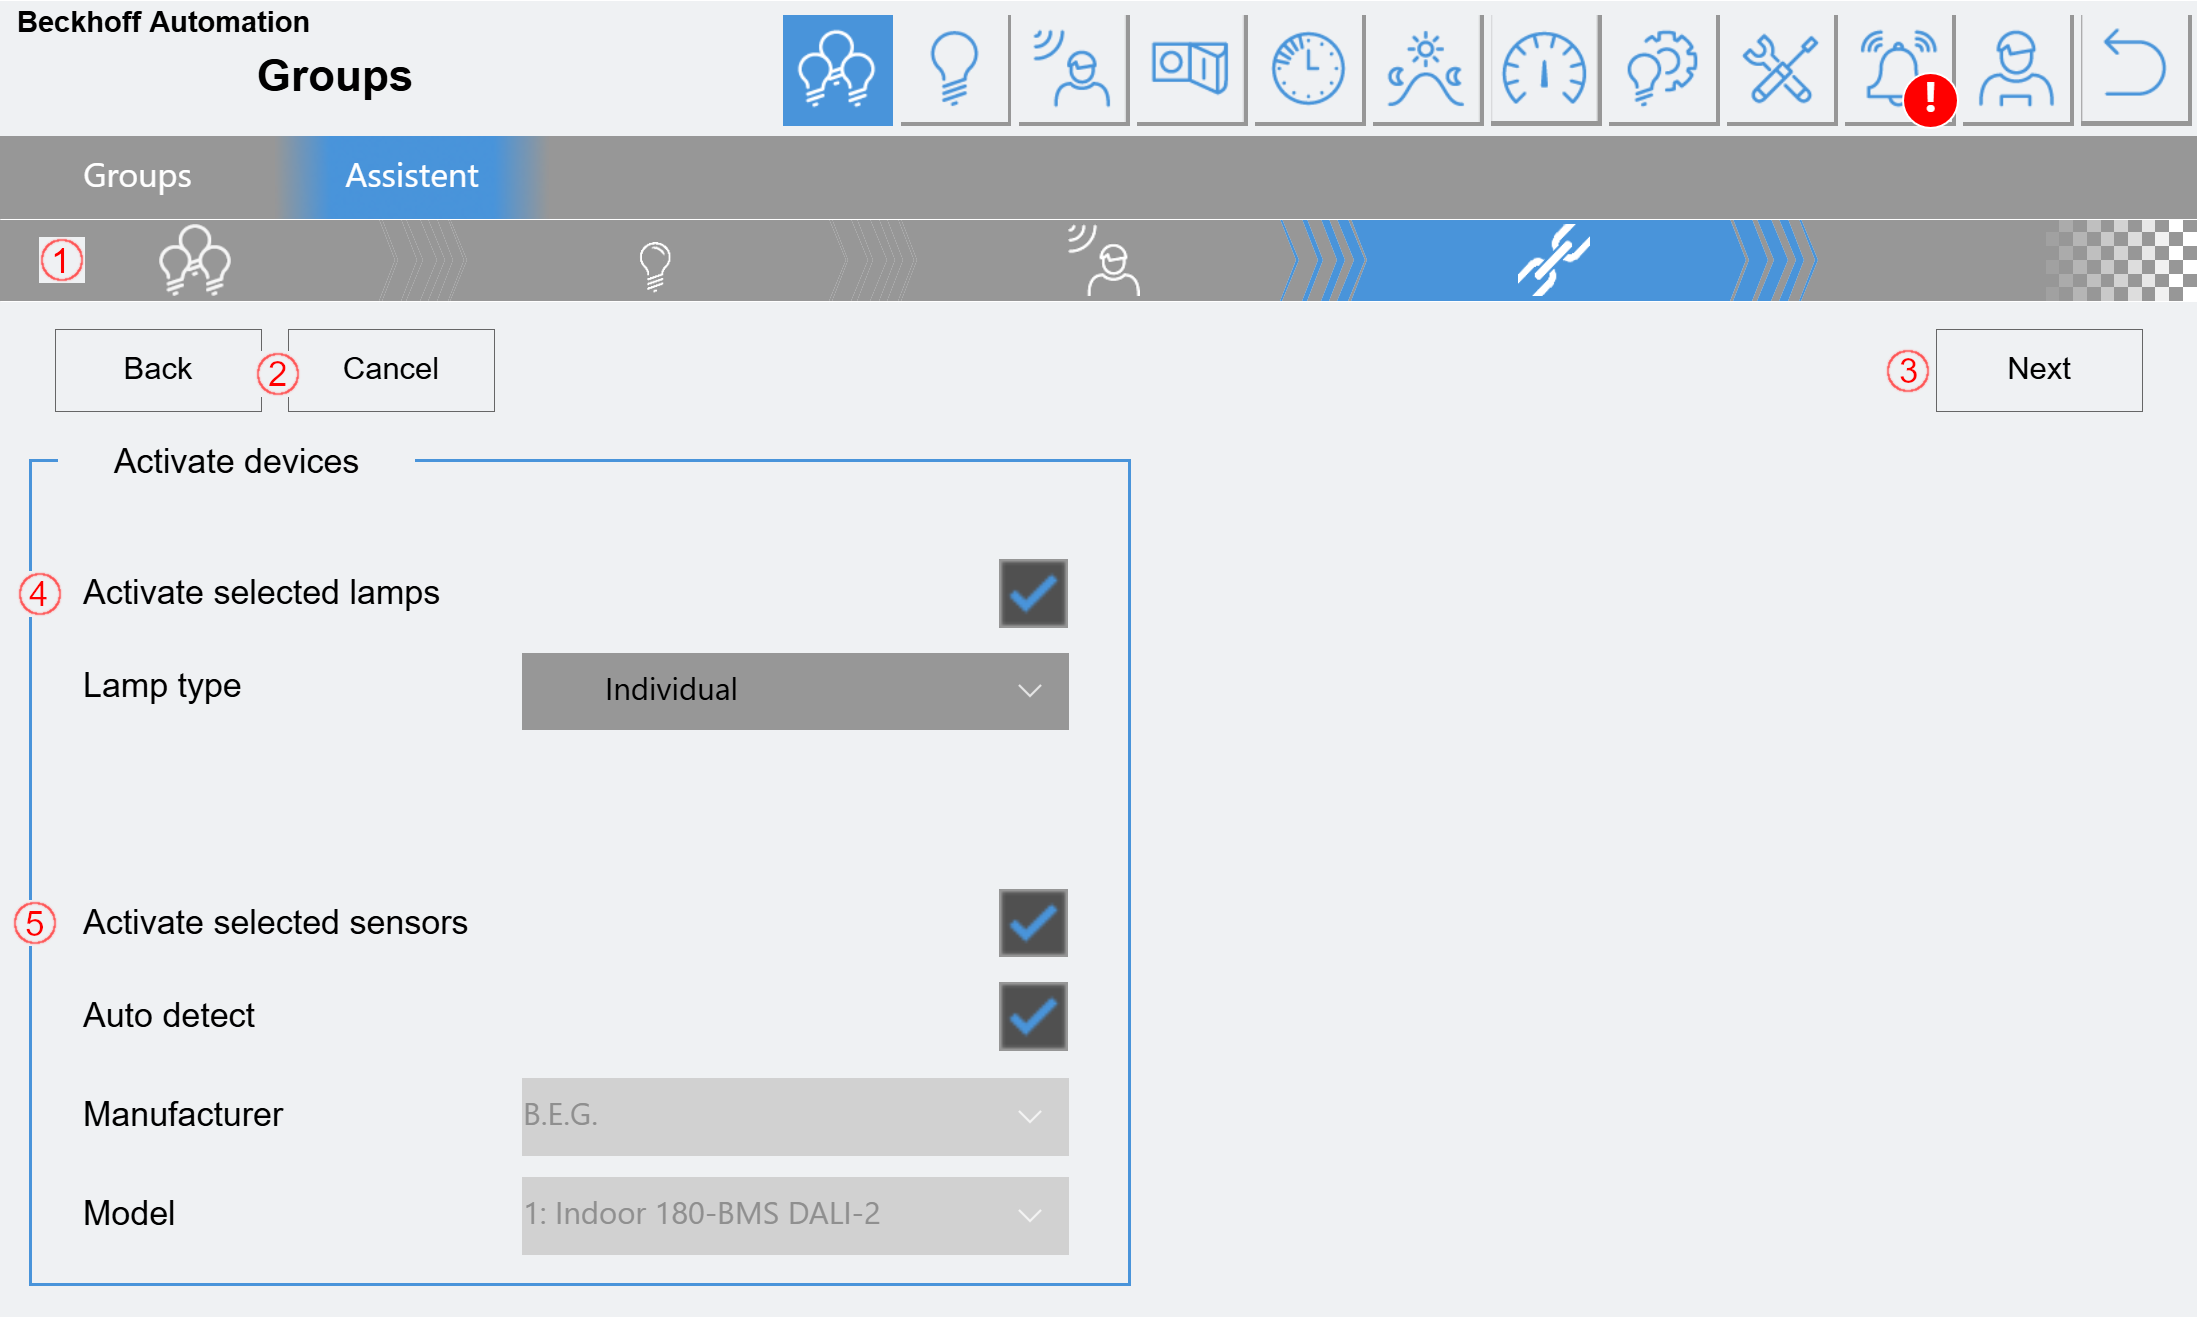
(1) Display of the current step.
(2) Return to the previous step or cancel the process.
(3) Continue to the next step.
(4) Here you can specify whether the previously selected lamps are to be "activated" and which lamp type they should be assigned.
(5) Here you can specify whether the previously selected sensors are to be "activated" and which sensor types they should be assigned. If auto-detection is selected, no type needs to be selected. In this case, the sensors should be checked later for correct function.
Step 5: Overview and test function
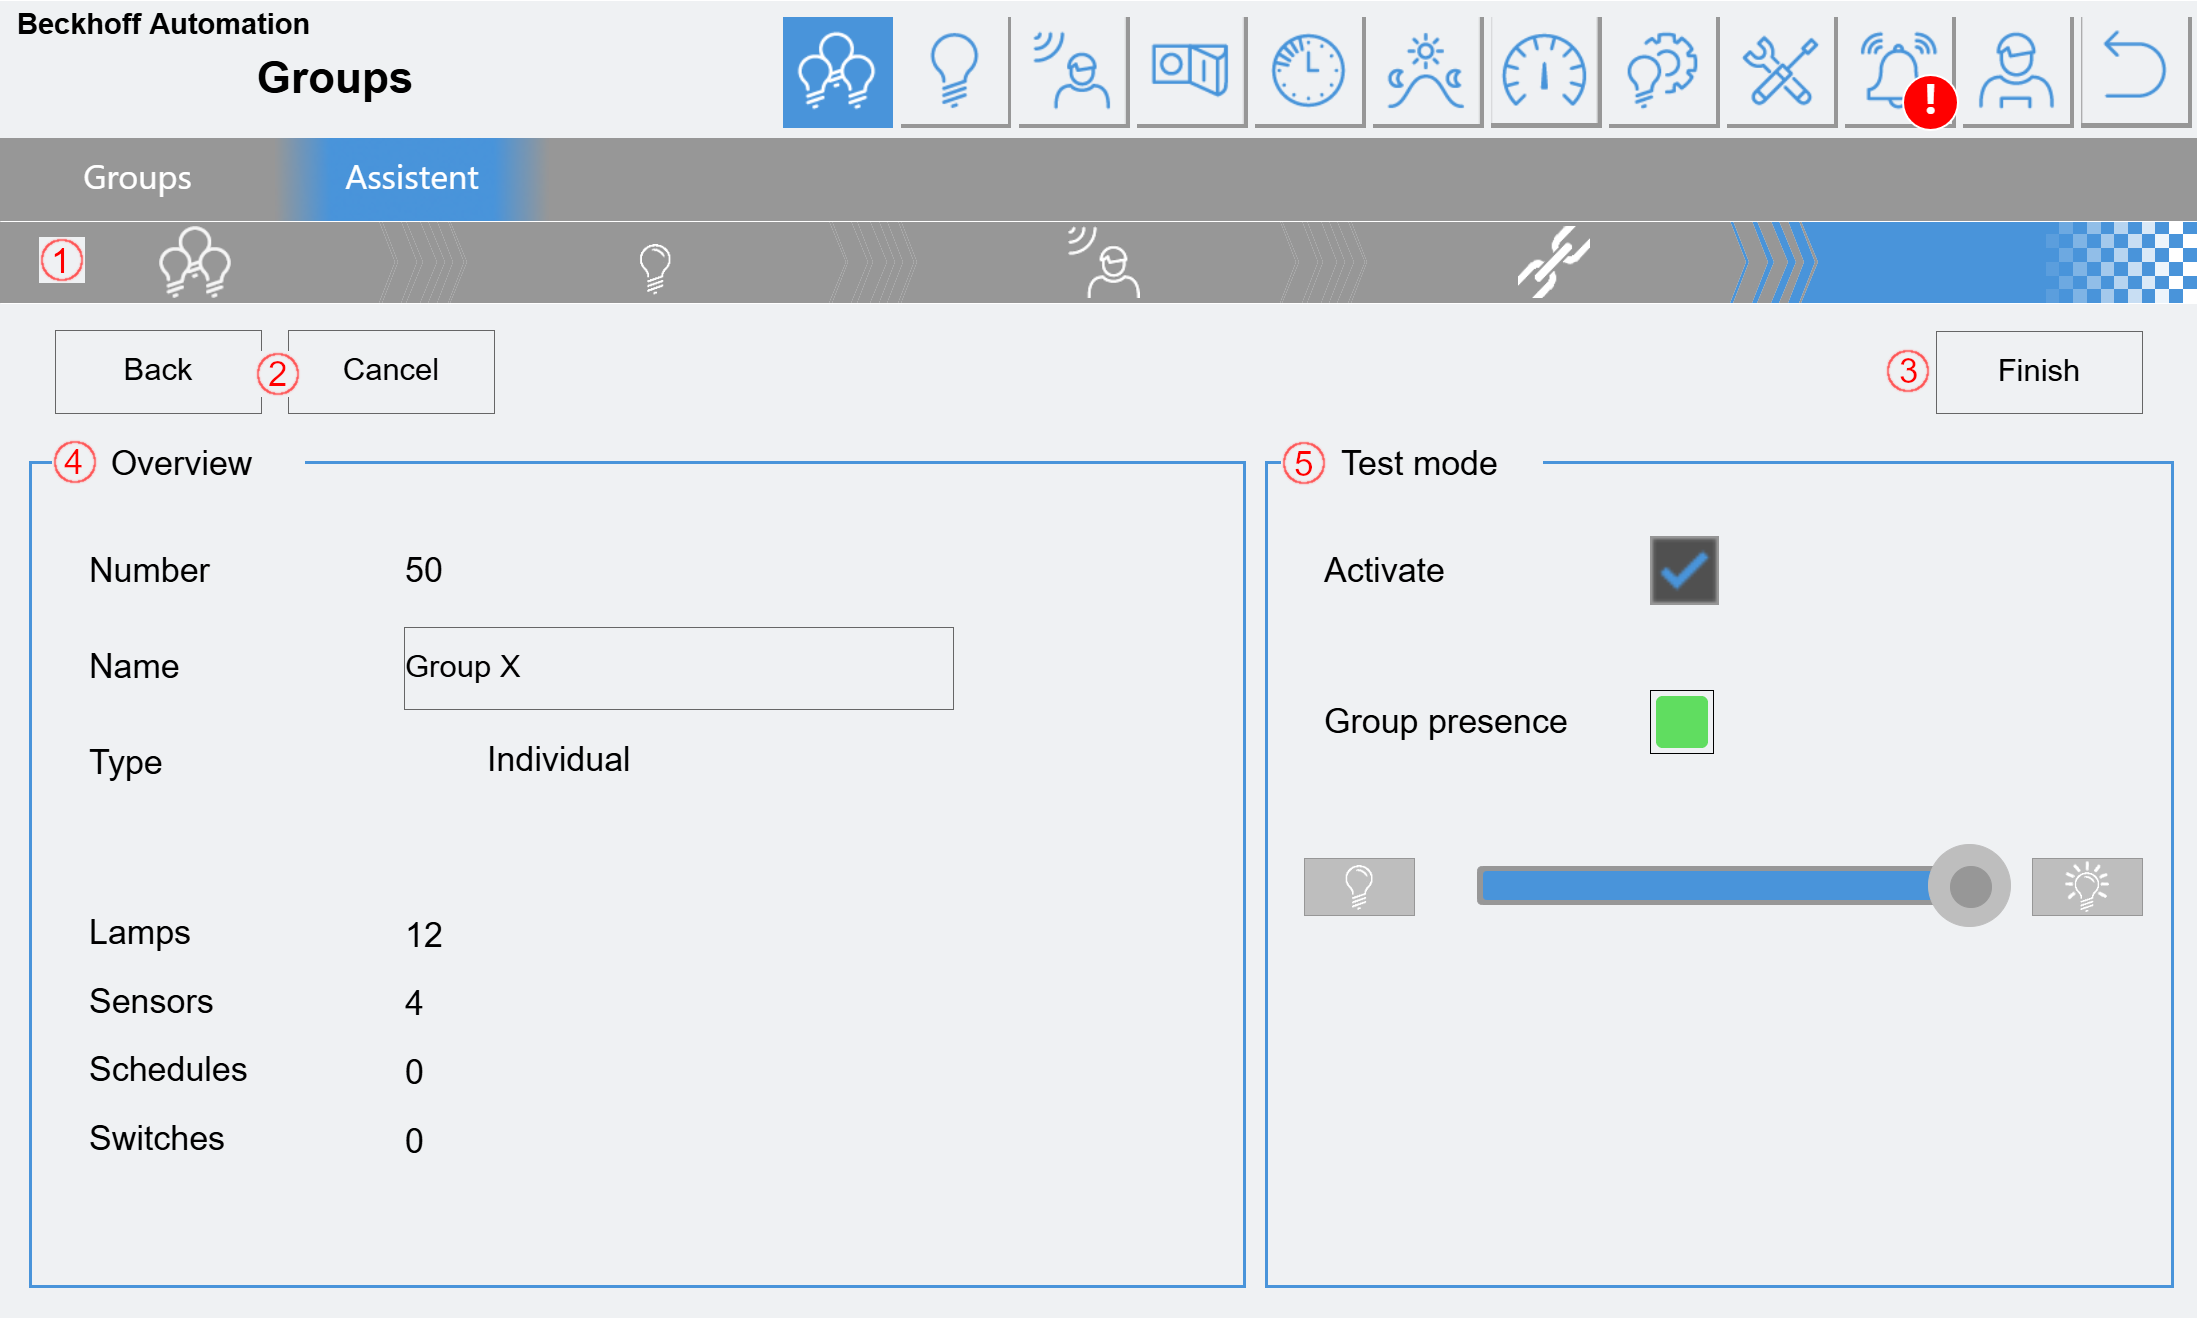
(1) Display of the current step.
(2) Return to the previous step or cancel the process.
(3) Completing the configuration. After clicking, you will be asked again whether the settings are correct. You will then be taken back to the start page of the assistant and the group will be set up.
(4) Some of the specified data is summarized again here.
The group name can be edited here again.
(5) A Test mode can be activated here. If the function is activated, a group presence is displayed. The illumination can also be switched.