"Groups" submenu
The submenu can be opened by clicking on the group name in the table. The selected group is highlighted in blue in the table. All settings for the respective group can be adjusted in the menu that opens. The following chapter describes each of the available submenus.
General:

(1) The displayed name can be edited here.
(2) Activate group. Only activated groups are processed by the program.
(3) The selected group type specifies most of the parameters via the corresponding template and locks them. Locked parameters are displayed in gray. If no template is to be used, the "Individual" type must be selected here.
(4) Light mode
|
Fixed Control |
The Fixed Control directly accepts the control value. |
|
Daylight Control |
The Daylight Control changes the lamp value in relation to the difference between the actual value and the setpoint. Daylight Control parameters can be changed in the settings. |
|
Global light control 1-5 |
The group adjusts to a fixed value that is set via a global control curve. "Global light control 1" refers accordingly to the first control curve. The curves can be set in the settings under "Light" -> "Global light control". See chapter "Global light control". |
(5) Control mode
|
Sensor / button / schedule |
Switch-on takes place by sensor, button or schedule. The status remains unchanged as long as a component is active. |
|
Sensor + (button / schedule) |
Switch-on only takes place if the activation has taken place via the button or a schedule and the sensor is also triggered. |
|
Daylight Control |
Always active in the "Daylight Control" mode. Activated via button/schedule in the "Fixed Control" mode. Presence always triggers. Useful with an area activation if only a light sensor without presence is available. |
|
Full Automatic |
The light switches on and off automatically via the sensor. If the light is operated or dimmed manually with the push button, the manual mode is retained until the delay time without presence has elapsed. Schedules have no effect. |
|
Semi-automatic |
The light is switched on via the push button. The sensor only switches off automatically. If the light is operated or dimmed manually with the push button, the manual mode is retained until the delay time without presence has elapsed. Schedules have no effect. |
|
Manual button |
The light is switched on and off via the push button. Schedules have no effect. In Daylight Control mode the Daylight Control can be enabled/disabled via the push button. |
|
Manual button with delay time |
The light is switched on and off via the push button. In addition, switching-off takes place on expiry of delay time 1. Schedules have no effect. In Daylight Control mode the Daylight Control can be enabled/disabled via the push button. |
(6) If this function is activated, the parameters are not affected by global changes.
(7) The HCL dimming position can be activated here
(8) If this function is activated, the group is ignored in the event of a central off command.
Configuration:
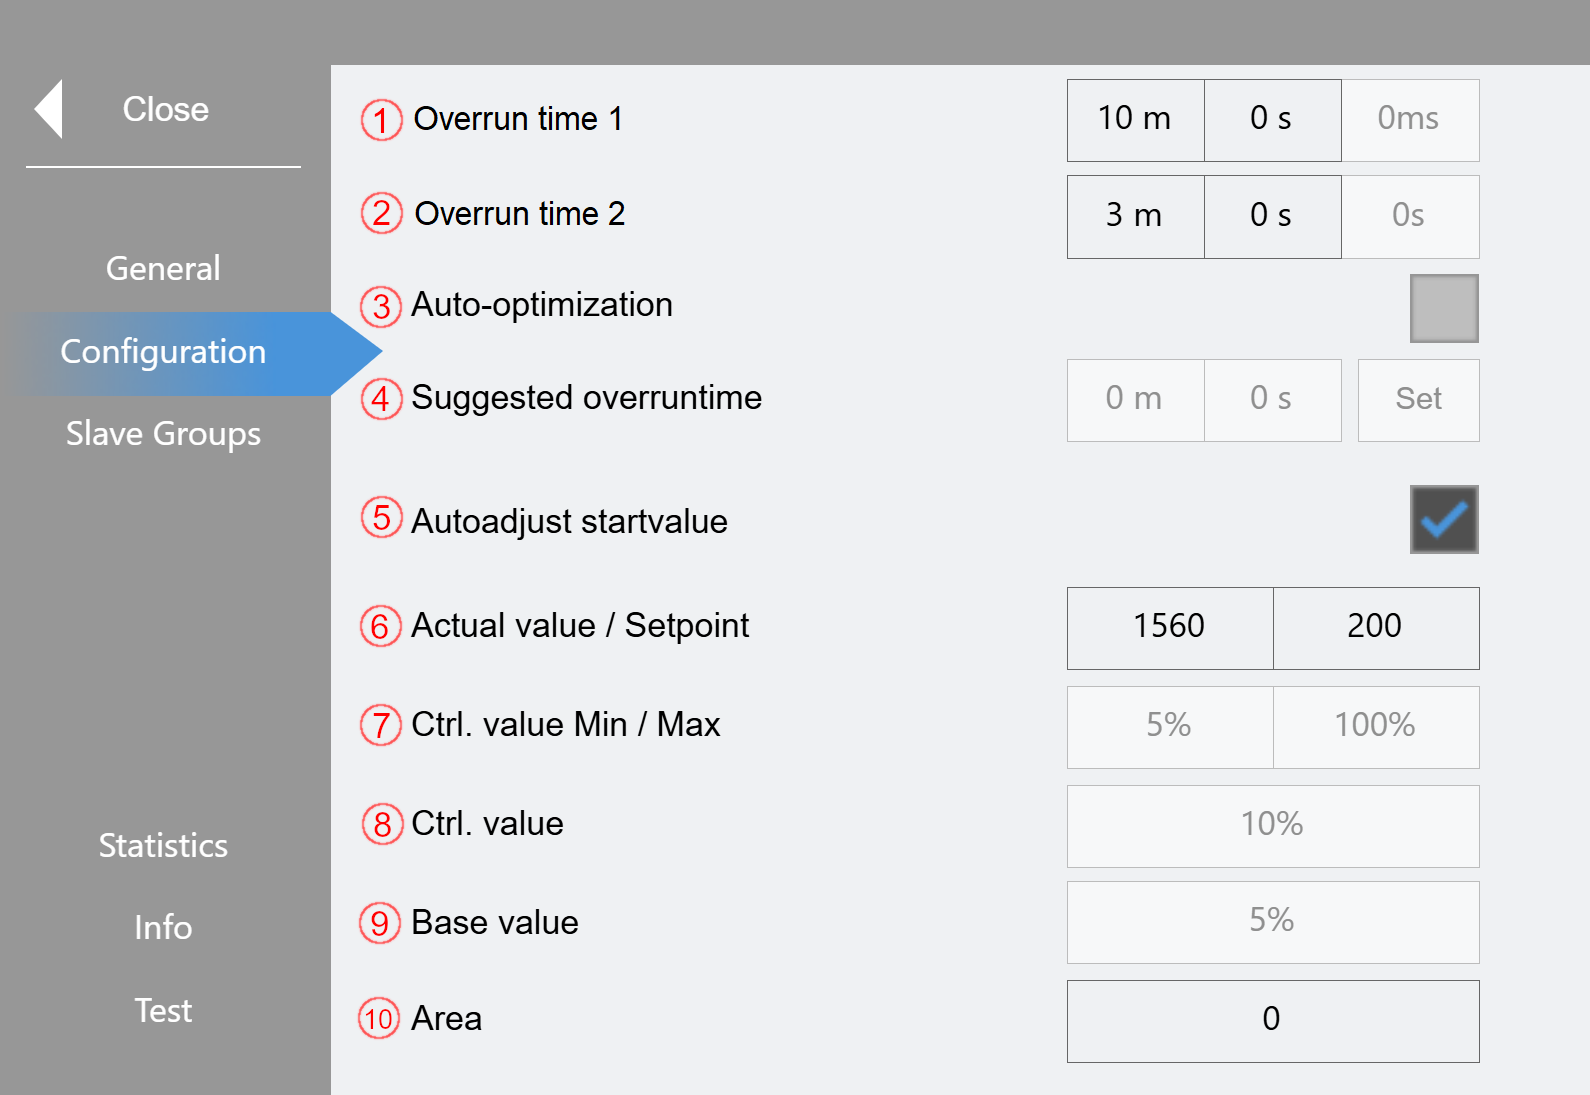
(1) Setting the 1st delay time in minutes and seconds. The current delay time is displayed in the right-hand field if it is currently expiring.
(2) Setting the 2nd delay time in minutes and seconds. The current delay time is displayed in the right-hand field if it is currently expiring.
(3) Activation of the automatic delay time optimization. See chapter "Optimization".
(4) Only displayed if (3) is disabled. If there is a proposal for a new delay time, this can be accepted with the "Set" button.
(5) Activation of an automatic start value adjustment for light control. If the function is activated, data is collected during normal operation. If sufficient values are available, a new start value is calculated and applied according to the brightness that is present when the group is switched on. If the function is disabled or too little data is available, the group is switched on with a defined start value (e.g. 90%). This function is only available in normal operation.
(6) The actual value and setpoint of the light control can be read or entered. Click on "Set" to define the current brightness value as the setpoint.
(7) These parameters can be used to limit the light control to a minimum / maximum.
(8) Enter the control value.
(9) Enter the base value.
(10) Enter the area.
Slave Groups:
Up to 8 master groups can be entered here. If one of the master groups is active, the slave group with the base value is also switched on.
Statistics:

(5) The bar chart shows the switching times of the group in the respective hour. The current week is shown in blue and the comparison week selected under (7) is shown in green. The bars are divided into four colors, each representing Presence (1), Overrun 1 (2), Overrun 2 (3) and Switches operation. In each case, the percentage of activation is given as an average. The area highlighted in yellow corresponds to the set operating time.
(6) Selection of the day of the week displayed
(7) Selection of comparison week shown in green
Info:
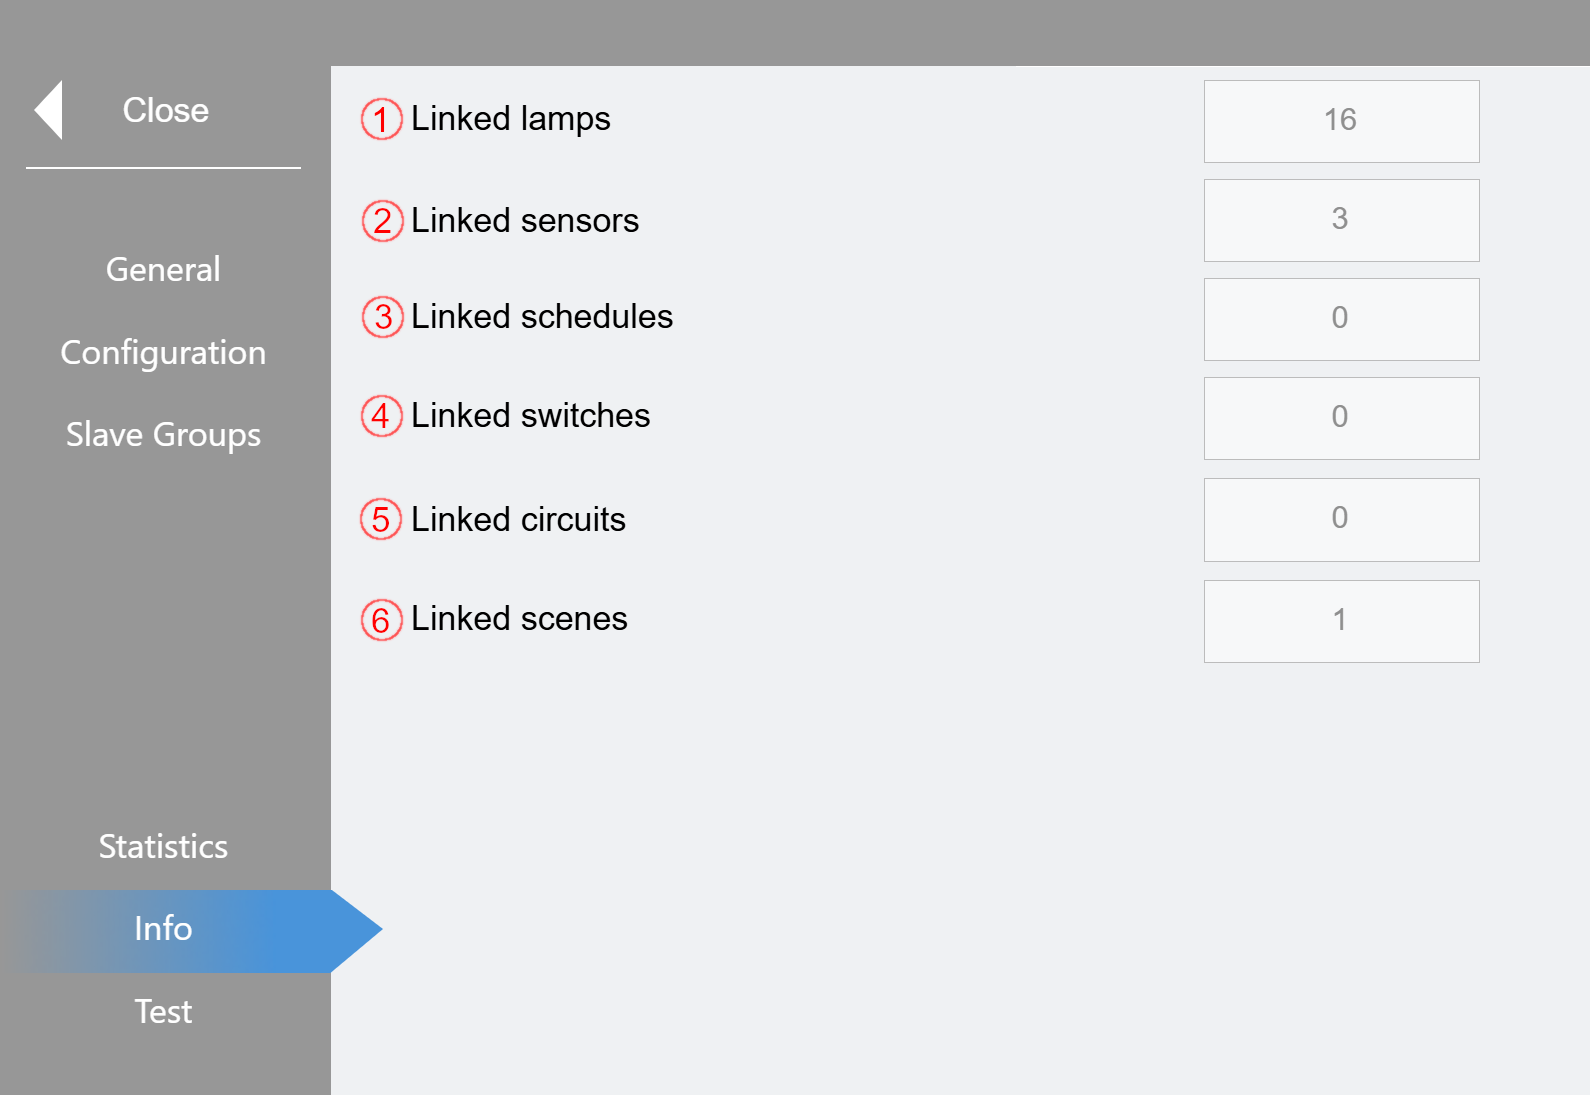
The number of linked devices or functions is displayed here. This page provides quick orientation, which can be particularly useful when changing the system.
Test:
Here, the group can be set to manual/service mode and dimmed using a slider.