Connect to third-party devices via OPC UA
Most of the step-by-step instructions in this sample section are based on an OPC UA subscriber channel, but the same principles can also be applied to data acquisition from another device type.
The following section describes step-by-step how to configure the TC3 IoT Data Agent to sample data from an OPC UA Server and to publish it to a MQTT Message Broker by using a JSON data format.
Configure OPC UA gate, channel and symbols
Follow the step-by-step instructions to create an OPC UA gate and a subscriber channel and add OPC UA nodes to the channel’s configuration.
- The topology view is activated.
- 1. Right-click the canvas and select Add Gate (OPC UA).
- 2. Select the new gate and configure OPC UA specific settings in the properties window (Server URL, Security Policy, Message Security Mode, …).
- 3. Right-click the new gate and select Add Channel (Subscriber).
- 4. Select the new channel and set “SamplingMode” to “OnChange”. Leave all other fields on their default settings.
- 5. Open the Target Browser.
- 6. Navigate to the OPC UA namespace and add some symbols to the configuration by dragging them to the subscriber channel.
- A OPC UA gate and a subscriber channel have been created. OPC UA nodes have been added to the configuration.
 | ServerURL Make sure that the ServerURL that you specified in the gate settings equals the ServerURL that is used in the target browser. |
Configure MQTT gate and channel
Follow the step-by-step instructions to create a MQTT gate and a publisher channel.
- The topology view is activated.
- 1. Right-click the canvas and select Add Gate (MQTT).
- 2. Select the new gate and configure MQTT-related settings in the properties window (Broker address, …).
- 3. Right-click the new gate and select Add Channel (Publisher).
- 4. Select the new channel and set “SamplingMode” to “OnChange”, “Formatter” to “Simple JSON” and “Topic” to “TestTopic”. Leave all other fields on their default settings.
- A MQTT gate and a publisher channel have been created.
Create mapping
Follow the step-by-step instructions to create a mapping between source and destination symbols. Note that a mapping can only be created between channels that have different roles (e.g. between a subscriber and a publisher channel and vice versa).
Drag-and-drop - Channel:
While holding the CTRL key, drag the subscriber channel to the publisher channel.
The configurator automatically creates new symbols on the publisher channel and a mapping between the source and destination symbol.
Drag-and-drop – Symbol:
While holding the CTRL key, drag a symbol from the subscriber channel to either an existing symbol on the publisher channel or to the publisher channel itself.
The configurator creates a link between source and destination symbol or, if the symbol has been dragged to a channel object, creates the destination symbol automatically
Activate configuration
Follow the step-by-step instructions to activate the currently opened configuration.
- 1. Select the target system via the toolbar.
- 2. Click the Activate Configuration button.
- A dialog opens asking if you want to switch the target TC3 IoT Data Agent into run mode.
- 3. Confirm the dialog with Yes if you want to switch the mode. Otherwise, choose No.
- The configuration is activated.
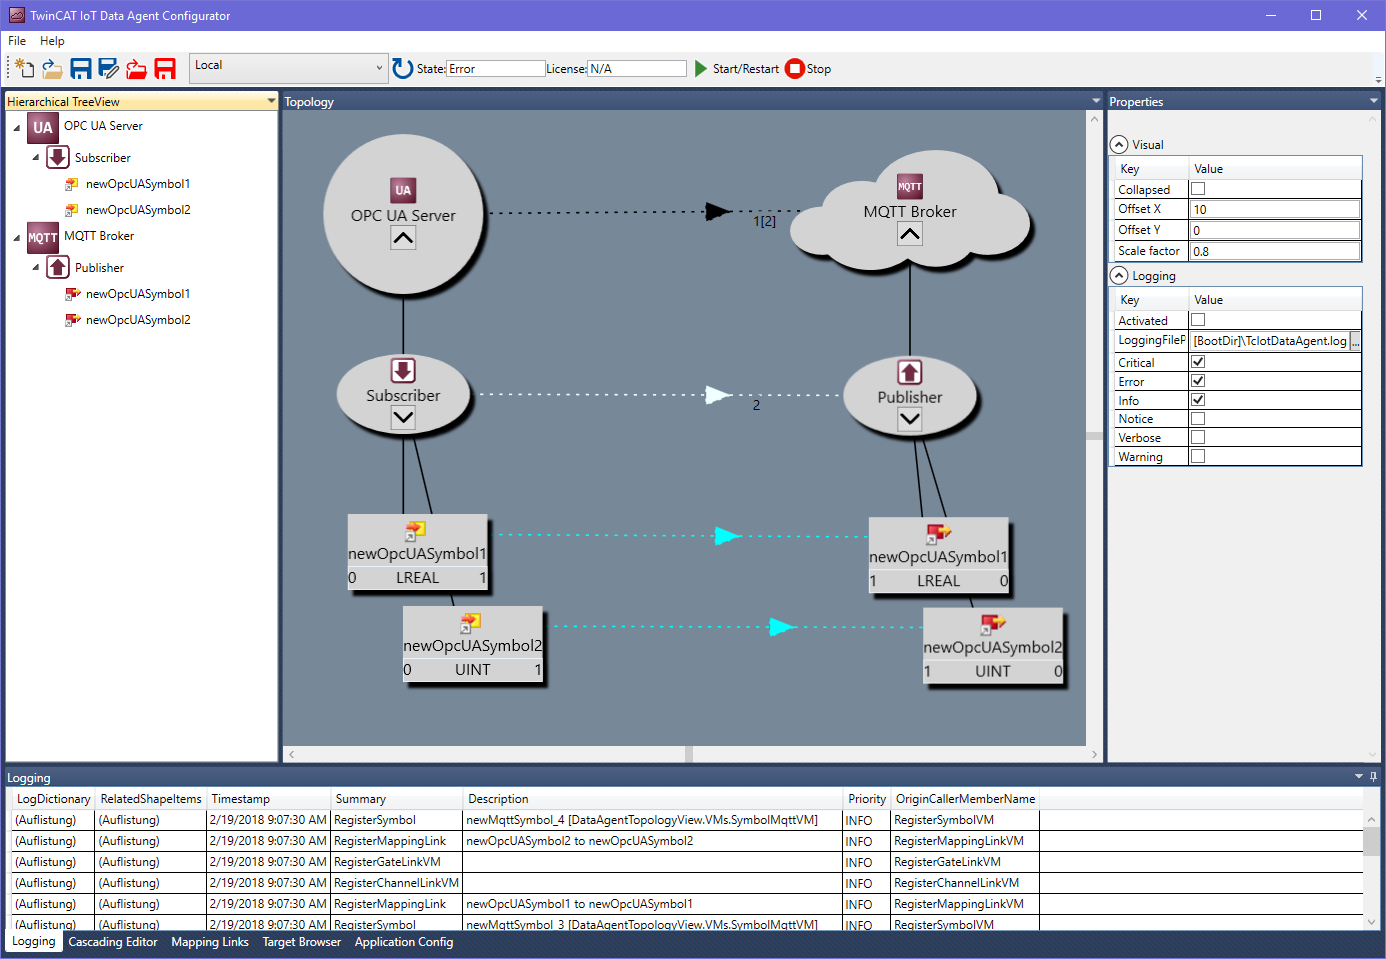
The resulting configuration looks like this: