Quick Start (C++ / UDP)
The example implements an "echo service": A UDP server is started on a port (default: 10000). If this server receives a UDP packet, it returns the content to the sender (with same IP and same port).
The engineering system must meet the requirements for TwinCAT 3 C++.
The example is also available for download under Sample 02.
Implementation of the UDP echo server in a C++ project
- A TwinCAT solution was generated
- 1. If no C++ project exists in the TwinCAT solution, you have to create one. Please use the template for “TwinCAT Module Class with Cyclic IO”.
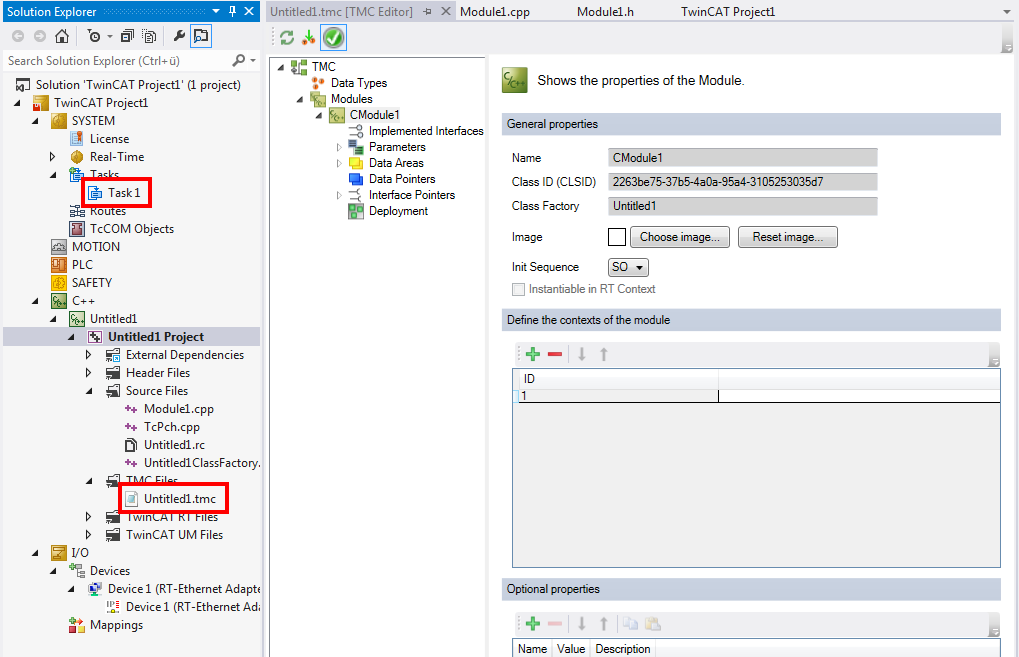
- 2. Create a task. Under System / Tasks right-click and select “Add new Item…”
A normal task (without image) is sufficient. - 3. In the C++ project, open the TMC editor by double-clicking on the TMC file.
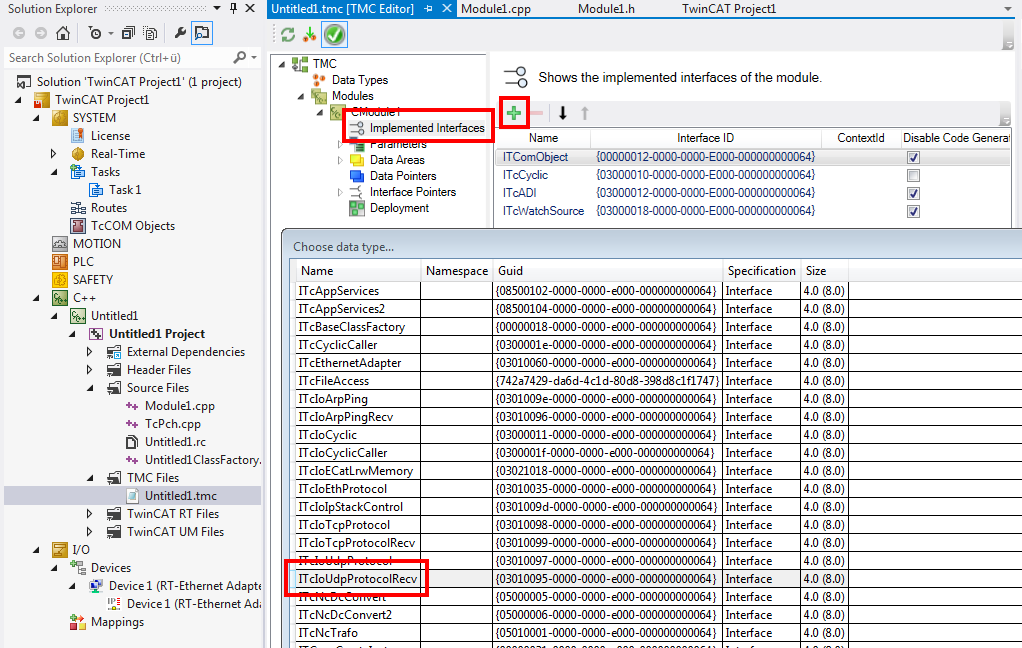
The module must implement the ITcIoUdpProtocolRecv. This creates a method, which is called when UDP packets arrive.
- 4. In the TMC editor select “Implemented interfaces” and create them with “+”. A dialog appears, in which the type ITcIoUdpProtocolRecv is selected:
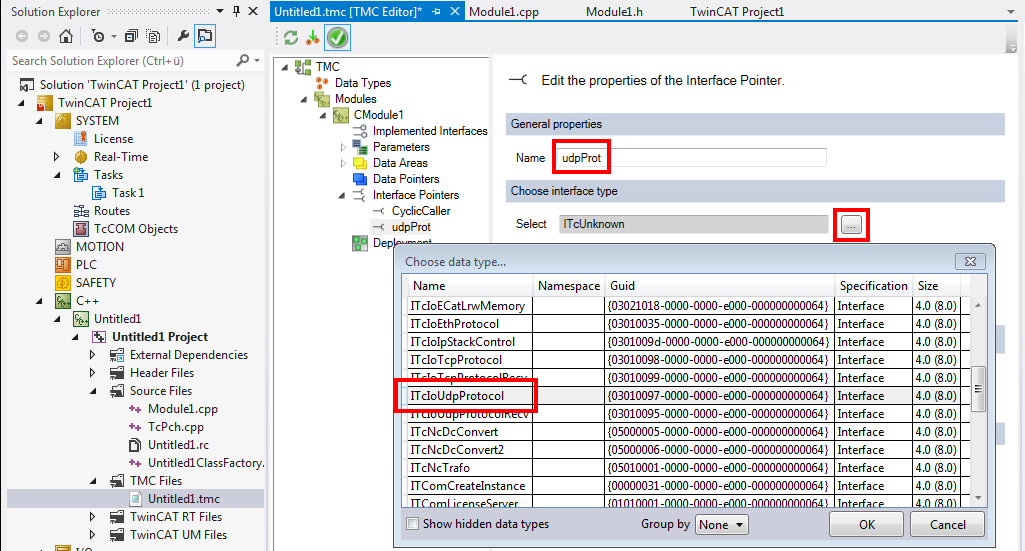
The module requires an interface pointer to ITcIoUdpProtocol, which contains the reference to the TCP/UDP RT object.
- 5. In the TMC editor select “Interface Pointer” and press “+”. An interface is created, which can be opened by double-clicking. Assign a name “UdpProt” and set the pointer type with “..:” and the selection in the dialog:
- 6. The TMC code generator is started once. Right-click on the C++ project and select “TMC Code Generator” in the context menu.
The CheckReceived() method of the TCP/UDP RT module must be called in the CycleUpdate() method in the CPP file of the module (Module1.cpp). As a result, arriving UDP packets are transferred to the implemented method ReceiveData() via callback.
- 7. The CycleUpdate() method is implemented as follows
///<AutoGeneratedContent id="ImplementationOf_ITcCyclic">
HRESULT CModule1::CycleUpdate(ITcTask* ipTask, ITcUnknown* ipCaller, ULONG_PTR context)
{
HRESULT hr = S_OK;
    m_counter+=m_Inputs.Value;
    m_Outputs.Value=m_counter;
    m_spUdpProt->CheckReceived(); // ADDED
    return hr;
}
The method “ReceiveData”, which was created through implementation of the interface, will be called repeatedly via CheckReceived(): one call for each packet received in the meantime.
- 8. The method ReceiveData has both sender information and data as input parameters. In this sample, the SendData method returns an incoming packet as response (with sender/receiver reversed). The implementation is done as follows:
///<AutoGeneratedContent id="ImplementationOf_ITcIoUdpProtocolRecv">
HRESULT CModule1::ReceiveData(ULONG ipAddr, USHORT udpDestPort, USHORT udpSrcPort, ULONG nData, PVOID pData, ETYPE_VLAN_HEADER* pVlan)
{
    HRESULT hr = S_OK;
    // mirror incomming data
    hr = m_spUdpProt->SendData(ipAddr, udpSrcPort, udpDestPort, nData, pData, true);
    m_Trace.Log(tlInfo, FLEAVEA "UDP ReceiveData: IP: %d.%d.%d.%d udpSrcPort: %d DataSize: %d (hr2=%x) \n",
         ((PBYTE)&ipAddr)[3], ((PBYTE)&ipAddr)[2], ((PBYTE)&ipAddr)[1], ((PBYTE)&ipAddr)[0],
        udpSrcPort, nData, hr);
    return hr;
}
///</AutoGeneratedContent>
During start and finish, a reference to the “UdpProtocol” interface must be set from the configured OID; corresponding approvals should be taken care of during shutdown.
- 9. The start is triggered in the transition from SafeOp to Op. During this process, RegisterReceiver is of particular interest: It opens a UDP port for reception.
HRESULT CModule1::SetObjStateSO()
{
    HRESULT hr = S_OK;
    //START EDITING
    if (SUCCEEDED(hr) && m_spUdpProt.HasOID())
    {
        m_Trace.Log(tlInfo, FLEAVEA "Register UdpProt");
        if (SUCCEEDED_DBG(hr = m_spSrv->TcQuerySmartObjectInterface(m_spUdpProt)))
        {
            m_Trace.Log(tlInfo, FLEAVEA "Server: UdpProt listen to Port: %d", 10000);
            if (FAILED(hr = m_spUdpProt->RegisterReceiver(10000,
 THIS_CAST(ITcIoUdpProtocolRecv))))
            {
                m_Trace.Log(tlError, FLEAVEA "Server: UdpProtRegisterReceiver failed on Port: %d", 10000);
                m_spUdpProt = NULL;
            }
    }
    }

    // If following call is successful the CycleUpdate method will be
called,
    // eventually even before method has been left.
    hr = FAILED(hr) ? hr : AddModuleToCaller();
    // Cleanup if transition failed at some stage
    if ( FAILED(hr) )
    {
        if (m_spUdpProt != NULL)
            m_spUdpProt->UnregisterReceiver(10000);
        m_spUdpProt = NULL;
        RemoveModuleFromCaller();
    }
    //END EDITING
    m_Trace.Log(tlVerbose, FLEAVEA "hr=0x%08x", hr);
    return hr;
}
- 10. The stop takes place in the Op to SafeOp transition. The UDP port is closed again:
HRESULT CModule1::SetObjStateOS()
{
    m_Trace.Log(tlVerbose, FENTERA);
    HRESULT hr = S_OK;

    if (m_spUdpProt != NULL)
            m_spUdpProt->UnregisterReceiver(10000);
    m_spUdpProt = NULL;
    m_Trace.Log(tlVerbose, FLEAVEA "hr=0x%08x", hr);
    return hr;
}
Finally, the module has to be instantiated and configured
- 11. Build the project once. Right-click on the module select “Build”
- 12. Creating an instance of the module. Right-click on the project to open “Add new item…”. Select the appropriate module here.
- 13. Double-click on the module instance to enable parameterization. First select the task in the “Context” tab.

“TCP/UDP RT” module configuration
- 1. Create the “TCP/UDP RT” module under the RT Ethernet adapter by selecting “Add Object(s)…” in the context menu.
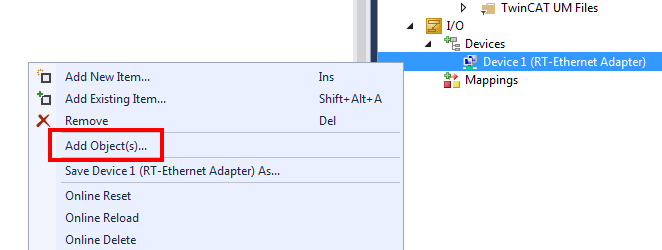
- 2. Then select the “TCP/UDP RT” module:
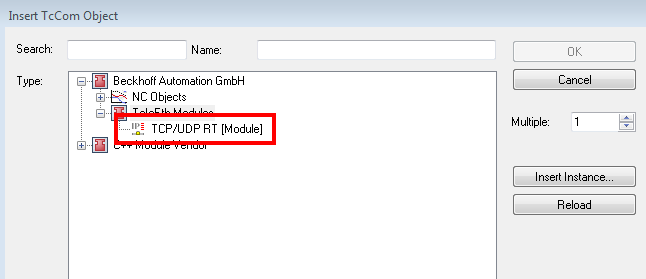
- The TCP/UDP RT object is created under the adapter.

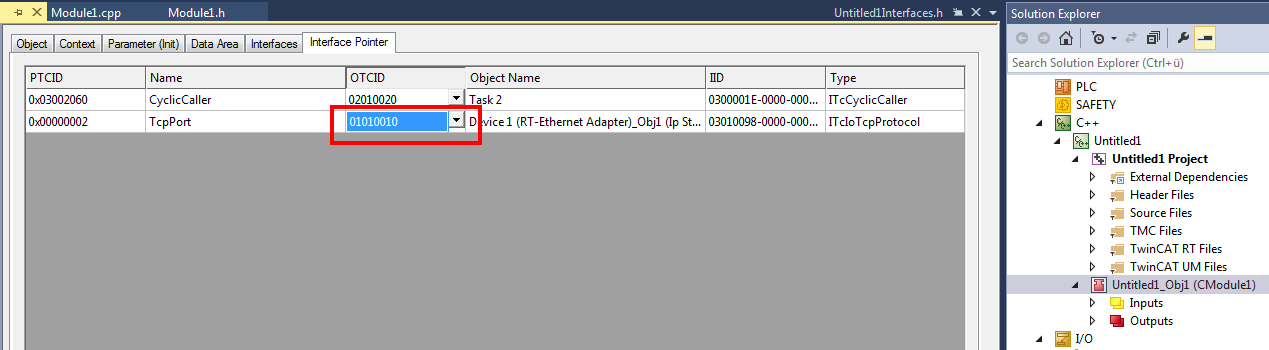
- 3. Parameterize the previously created instance of the module (here: Module1) under “Interface Pointer” “TcpProt” with the OID of the created “TCP/UDP RT” object:
- 4. For PLC projects this configuration is also done at the instance, under the tab “Symbol Initialization”:
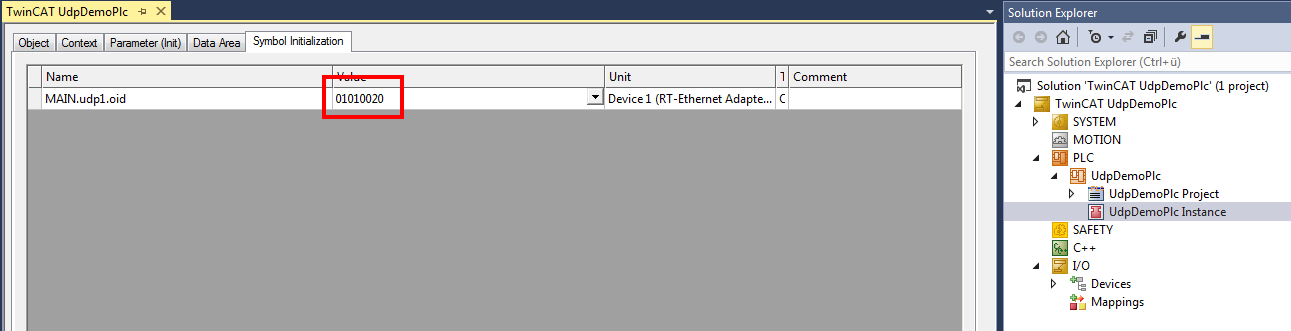
- The configuration is thus completed
 | Disconnection by the operating system in Promiscuous mode If Promiscuous mode is active at the RT Ethernet adapter in the “Adapter” tab, any TCP connection attempts are blocked by the operating system, since it does not recognize a port opened in the TCP/UDP RT object. |
Testing
Once the configuration has been enabled, a UDP packet can be sent to the C++ module via the UDP Sample Client. By activating the corresponding TraceLevel (here at least tlInfo; see C++ Tracing), an output can be generated in the Visual Studio log. The client displays the returned packets at the top.
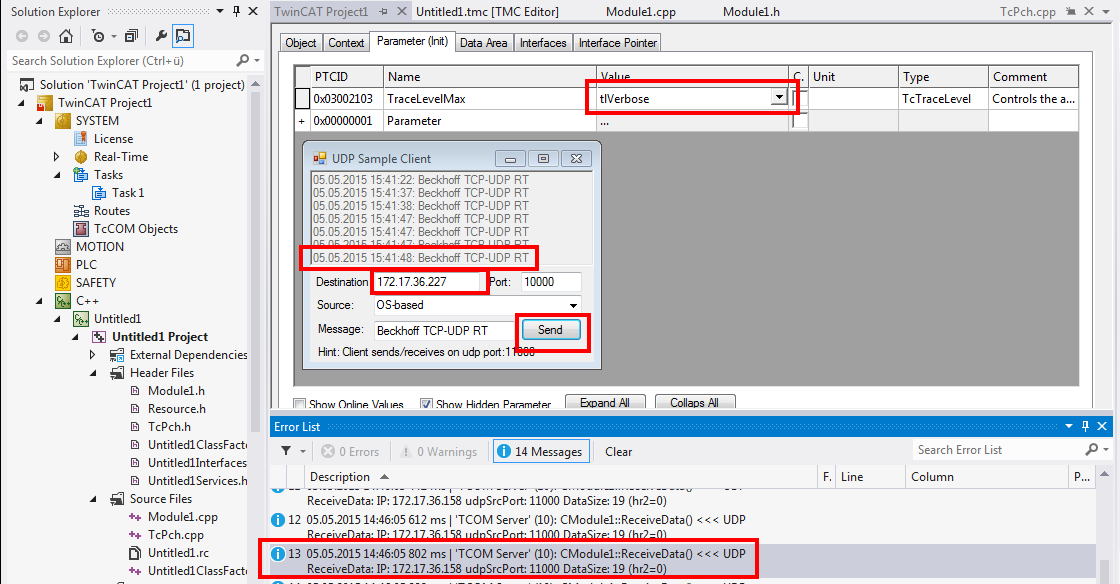
| No local communication The UDP sample client must run on a different computer than the PLC with the TCP/UDP RT object, because no local communication between the Windows operating system and the real-time is available. |