Creating an EtherNet/IP slave
Once you have added an EtherNet/IP adapter, a slave is automatically added to your configuration.
- 1. Set the IP address of the slave. (The IP address does not have to be the same as the IP address of the operating system.) Click on the box and switch to the Settings tab. Here you can set the IP address, the network mask and the gateway address.
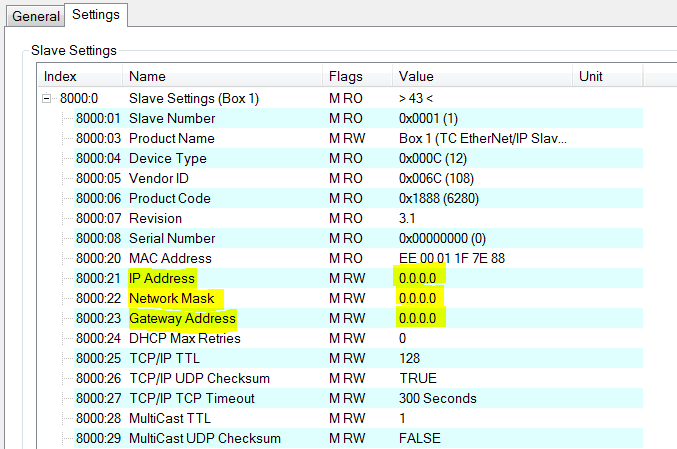
1 a) If the IP address is to be issued by a DHCP server in your network, enter the value0.0.0.0in the IP address field.
1 b) If the IP address of the operating system is to be used, enter the value255.255.255.255in the IP address field. The subnet mask and the gateway address can be used unchanged. When TwinCAT starts, the EtherNet/IP driver then uses the IP address of the system.
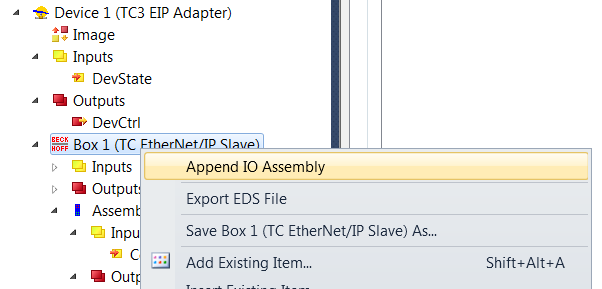
Please note the firewall settings. - 2. Click on the box and select Append IO Assembly.
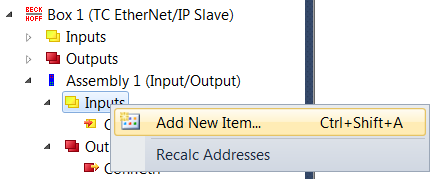
- 3. To create data under Inputs, right-click on Add New Item…
- 4. Now select the data format and the number of data to be transferred. The number of bytes will be important later. It can be read in the object tree. e.g.: Enter 4 words, i.e. 8 bytes of process data:
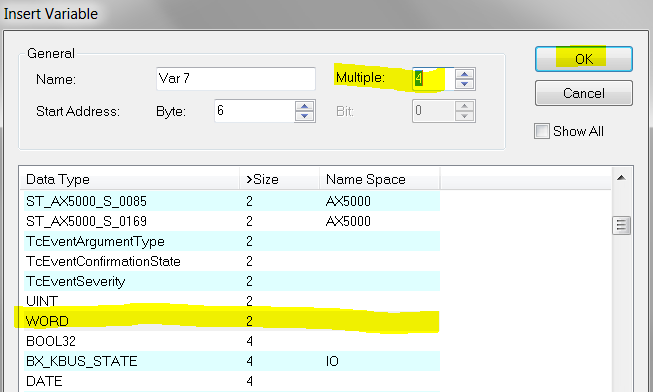
In addition there are 4 bytes for the ConnState. The ConnState currently has no function. It can be used for additional information in the future. - 5. Therefore, 12 bytes of process data must be created. Navigate to the box and select the Settings tab.
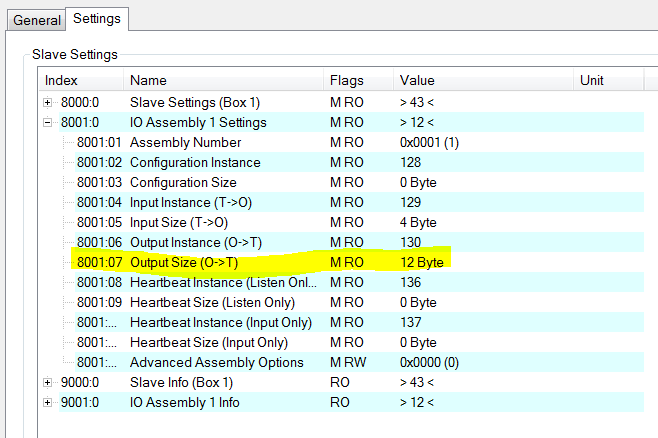
- The length can be found in index field
0x8001:07. The length is displayed from the master perspective. TwinCAT inputs are outputs in the master, hence the reference to output size here. - 6. Now do the same with the outputs of the EtherNet/IP adapter.
- Data creation is now complete. Now link the data with the PLC.
Further Information