EtherCAT Master
You can easily publish data points from an EtherCAT Master image. An intermediate PLC project is not required but may be added in case you need data conversion or transformation. The following documentation describes all necessary steps to set this use case up. These steps consist of:
- Activate the ADS Symbol Server on the EtherCAT Master
- Set up an OPC UA RT Device
- Configure a publisher with a data set
- Add data points from the EtherCAT Master to the publisher data set
- [optional] Set up a TwinCAT subscriber
- [optional] Set up a generic MQTT client subscriber
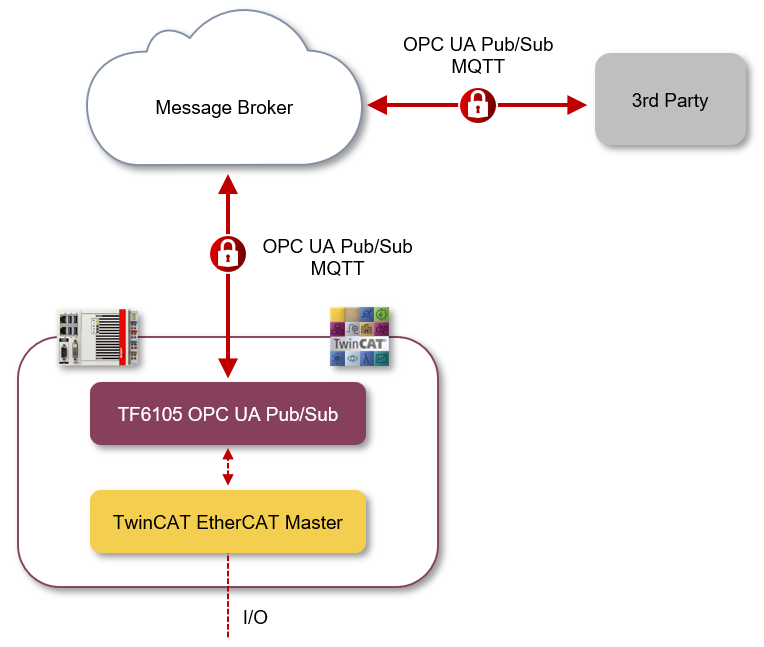
This sample demonstrates this setup based on a use case in which I/O data points from the EtherCAT Master should be published to a message broker in the Cloud. A 3rd-party application should then connect to the same broker and subscribe to the data. This sample may be adapted to different variations of this use case as required by the application.
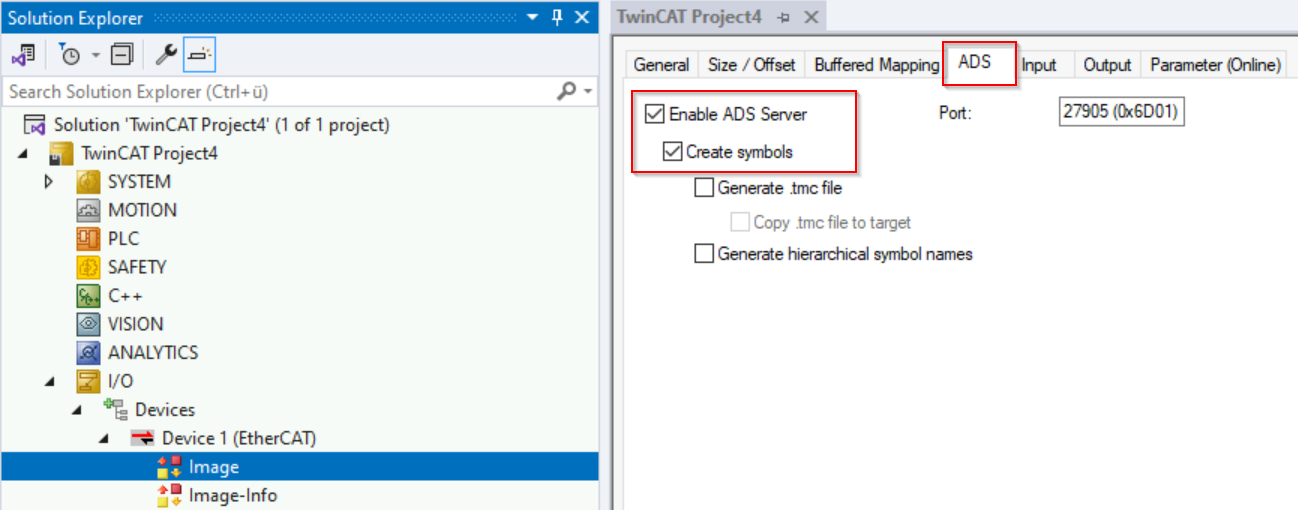
Activate the ADS Symbol Server on the EtherCAT Master
The TwinCAT EtherCAT Master offers the functionalities of an ADS Symbol Server. All terminals and variables on the EtherCAT Master are then made available via ADS. ADS Clients can connect to the ADS Symbol Server in order to browse its namespace and read/write data. You can activate this feature on the ADS settings page of the EtherCAT Master Image.
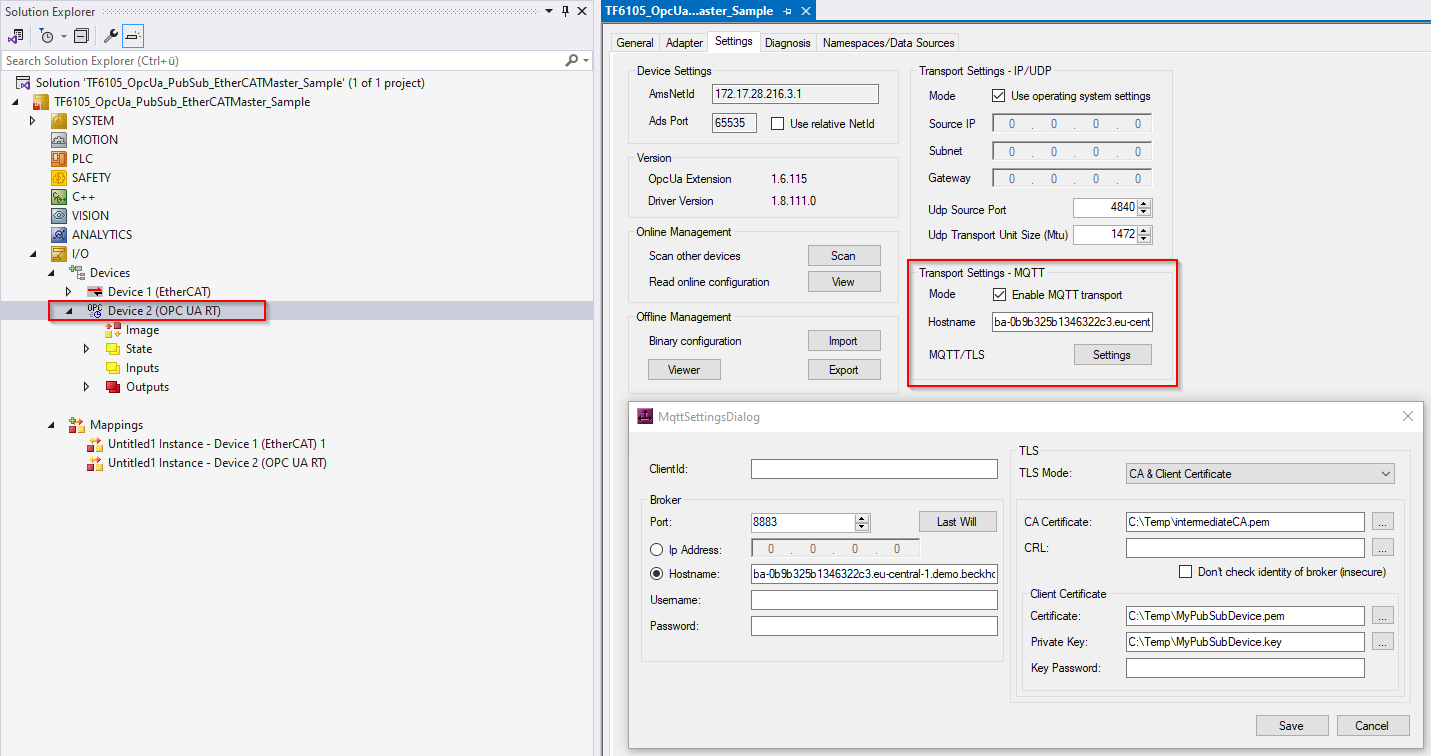
Set up an OPC UA RT Device
Set up an OPC UA RT Device as described in our Quick Start tutorials. In this sample, the OPC UA RT Device will be configured for a secure MQTT connection to a remote message broker that runs in the Cloud but you can also run this sample locally. Please enter the MQTT connection details according to your environment.
Configure a publisher with a data set
Next, you want to create a publisher that includes a data set containing variables that are linked to the data points of the EtherCAT Master Image. Right-click the OPC UA RT Device and select Add New Item and then OPC UA Publisher. Then right-click the added publisher and select Add New Item and then Published DataSet. Note that the data set does not contain any fields yet, as shown in the following screenshot.
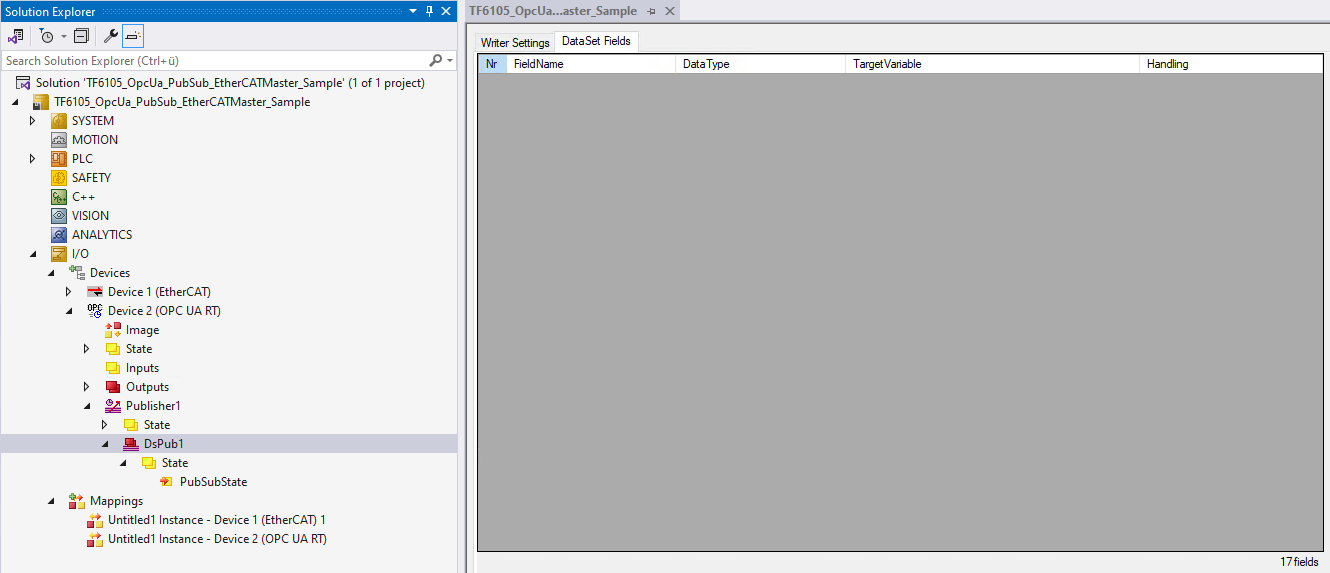
You can now add data points from the EtherCAT Master by using the TwinCAT Target Browser.
Add data points from the EtherCAT Master to the publisher data set
Open the TwinCAT Target Browser and navigate to the ADS Symbol Server of the EtherCAT Master. If this ADS Server is not shown yet, you can add its port via the ADS Port Selection dialog, as shown in the following screenshot.

The ADS port of the EtherCAT Master Image can be found on the settings page in step 1.
You can now navigate through the namespace of the EtherCAT Master Image and select the data points that you want to publish. When adding data points you have four options:
- Select every data point individually and use Drag&Drop to add it to the data set.
- Select the whole process image and use Drag&Drop to add it to the data set. In this case, every terminal on the image will be added as a structured data type to the data set.
- Select the whole process image and use SHIFT + Drag&Drop to add it to the data set. In this case, only the variables on each terminal will be added to the data set (as simple data types). This option may be required if the OPC UA Pub/Sub subscriber does not support structured types.
- Select the terminals and use Drag&Drop to add them to the data set.
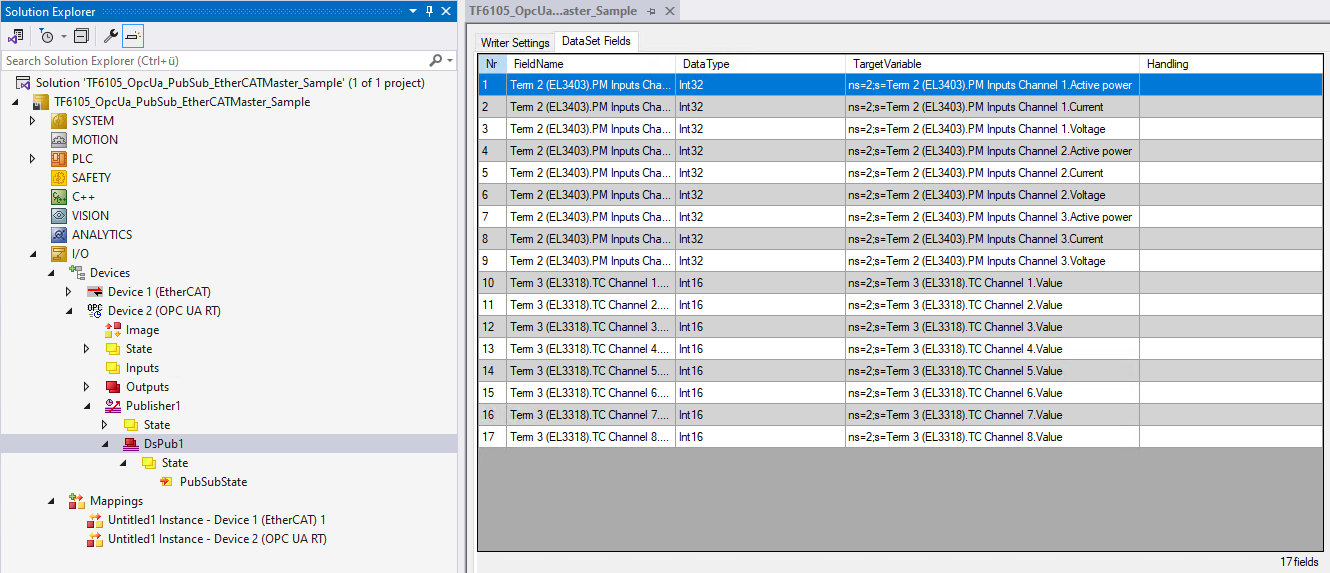
The following screenshot shows the result of a Drag&Drop operation as described in option 1 for two terminals (EL3403 and EL3318).
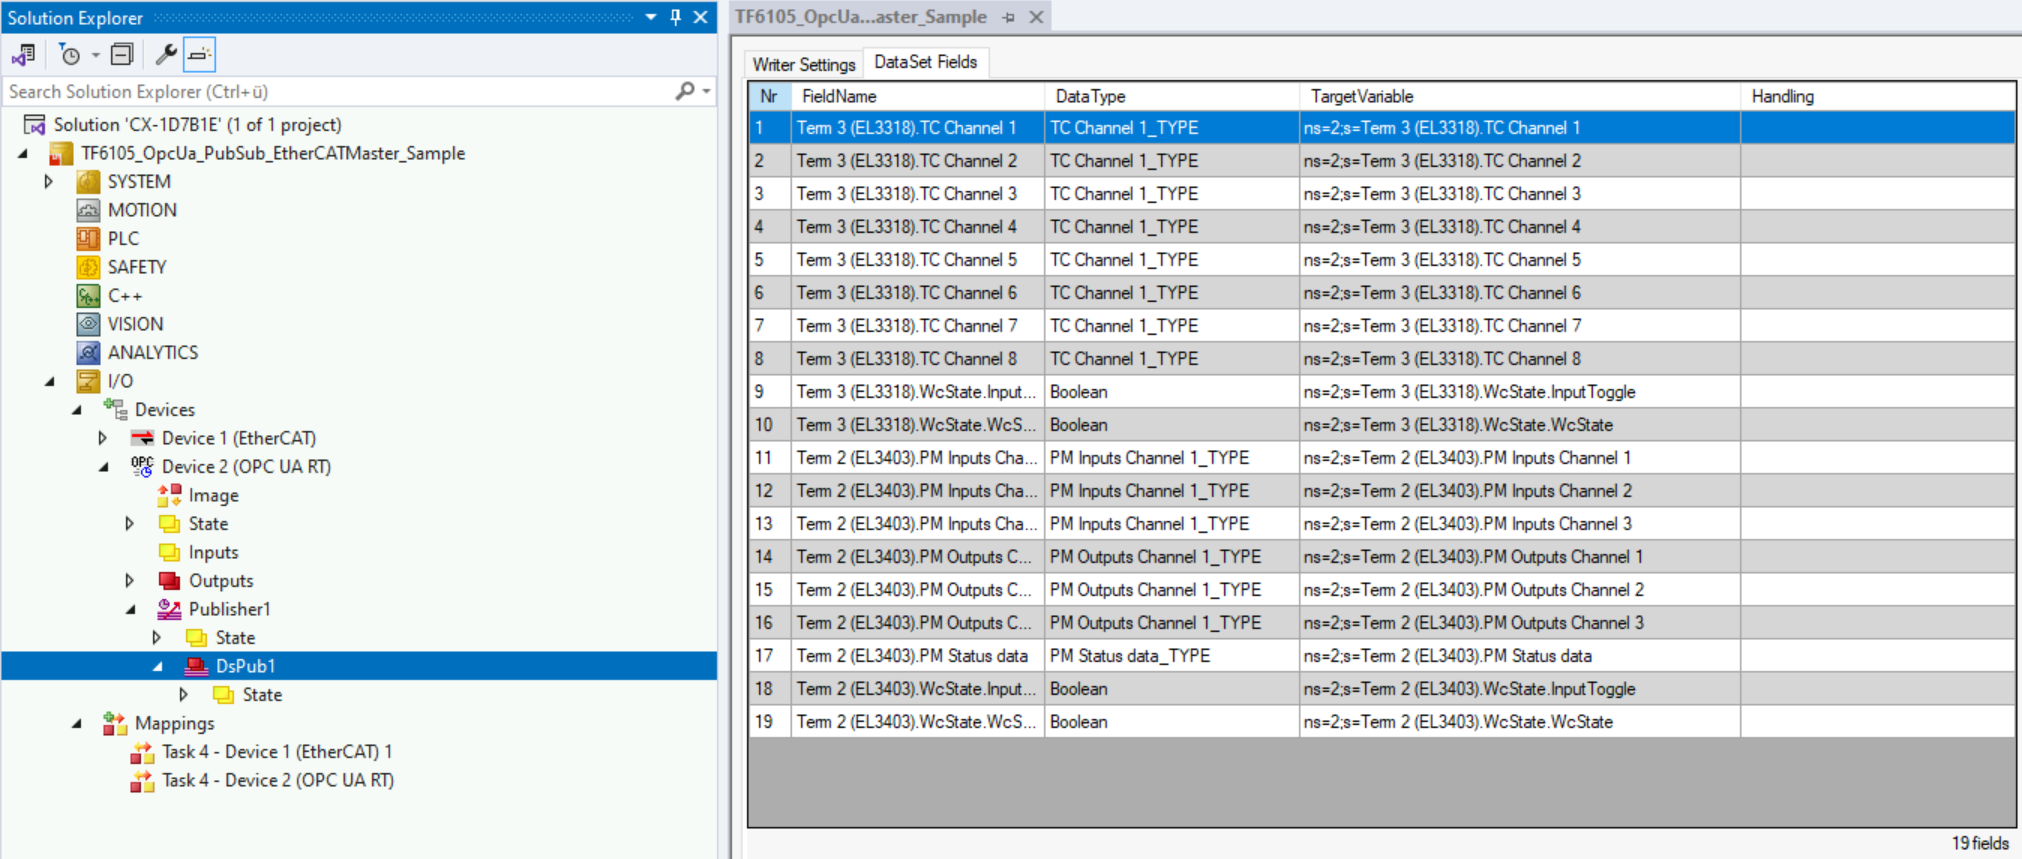
The following screenshot shows the result of a Drag&Drop operation as described in option 4 for two terminals (EL3403 and EL3318).
[optional] Set up a TwinCAT subscriber
You can easily set up a subscriber for the published data points by exporting the configuration into a OPC UA Binary exchange file. This file can then be imported on the other side to automatically create a subscriber that fits the publisher configuration.
To export the configuration, double-click the OPC UA RT Device and select Settings. Click on the button Export and save the configuration in a file.

Import this configuration file on the device that should host the subscriber. If the device is also a system that runs TwinCAT, you can import the file to the corresponding TwinCAT project by using the Import button on the OPC UA RT Device.
You can also create a subscriber in the same project that also runs the publisher. The controller will therefore act as a publisher AND subscriber.
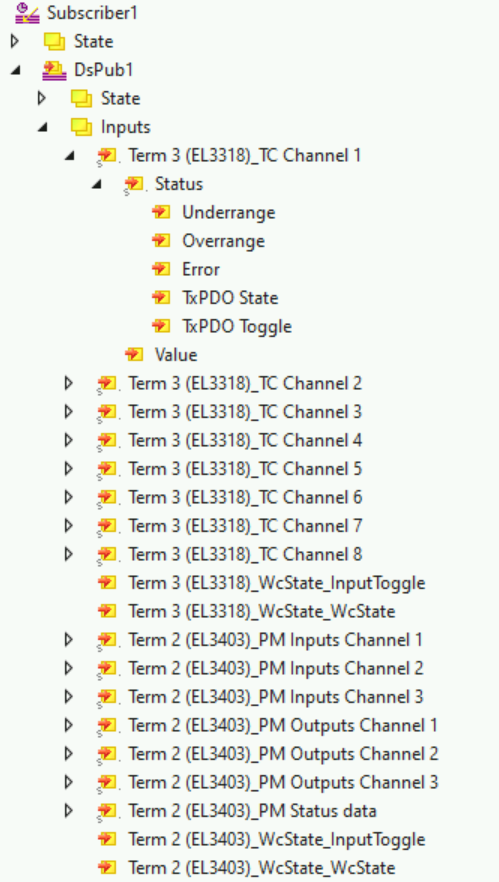
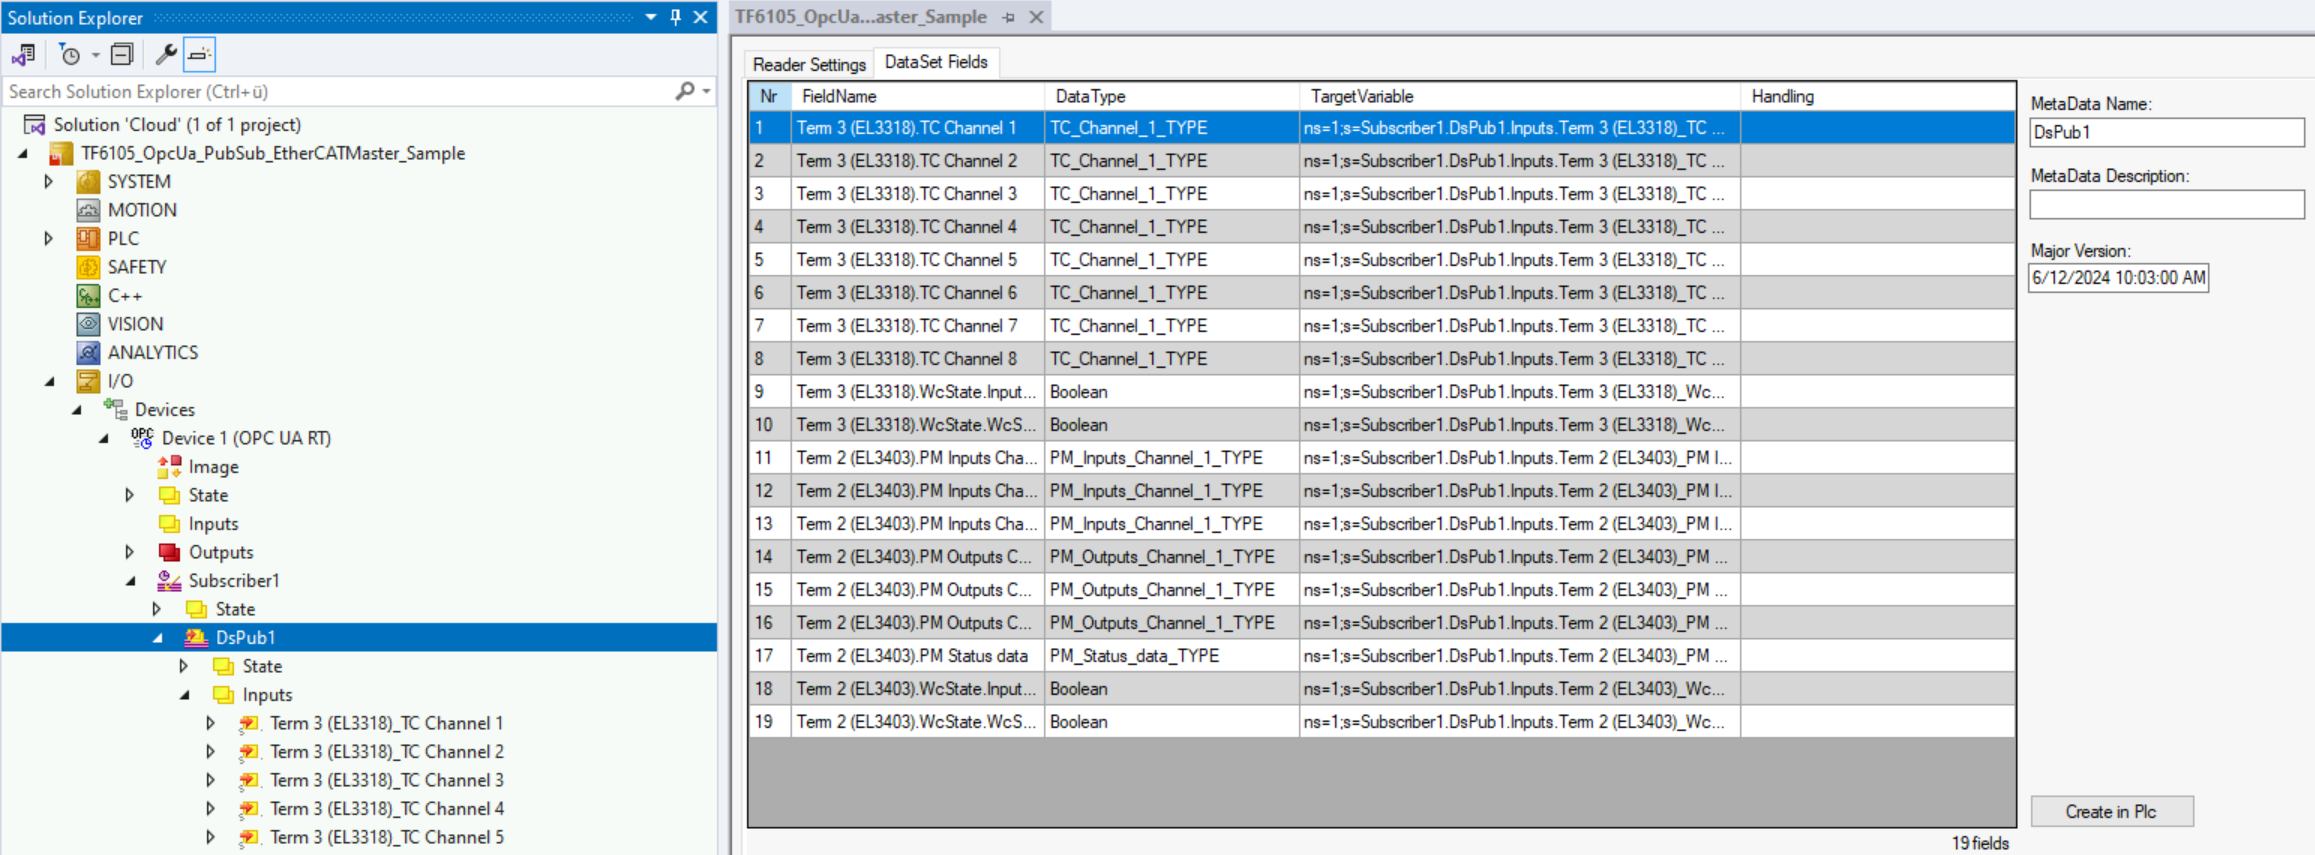
After importing the configuration file, the subscriber will be automatically configured with a data set that includes the fields from the publisher.
You can then create a mapping with variables e.g. from a PLC application or generate PLC code automatically via the Create PLC code button on the data set configuration.
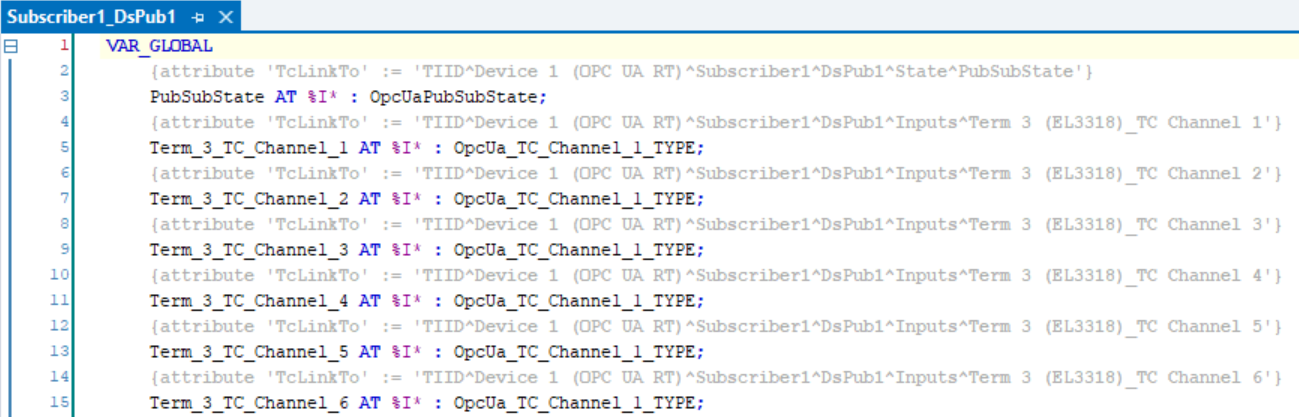
This operation will create a GVL that contains variables that are linked to the process image variables via the attribute “TcLinkTo”, e.g.:
[optional] Set up a generic MQTT client subscriber
You can subscribe any MQTT client to the data that is published to the MQTT message broker. In this example we have used the MQTT/JSON data format which allows an ASCII-based, easy interpretation of the data. The following section shows how the resulting JSON format may look like.
{
  "DataSetWriterId": 1,
  "PublisherId": "1",
  "SequenceNumber": 5228,
  "MinorVersion": 771501780,
  "Timestamp": "2024-06-12T10:14:04.734Z",
  "Status": 0,
  "Payload": {
    "Term 3 (EL3318).TC Channel 1": {
      "Status": {
        "Underrange": false,
        "Overrange": false,
        "Error": false,
        "TxPDO State": false,
        "TxPDO Toggle": false
      },
      "Value": 233
    },
    "Term 3 (EL3318).TC Channel 2": {
      "Status": {
        "Underrange": true,
        "Overrange": false,
        "Error": false,
        "TxPDO State": false,
        "TxPDO Toggle": false
      },
      "Value": 13720
    },
...
...