Quick Start (TwinCAT 2)
The following chapter provides a quick start to the TwinCAT OPC UA Server if it is operated under TwinCAT 2. In these instructions, you initialize the TwinCAT OPC UA Server in the delivery state, then create a TwinCAT PLC project and finally enable a PLC variable by setting a comment via OPC UA. The variable is then available in the address space of the server.
The action steps are described in more detail below in the order in which they are performed:
- Initialization of the server
- Creating a TwinCAT PLC project
- Activating the download of the symbol files
- Enabling a variable
- Connecting an OPC UA client
Initialization of the server
After installation, the server needs to be initialized once according to the so-called TOFU principle (Trust-On-First-Use). Here you configure a user account, which is then required to establish a connection with the server.
As this is a central and security-relevant topic, initialization is explained in detail in a separate documentation chapter. The further steps in this section assume that this process has been carried out once and that you have initialized the server with a user account.
 | Tools for initializing the server You can use the TwinCAT OPC UA Configurator to initialize the server. This may require the installation of an additional software package. |
Creating a TwinCAT PLC project and activating the download of the symbol files
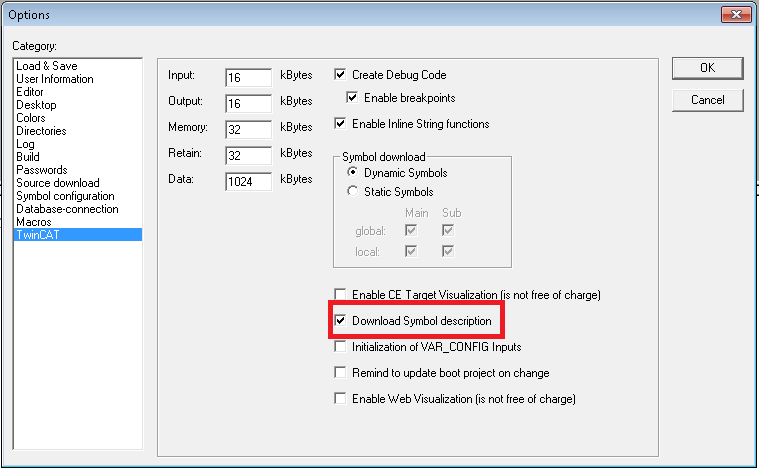
Create a new project in TwinCAT PLC Control or open your existing PLC project. Open the project properties and activate the “Download Symbol description” option so that the symbol file (*.tpy) of the PLC program is transferred to the boot directory of the target device when it is activated.
Enabling a variable
- 1. Add a new variable of data type INT to the MAIN program.
- 2. Set the comment on this variable to enable the variables via OPC UA. A text can be defined via the "Description", which is also displayed as a Description attribute at the respective node in the OPC UA address space.
nMyCounter : INT; (*~ (OPC:1:some description) *)- 3. You can mark the variable as read-only with an additional comment. Write operations via OPC UA are then rejected by the server with the status code BadNotWriteable.
nMyCounter : INT; (*~ (OPC:1:some description)
(OPC_PROP[0005]:1:read-only flag) *)- 4. You can use the following comment to define an alias for the variable, i.e. specify a different name for the variable in the OPC UA namespace. The value you specify for x then corresponds to the new variable name.
nMyCounter : INT; (*~ (OPC:1:some description)
                      (OPC_PROP[0005]:1:read-only flag)
(OPC_UA_PROP[5100]:x:alias name) *)- 5. In the implementation part of the MAIN program, increment this variable by 1 each cycle.
nMyCounter := nMyCounter + 1;- 6. Activate the TwinCAT project on your system.
Connecting an OPC UA client
An OPC UA client uses the so-called ServerURL to connect to a server. The ServerURL contains the IP address or the host name of the device on which the server was installed. In this tutorial, we assume that the client and server are running on the same system. The client thus connects to the following ServerURL:
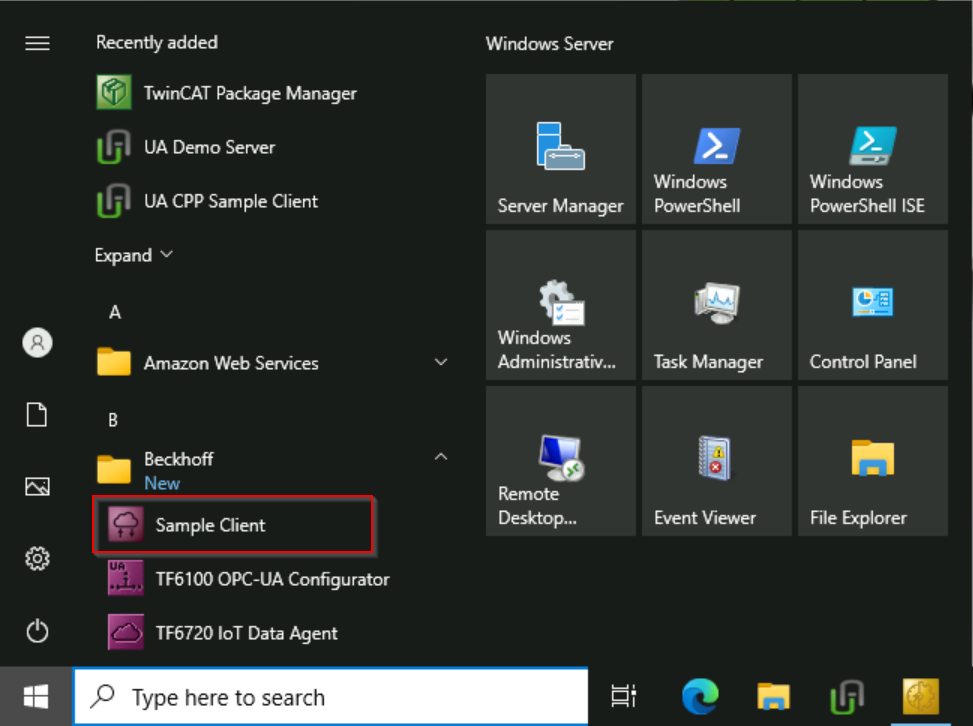
opc.tcp://localhost:4840As a client, we use the TwinCAT OPC UA Sample Client, which is part of the TF6100 product package.
After installation, it can be called up via the Windows start menu.
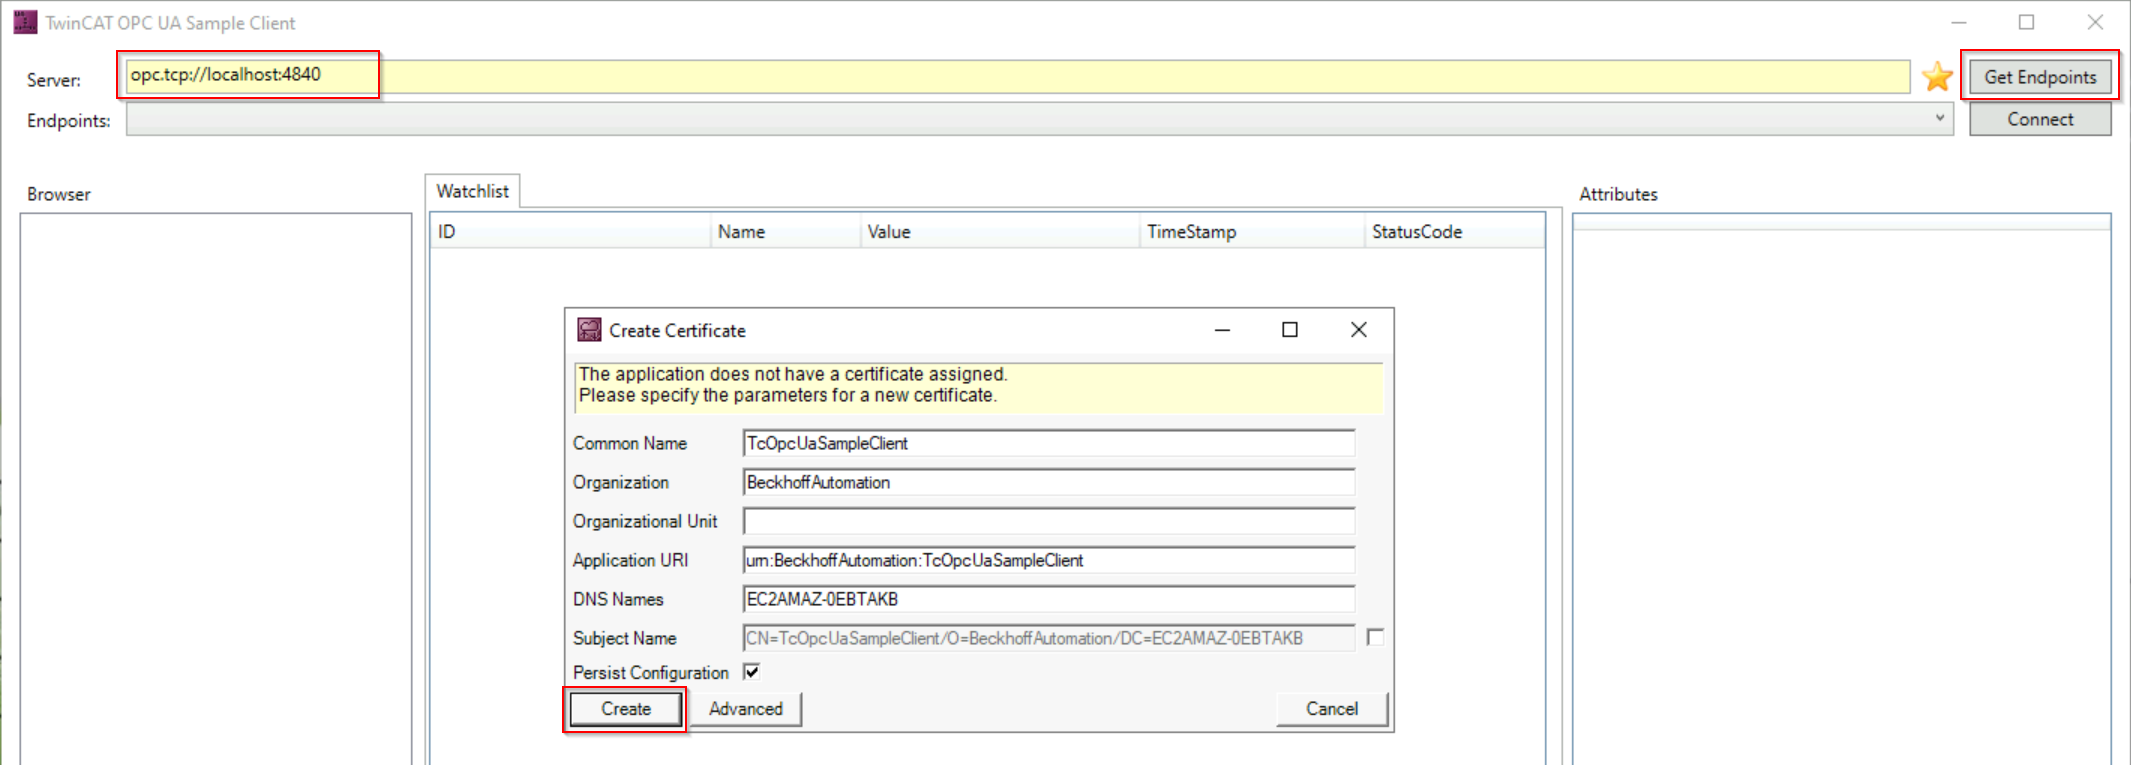
The ServerURL to the local host is already entered by default in the TwinCAT OPC UA Sample Client.
- 1. Click on the Get Endpoints button.
- If you are using the Sample Client for the first time, a dialog box appears to accept settings for generating application certificates.
- 2. Confirm the dialog box with the Create button.
- All connection endpoints are now read from the server and displayed.
- 3. Select the endpoint "SignAndEncrypt:Basic256Sha256:Binary" and click on the Connect button.
- 4. Enter the data for the user account that you configured in the first step of this documentation article for initializing the server.
- 5. Click OK.

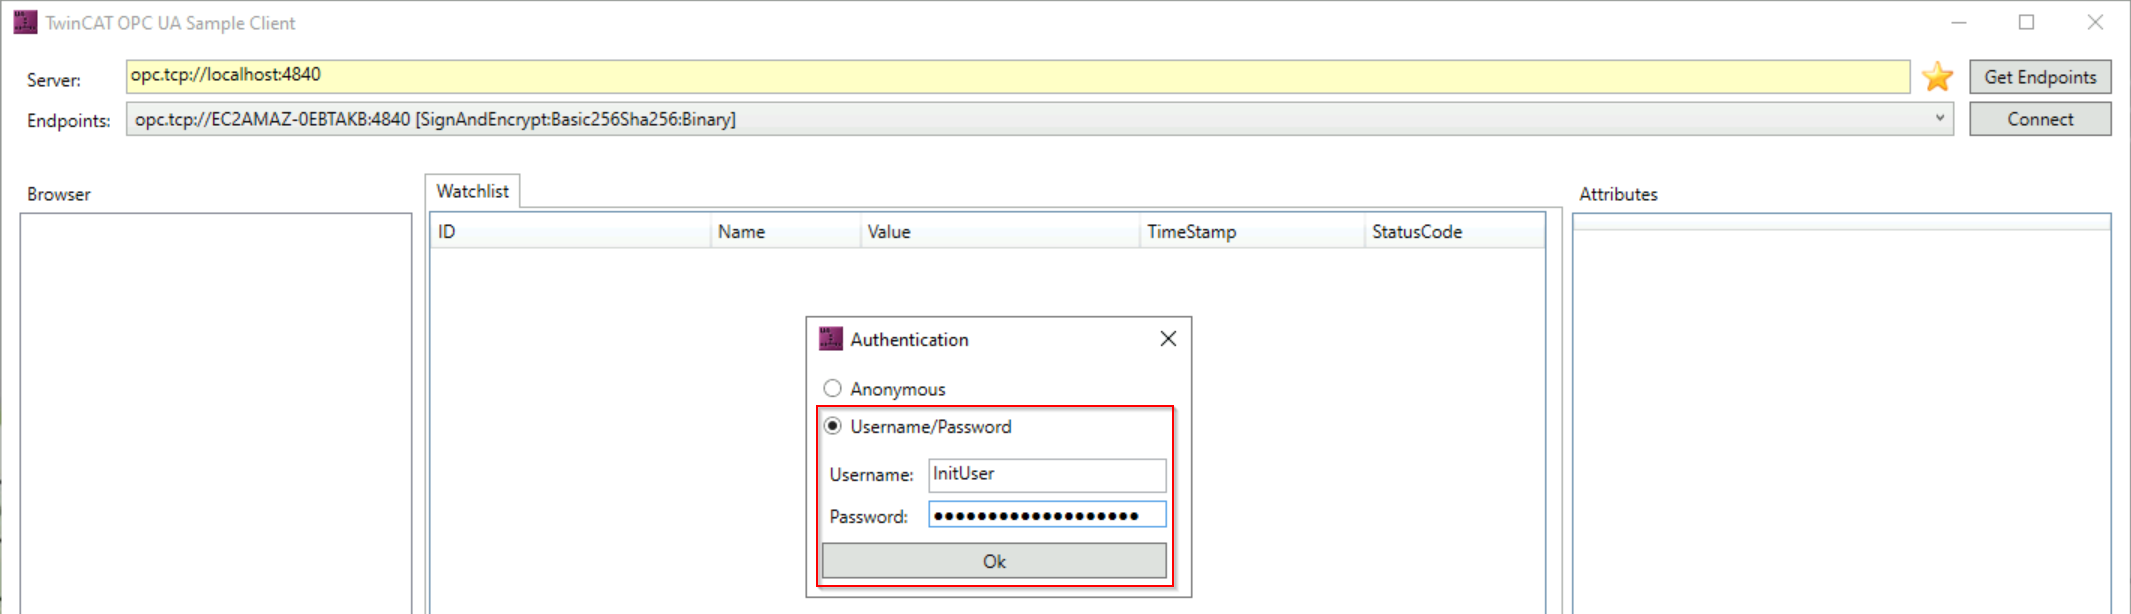
- You are now connected to the server.
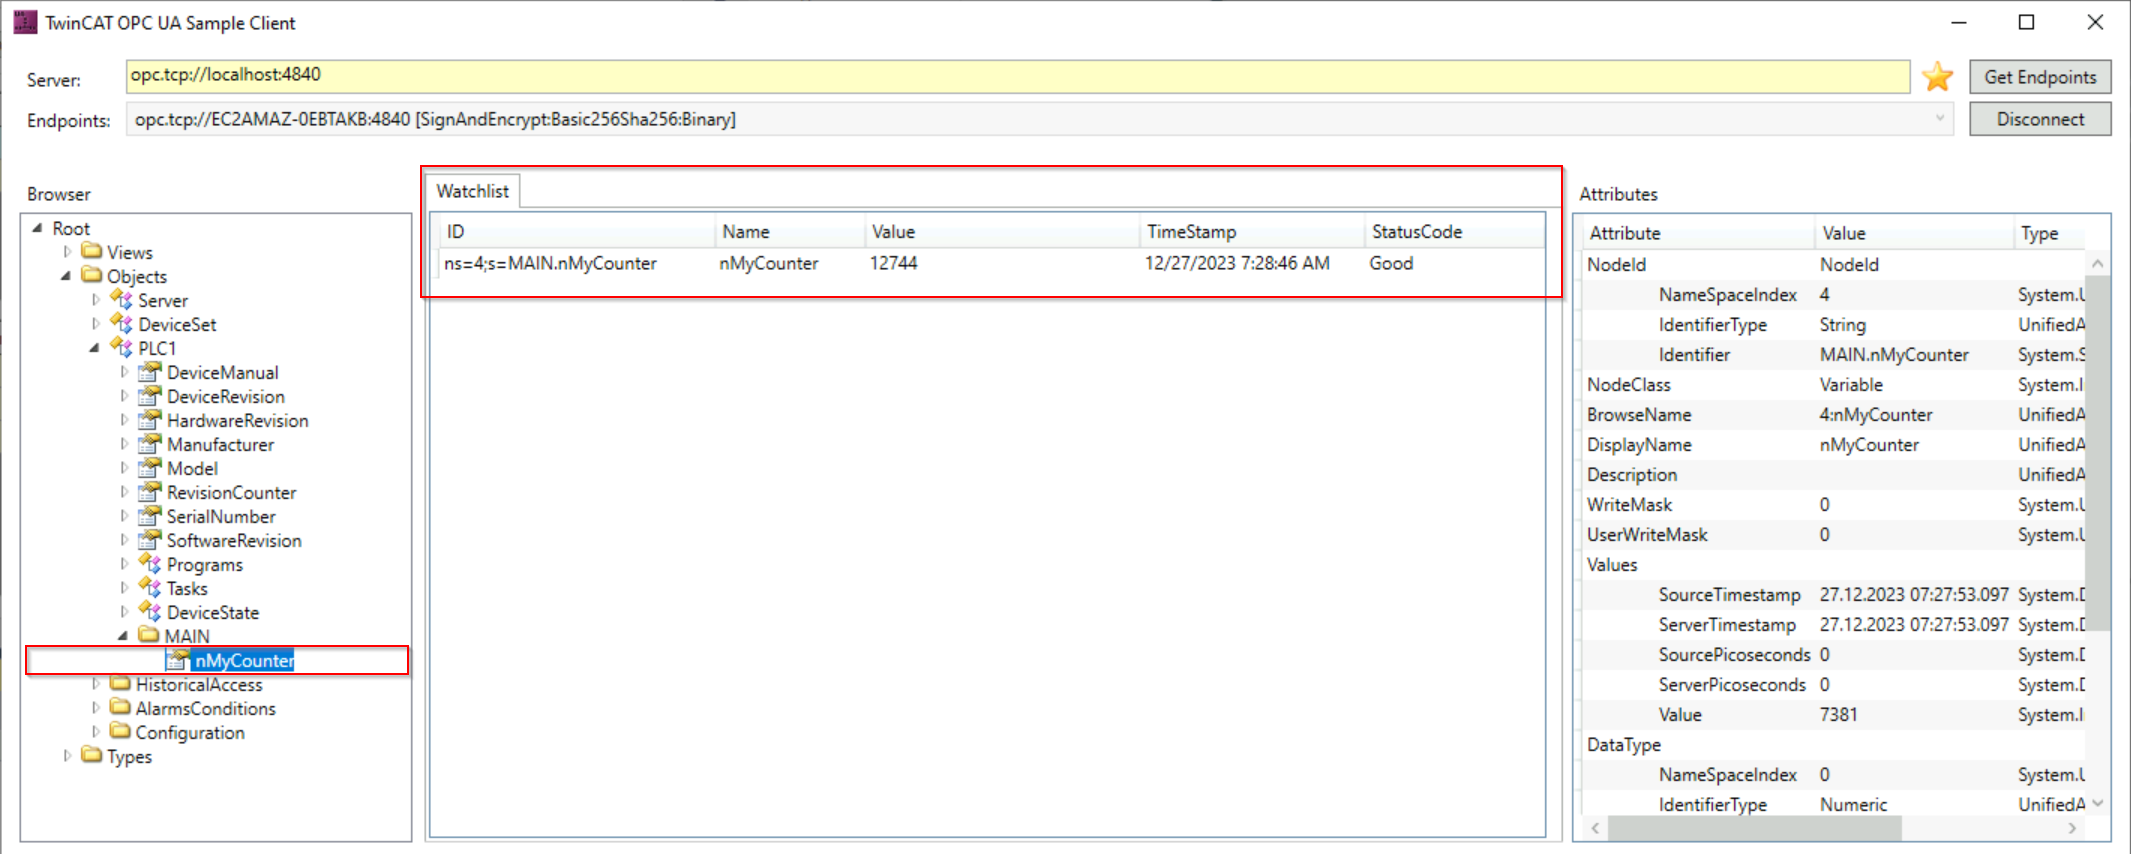
The address space of the server is displayed in a tree structure on the left-hand side of the application and you can navigate through the symbolism of the PLC program. In this example, we have enabled a PLC variable for OPC UA. These can be found at the following path:
Root \ Objects \ PLC1 \ MAIN \ nMyCounterYou can add the variable to the "Watchlist" by double-clicking on it. This means that a subscription is created for the variable and the variable value is transferred from the server to the client in the event of a value change.