Quick start
The following chapter provides a quick introduction to the TwinCAT OPC UA Configurator. In these instructions, the Standalone Configurator is used to establish a connection with the locally installed TwinCAT OPC UA Server and to configure it. This requires both products to be installed - on the same system in this example.
The following steps are described in more detail below:
- Starting the Standalone Configurator
- Configuring a server connection
- Connecting to the server and reading the configuration
- Making changes to the configuration
- Activating the new configuration on the server
Starting the Standalone Configurator
The TwinCAT OPC UA Configurator is installed by default in a subdirectory of the TwinCAT installation directory. Further information can be found in the documentation chapter on the application directories.
When the product is installed, a shortcut is created in the Windows Start menu, which enables easy access to the application.
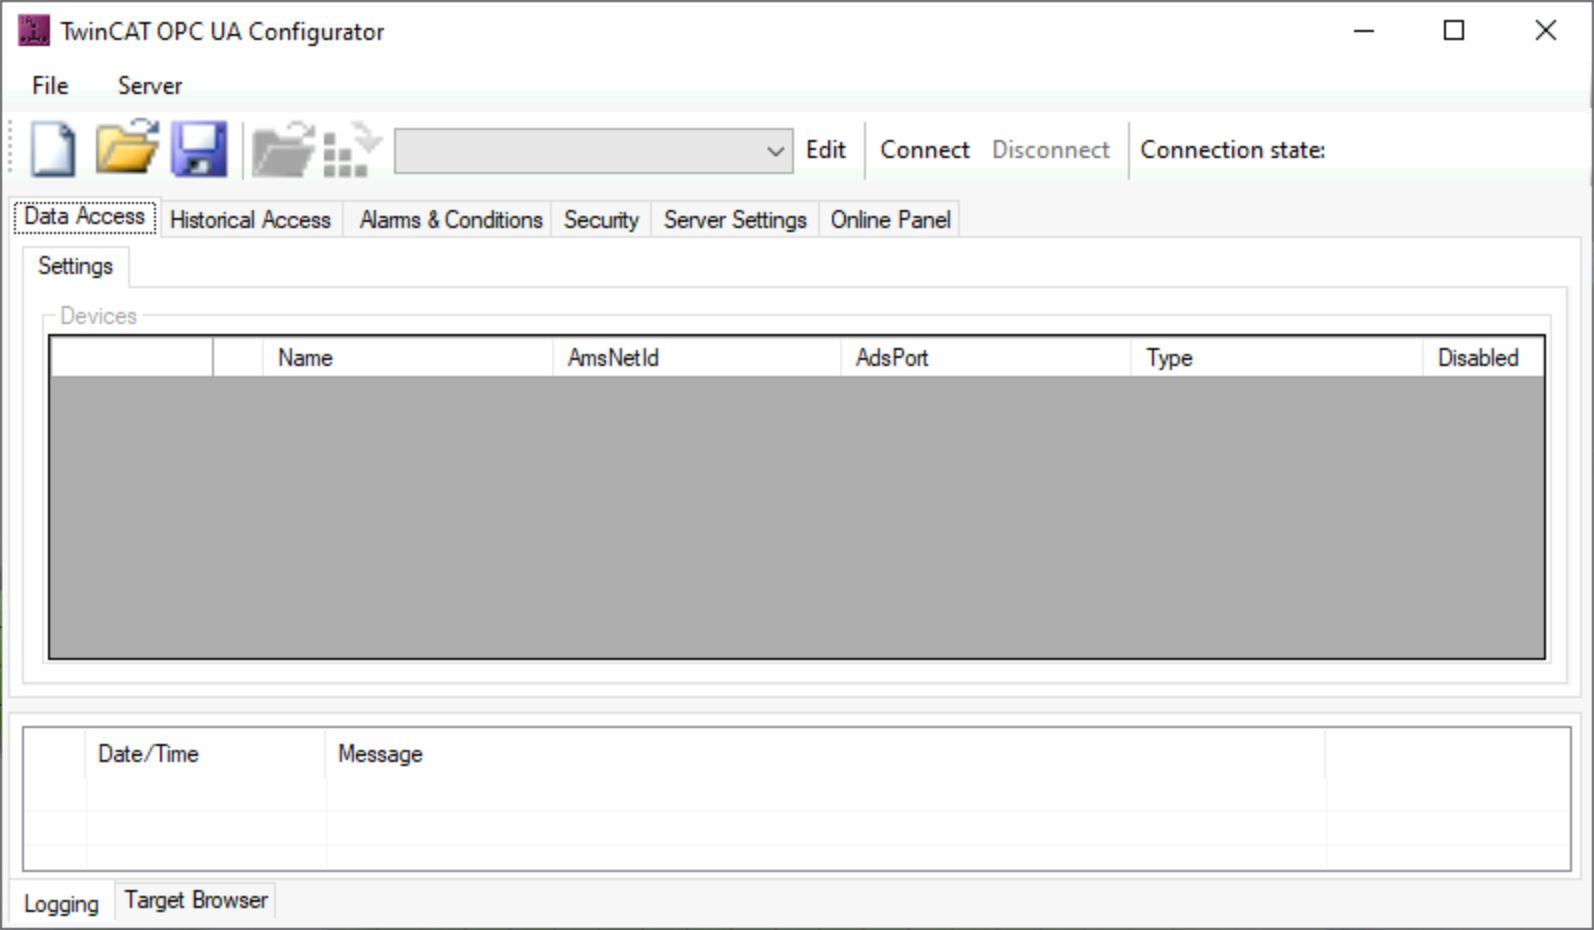
After starting the application, you must first configure a new server connection. In the next step, you will learn how to do this.
Configuring a server connection
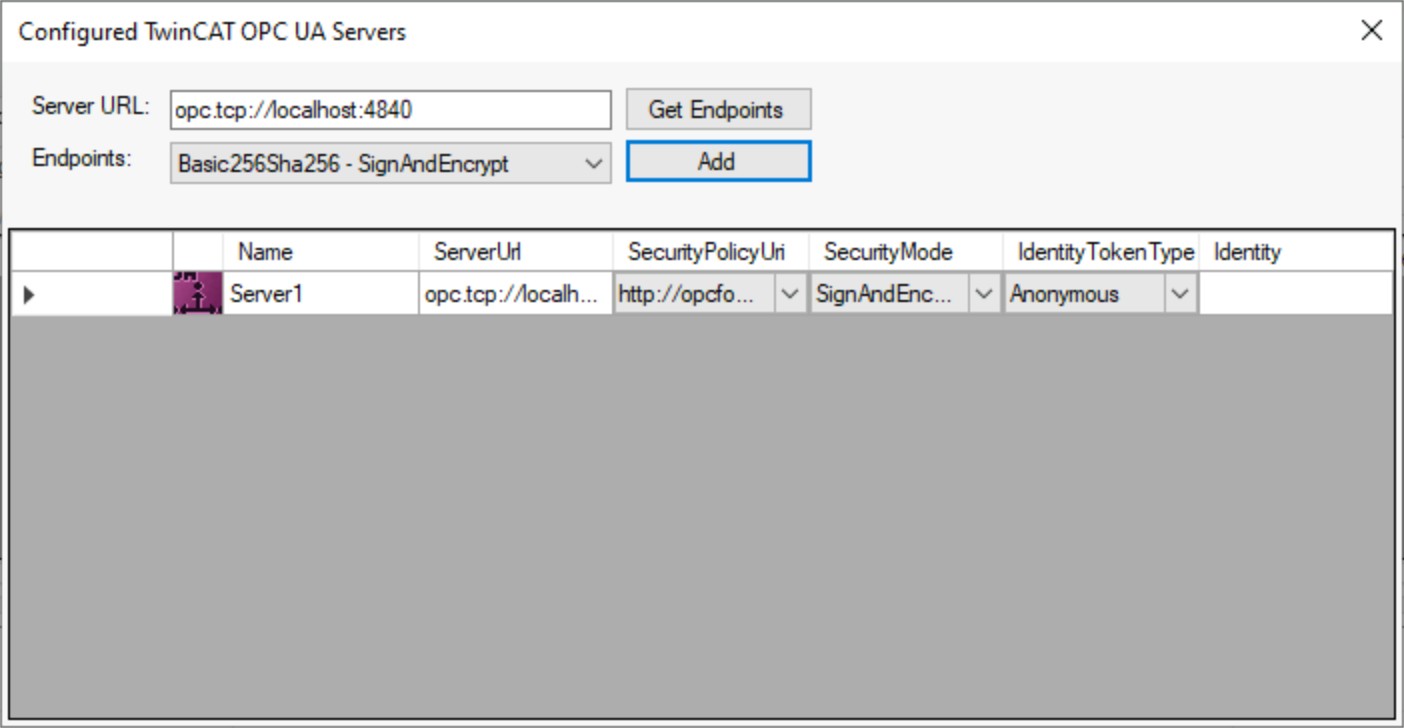
- 1. Open the server selection dialog by clicking on the Edit button in the toolbar. Enter the server URL of the TwinCAT OPC UA Server to be configured in the dialog that opens. In this example, the server is installed on the same system and we can use the default address (opc.tcp://localhost:4840). Click on the Get Endpoints button to obtain a list of all server endpoints. Select the endpoint "Basic256Sha256 - SignAndEncrypt".
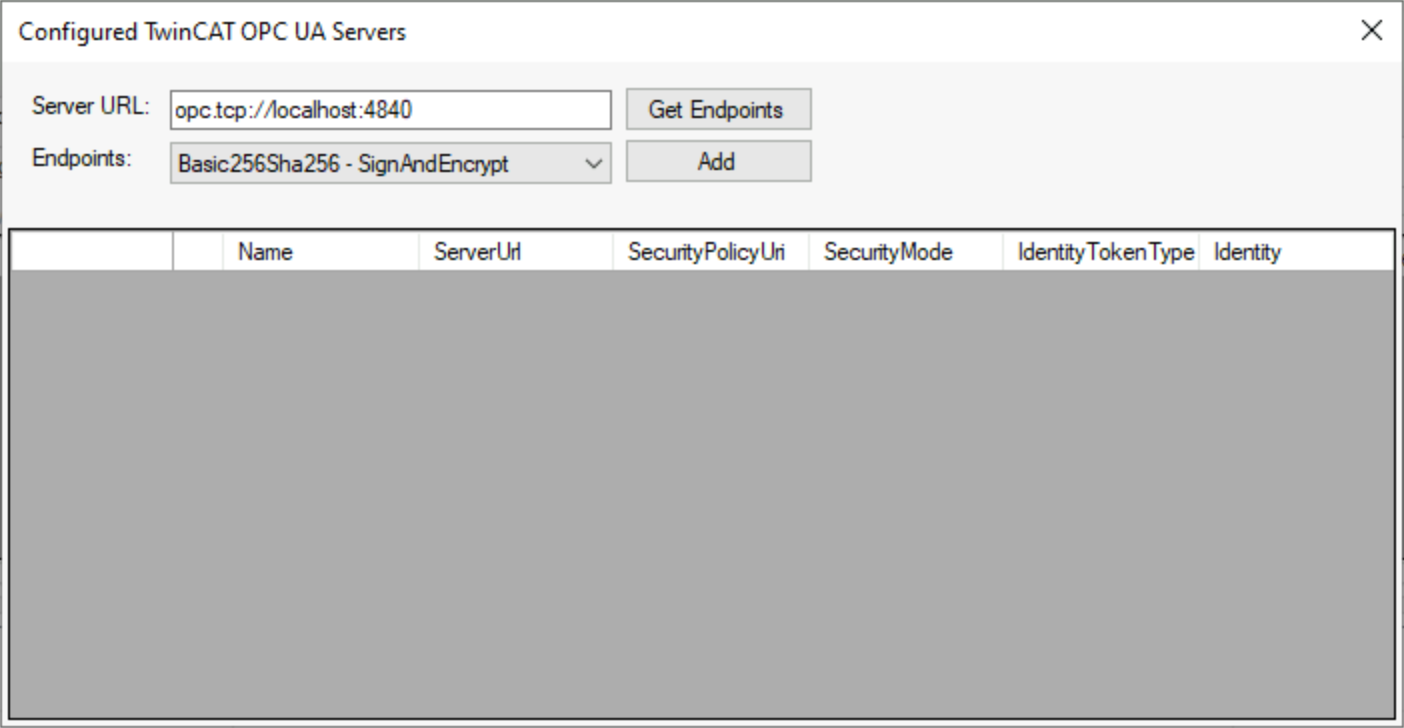
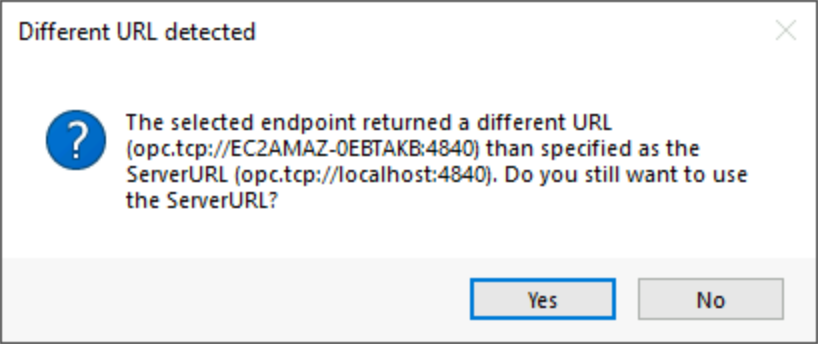
- 2. Then click Add to add the server. If you receive a warning regarding the differences in the server URL, confirm this message with Yes.
- The TwinCAT OPC UA Server has now been added to the selection dialog.
Depending on the operating environment, further settings for the connection parameters may now be necessary, e.g. user name/password for access to the server. In this example, however, it is assumed that both the TwinCAT OPC UA Server and the TwinCAT OPC UA Configurator were used on this system for the first time. So we leave the default settings and close the dialog.
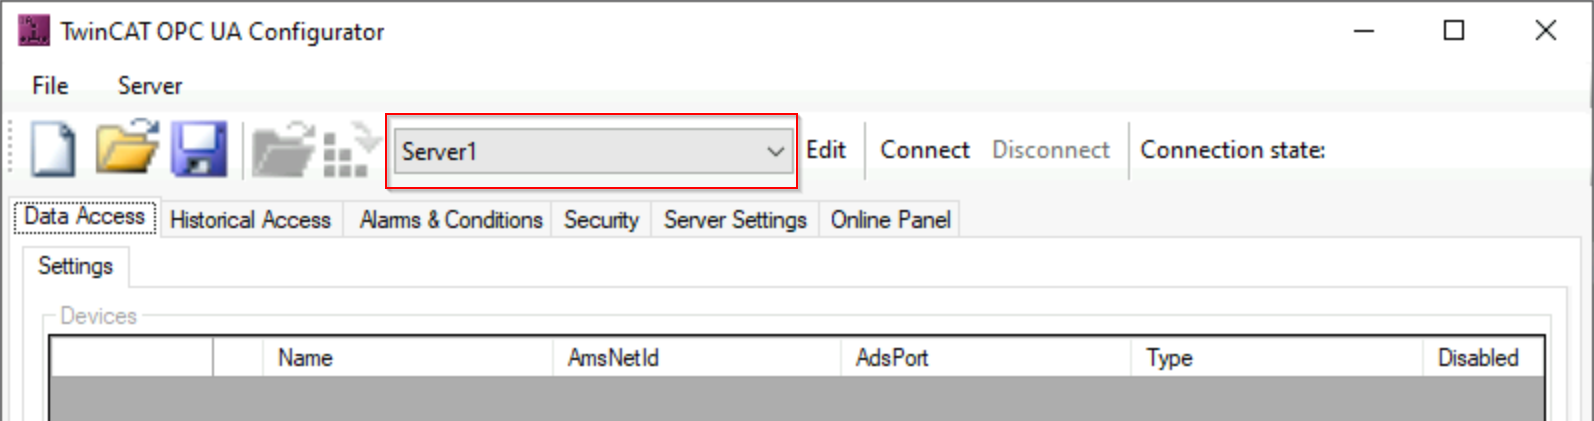
In the server selection list in the toolbar, you will now find a new entry with the connection profile you have just configured.
Connecting to the server and reading the configuration
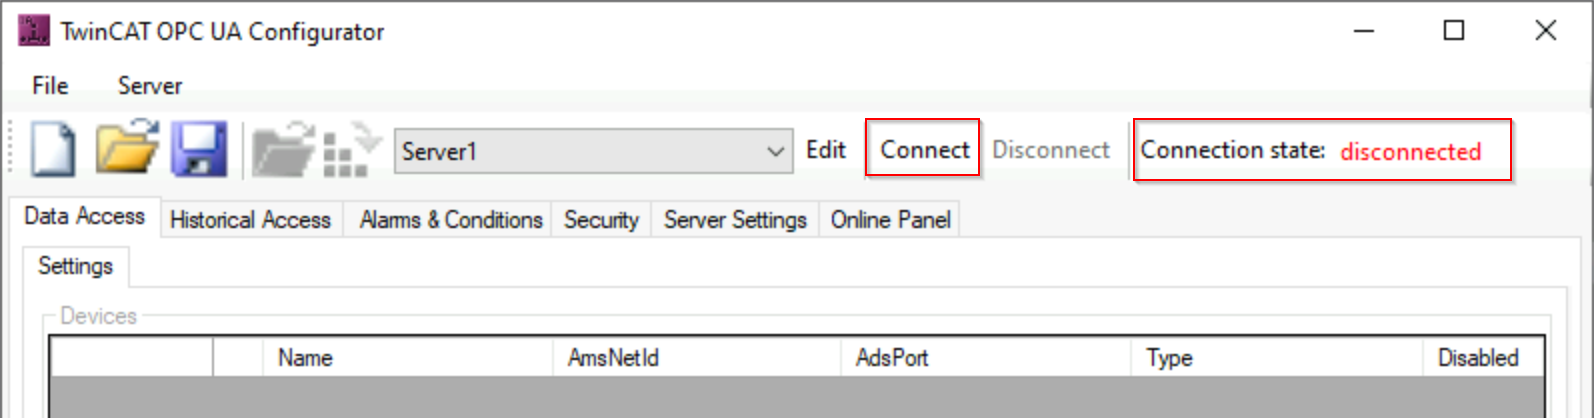
- To establish a connection with the server, make sure the server you just configured is selected.
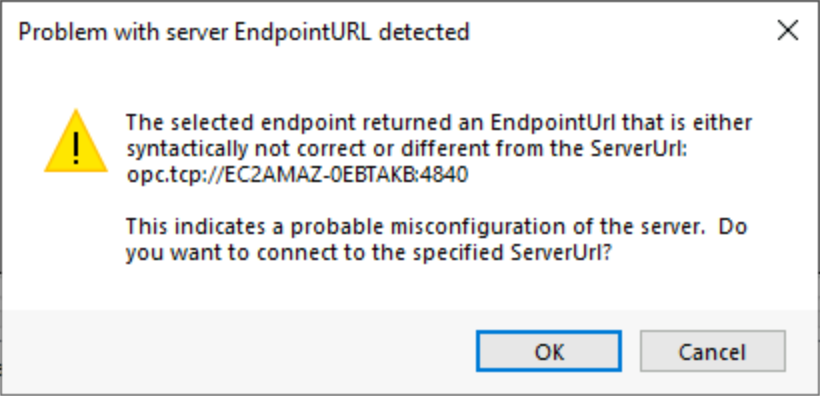
- 1. Click on Connect in the toolbar. If you receive a warning regarding a different server URL, please confirm this dialog with Ok.
- 2. Since we assume a new installation in this tutorial, i.e. both the TwinCAT OPC UA Server and the TwinCAT OPC UA Configurator are used for the first time, the Configurator now recognizes that the server is an uninitialized server in the delivery state. For more information on the initialization concept (also known as TOFU Trust On First Use), we recommend the corresponding documentation chapter in the TwinCAT OPC UA Server documentation.
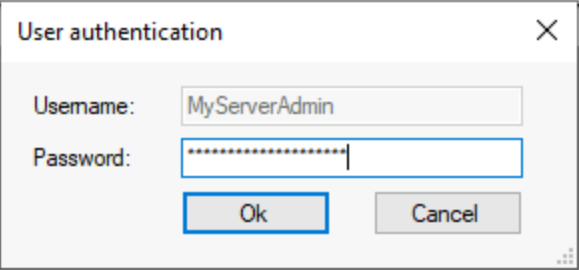
- 3. Enter a username/password combination to initialize the server. You can either use an existing user in the operating system or a new user, which is then automatically created in the operating system.
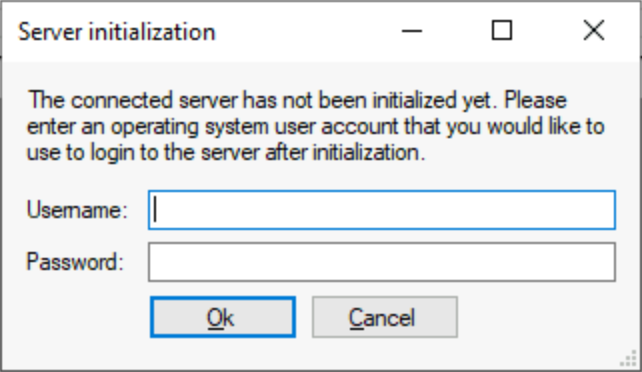
Please make a note of the username/password combination used, as this is required for later access to the server via OPC UA. - The server is now initialized and restarted.
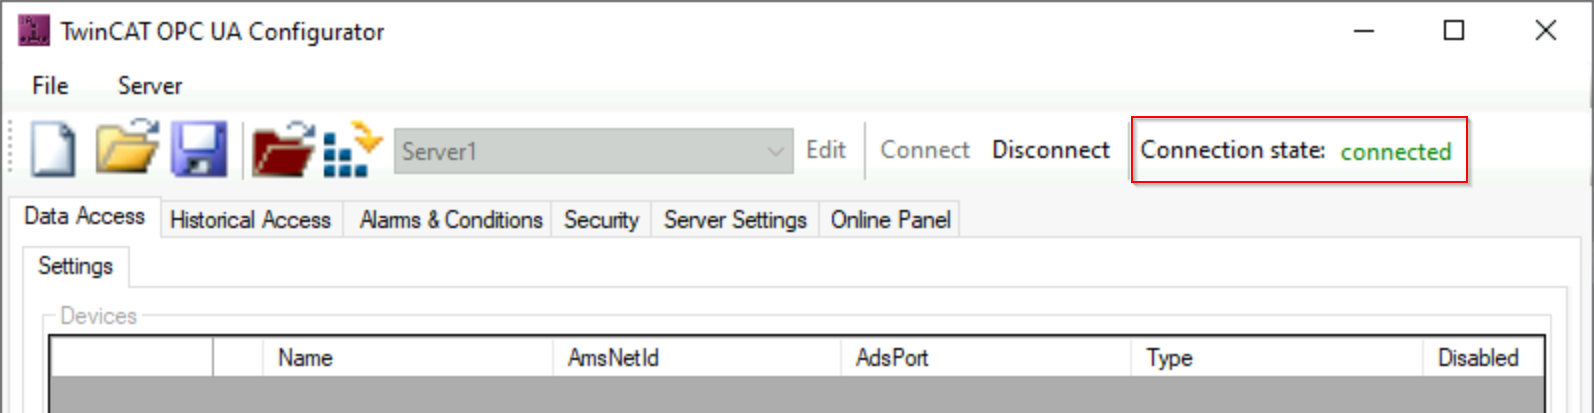
- 4. You can now re-establish a connection to the server via the toolbar. The user used for initialization was automatically stored in the connection profile. Only the password needs to be re-entered for a connection.
- The Connection State will change to "Connected" (green) and you will be connected to the server.
- 5. You can now read the configuration of the server by clicking the Open from Target button in the toolbar.

- The configuration of the server is read and displayed in the user interface of the Configurator.
Making changes to the configuration
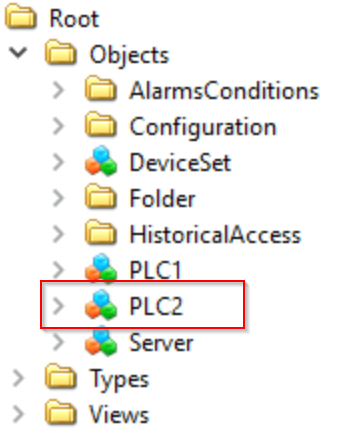
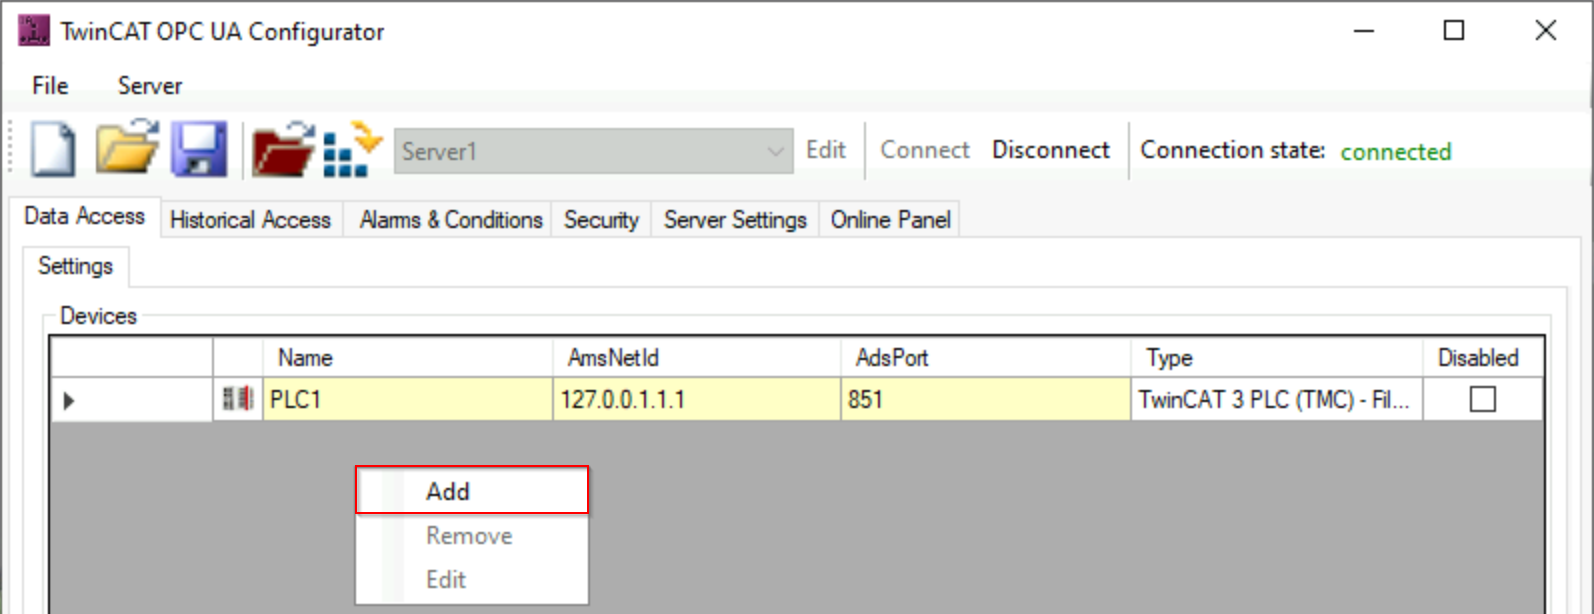
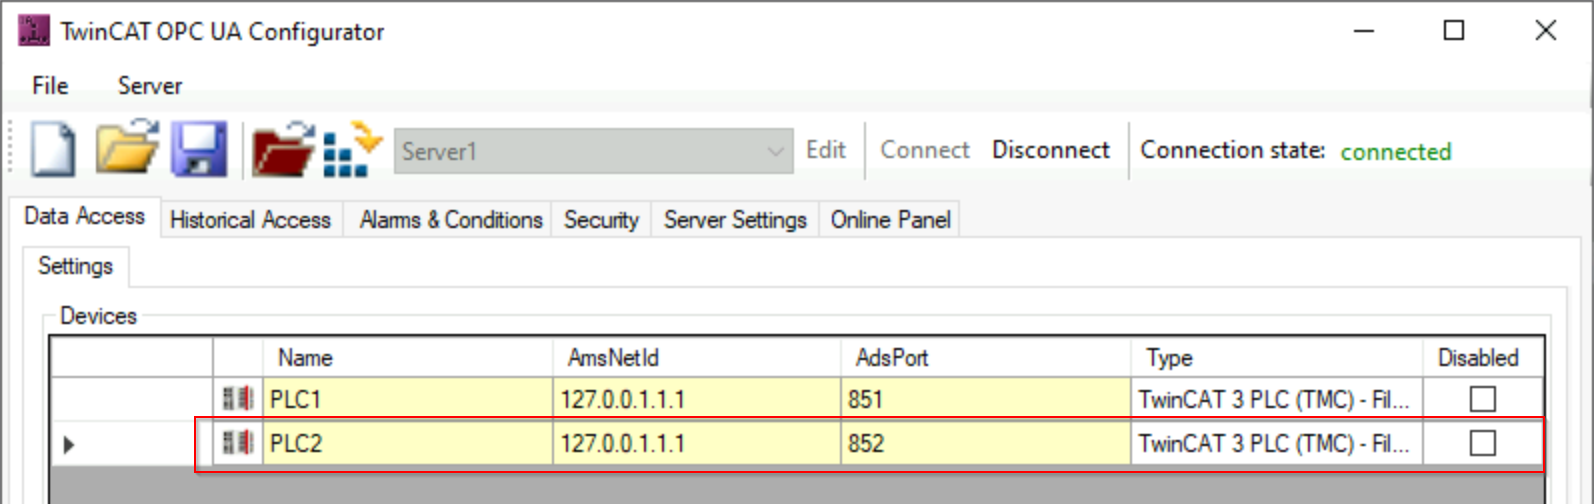
You can now make any changes to the configuration. In this example, we want to make an additional ADS device available via the TwinCAT OPC UA Server. By default, only the first, locally running PLC runtime from the server perspective is made available via OPC UA. This PLC runtime named "PLC1" can be viewed in the Data Access tab.
- 1. We now add another Data Access device via the context menu.
- 2. In the device properties, we set the parameters for Name, AmsNetId, AdsPort and SymbolFile to the settings shown below and save these settings using the OK button.

- We have now added a second Data Access device to our configuration.
Activating the new configuration on the server
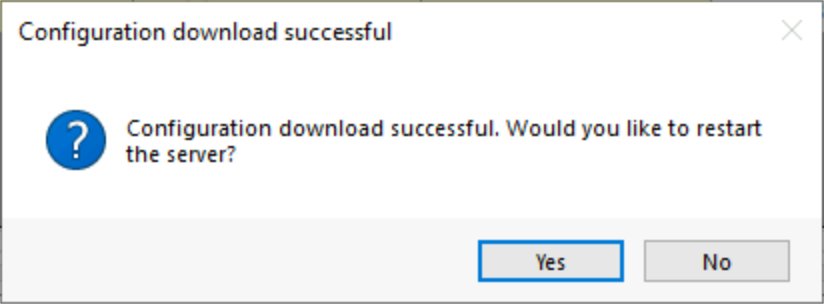
Finally, we need to download the configuration to the server. You can use the corresponding Activate on Target button in the toolbar to do this. A final dialog informs us that the configuration has been successfully transferred to the server and asks whether it should be restarted. Confirm this with Yes.
You have successfully used the TwinCAT OPC UA Configurator to make a configuration change to the TwinCAT OPC UA Server. In this example, we have added an additional Data Access device to the server. The additional device is the second PLC runtime on the local system. Any OPC UA Client connecting to the server will now find this second PLC runtime under the "PLC2" object in the server address space.