Custom attributes
With the Custom attributes, it is possible to provide the AI model with metadata that is to be taken into account in the PLC at runtime. The metadata concept also exists similarly in ONNX, but these cannot be evaluated in the PLC at runtime.
In principle, you can use both metadata areas at the same time. Distinguish between information required at runtime in the PLC (Custom attribute area) and information required by the PLC programmer only at the engineering stage (ONNX metadata or Custom attributes).
In any case, the aim is for the creator of an ONNX to be able to pass on enough information to the consumer of the ONNX so that the consumer can use the AI model correctly and efficiently.
Custom attributes for image preprocessing
In the following, the sample AI-based image processing is extended. Information about the input image is added. The aim is to adapt the image pre-processing according to the metadata.
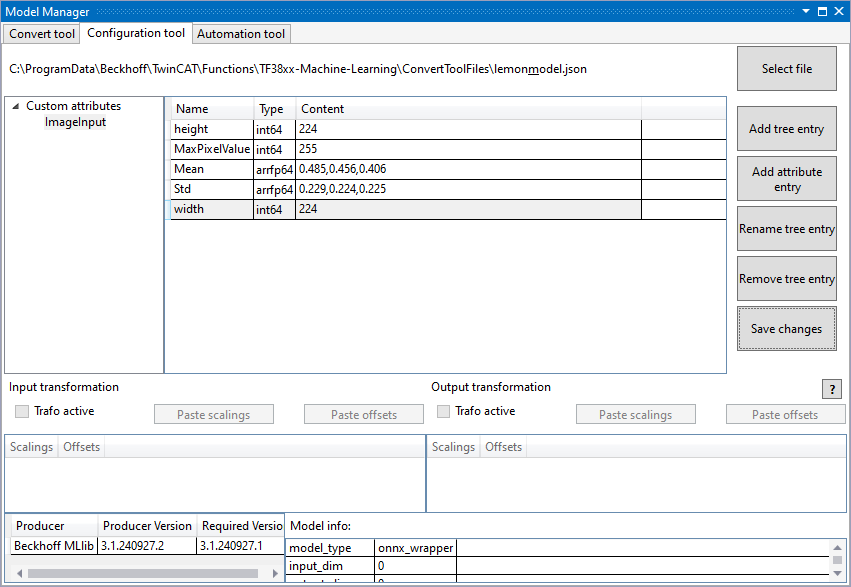
Implementation in the TwinCAT Machine Learning Model Manager
The Configuration Tool can be used in the graphical environment to enter the Custom attributes.
Implementation in Python
From a workflow perspective, it is often more convenient to enter all required Custom attributes directly in Python after model training.
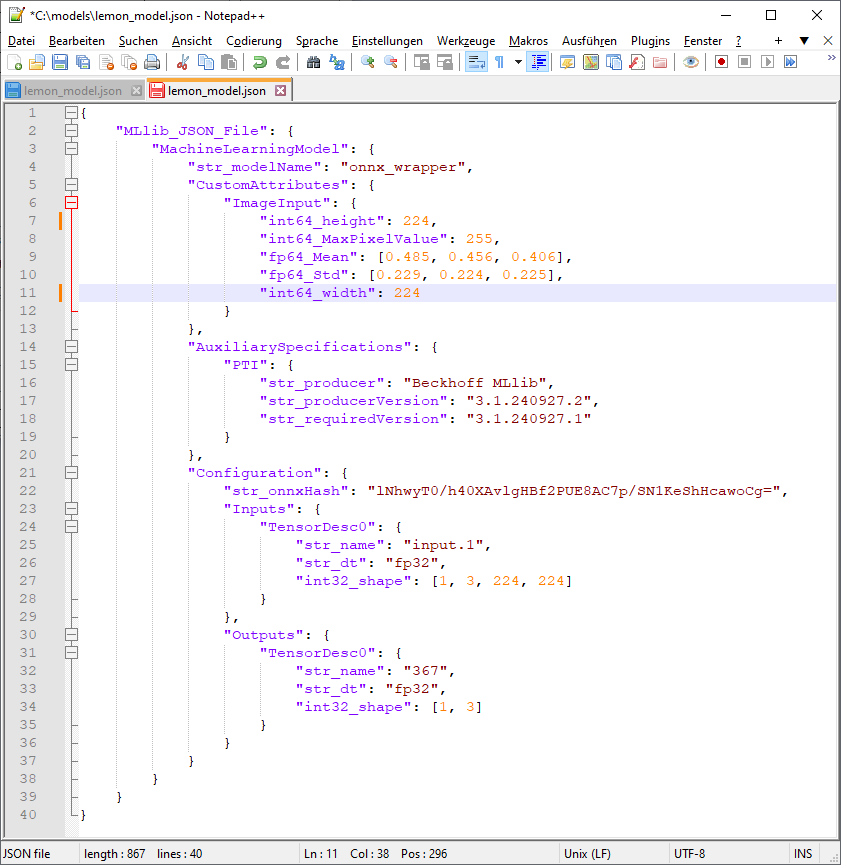
new_ca = { 'ImageInput' : {'nwidth' : 244, 'nheight' : 244, 'nMaxPixelValue' : 255, 'fMean' : [0.485, 0.456, 0.40], 'fStd' : [0.229, 0.224, 0.225]} }
tb.modify_ca("C:\\models\\lemon_model.json", "C:\\models\\lemon_model.json", new_ca)
The result can be traced in plain text in the JSON.
Reading the Custom attributes in TwinCAT
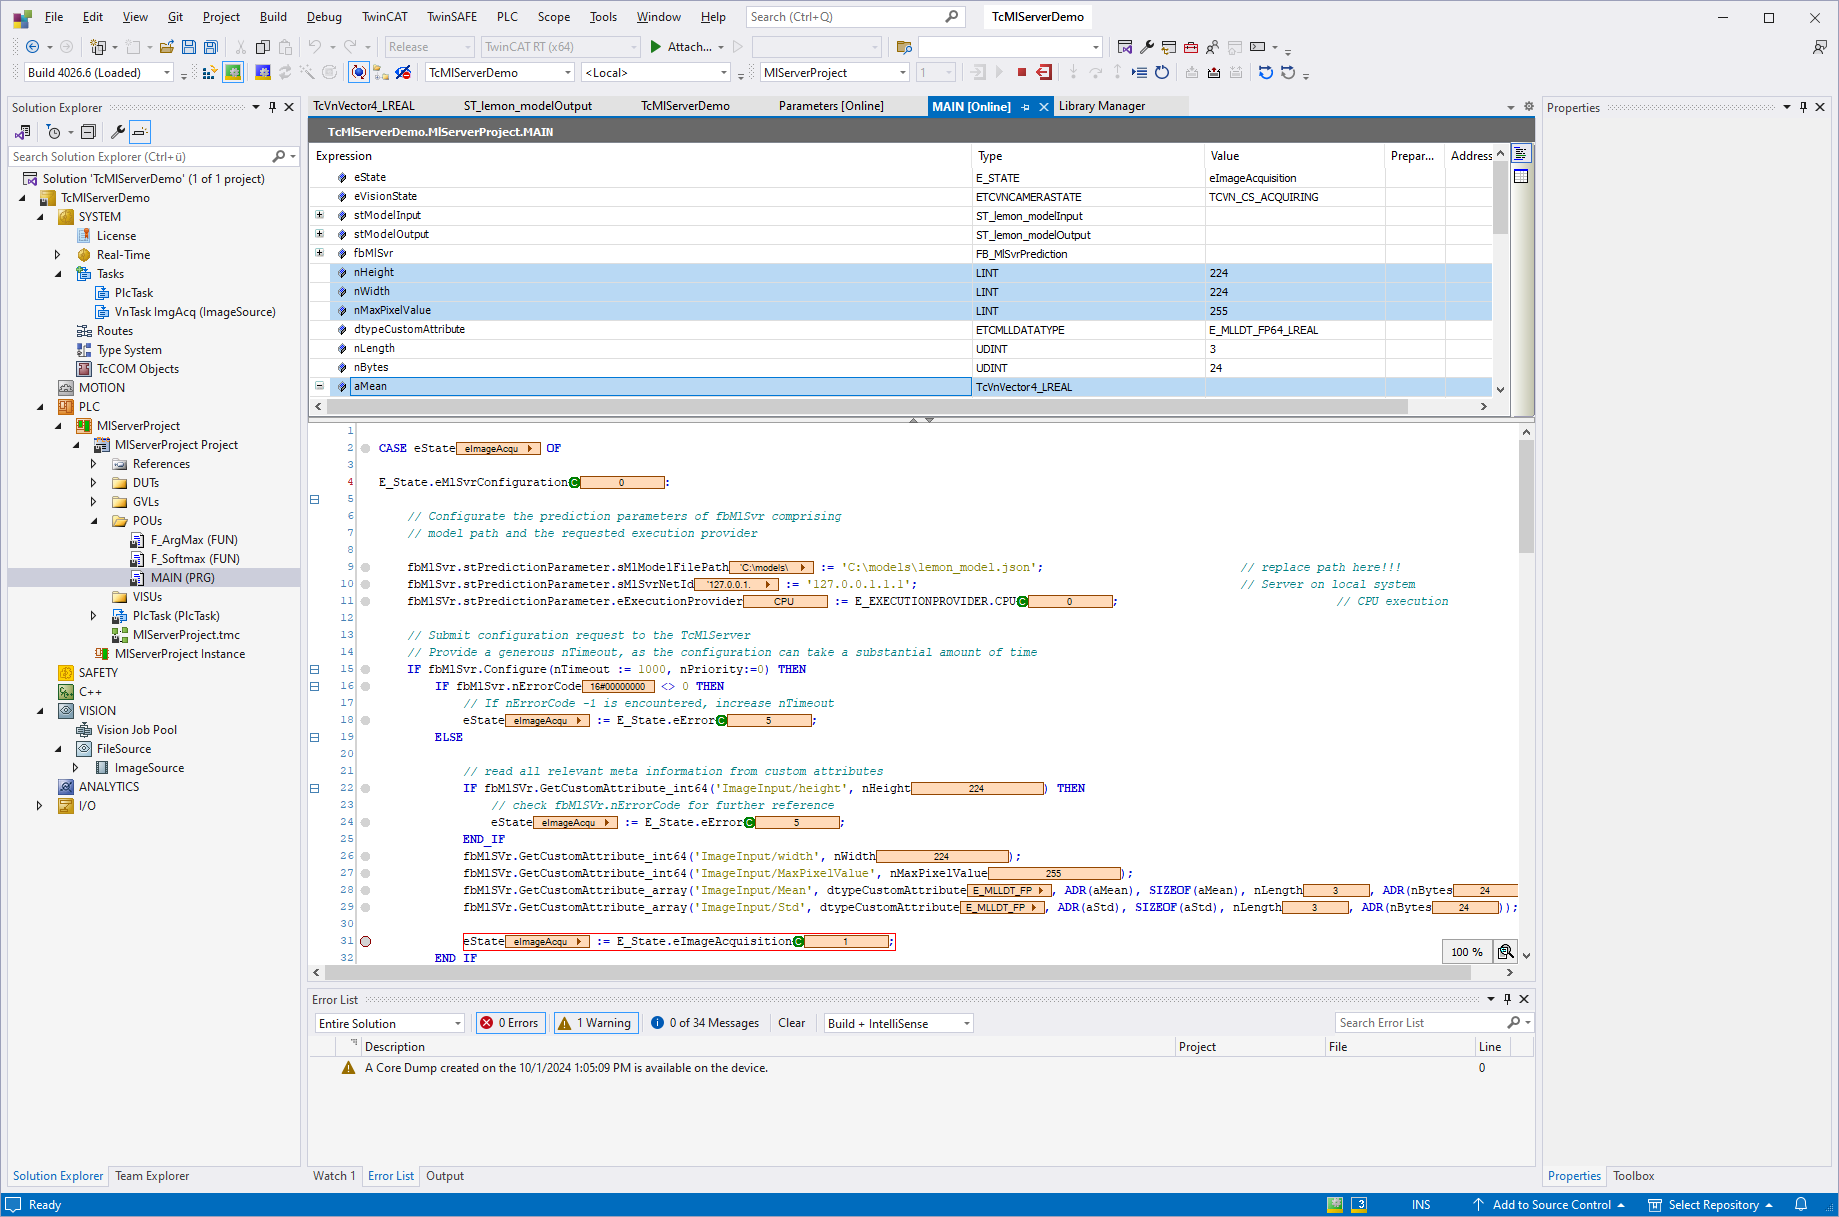
The PLC project from the sample is expanded below.
Once a session has been successfully configured on the TwinCAT Machine Learning Server, the stored Custom attributes are read out.
IF fbMlSvr.Configure(nTimeout := 1000, nPriority:=0) THEN
   IF fbMlSvr.nErrorCode <> 0 THEN
      // If nErrorCode -1 is encountered, increase nTimeout
      eState := E_State.eError;
   ELSE

      // read all relevant meta information from custom attributes
      IF fbMlSVr.GetCustomAttribute_int64('ImageInput/height', nHeight) THEN
         // check fbMlSVr.nErrorCode for further reference
         eState := E_State.eError;
      END_IF
      fbMlSVr.GetCustomAttribute_int64('ImageInput/width', nWidth);
      fbMlSVr.GetCustomAttribute_int64('ImageInput/MaxPixelValue', nMaxPixelValue);
      fbMlSVr.GetCustomAttribute_array('ImageInput/Mean', dtypeCustomAttribute, ADR(aMean), SIZEOF(aMean), nLength, ADR(nBytes));
      fbMlSVr.GetCustomAttribute_array('ImageInput/Std', dtypeCustomAttribute, ADR(aStd), SIZEOF(aStd), nLength, ADR(nBytes));

      eState := E_State.eImageAcquisition;
   END_IF
END_IF
The Custom attributes stored in PLC variables are then used in the pre-processing pipeline. Essentially, all that needs to be considered here are the necessary type conversions.
// Adjust the dimensions of the input image to match the model input requirements
hrVision := F_VN_ResizeImageExp(ipInputImage, ipTensorImage, LINT_TO_UDINT(nWidth), LINT_TO_UDINT(nHeight), eInterpolationType, ePaddingMode, aBlack, hrVision);
// Convert the image to type REAL and scale to the range [0.0, 1.0]
hrVision := F_VN_ConvertElementTypeExp(ipTensorImage, ipTensorImage, TCVN_ET_REAL, 1.0 / LINT_TO_REAL(nMaxPixelValue), 0, hrVision);
// Normalization
hrVision := F_VN_SubtractVectorFromImage(ipTensorImage, aMean, ipTensorImage,hrVision);
hrVision := F_VN_DivideImageByVector(ipTensorImage, aStd, ipTensorImage, hrVision);
Once the configuration has been activated, you can use the Online View to check that the values have been applied correctly.