Quickstart
The following chapter is intended to provide an easy introduction to using the TwinCAT 3 TestFramework. In principle, the TestFramework can be used in two different ways.
- The test cases are located in a TwinCAT PLC project, and the control code to be tested is implemented as a PLC library. This use case is intended for testing PLC libraries.
- The test cases and the control code to be tested are located in the same PLC project; a compiler switch is used, for example, to determine whether the test cases are also compiled (see the chapter on conditional compilation/conditional pragmas).
This quick start guide covers the first use case, as this is likely the more common scenario.
- 1. Create a new TwinCAT 3 project.
- 2. Create a new PLC project.
- 3. Add the Tc3_PlcTestFramework PLC library to the PLC project.
- 4. Add the PLC library to be tested, unless the test cases are included directly in the application's control code.
Implementation of the test cases:
Follow these steps for each test case you want to implement:
- 5. Create a new function block that is derived from the FB_TestCaseBase block in the Tc3_PlcTestFramework PLC library.
- 6. Enter the name of the test case as an attribute above the name of the function block, exactly as it should appear in the test log or the test clients. If you do not want to specify a name, the name of the POU will automatically be used as the name of the test case.
- 7. Optionally, use attributes to specify a timeout and the test case owner.
- The declaration part of the function block could then look like this:
{ attribute 'Name':='TB_Sum-Test' }
{ attribute 'Timeout':='t#20s' }
{ attribute 'Owner':='TestOwner' }
FUNCTION_BLOCK FB_TestSum EXTENDS FB_TestCaseBase
VAR_INPUT
END_VAR
… - 8. In the variable declaration of the function block, declare the function block you want to test
- 9. Also declare variables that will hold the expected result of the test case and the actual result. This explicit definition is necessary because the method that compares the result with the expected value is based on the `Any` data type.
- 10. Implement the test case. The result is verified for correctness using the method
AssertEqual, which is already implemented in the base function block.
The tests run until the test case is exited using the Succeded() function or an error occurs. This makes it possible to design test cases so that they can be run iteratively.
The control code for testing a summation block could look something like this, in simplified form:
{ attribute 'Name':='TB_Sum-Test' }
{ attribute 'Timeout':='t#20s' }
{ attribute 'Owner':='TestOwner' }
FUNCTION_BLOCK FB_TestSum EXTENDS FB_TestCaseBase
VAR_INPUT
END_VAR
VAR_OUTPUT
END_VAR
VAR
    myFB : FB_Sum;
    expectedValue : UINT;
    result: UINT;
END_VAR
// test 2 + 2 = 4
myFB(var1:= 2, var2:= 2, result=> result);

expectedValue:=4;
AssertEqual(expected:= expectedValue, actual:= result, message:= 'Addition with the FB_Sum function block is incorrect!');
Succeeded();
Once all test cases have been implemented, proceed as follows:
- 11. Make sure that the Autostart Boot Project option is active in the PLC project.
- 12. Activate the project on the desired target system.
- 13. Open or launch a test client and run the tests.
Test client with user interface:
- 14. Start the Test Client.
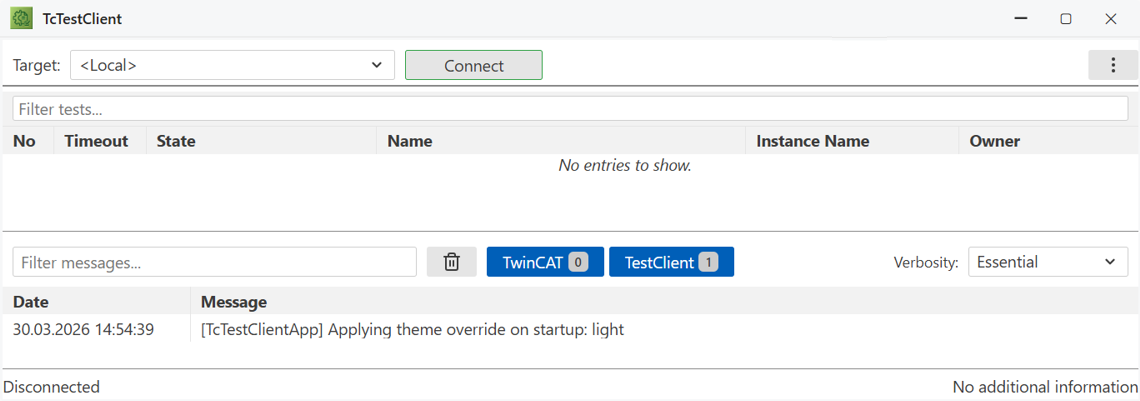
- 15. Use the target choice drop-down box to select the target system on which the test project will run.
- 16. Then press the Connect button located directly next to the target system selection
- All test cases are represented in a tabular view in the test client.
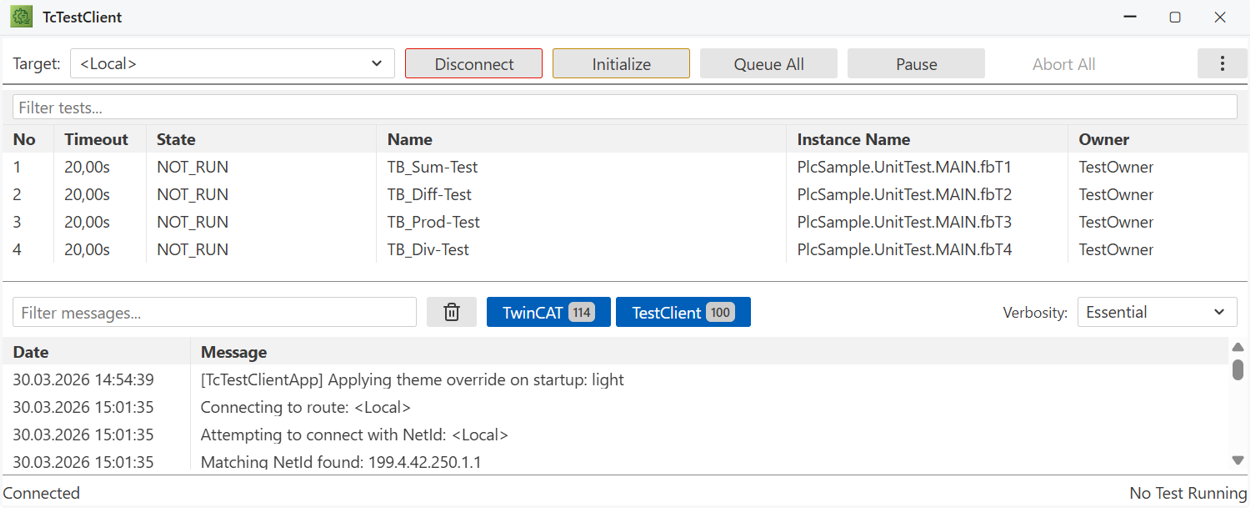
- 17. Click the Queue All button to start running all test cases.
- For a detailed description of the test client's user interface functions, see the chapter Reference User Interface.
Command line client:
- 1. Run the following command using a script or from the command line:
TcTestClientCli.exe --target 199.4.42.250.1.1 --saveResultsAsJunit "C:\temp\testJunit.junit.xml" --tcStartupRetries 10 --mode checkMemory
By default, TestClientCli is installed in the directory C:\Program Files (x86)\Beckhoff\TwinCAT\Functions\TE1040-TestFramework\TcTestClientCli\.
- The
--targetoption refers to the target system on which the test cases are executed. - The
--saveResultAsJunitoption enables the results to be written in JUnit format and specifies the file where the results will be saved. - The
--TcStartupRetriesoption specifies the number of attempts–that is, how often the test client tries to start a test. - In this case, the option
--mode checkMomoryenables the test client to check the TwinCAT router memory after each test run. This makes it possible to find memory leaks within the function blocks you've written. Using this option results in a slightly longer runtime.