Dashboard Configuration
HMI Dashboard tab
The HMI Dashboard tab contains all the configurations for the dashboard.
Configuration
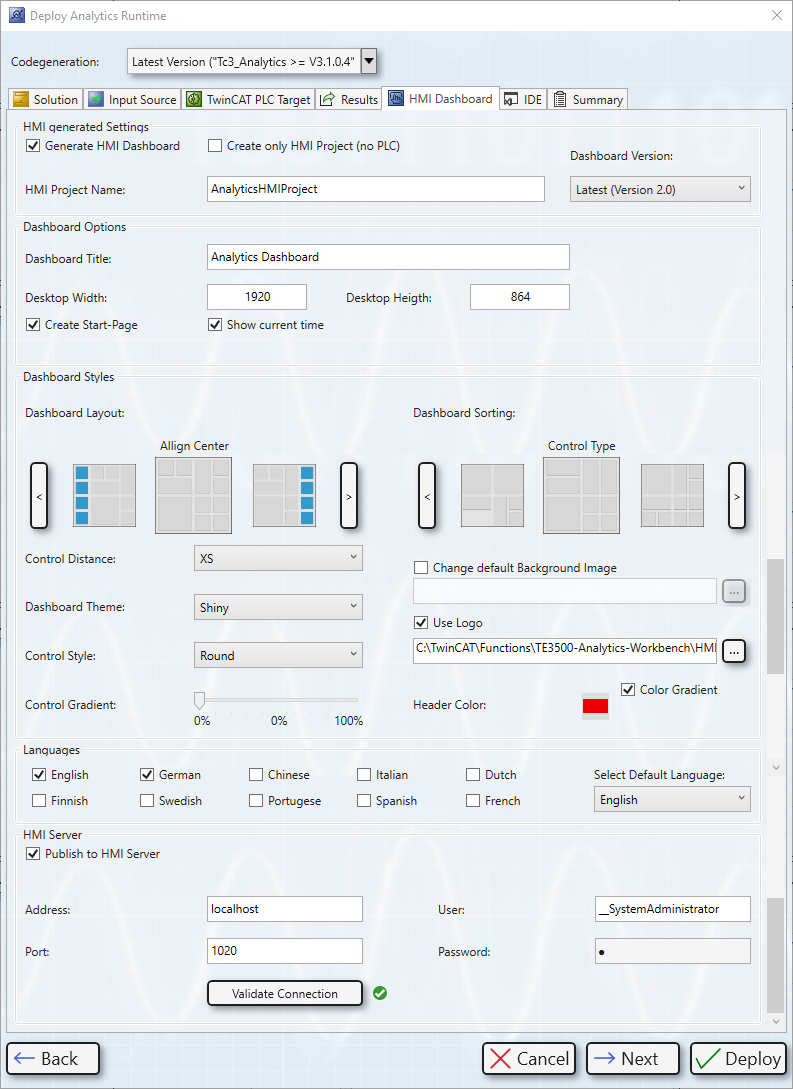
HMI generation Settings
Generate HMI Dashboard | Enables the generation of the HMI Dashboard, if enabled. This automatically activates/deactivates the checkboxes Create Bootproject and Activate PLC Runtime on the TwinCAT PLC Target tab. |
Create only HMI Project (No PLC) | Creates only one HMI project and not a PLC project, if enabled. |
HMI Project Name | Name of the TwinCAT HMI project. |
Dashboard version | Selection of the dashboard version. |
Dashboard Options
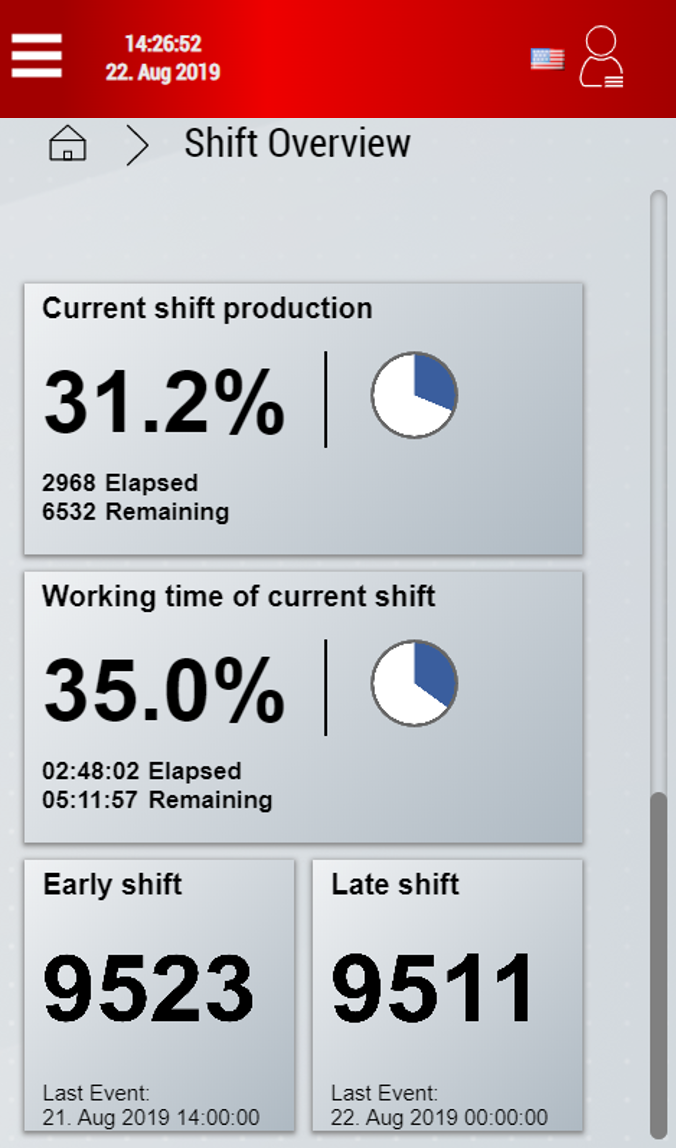
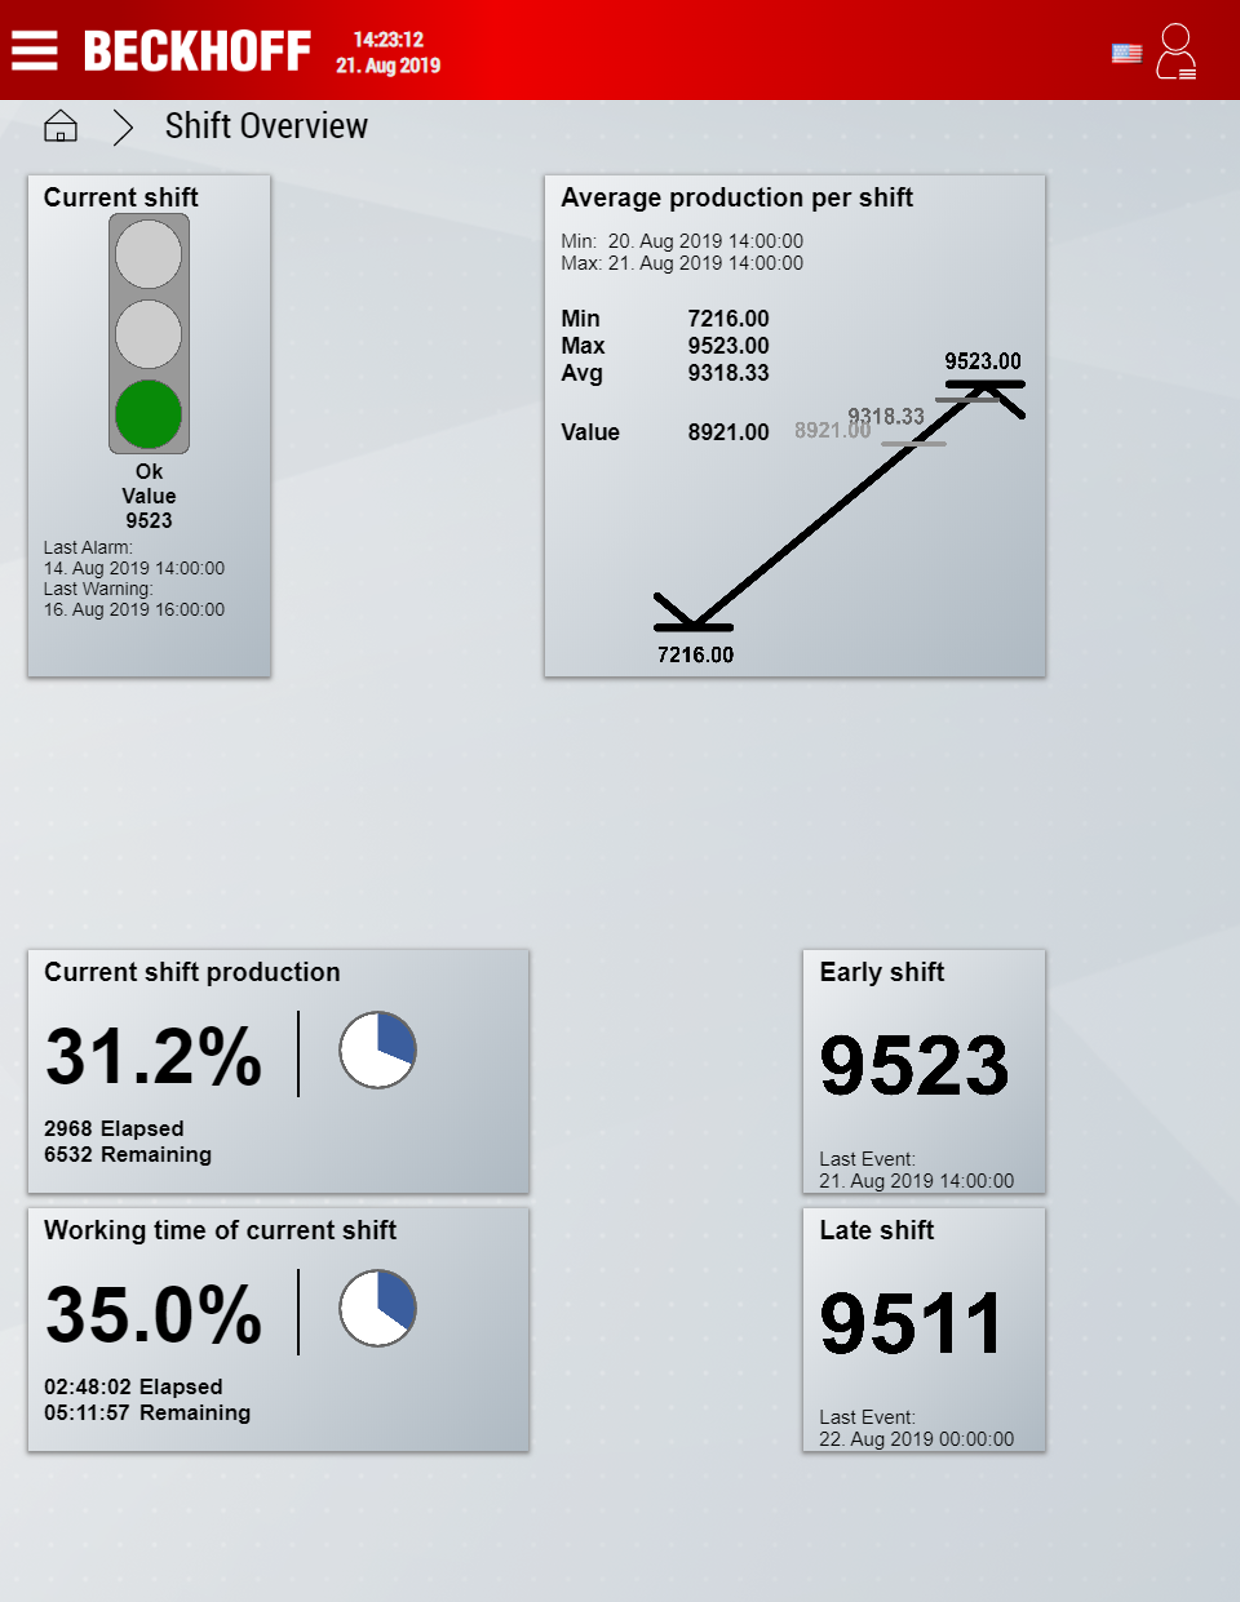
Dashboard Title | Title of the HMI Dashboard, which is displayed in the dashboard header. |
Desktop Width | Width of the target screen in pixels. |
Desktop Height | Height of the target screen in pixels. |
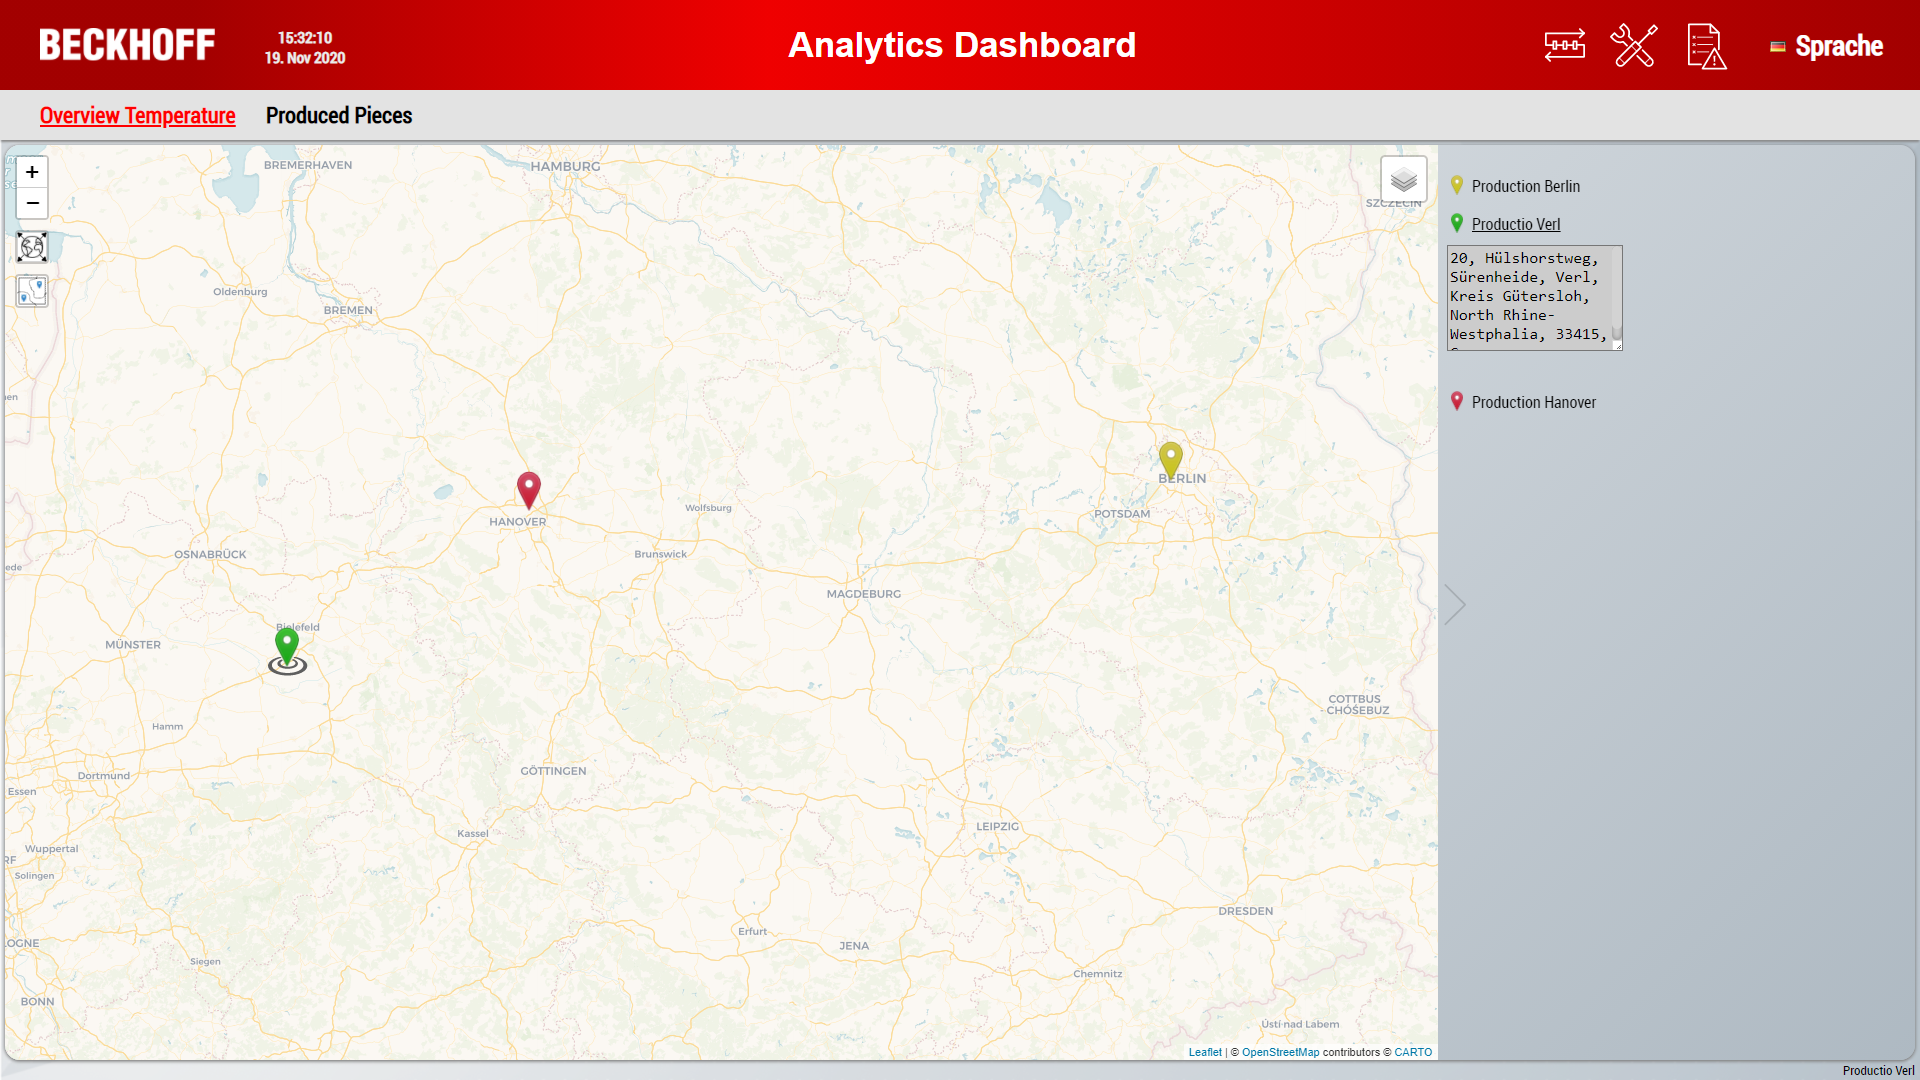
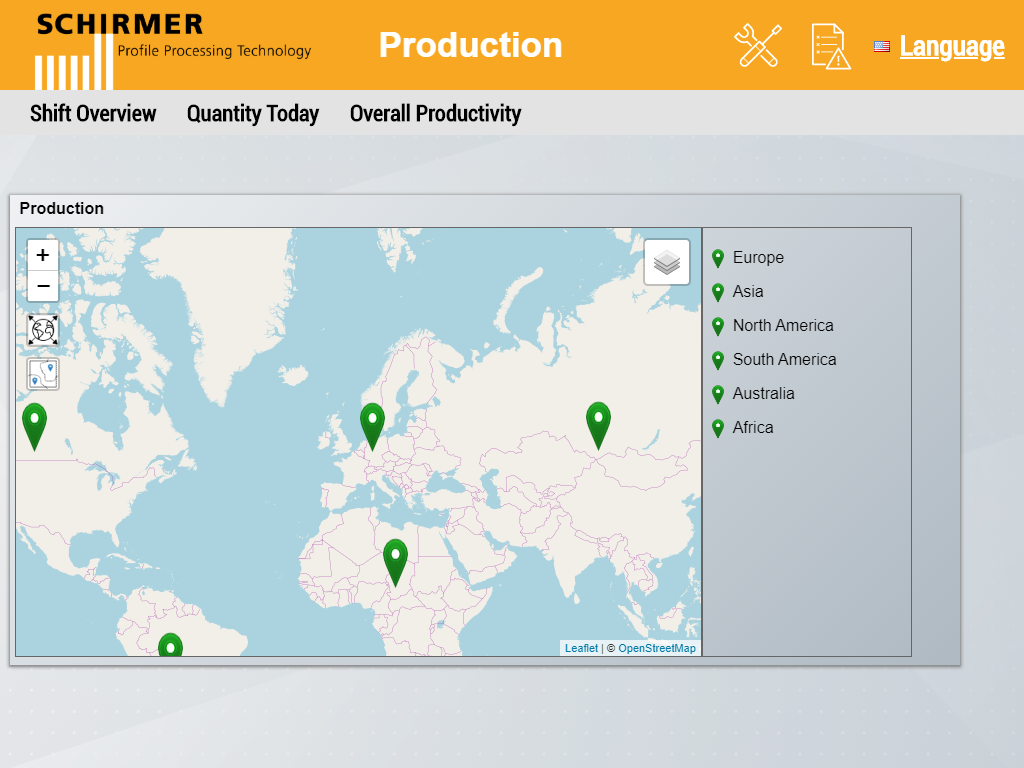
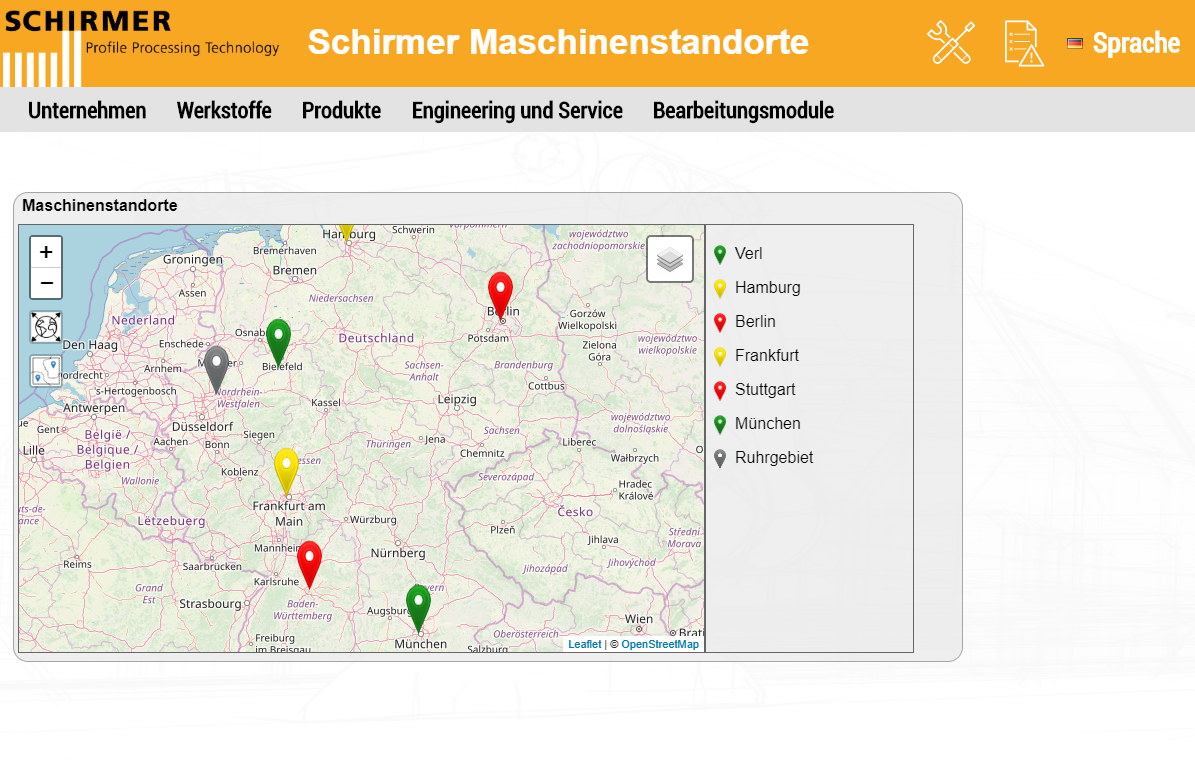
Create Start-Page | Creates a start page for the dashboard that displays a map with all machine locations. The location data is adopted from the machine management data. |
Show current time | Creates a clock in the dashboard header that shows the current local time. |
Dashboard Styles
Dashboard Layout | Defines the layout of the dashboard. Dock requires the "Dock" property of a module to be TRUE. Dock Left: fixed left column |
Dashboard Sorting | Defines the sorting of the dashboard. Space Saving: arranges the controls without free space. |
Control Distance | Determines the minimum distance between controls in the grid. |
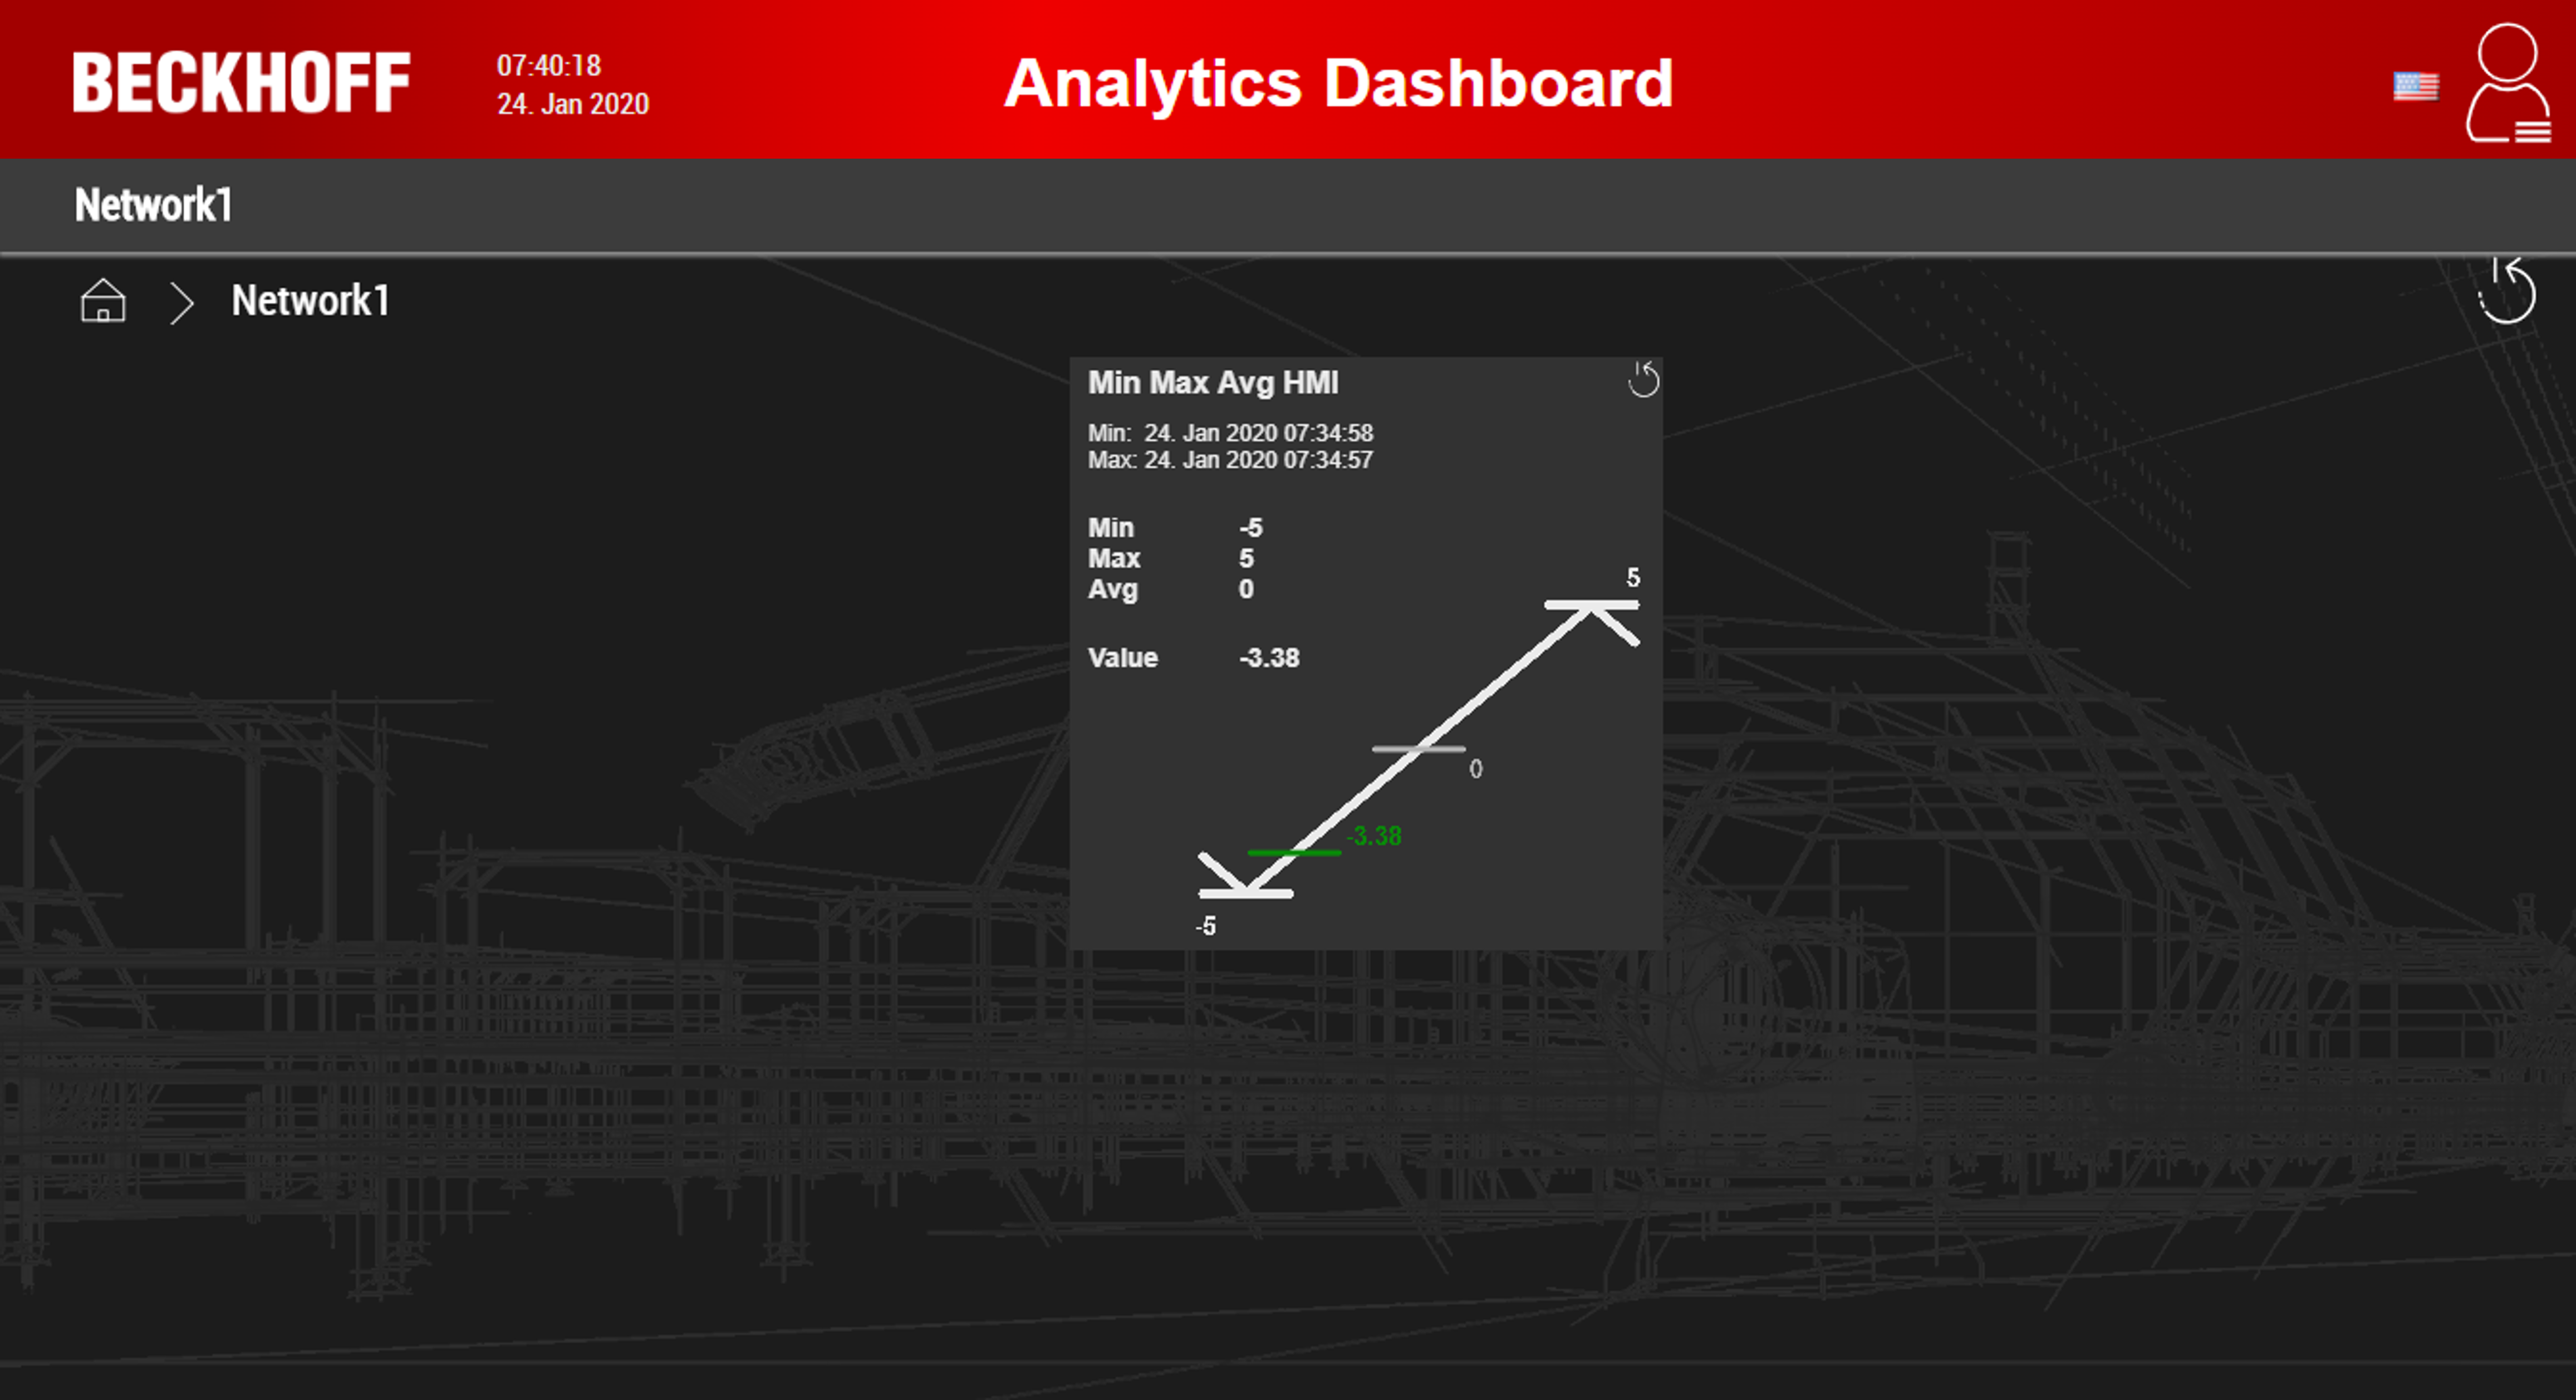
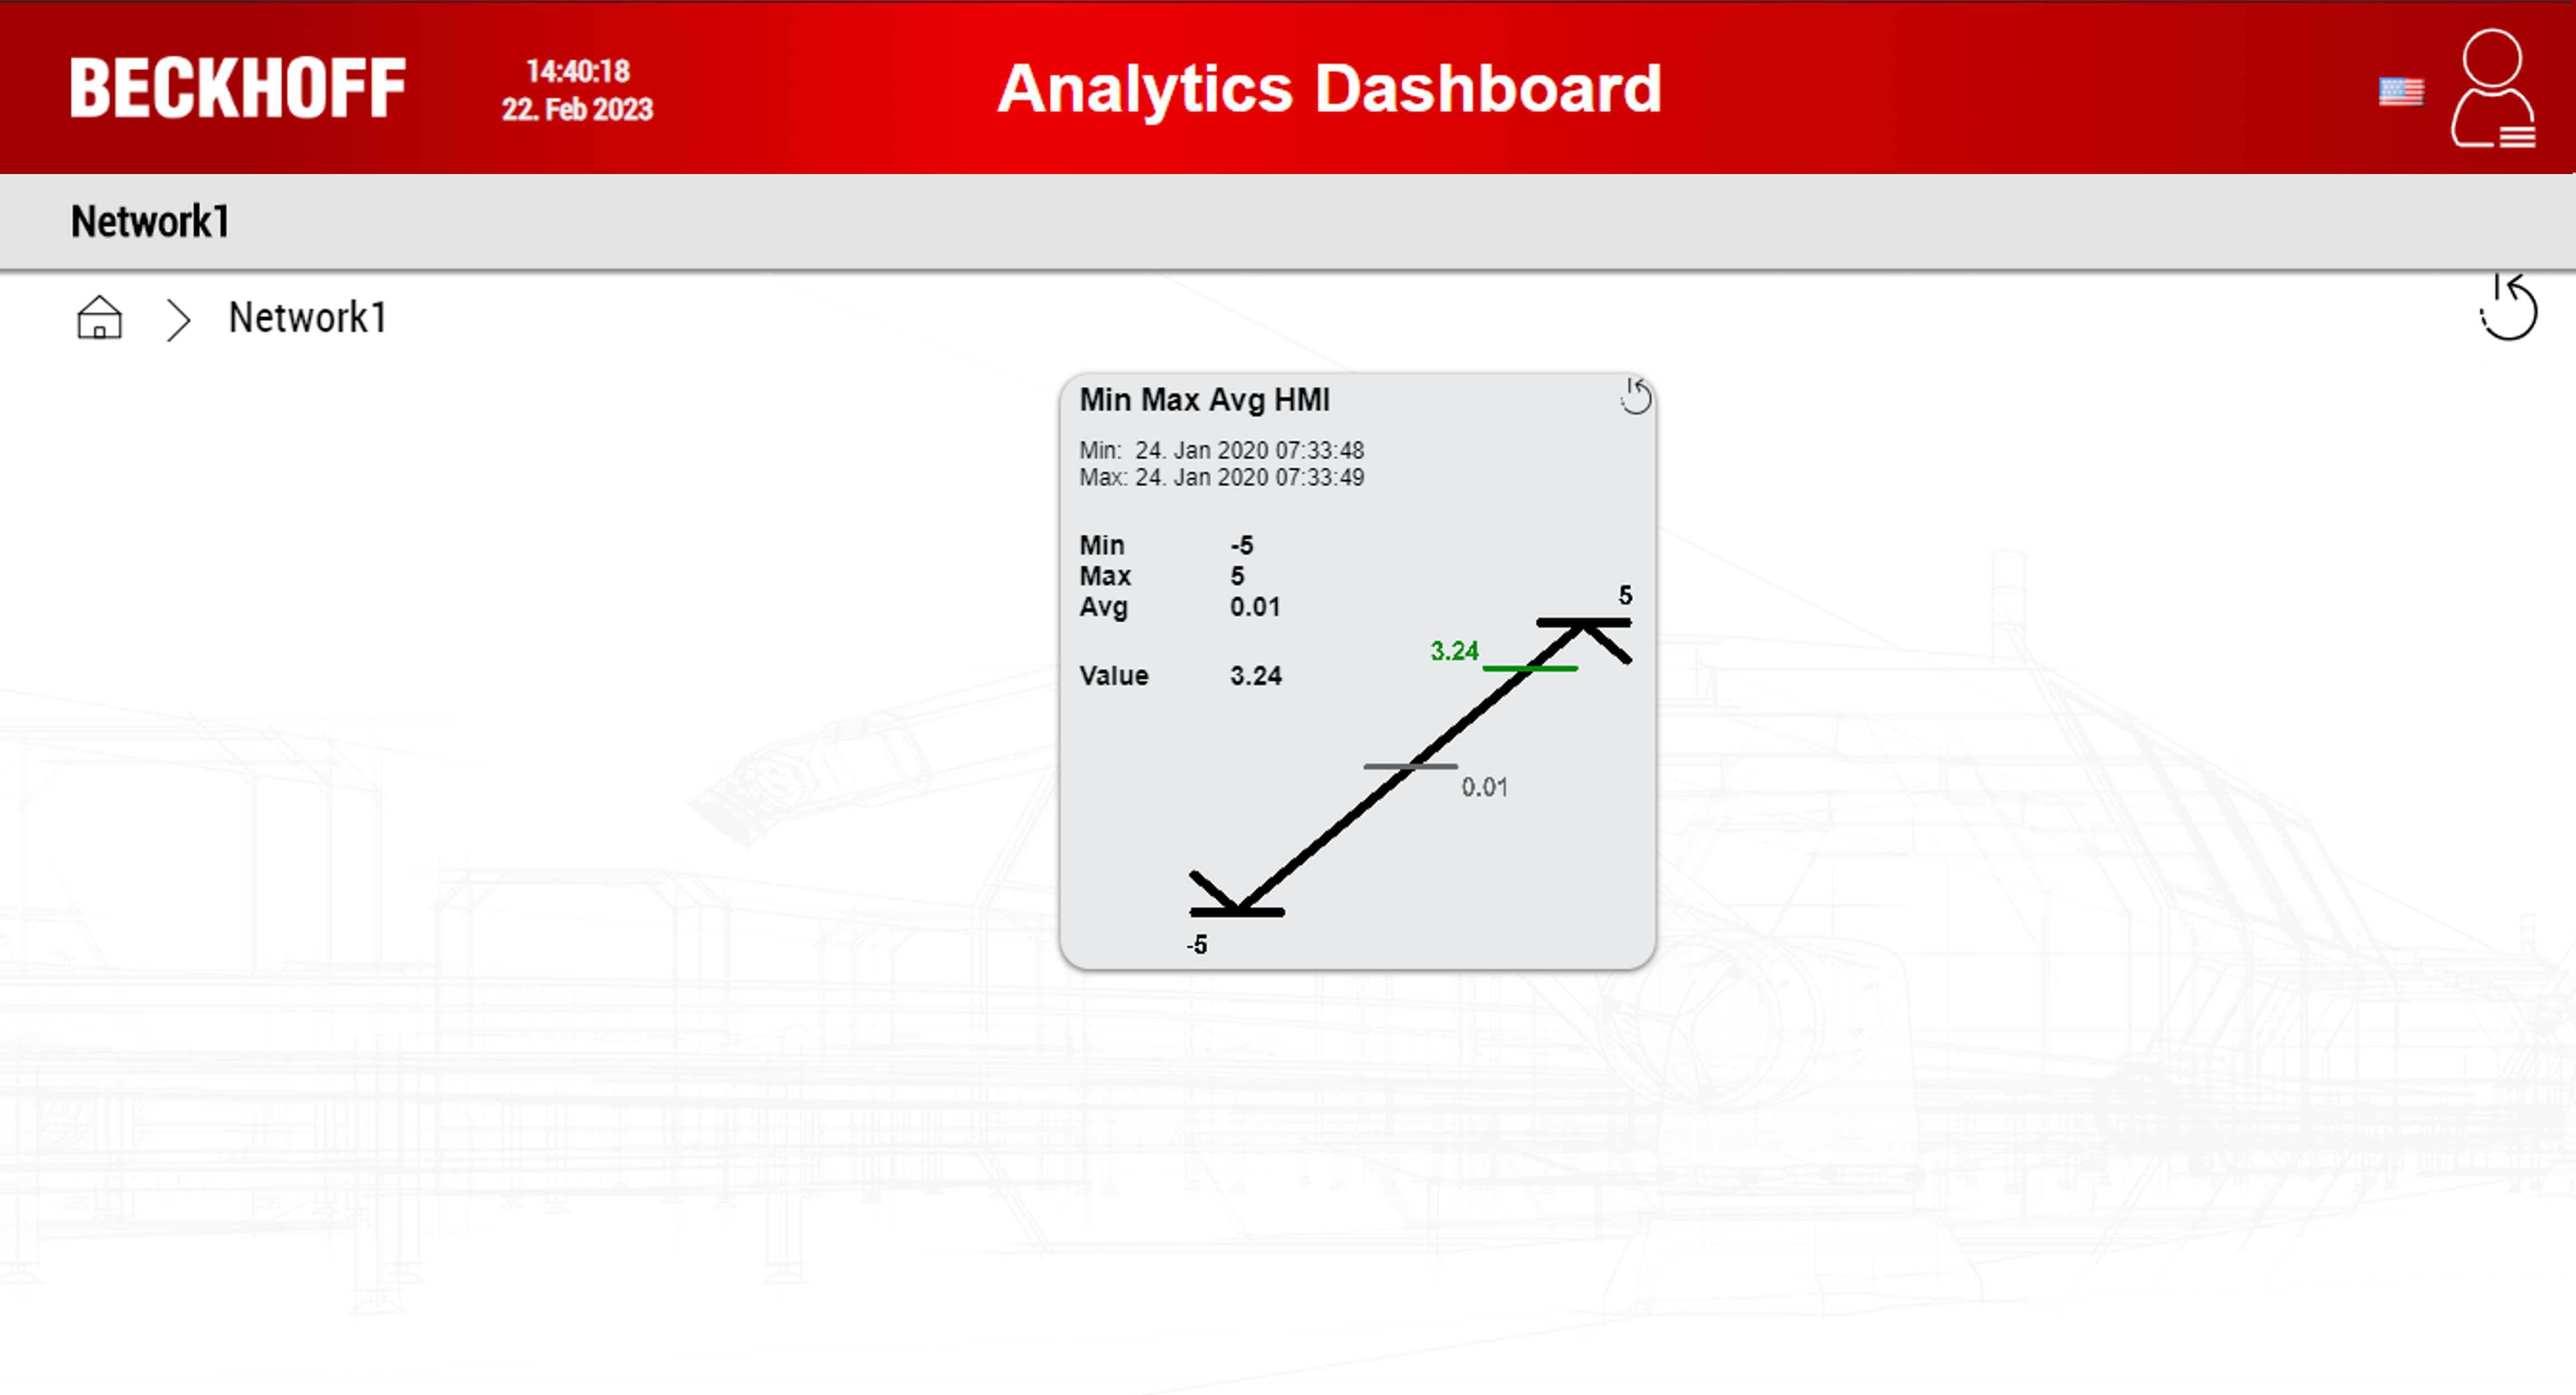
Dashboard Theme | Defines the topic of the HMI dashboard, affects controls and backgrounds: Light: bright skin, especially for day mode. |
Header Color | Specifies the color of the dashboard header. This contains a color gradient if Color Gradient is enabled. |
Control Style | Defines the style of the controls: Round: The controls have rounded corners. |
Change default Background Image | If enabled, a customer-specific background image can be set for the HMI Dashboard. If nothing is defined, the default image is used. |
Use Logo | If enabled, a logo is added to the dashboard header. A customer-specific image can be defined for the logo. |
Languages
Languages | Selection of languages available in the HMI Dashboard. |
Select Default Language | Default language for the dashboard. |
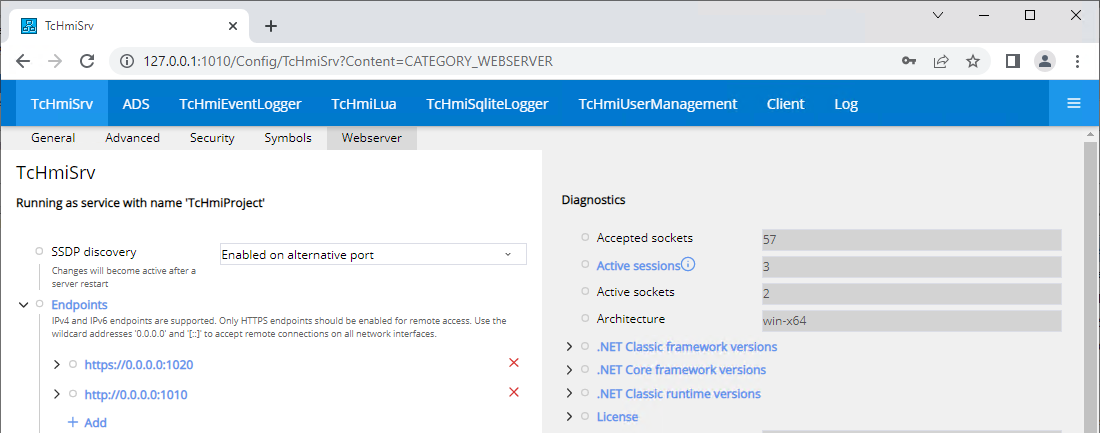
HMI Server
Publishes the dashboard to a TwinCAT HMI server, if enabled. | |
Address | Enter the IP address or host name of the TwinCAT HMI server. |
Port | Enter the port of the TwinCAT HMI Server (by default 1010 without encryption and 1020 with encryption). |
User | Enter the user name. |
Password | Enter the password. (The administrator password must be set once on the HMI server via the configuration page). |
Validate Connection | Press the button to validate your server connection. |
 | In order to publish to a remote HMI server, the HMI port and IP of the development computer must be shared in the HMI server. Also an inbound rule with the HMI ports must be set up in the Windows firewall from the remote PC.
|

IDE tab
On the IDE tab, you can select which IDE (Visual Studio or TwinCAT XAE Shell) is to be used for generating the PLC and HMI. In addition, it is possible to generate HMI and PLC in two different solutions.
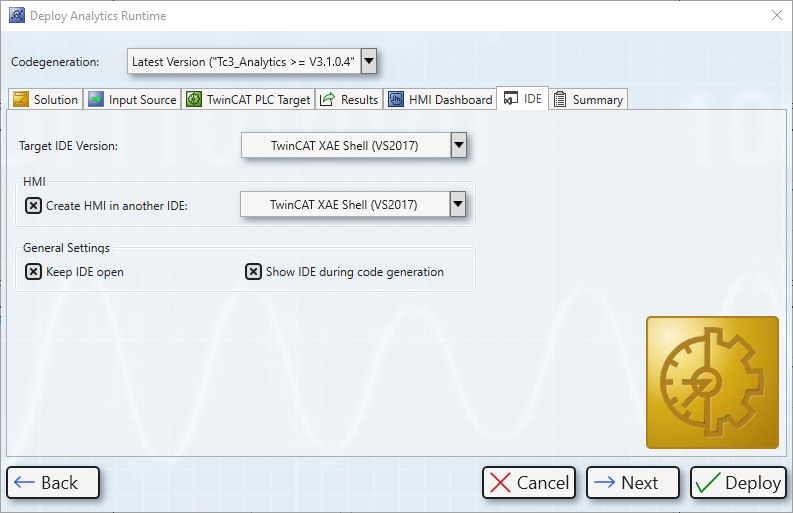
Keep IDE open | Keeps the IDE open after generation, if enabled. |
Target IDE Version | The IDE target version for PLC and HMI. |
Create HMI in another IDE | If enabled, the HMI is generated into a second solution. A different IDE can be selected. |
Requirement: TwinCAT or TwinCAT HMI must be installed in the selected IDE. | |
Click Next to display the Summary tab, then click Deploy to start generating the dashboard.
Impressions
Topics
Styles
Views for mobile devices
Map on customer-specific dashboard
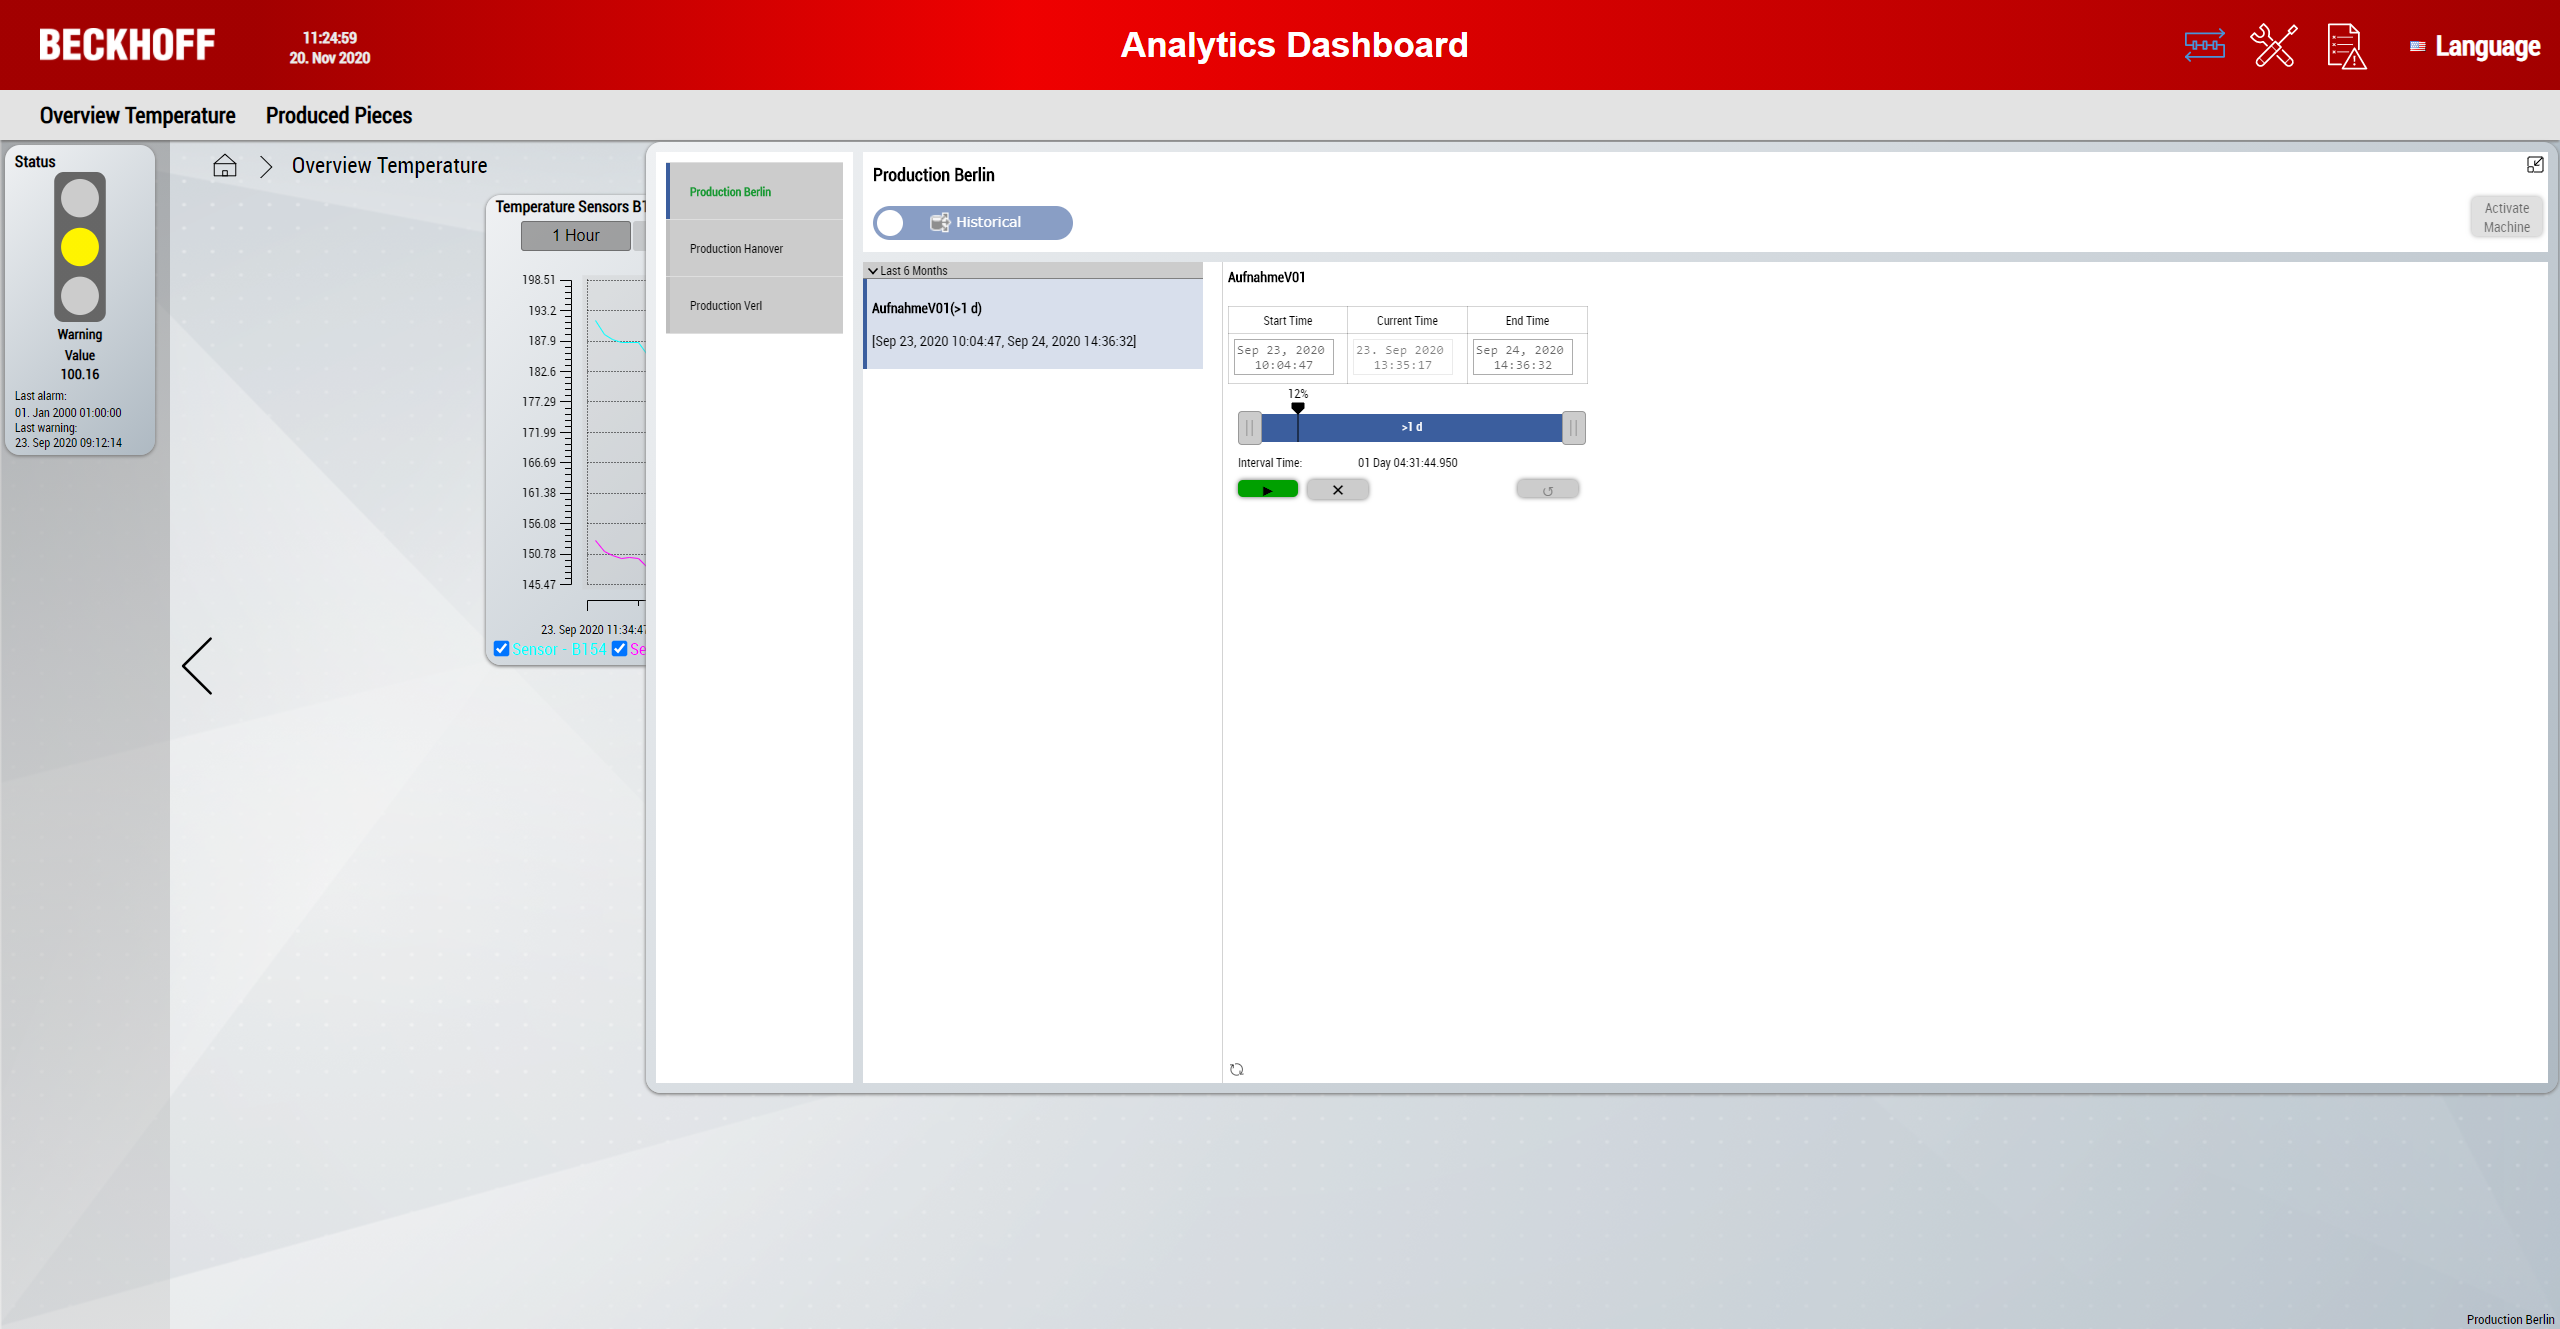
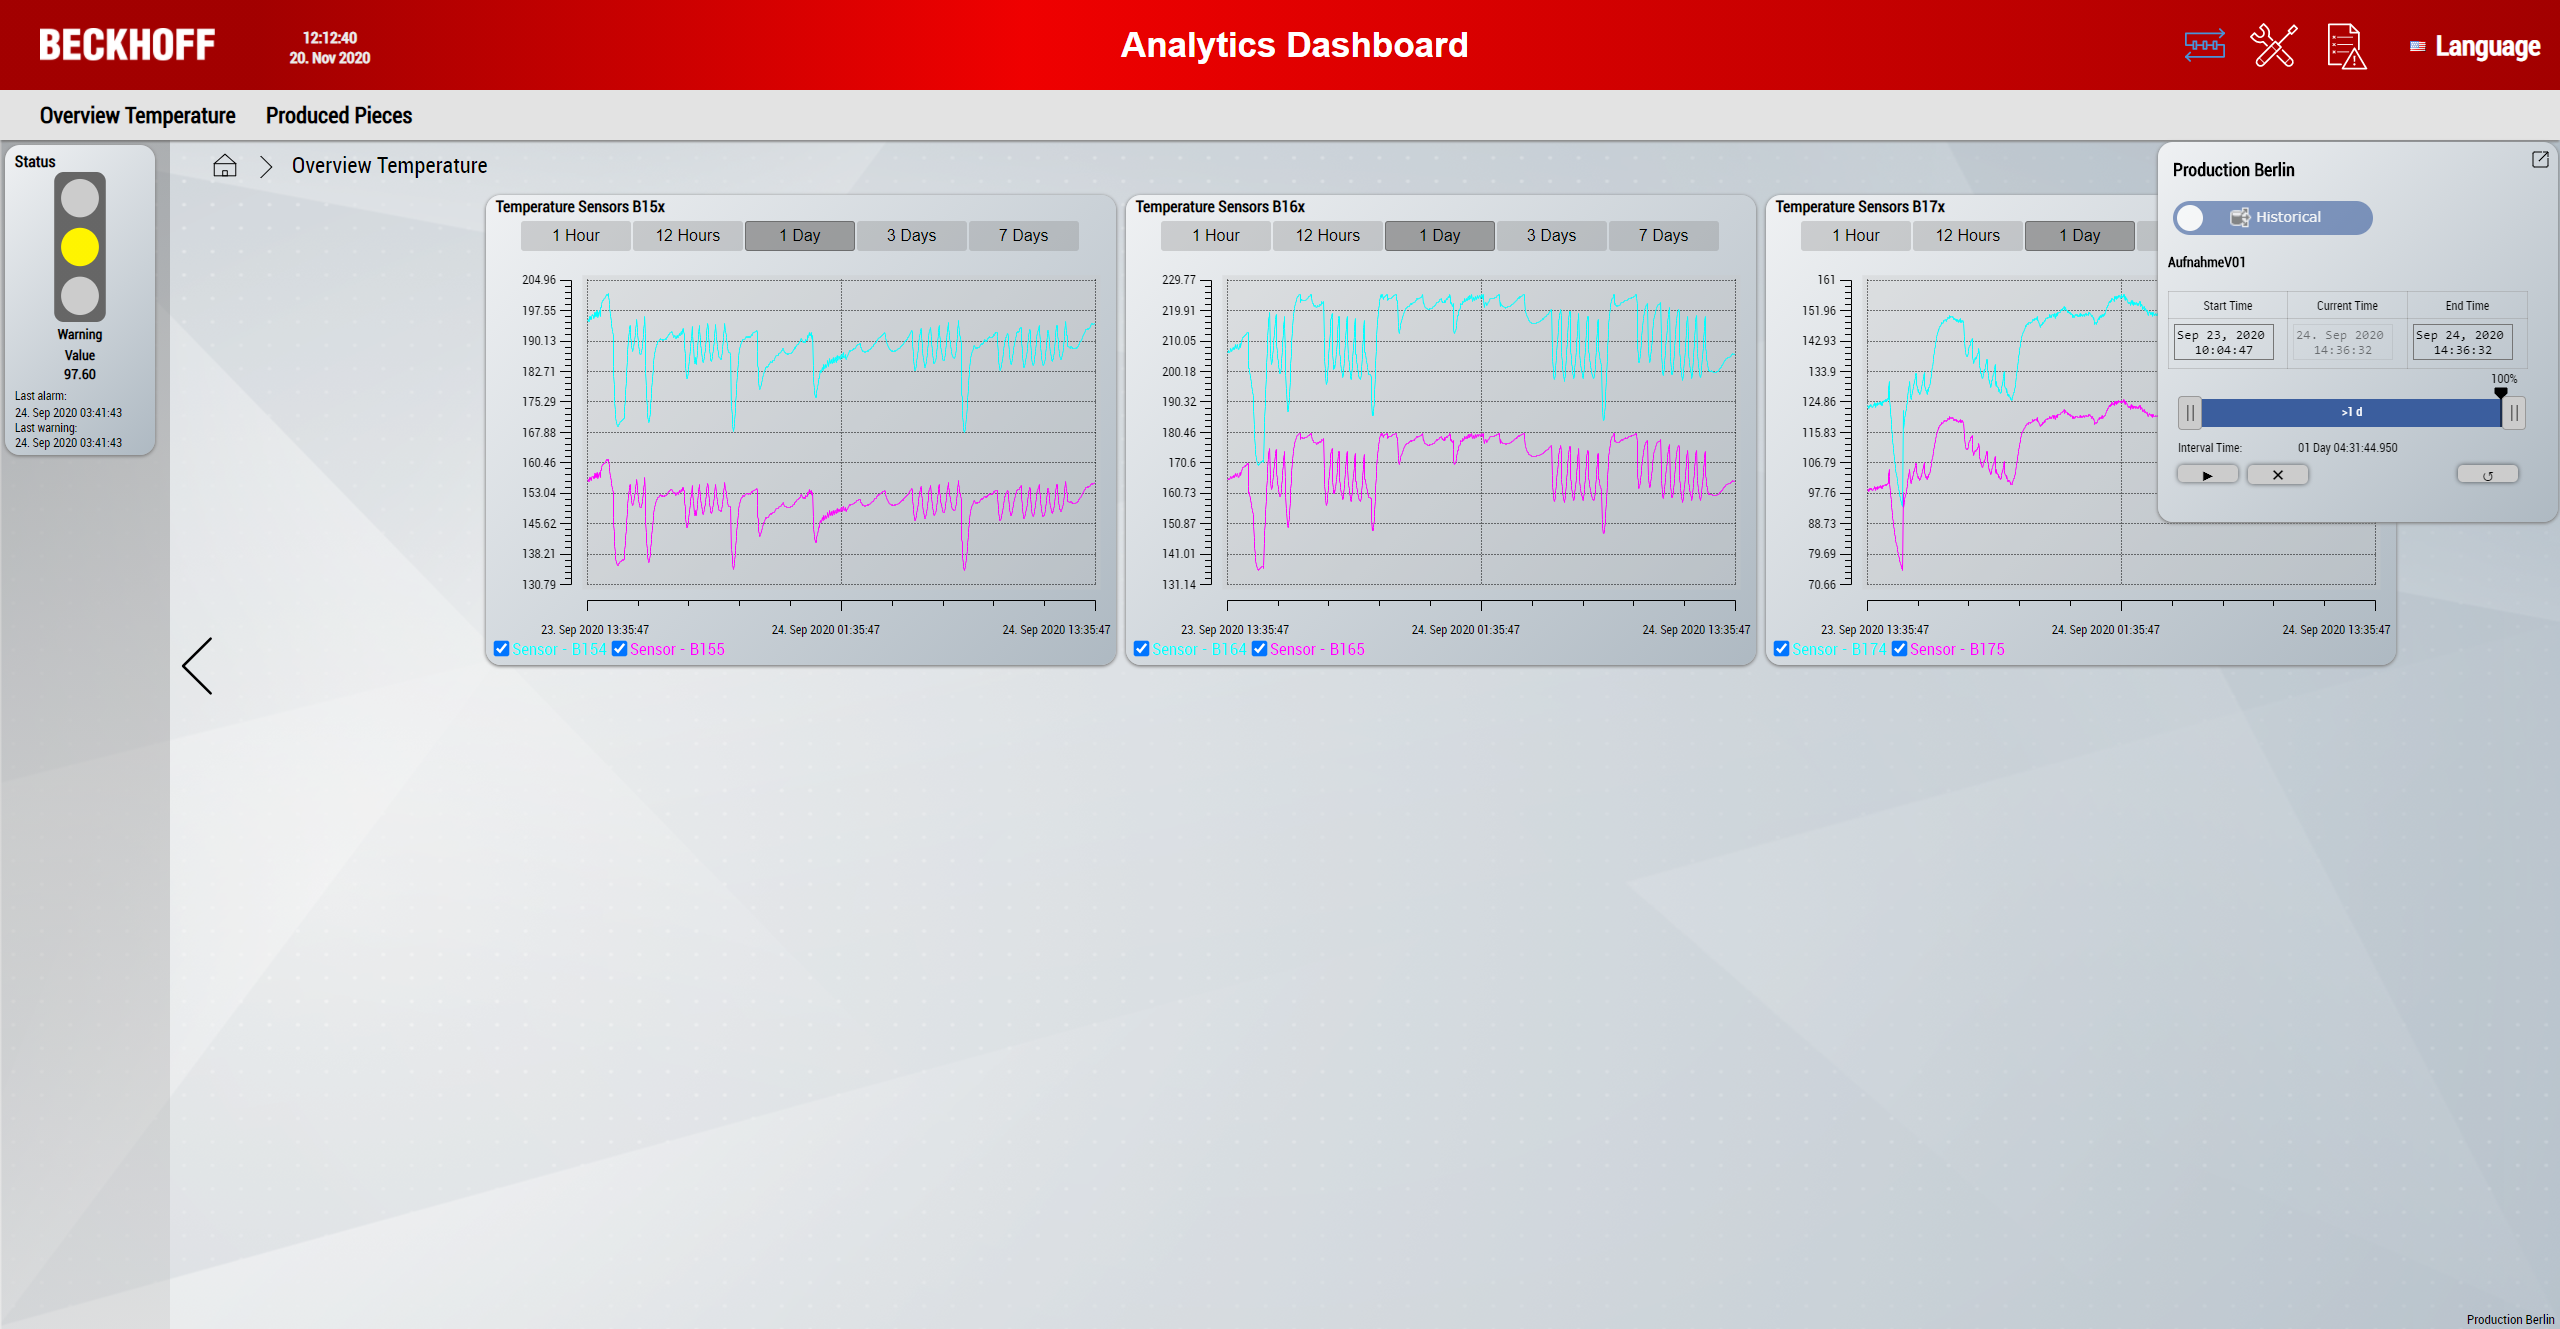
Historical data and machine switching