Runtime deployment
PLC code can be generated with all modules and parameters configured in the TwinCAT Analytics Workbench Configurator. This code can be downloaded into a TwinCAT Analytics Runtime to realize 24/7 data analysis.
Notice | |
Compatibility of automatically generated PLC code The automatically generated PLC code is based on the TwinCAT Analytics Library. Interfaces of the base models of the library are compatible with earlier versions after release of the library. The automatically generated code itself is only a sample code! This code generation may change from version to version. As far as possible, this is solved by the code generation version. |
Notice | |
TwinCAT Version (4026.20 or later) recommended It is recommended to work with a current TwinCAT version. Especially when using the Usermode Runtime, both the Usermode Runtime and TwinCAT should be at least version 4026.20. |
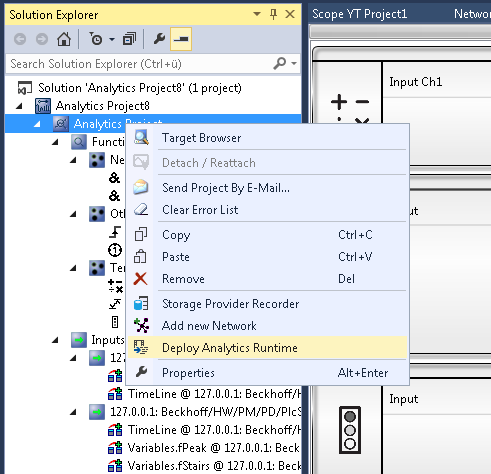
- After configuration, click on the Deploy Analytics Runtime command in the context menu.
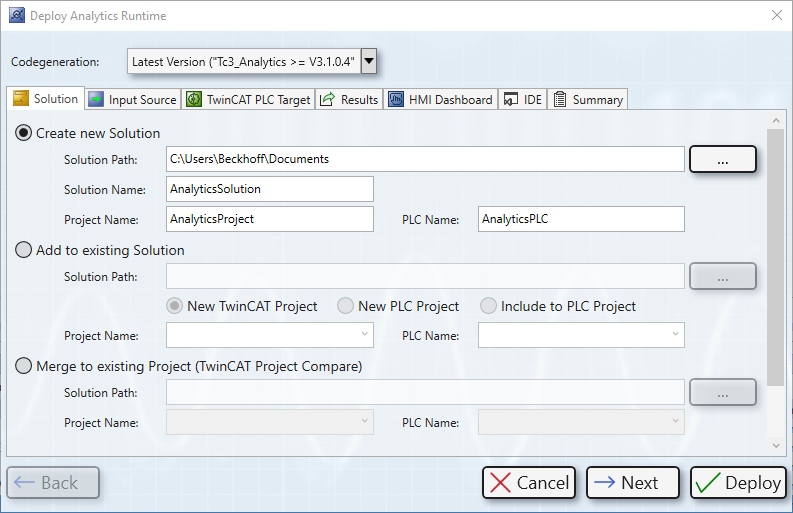
- The Deploy Wizard starts and it is possible to set up the entire required configuration step by step for use.
- 1. On the first tab Solution, select whether a new Solution is to be created (Create new Solution), whether the analysis PLC code is to be integrated or added to an existing Solution as a new project, new PLC or to an existing PLC (Add to existing Solution), or whether the new project is to be added to an existing solution using the TwinCAT Project Compare Tool (Merge to existing Project).
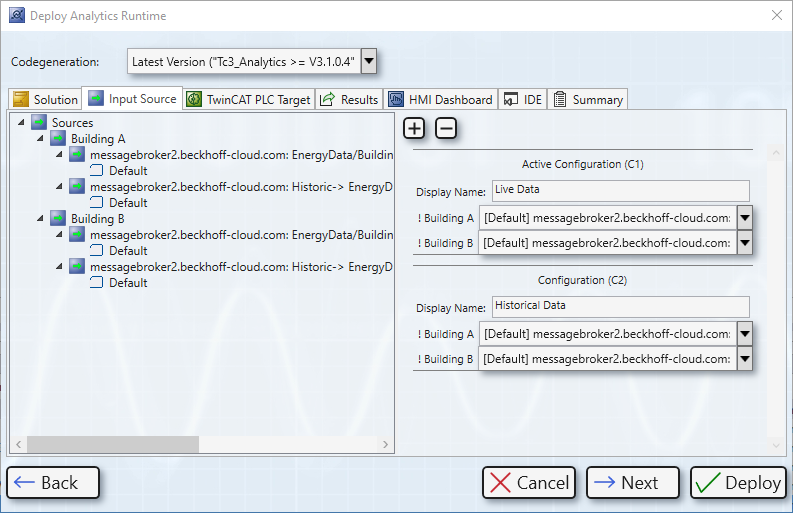
- 2. Select several data source configurations on the second tab Input Source. This is necessary, for example, if both live data and historical data are to be analyzed.
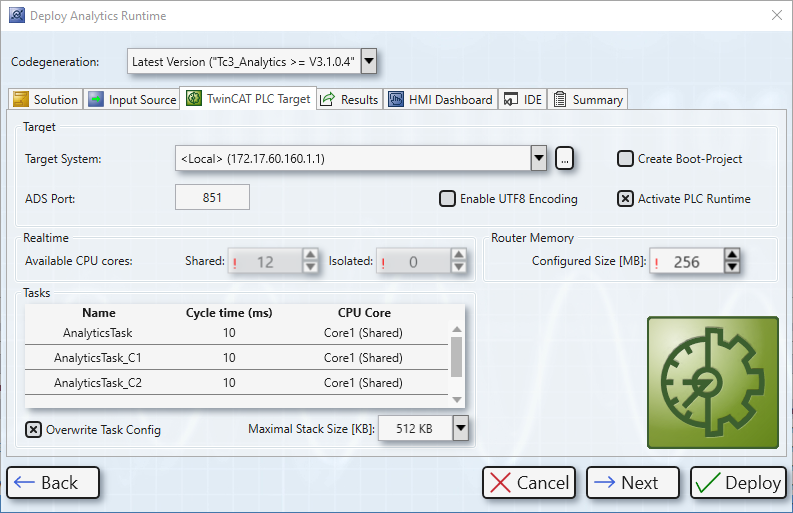
- 3. On the third tab TwinCAT PLC Target PLC-specific parameters such as target system, task cycle time or task assignment to corresponding CPU cores can be specified.
- 4. If you have set the PLC Result property of some functions in the configurator, the Result tab is enabled.
Specify where the results are streamed or saved.
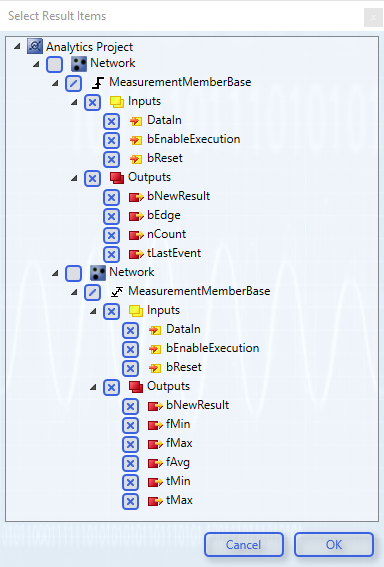
- 5. By clicking Select Result Items it is possible to select only the desired values.
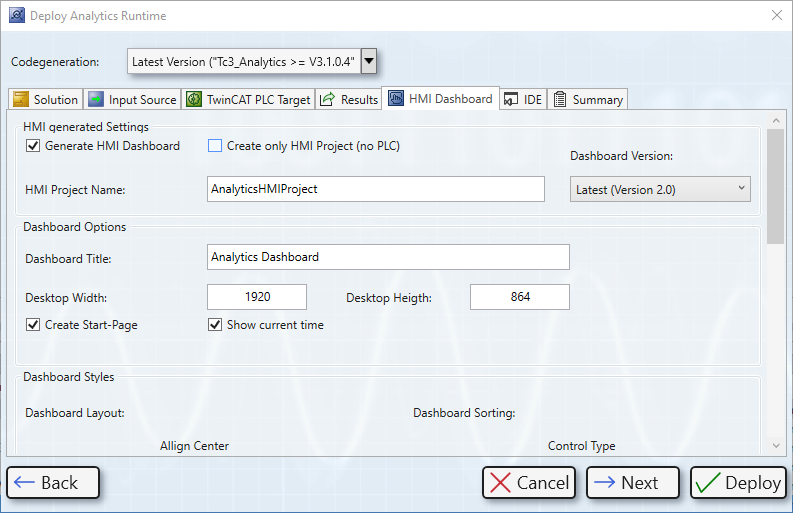
- 6. If you have assigned HMI Controls to one or more functions, the HMI Dashboard tab is enabled. Here you can make various settings to generate a customized dashboard that suits your needs.
- 7. On the IDE tab, select which Visual Studio version or TwinCAT XAE Shell is to be used for the generation if several are installed.

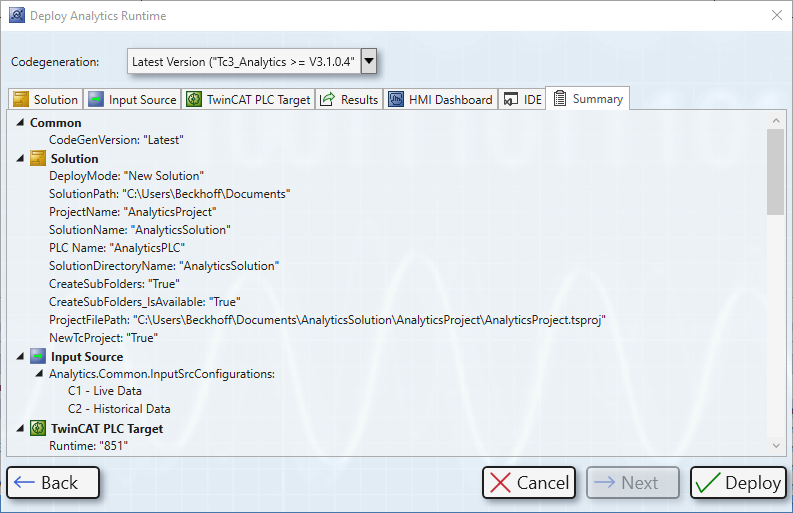
- 8. The Summary tab shows you all the settings you have made for the generation. Click on Deploy to start the generation process.
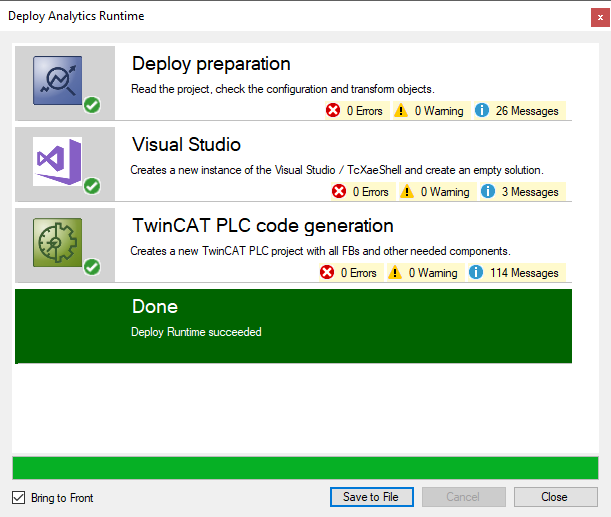
- The overview window shows each step during the generation process, clearly arranged and divided into categories.