Storage Provider Recorder
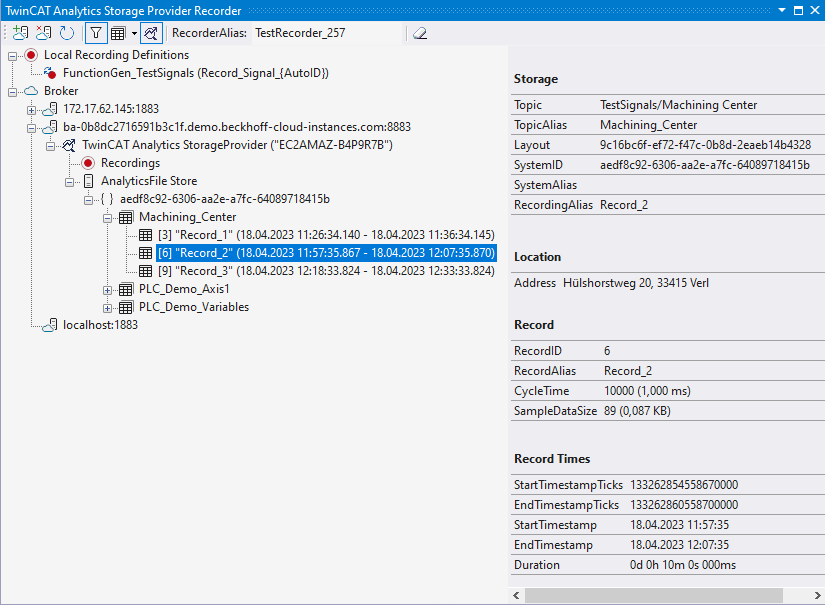
With the Storage Provider Recorder recording definitions can be created, started and managed. In addition, it is possible to manage the data memories of individual Analytics Storage Providers. All important properties of the found Analytics Storage Providers and historized data are clearly displayed.
Toolbar

1 | Add new broker |
2 | Remove selected broker |
3 | Display filters (All / Show my active recordings) |
4 | Select display type (Alias / Topics) |
5 | Show / Hide Offline Analytics Storage Provider |
6 | "RecorderAlias" - grouping name of recordings |
7 | Remove messages from error list |
Recorder window setup
First assign a "RecorderAlias". This helps to group the started recordings and to find its self started ones again. The filter can also be used to display recordings started by others.
After that, one or more brokers can be set up. This is done via the already known input mask for MQTT connection properties.
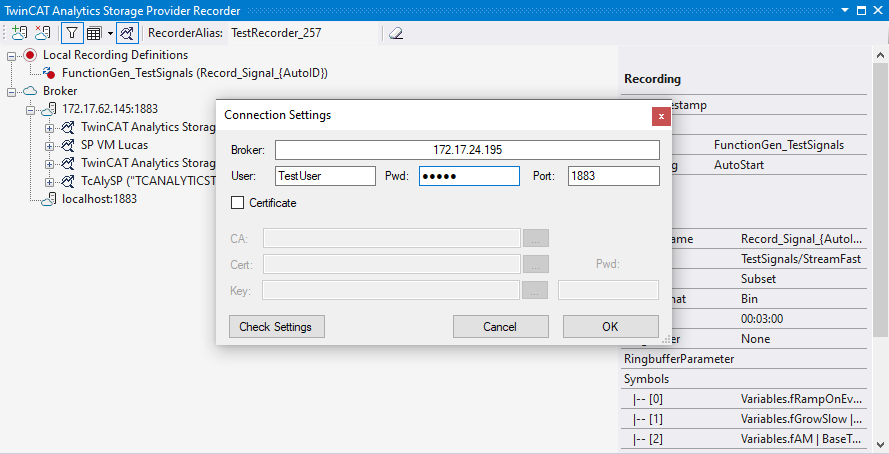
Once a connection to the broker could be established, all Analytics Storage Providers connected to it will be listed.
Create recording definition
To configure the recording, select your target in the Target Browser. Click Live Data and select one or more variables by multiple selection and drag and drop them to the Local Recording Definitions node in the Recorder window.
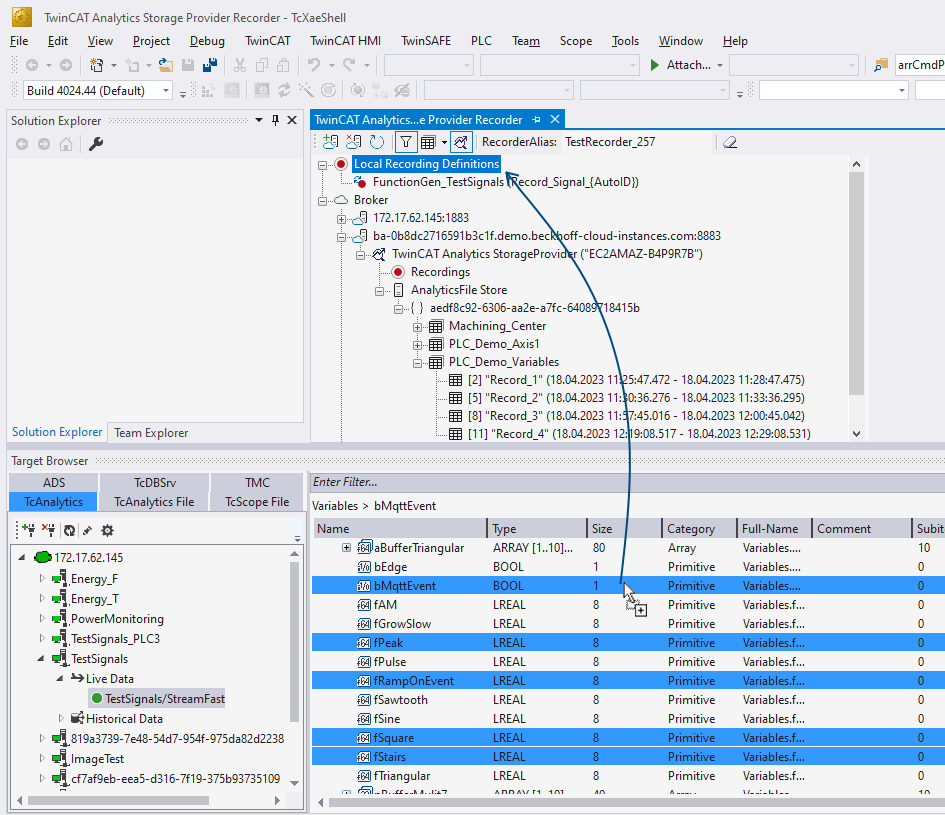
In the recorder you can add the selected variables or the complete source process image of the variables.
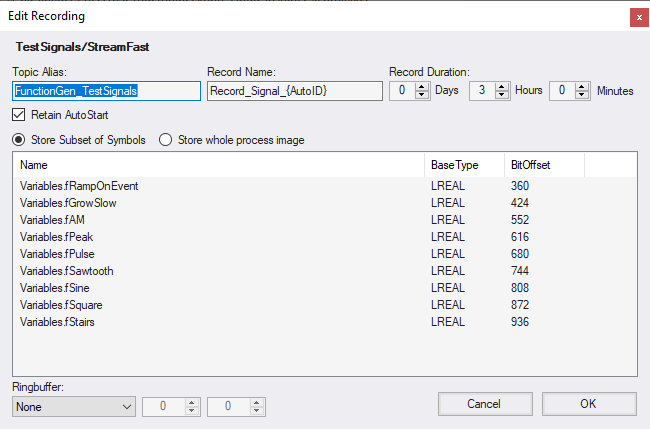
You can also configure recording names and a duration (otherwise the recording will run endlessly until it is stopped manually). A ring buffer can be set by storage or time.
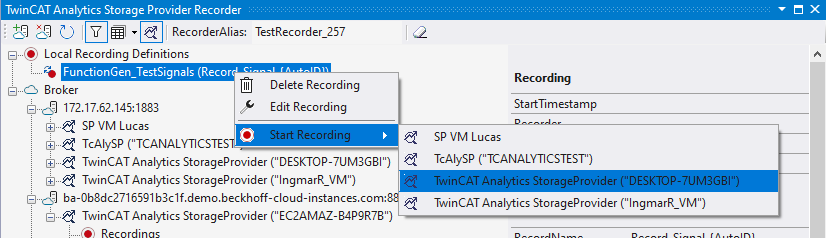
Start recording
There are three different ways to start a recording.
- Via the context menu at a local recording definition node. Here you can select the desired Analytics Storage Provider, which should record the data. Only the storage providers that have access to the selected topic are displayed.
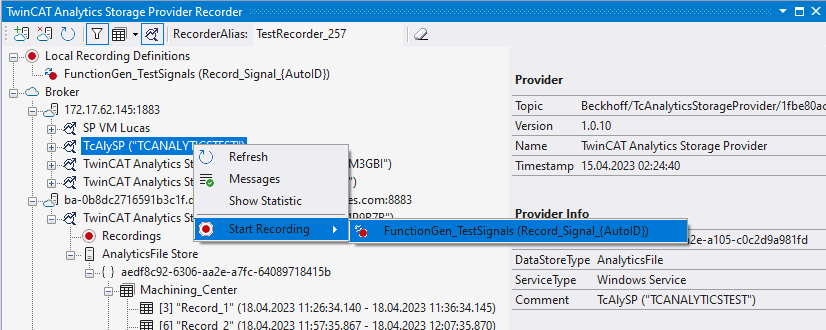
- From the context menu on the Analytics Storage Provider node. The desired recording definition can be selected here. Only the definitions that can also be processed by the Analytics Storage Provider are displayed.
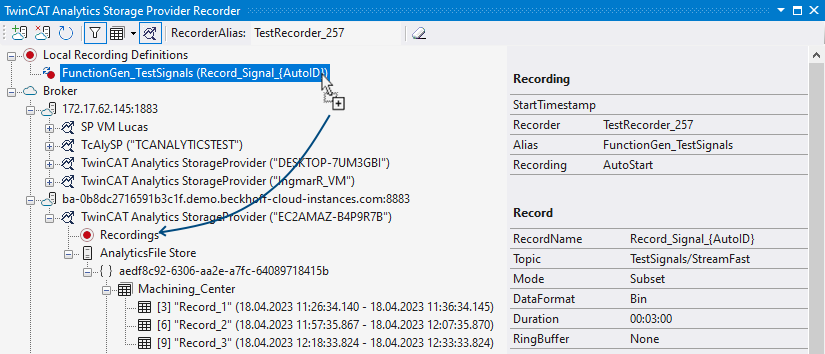
- Drag and drop the local recording definition node. The desired recording definition can be started on the desired Analytics Storage Provider via drag-and-drop. If the Storage Provider is unable to execute the recording definition, an error message is displayed in the error list.
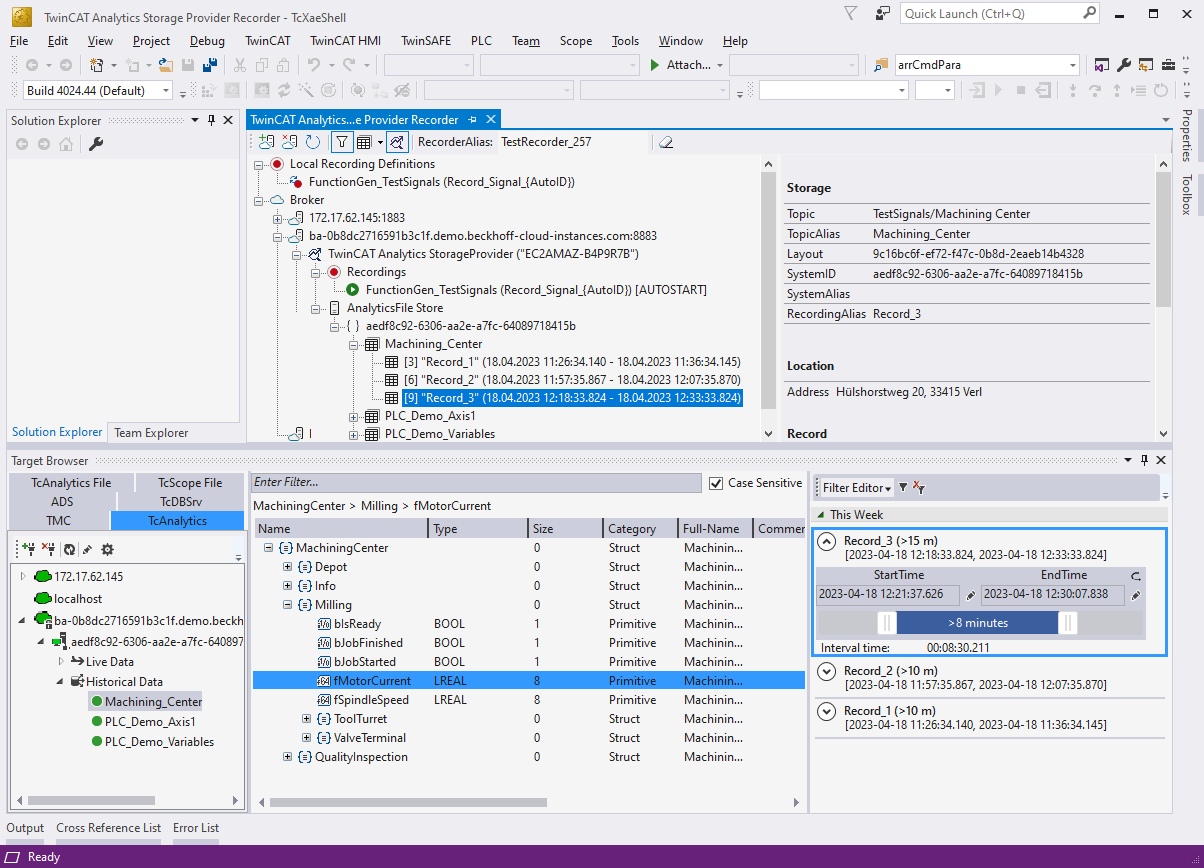
Use historized data
After and also during recording, you can select the historical data as input for your analysis in Target Browser. In the Target Browser, you will find a new control on the right side for the historical data. There you can select the timespan for your data.