Lambda Template

The lambda template guides through the development of a lambda function. Within the parameter area there is a control. This control contains four buttons for configuring, programming and publishing the lambda function. The fourth button is for viewing the log files of the development process. A status bar provides additional information during the process. A drop-down menu at the bottom right offers the possibility to choose between a release and a testing version of the lambda function.
Configuring the lambda function
The first button from the left opens a wizard. With the help of this wizard you can configure the lambda function.
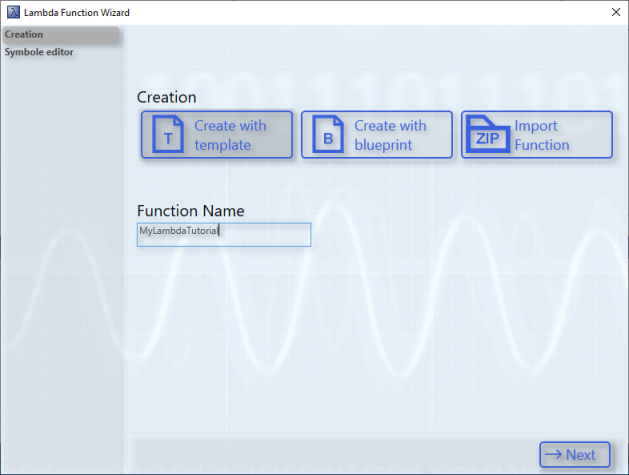
On the first page you can choose between three modes. The first mode is called Template. With this mode new lambda functions can be developed. All files and dependencies are prepared in a template and can be implemented with user-specific logic.

The second mode is called Blueprint. There are three blueprints already implemented in each case. There is a blueprint for calculating trigonometric functions, for label encoding and for calculating covariance. These blueprints serve as an example configuration and implementation of a lambda function. More detailed information is available at the following link (see: Lambda Blueprints).
Via the third mode you import exported lambda functions. With a click on the button Import Function, an Open File dialog opens. Then you can select the exported lambda function, which should be available as a ZIP archive. As soon as the lambda function is imported, the name can be recognized and the configured symbols are shown on the next page.
The name of the lambda function can be selected individually. However, the version number in the name of the lambda function should not be adjusted or changed. Otherwise, the proper use of the lambda functions may be impaired. Also the function name should contain at least four characters.
On the second page of the wizard you configure the symbols and variables of the lambda function.
In the Blueprint mode, some symbols are already preconfigured.
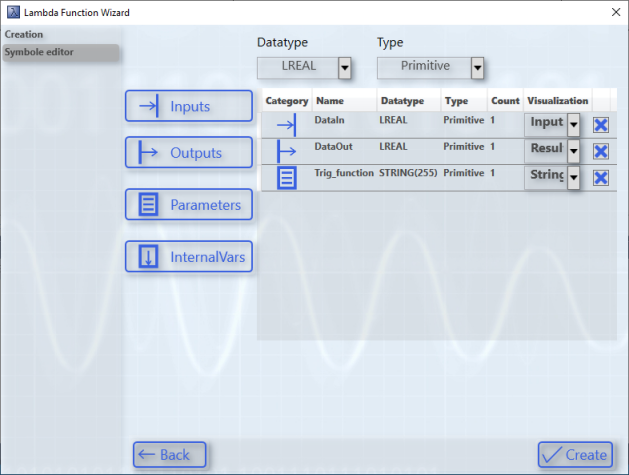
In the template mode the list of symbols is empty. As shown in the following figure, you can configure user-specific symbols.
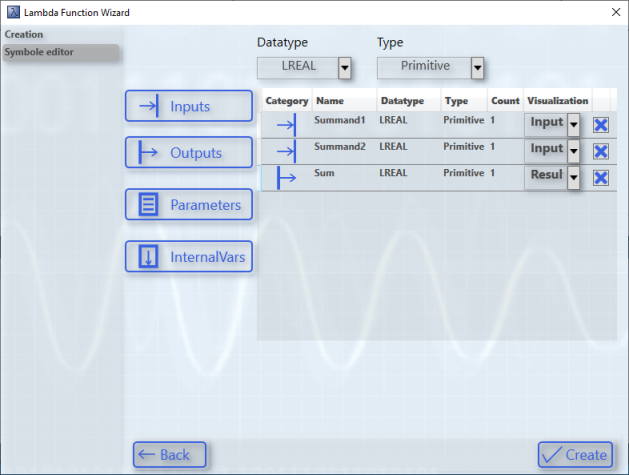
Use the two drop-down boxes at the very top of the page to select the data type and the data structure type, respectively.
Available data types | ||||
|---|---|---|---|---|
LREAL | REAL | BOOL | WORD | INT |
LINT | ULINT | LTIME | STRING(255) |
|
For the data structure types you can choose between primitive and array.
Use the buttons on the right to add the variables with the selected data type and data structure type.
Internal variables are member variables. They are not displayed in the algorithm interface and cannot be linked in Analytics Workbench. Their purpose is to store variable values over cycles.
If the data structure type Array is selected for a variable, the size of the array can be specified in the Count column of the variable. To create multi-dimensional arrays, the dimensions must be separated with the letter "x" (example: 2x4).
You can configure the visualization of the symbol in the Workbench using the drop-down menu. Depending on the data type, different visualizations are possible. Undefined visualizations are not possible. No visualization can be selected for the internal variables because they are not displayed in the Workbench. The following visualizations are possible for the respective data types for inputs, outputs and parameters:
Data type | Visualization | Sample |
|---|---|---|
STRING(255) | String (Input) |
|
String (Output) |
| |
String (Parameter) |
| |
FileOpen/FileSave (Parameter) |
| |
ULINT | Timestamp (Output) |
|
BOOL | Boolean (Input) |
|
Boolean (Output) |
| |
Boolean (Parameter) |
| |
REAL | Input (Input) |
|
Result (Output) |
| |
INT | Count (Output) |
|
LINT | Timespan (Output) |
|
| Clock (Parameter) |
|
Interval (Parameter) |
| |
WORD | DayOfWeekMask (Parameter) |
|
LREAL | Input (Input) |
|
Result (Output) |
| |
Level (Parameter) |
|


After clicking the Create button, the C++ project is generated in the background and the wizard is closed.
Programming the lambda function

After you click the second button, the C++ project will be added to the Solution Explorer. The project contains all files, dependencies and configuration to develop an executable TcCOM module for the Analytics Workbench as well as for use in a real-time context.
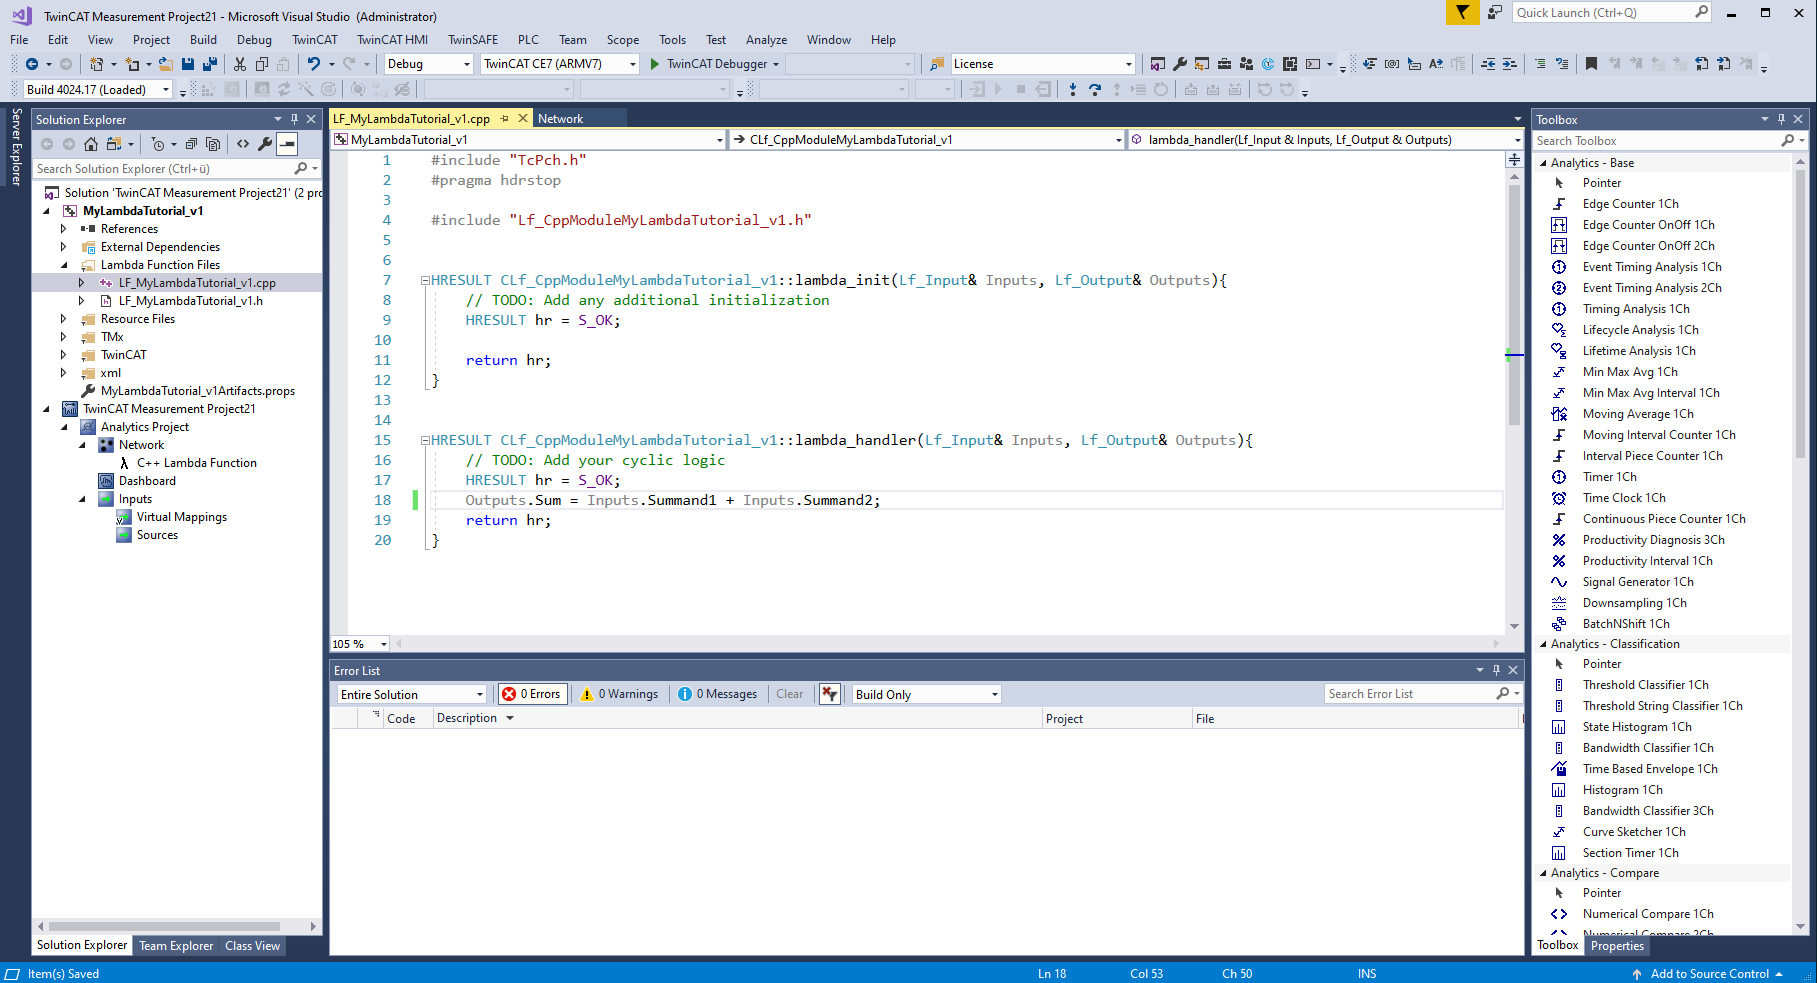
The automatically opened file contains several encapsulated functions. The so-called lambda_init method is for the initialization of variables. The lambda_handler method is executed cyclically. The lambda_uninit method is for deinitializing variables. In both methods the inputs, outputs, parameters and internal variables are available as structures in the method parameters. The following inputs and outputs are available by default in the lambda functions.
Category | Symbol name | Data type | Description | Visibility |
|---|---|---|---|---|
Input | tTimestamp | ULINT | The variable contains the TwinCAT timestamp. | Hidden |
bReset | BOOL | The variable resets the configured symbols. | Optional | |
bEnableExecution | BOOL | The variable activates the lambda_handler method. | Optional | |
Output | bNewResult | BOOL | The variable indicates whether the algorithm returns new results. | Optional |
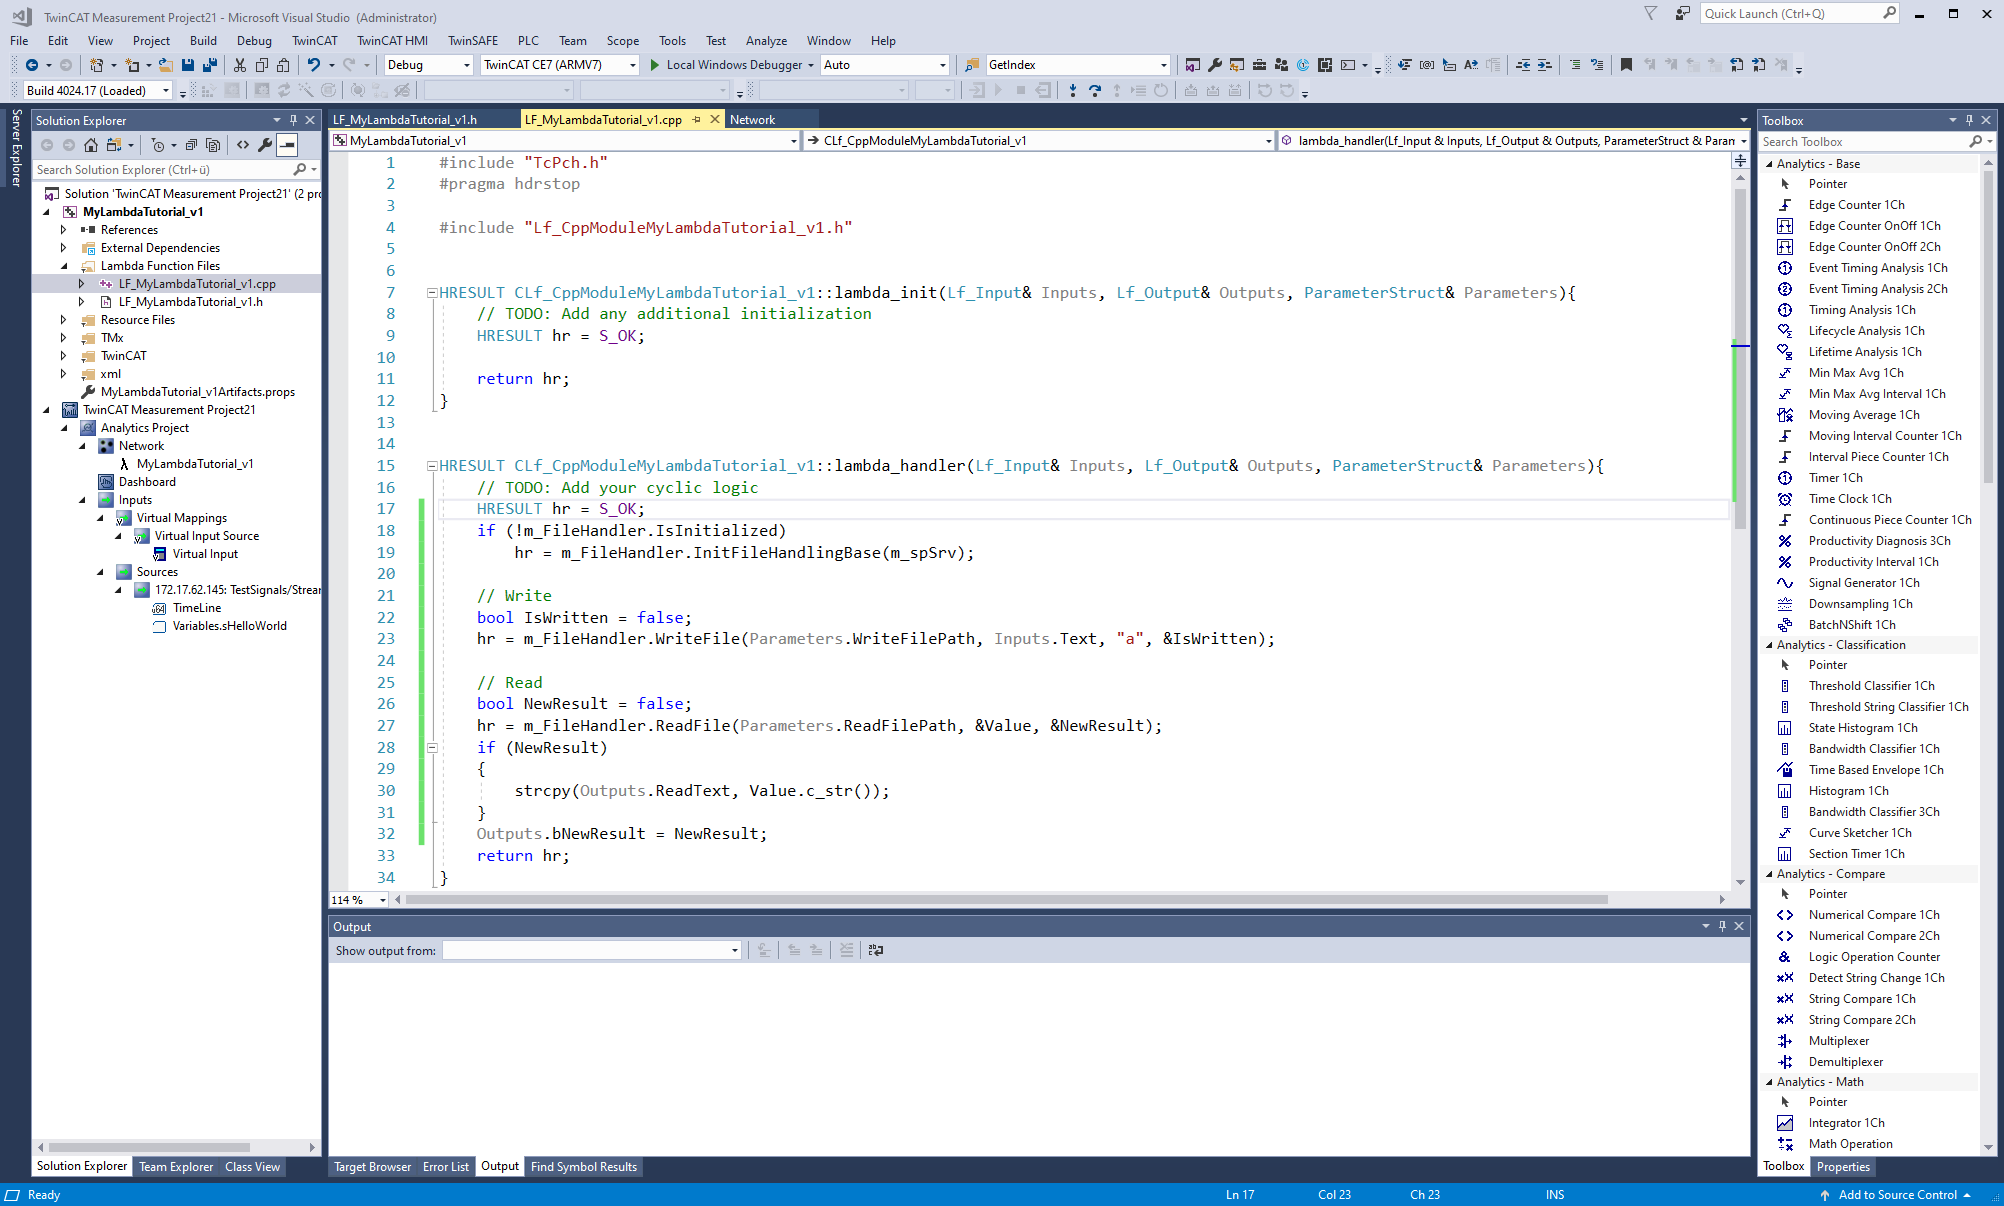
Variables created within the methods lose their content after one cycle. Internal variables offer the possibilities to store variable values over cycles. An object named "m_FileHandler" is available in the two Lambda methods. You must initialize this object once, if you have not already done so. Then you can use the two functions "ReadFile" and "WriteFile" of the object. The functions have the following properties:
Function name | Parameter |
| Return value | ||
|---|---|---|---|---|---|
InitFileHandlingBase | ITComObjectServer* ipSrv |
|
|
| Hresult |
ReadFile | PCCH filename | Std::string* value | bool* bNewResult |
| Hresult |
WriteFile | PCCH filename | Std::string value | Std::string mode | bool* bIsWritten | Hresult |
In TwinCAT Analytics Workbench, file access is synchronous, whereas in Analytics Runtime it is asynchronous. This feature is automatically distinguished in the methods. In case of an asynchronous read access, the method does not return the read value in the same cycle. Only as soon as the parameter bNewResult returns the value true, the parameter value contains the read value. With asynchronous write access, the data is stored internally and written at the next opportunity. Once the data is written, the bIsWritten parameter returns true. You can use the two parameters bNewResult and bIsWritten analogously for a synchronous file access. The following figure shows an example usage of the file access in the lambda functions:
Create the project as usual in Visual Studio® to check the syntax.
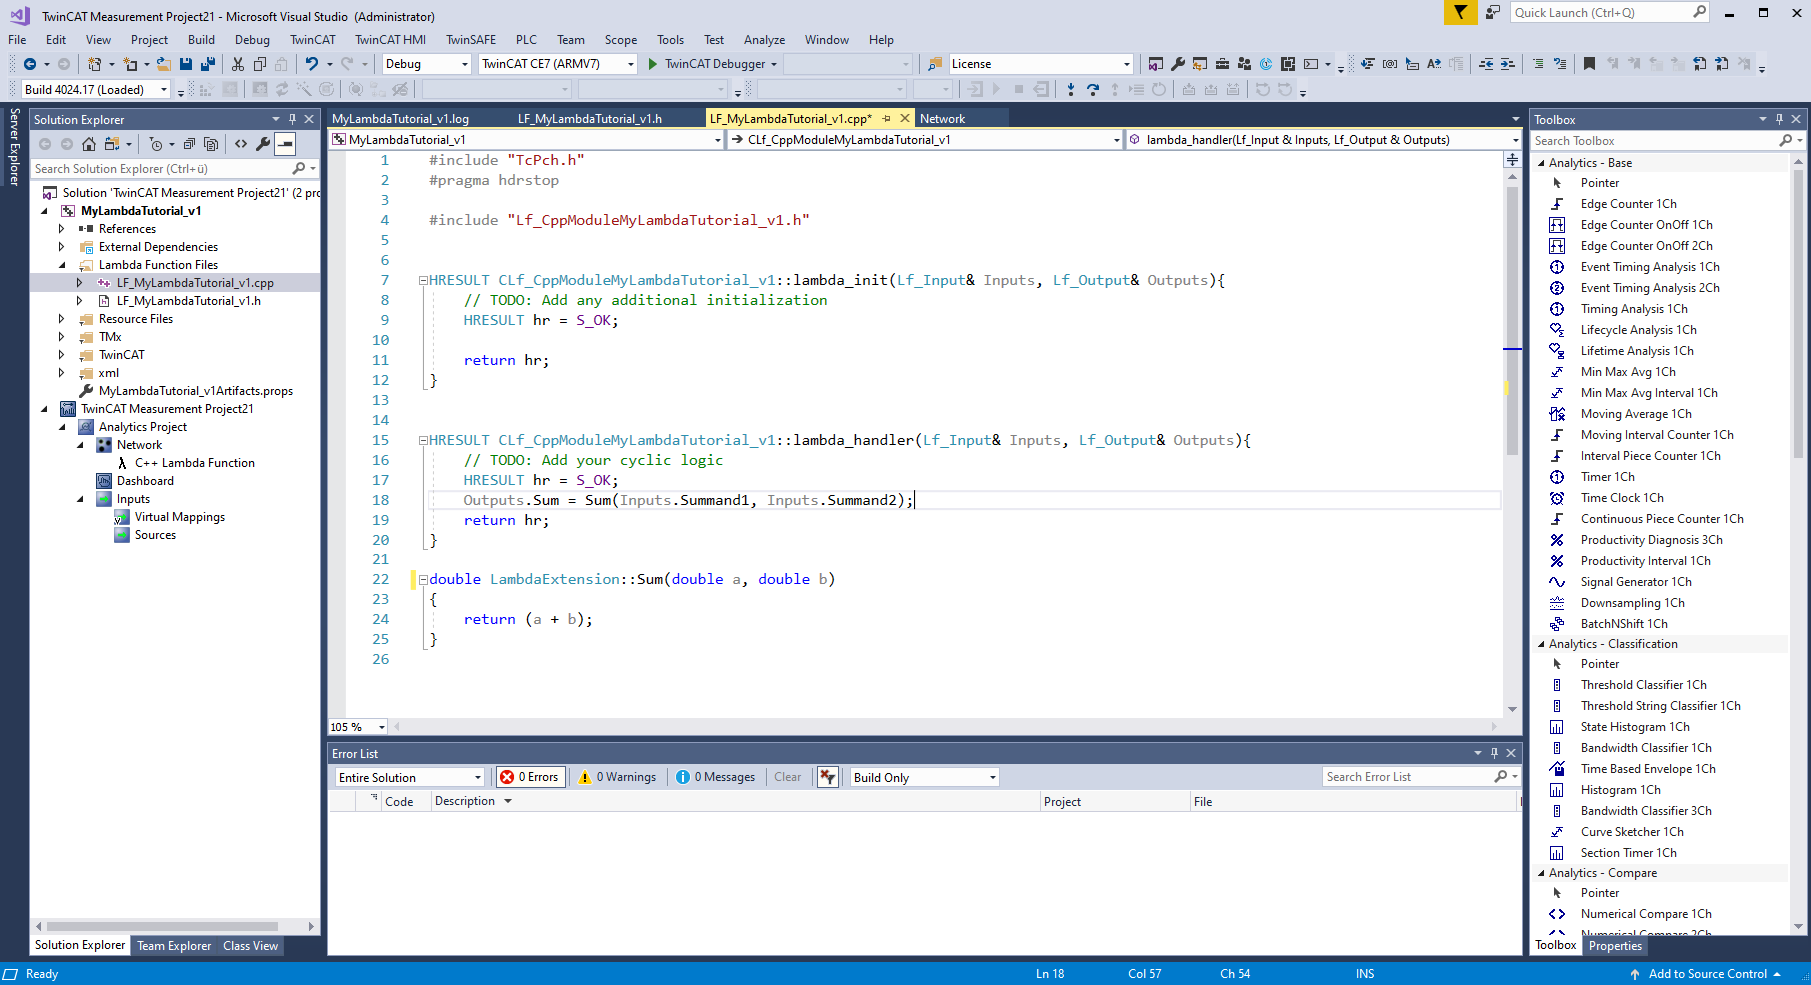
In the header file in the "Lambda Function Files" folder you can declare user-specific objects and methods.
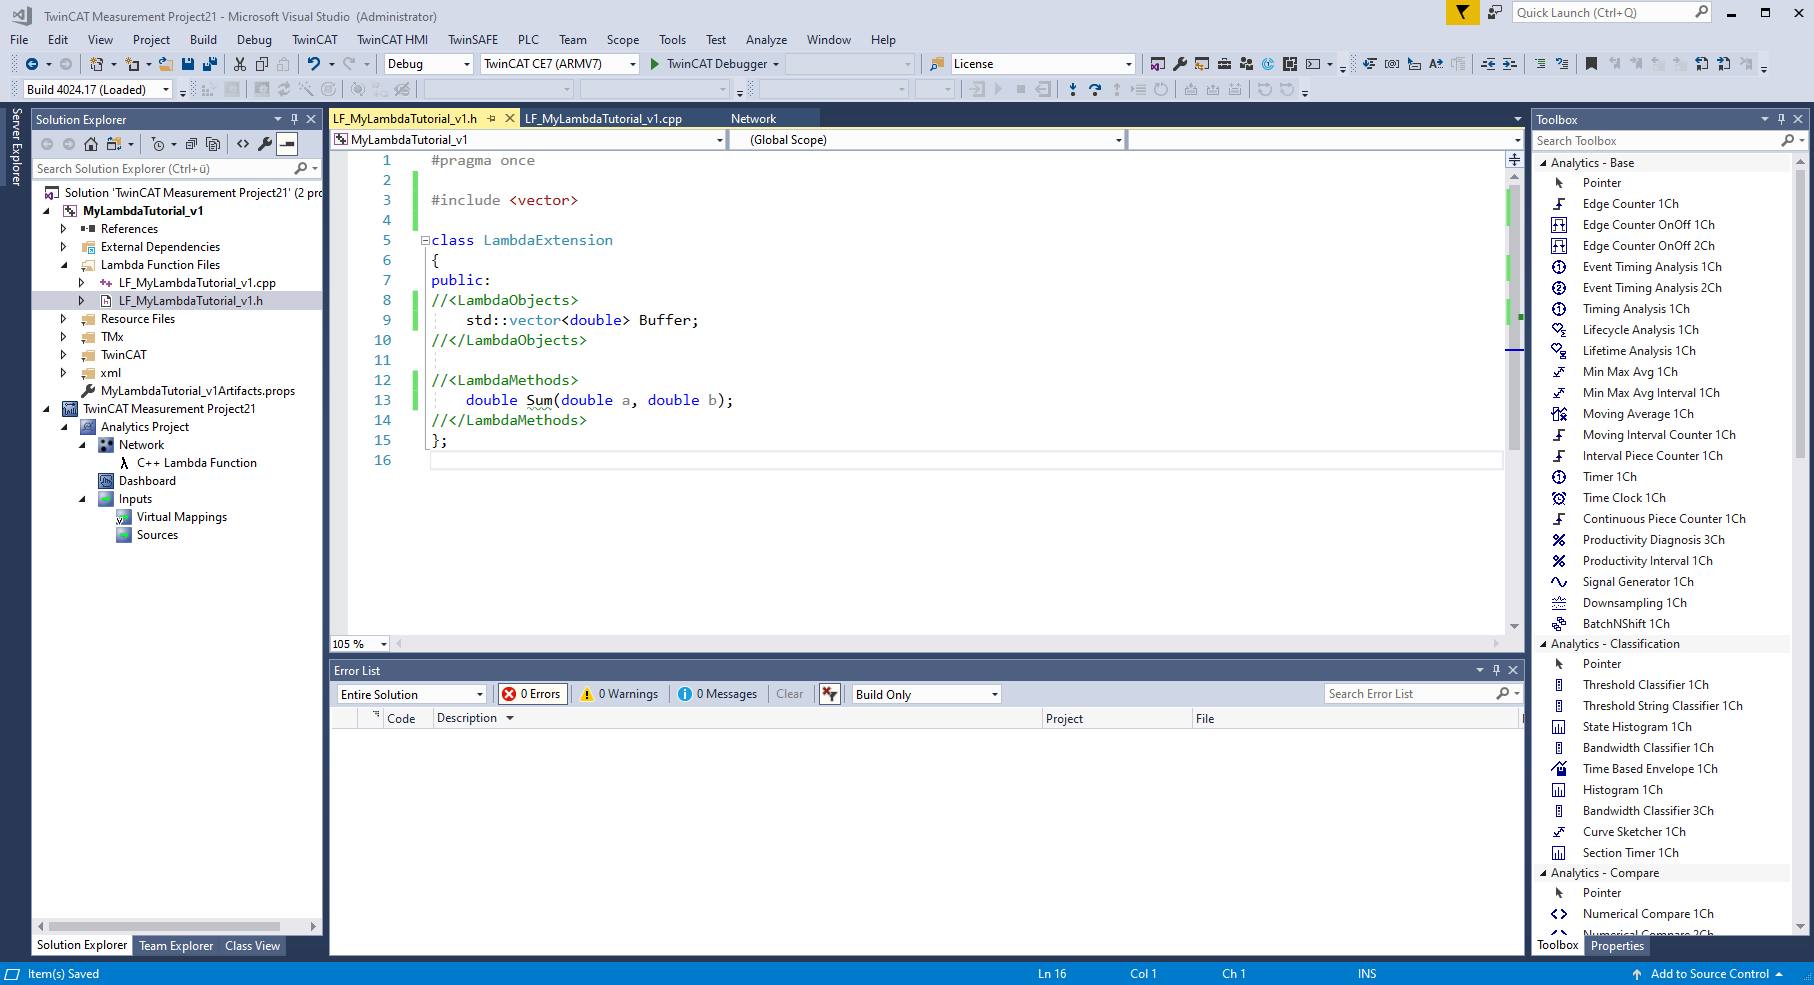
Above the class "LambdaExtension" libraries can be included. Within the class, objects and methods can be declared and used in the lambda functions. The newly declared methods can be implemented below the two lambda functions.
After the logic is integrated, you need to save the project. Then switch back to the lambda template in the Analytics project.
If sufficient know-how in dealing with TcCOM modules is available, the C++ project can be extended individually. If the TcCOM modules are used improperly, errors may occur during subsequent steps of the lambda functions. More information on the development of TcCOM modules can be found at the following link TwinCAT C++ development.
Publishing the lambda function
Before publishing, you can configure the type of lambda function using the drop-down menu at the bottom right.

A lambda function of type "testing" contains the control with the four buttons for developing lambda functions. This type is useful during the development and testing phase.

Once the lambda function is working, select the "release" type. After clicking the third button, a Release Wizard opens.

The wizard offers the possibility to assign a final name and select individual icons. One icon with 256 x 256 pixels and one icon with 16 x 16 pixels must be selected. Alternatively, you can continue to use the Lambda icons. Use the drop-down menu to assign the lambda function to a specific group in the toolbox. By default, the "C++ Lambda Functions" group is selected. For example, a final lambda function can be placed in the "Analytics - Base" section of the toolbox. If the "Map HMI Control" checkbox is activated, a wizard for linking HMI controls with the lambda function opens after publishing. In Analytics HMI Control Manager, the points for module selection are preselected directly with the corresponding lambda function (see also Use customized and own controls). Use the Create button to generate the lambda function.

After successful publishing, the lambda template is automatically replaced by the newly generated lambda function.
Viewing the log files
If an error occurs while publishing the lambda function, it is shown in the status display and the log file can be viewed via the fourth button.