TwinCAT/BSD
 | These instructions refer to version 26.5.0 of Keycloak. |
| Keycloak is operated in "dev" mode in this manual. This mode is purely for test purposes. |
Installation of Keycloak
- Connect to the TwinCAT/BSD Package Manager to install the corresponding package.
- 1. Open the repos/FreeBSD.conf to turn on the FreeBSD® repository.
doas ee /usr/local/etc/pkg/repos/FreeBSD.conf- 2. Change the value of FreeBSD® to "yes"
FreeBSD: {enabled: yes}- 3. Update the packages.
doas pkg update- 4. Install OpenJDK.
doas pkg install openjdk24- 5. Install wget
doas pkg install wget- 6. Download Keycloak
cd /usr/local
doas wget https://github.com/keycloak/keycloak/releases/download/26.5.0/keycloak-26.5.0.tar.gz- 7. Unpack Keycloak
doas tar zxvf keycloak-26.5.0.tar.gz- 8. Start Keycloak
cd /usr/local/keycloak-26.5.0
export KC_BOOTSTRAP_ADMIN_USERNAME=admin
export KC_BOOTSTRAP_ADMIN_PASSWORD=1
doas bin/kc.sh start-dev --bootstrap-admin-username $KC_BOOTSTRAP_ADMIN_USERNAME --bootstrap-admin-password $KC_BOOTSTRAP_ADMIN_PASSWORD- 9. Keycloak was created with a temporary admin.
- Keycloak has been successfully launched.
Firewall settings
- 1. Open pf.conf to configure the firewall.
doas ee /etc/pf.conf- 2. Add the port 8080.
pass in quick proto tcp to port 8080 keep state- 3. Save and exit the editor.
- 4. Reload the firewall configuration.
- Port 8080 has been opened in the firewall.
doas pfctl -f /etc/pf.confConfigure Keycloak
- 1. Open the following URL in your browser:
Example for the placeholder:
<root> = 192.168.2.144:8080
http://<root>/- 2. Log in to the Keycloak server.
- 3. Select the Clients tab.
- 4. Create a new client for your TwinCAT HMI application.
- 5. Name your client
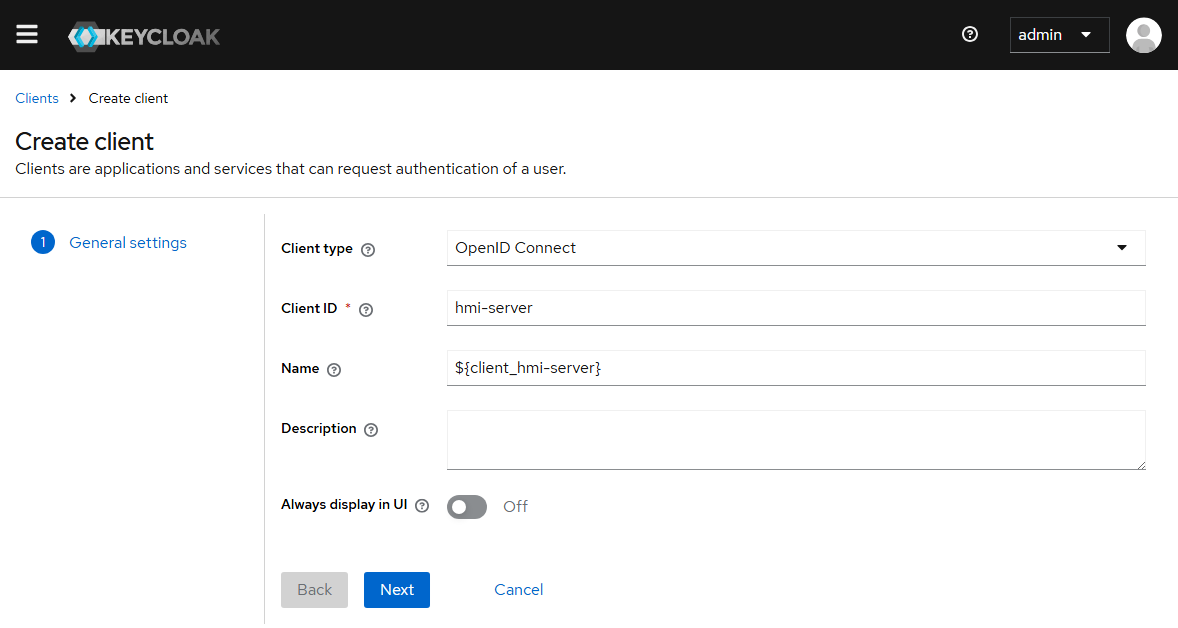
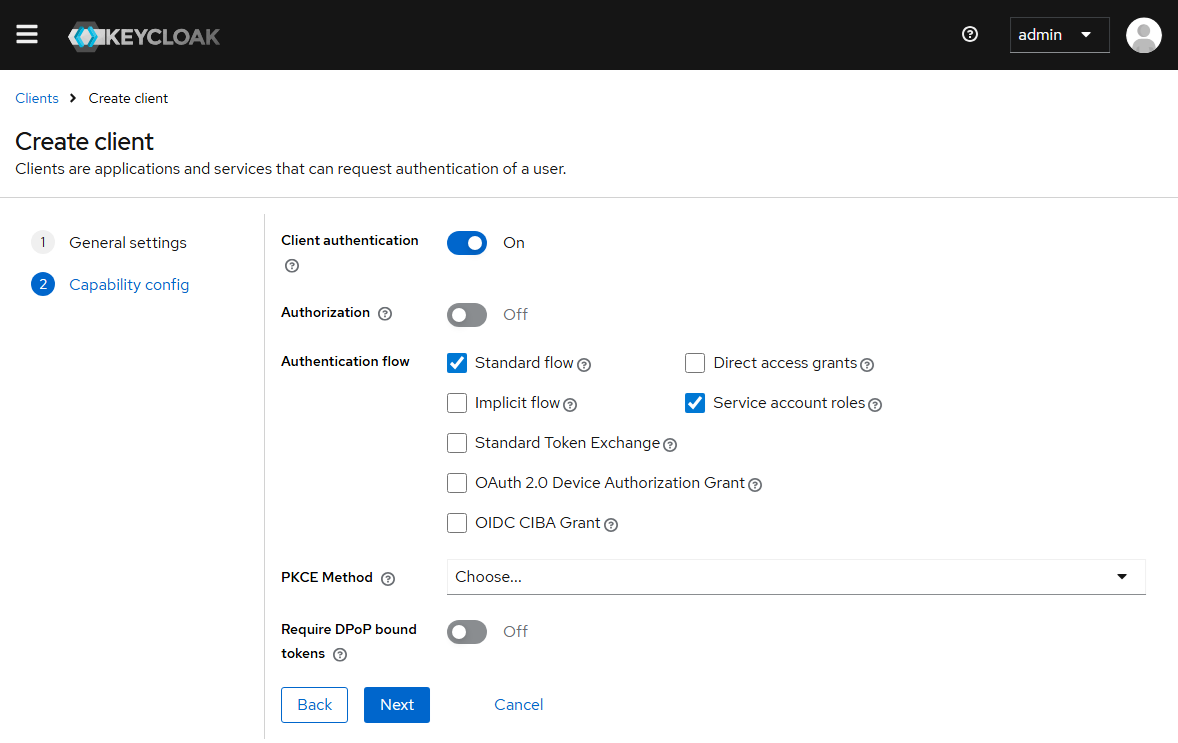
- 6. Switch Client authentication to on and activate Service account roles
- 7. Enter the Valid redirect URIs as shown in the screenshot.
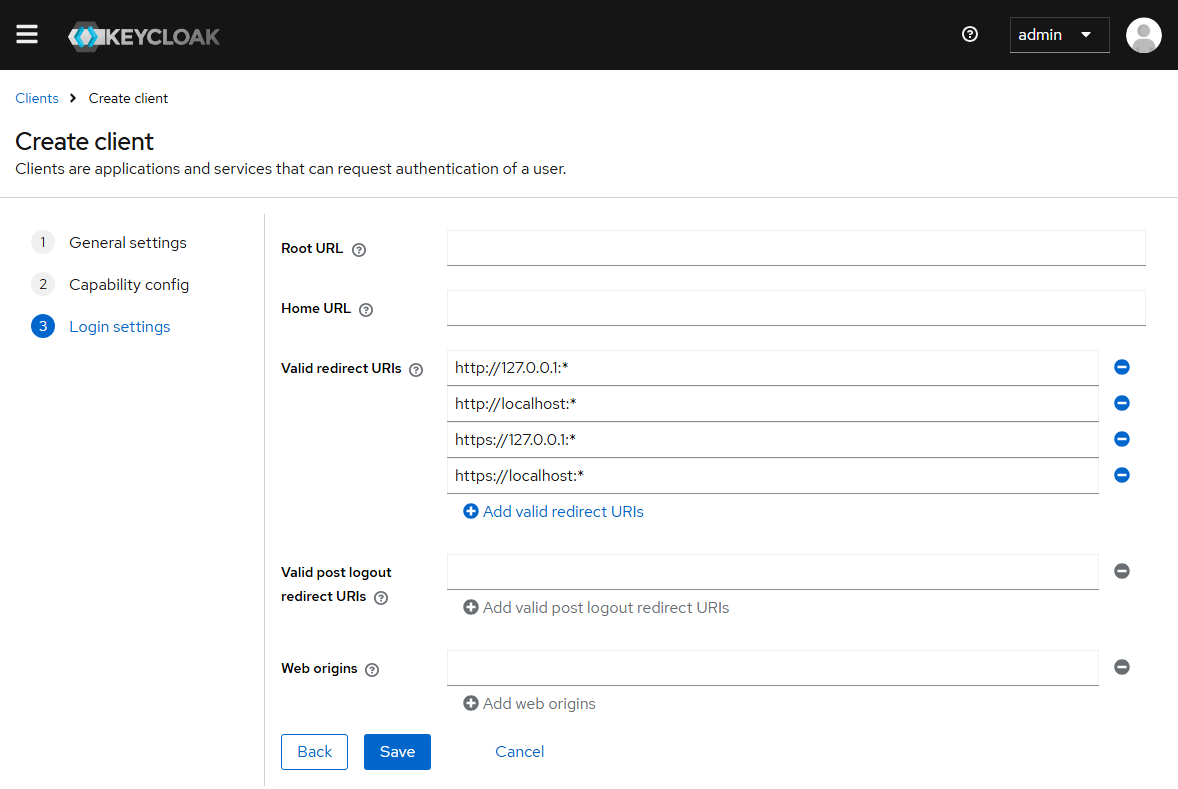
http://127.0.0.1:*
http://localhost:*
https://127.0.0.1:*
https://localhost:*- 8. Click on Save to create the new client.
- The new client has been successfully created.