Windows
 | These instructions refer to version 26.5.0 of Keycloak. |
| Keycloak is operated in "dev" mode in this manual. This mode is purely for test purposes. |
Installation of OpenJDK
- 1. Download the latest version of OpenJDK.
- 2. Unpack the zip file in "C:\Program Files"
- You have successfully stored OpenJDK. This must now be entered in the system environments.
Enter OpenJDK in system environments
- 1. Enter System Environment Variables in the Windows search.
- 2. Open the Environment Variables window.
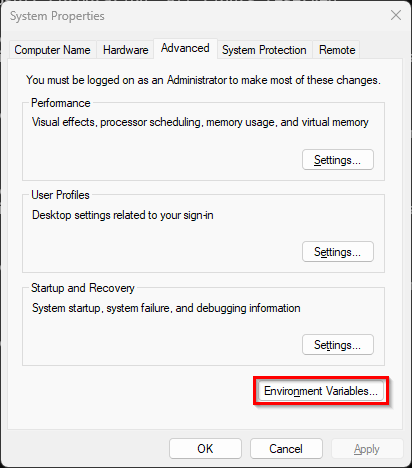
- 3. Add a new entry.
Variable: JAVA_HOME
Value: C:\Program Files\jdk-<version>
Enter the entry either specifically for a user or system-wide.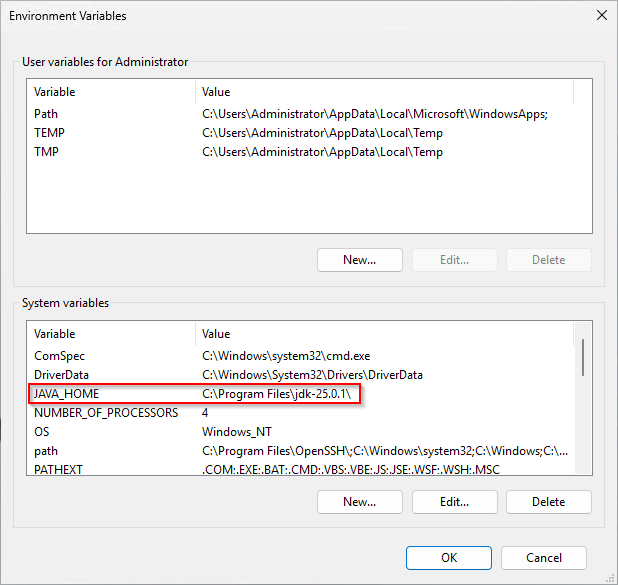
- 4. Restart the PC so that the adjustment is applied.
- "OpenJDK" can now be addressed directly in the command line or PowerShell.
Installation of Keycloak
- 1. Download the Keycloak zip.
- 2. Unpack the zip file in "C:\Program Files"
- You have successfully stored Keycloak. This must now be entered in the system environments.
Start Keycloak
- 1. Open PowerShell
- 2. Start Keycloak
$env:KC_BOOTSTRAP_ADMIN_USERNAME="admin"
$env:KC_BOOTSTRAP_ADMIN_PASSWORD="1"
& 'C:\Program Files\keycloak-26.5.0\bin\kc.bat' start-dev- 3. Leave PowerShell open to avoid stopping the execution.
- Keycloak has been successfully launched.
Configure Keycloak
- 1. Open the following URL in your browser:
Example for the placeholder:
<root> = 192.168.2.144:8080
http://<root>/- 2. Log in to the Keycloak server.
- 3. Select the Clients tab.
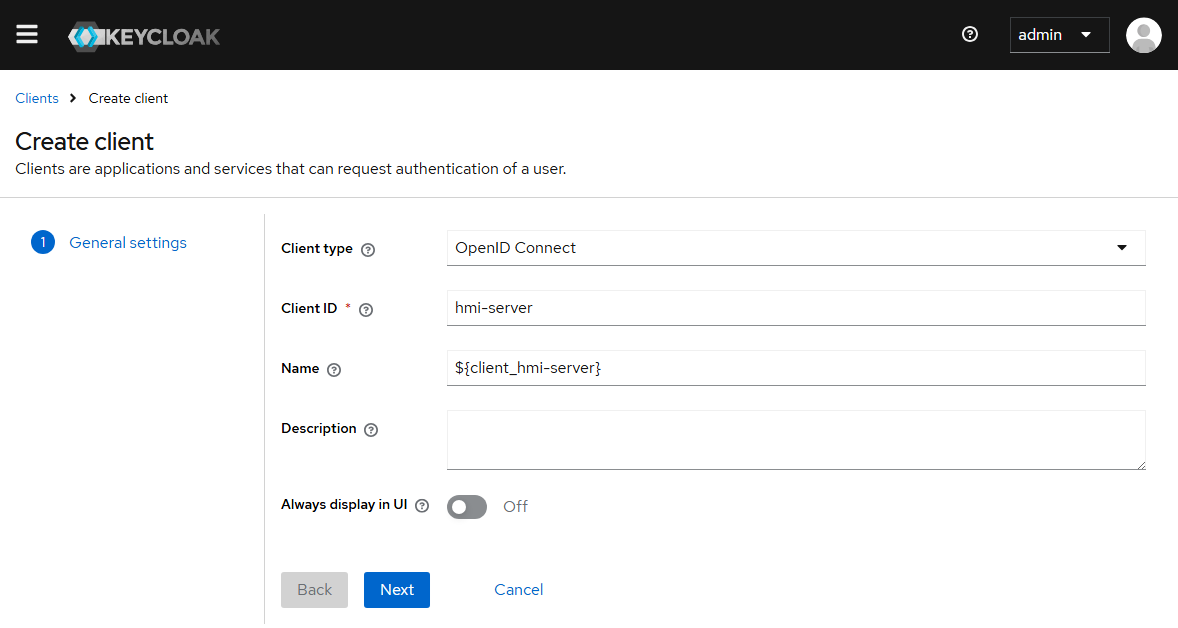
- 4. Create a new client for your TwinCAT HMI application.
- 5. Name your client
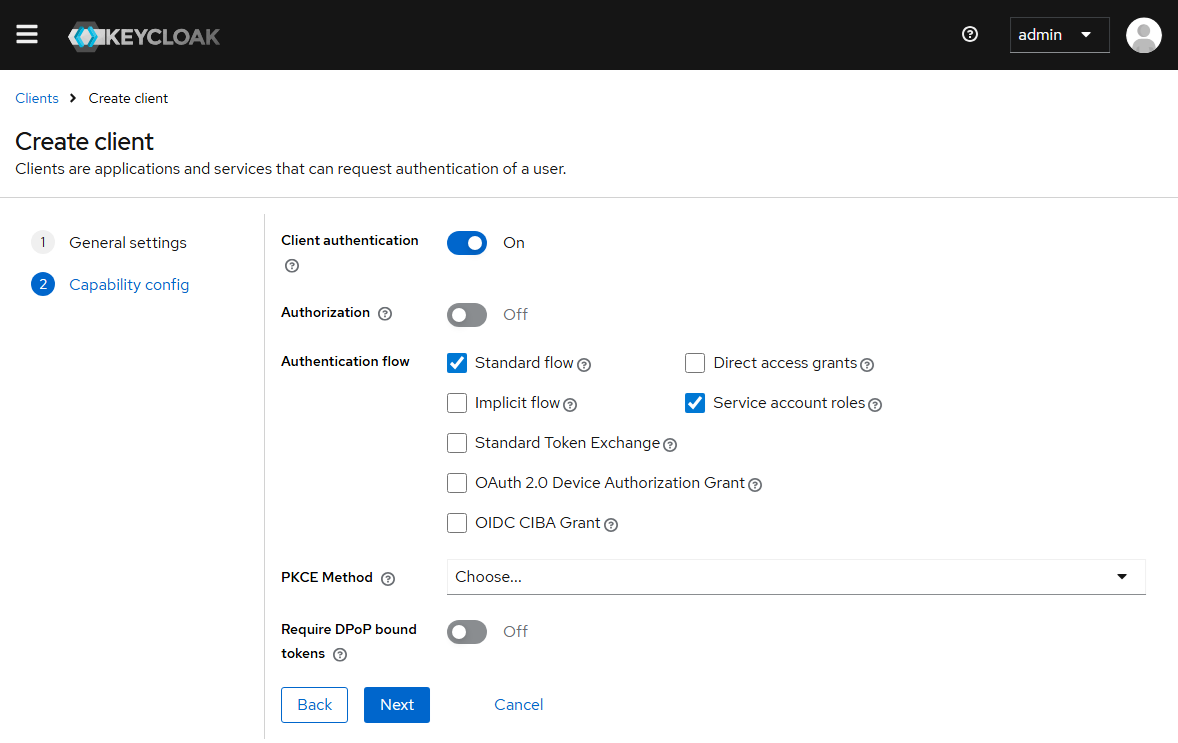
- 6. Switch Client authentication to on and activate Service account roles
- 7. Enter the Valid redirect URIs as shown in the screenshot.
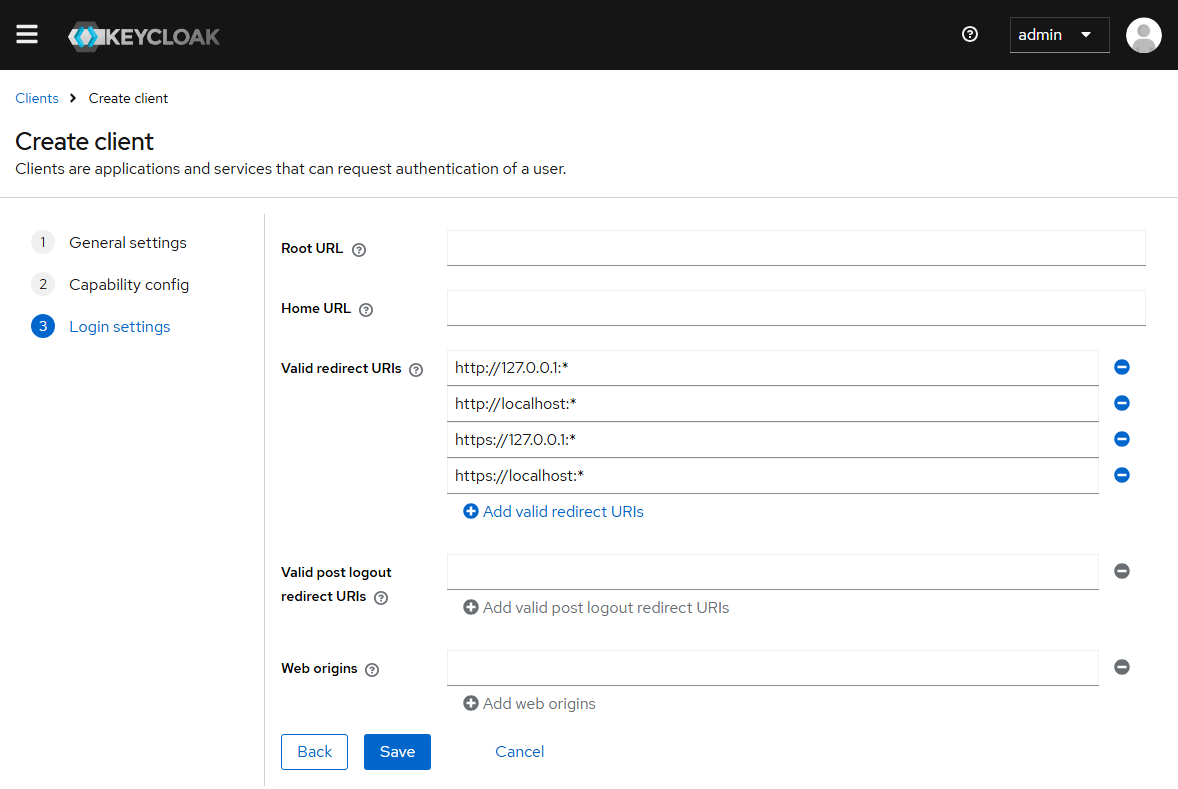
http://127.0.0.1:*
http://localhost:*
https://127.0.0.1:*
https://localhost:*- 8. Click on Save to create the new client.
- The new client has been successfully created.