Docker®
 | These instructions refer to version 26.5.0 of Keycloak. The "latest" Docker® image is still referenced. |
| Keycloak is operated in "dev" mode in this manual. This mode is purely for test purposes. |
Installation of Docker® on TwinCAT Runtime Linux®
- Connect to the PackageManager of TwinCAT Runtime Linux® to install the corresponding package.
- 1. Update the packages.
sudo apt update- 2. Install the official GPG key from Docker®.
sudo apt-get install ca-certificates curl
sudo install -m 0755 -d /etc/apt/keyrings
sudo curl -fsSL https://download.docker.com/linux/debian/gpg -o /etc/apt/keyrings/docker.asc
sudo chmod a+r /etc/apt/keyrings/docker.asc- 3. Add the Docker® repository.
echo \
  "deb [arch=$(dpkg --print-architecture) signed-by=/etc/apt/keyrings/docker.asc] https://download.docker.com/linux/debian \
  $(. /etc/os-release && echo "$VERSION_CODENAME") stable" | \
sudo tee /etc/apt/sources.list.d/docker.list > /dev/null- 4. Update the packages.
sudo apt update- 5. Install the Docker® package.
sudo apt install docker-ce docker-ce-cli containerd.io docker-buildx-plugin docker-compose-plugin- 6. Check whether Docker® has been started successfully.
sudo systemctl status docker- 7. Start Docker® if it is not already running.
- Docker® has been successfully installed.
sudo systemctl start dockerCreating the YAML file
- 1. Create a new folder structure in the Home folder.
mkdir -p docker/keycloak- 2. Create a YAML file for Keycloak.
echo "# Datei: /compose.yaml
services:
  keycloak:
    image: quay.io/keycloak/keycloak:latest
    environment:
      KEYCLOAK_ADMIN: admin
      KEYCLOAK_ADMIN_PASSWORD: 1
      KC_HTTP_ENABLED: true
    command: [ 'start-dev' ]
    ports:
- 8080:8080" > /home/Administrator/docker/keycloak/compose.yaml- 3. Now switch to the Docker® folder if you have created all YAML files. If you have only created the PostgreSQL YAML file, please go to the folder ""
cd /home/Administrator/docker/keycloak/- 4. Create Docker® containers and start them directly.
- The Docker® containers were successfully created and started.
sudo docker compose up -d | After starting the Docker®, it may be that not all services are available within the Docker®. It may take a short time for these to start up. |
| To access the Docker® containers from another system, the firewall must be configured accordingly. Keycloak port: 8080 |
Firewall settings
- 1. Create a configuration file in the /etc/nftables.conf.d/ directory with the name 00-keycloak.conf, for example
sudo nano /etc/nftables.conf.d/00-keycloak.conf- 2. Insert the following content and adjust the values to your network requirements:
table inet filter {
  chain input {
    # accept Keycloak
    tcp dport 8080 accept
  }
  chain forward {
    type filter hook forward priority 0; policy drop;
    # Allow forwarding of packets with TCP source ports
    tcp sport 8080 accept
    # Allow forwarding of packets with TCP destination ports
    tcp dport 8080 accept
  }
}- 3. Save and close the configuration file.
- 4. Load the new rule with the command
sudo systemctl reload nftables- 5. Check the settings and make sure that the configuration has been applied correctly.
- Port 8080 has been released for Keycloak.
sudo nft list rulesetConfigure Keycloak
- 1. Open the following URL in your browser:
Example for the placeholder:
<root> = 192.168.2.144:8080
http://<root>/- 2. Log in to the Keycloak server.
- 3. Select the Clients tab.
- 4. Create a new client for your TwinCAT HMI application.
- 5. Name your client
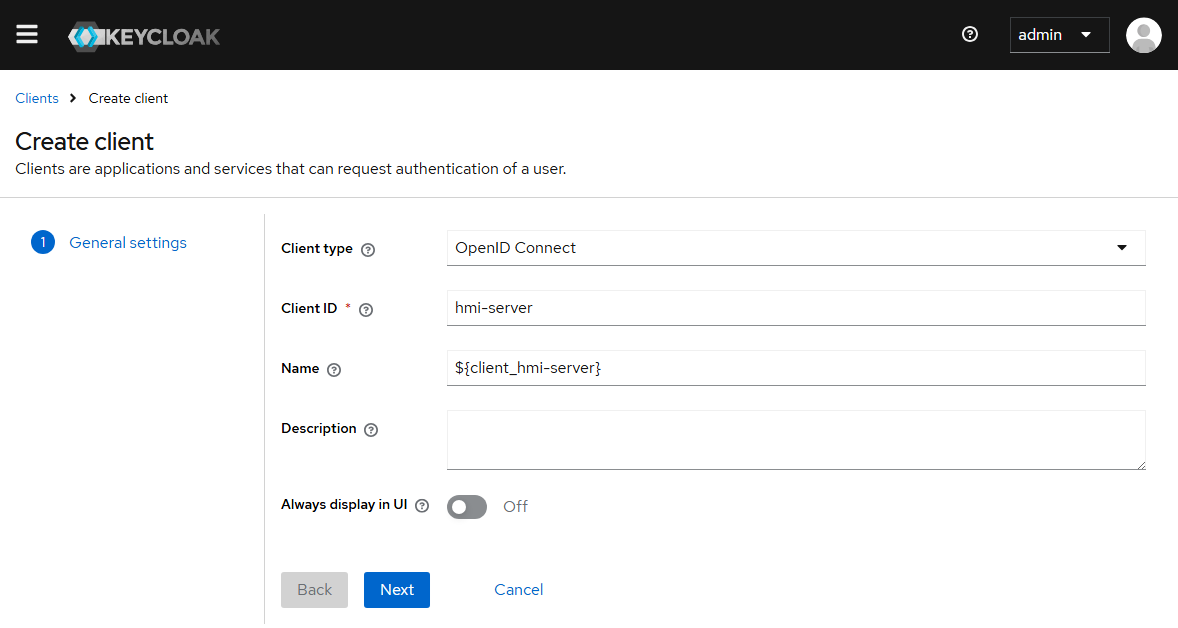
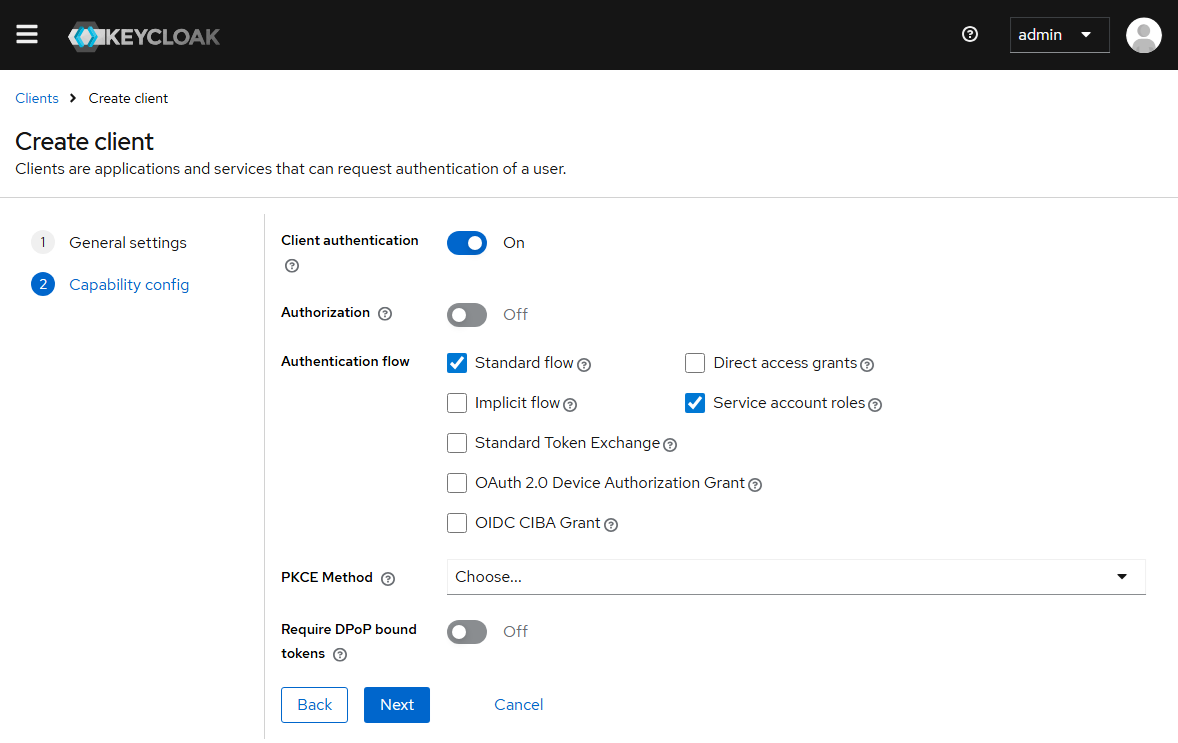
- 6. Switch Client authentication to on and activate Service account roles
- 7. Enter the Valid redirect URIs as shown in the screenshot.
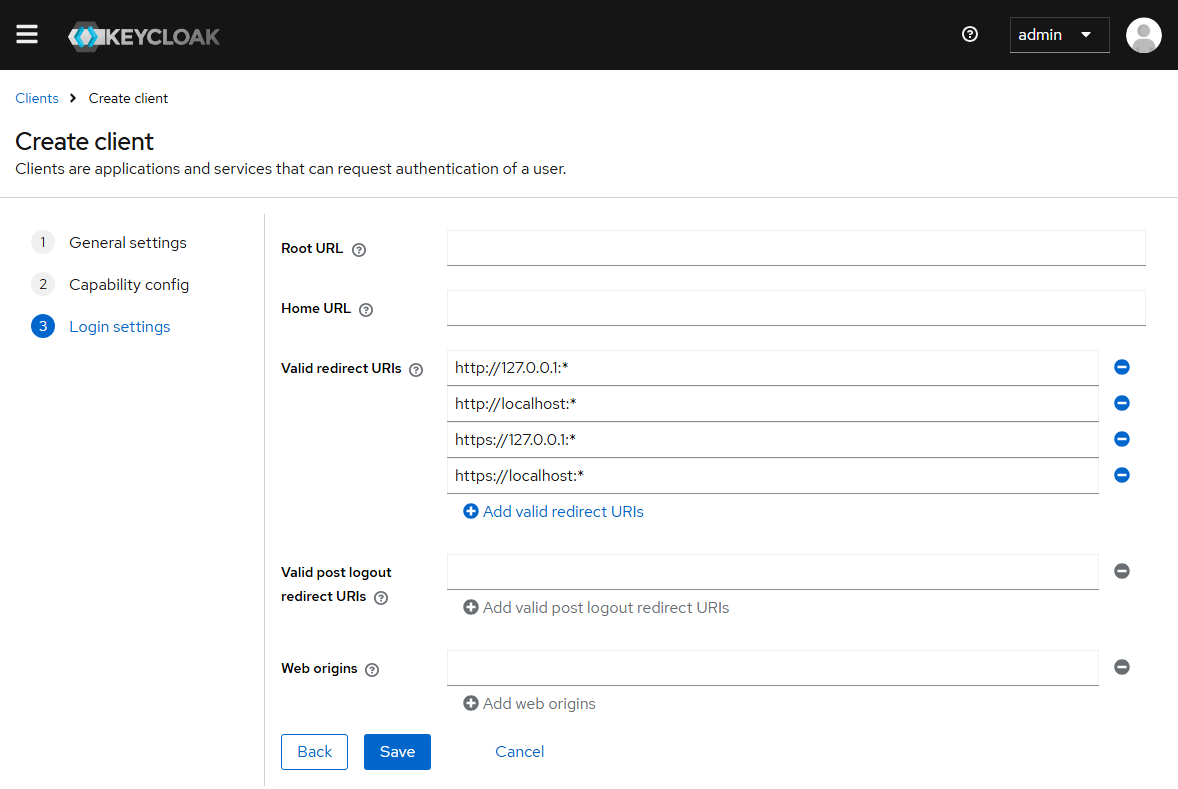
http://127.0.0.1:*
http://localhost:*
https://127.0.0.1:*
https://localhost:*- 8. Click on Save to create the new client.
- The new client has been successfully created.