Beckhoff RT Linux®
 | These instructions refer to version 26.5.0 of Keycloak. |
| Keycloak is operated in "dev" mode in this manual. This mode is for test purposes only. |
Installation of Keycloak
- Establish a connection to the Package Manager of Beckhoff RT Linux® to install the corresponding package.
- 1. Update the packages.
sudo apt update- 2. Install OpenJDK.
sudo apt install default-jdk- 3. Install wget
sudo apt install wget- 4. Download Keycloak
cd /opt
sudo wget https://github.com/keycloak/keycloak/releases/download/26.5.0/keycloak-26.5.0.tar.gz- 5. Unpack Keycloak
sudo tar zxvf keycloak-26.5.0.tar.gz- 6. Start Keycloak
cd /opt/keycloak-26.5.0
export KC_BOOTSTRAP_ADMIN_USERNAME=admin
export KC_BOOTSTRAP_ADMIN_PASSWORD=1
sudo bin/kc.sh start-dev --bootstrap-admin-username $KC_BOOTSTRAP_ADMIN_USERNAME --bootstrap-admin-password $KC_BOOTSTRAP_ADMIN_PASSWORD- 7. Keycloak was created with a temporary admin.
- Keycloak has been successfully launched.
Firewall settings
- 1. Create a configuration file in the /etc/nftables.conf.d/ directory with the name 00-keycloak.conf, for example
sudo nano /etc/nftables.conf.d/00-keycloak.conf- 2. Insert the following content and adjust the values to your network requirements:
table inet filter {
  chain input {
    # accept Keycloak
    tcp dport 8080 accept
  }
}- 3. Save and close the configuration file.
- 4. Load the new rule with the command
sudo systemctl reload nftables- 5. Check the settings and make sure that the configuration has been applied correctly.
- Port 8080 has been released for Keycloak.
sudo nft list rulesetConfigure Keycloak
- 1. Open the following URL in your browser:
Example for the placeholder:
<root> = 192.168.2.144:8080
http://<root>/- 2. Log in to the Keycloak server.
- 3. Select the Clients tab.
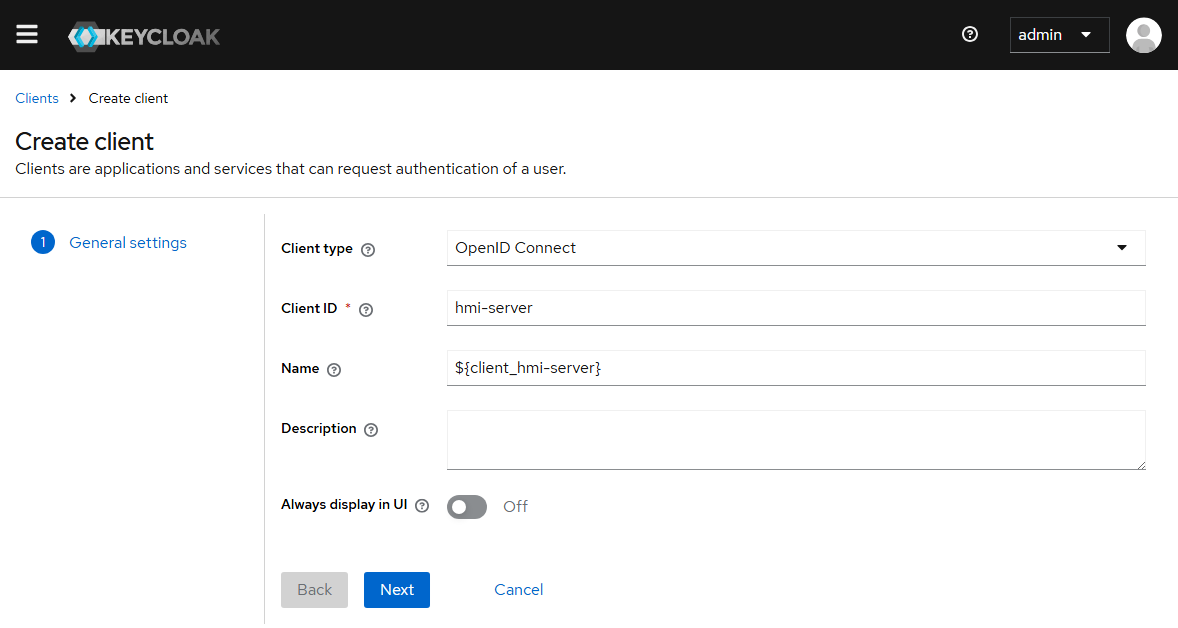
- 4. Create a new client for your TwinCAT HMI application.
- 5. Name your client
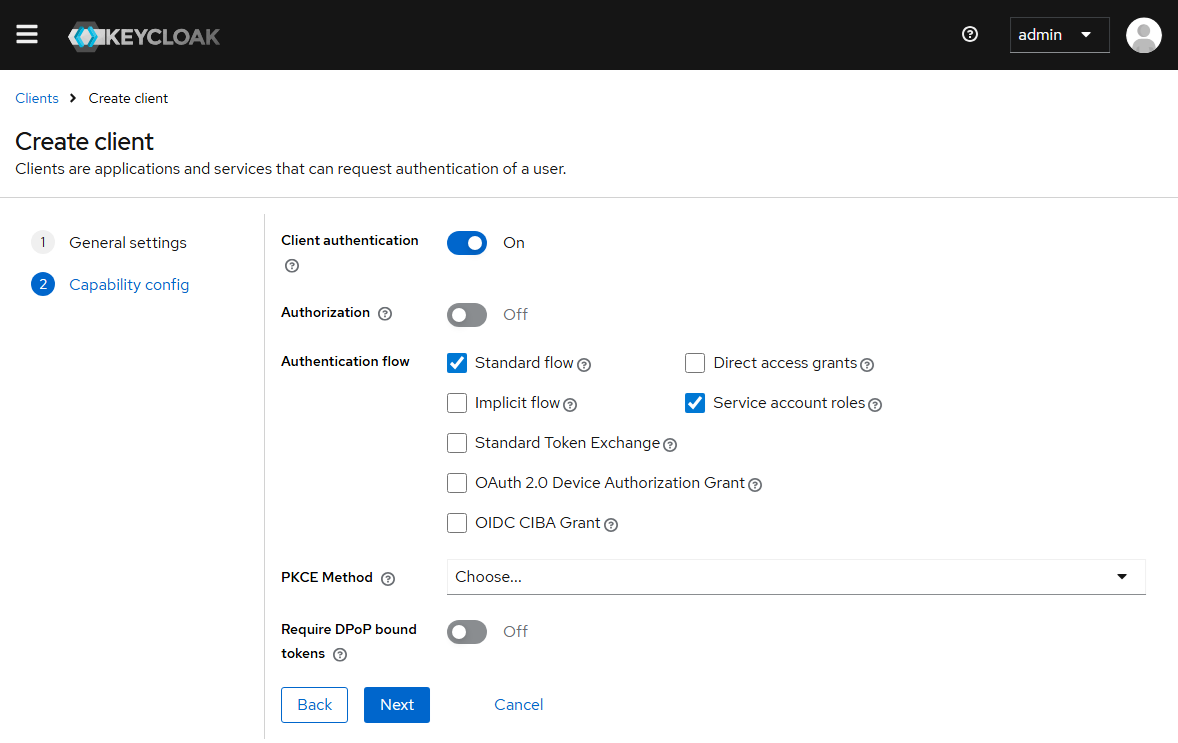
- 6. Switch Client authentication to on and activate Service account roles
- 7. Enter the Valid redirect URIs as shown in the screenshot.
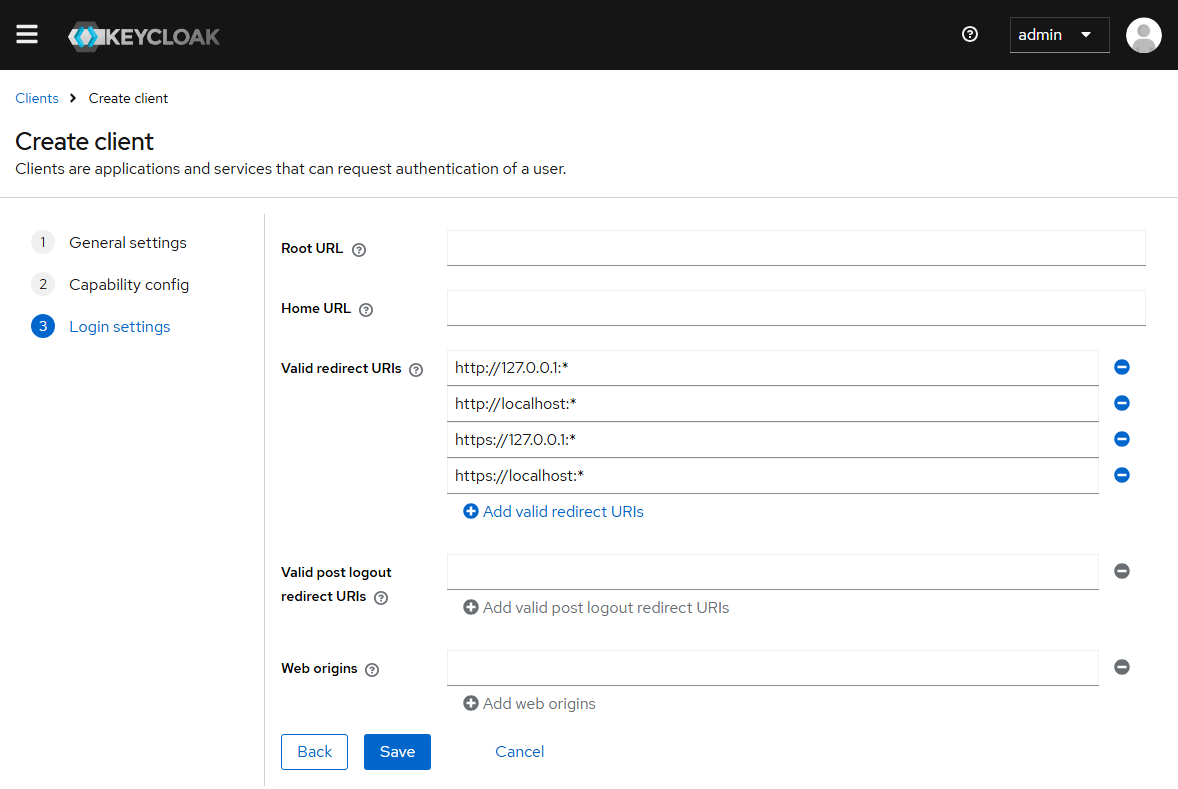
http://127.0.0.1:*
http://localhost:*
https://127.0.0.1:*
https://localhost:*- 8. Click on Save to create the new client.
- The new client has been successfully created.
Further Information