Windows
 | These instructions refer to version 17 of PostgreSQL. |
Installation:
- 1. Download the installation file.
- 2. Install the database
- PostgreSQL Server
- Command Line Tools
- PG Admin (for easy access to the database)
- The database has been installed and is now available without any specific configuration.
Creating a new database
- 1. Open the pgAdmin.
- 2. Select the server on which you want to add a new database.
- 3. Right-click on the server.
- 4. Click on Create database.
- Another window opens in which you can configure your database.
- You have created a new database.
Settings for access via the network
- 1. Use a text editor to open the file pg_hba.config in C:\Program Files\PostgreSQL\*version*\data\
- 2. Adjust the entry host all all 127.0.0.1/32 scram-sha-256 or add a new one.
- By default, 127.0.0.1/32 is entered as local only. If other systems are to have access to the database, the corresponding IP address must be set.
- 3. Configure your firewall according to the port selected during installation (default: 5432/tcp).
- Thanks to the new configuration, your database is now accessible over the network.
Enter PostgreSQL in System Environments
- 1. Enter System Environment Variables in the Windows search.
- 2. Open the Environment Variables window.
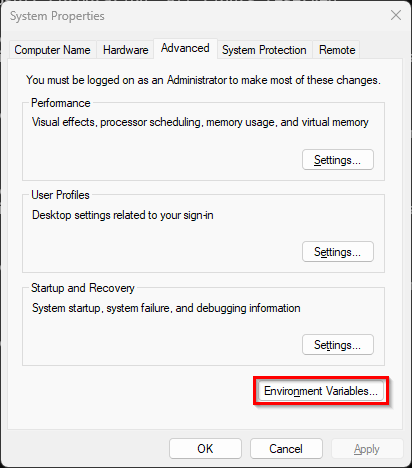
- 3. Edit the Path entry.
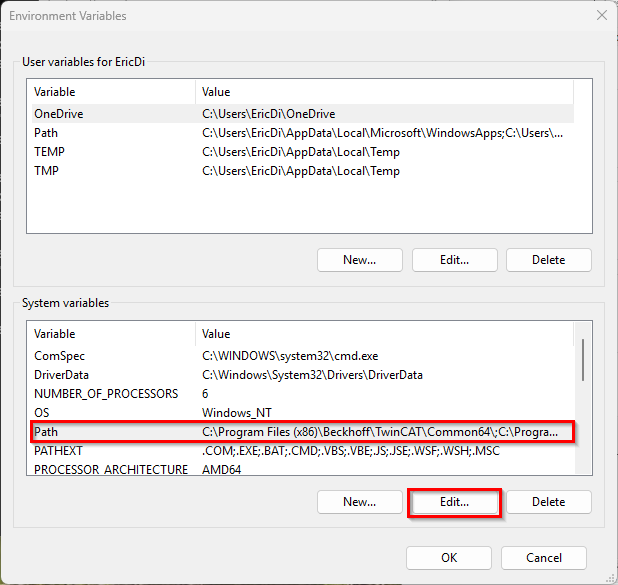
- 4. Add the path of the PostgreSQL database. C:\Program Files\PostgreSQL\<version>\bin
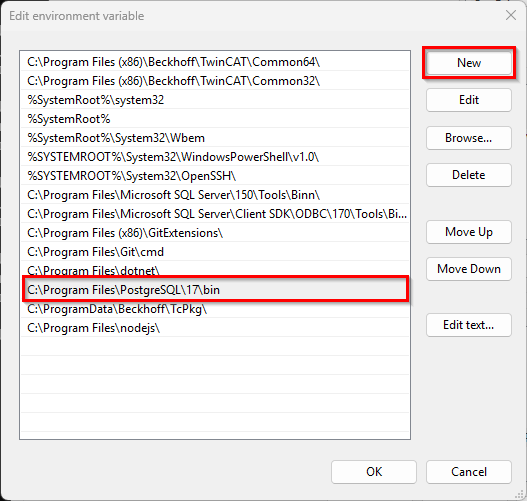
- "pg_config" can now be addressed directly in the command line or PowerShell.
Installing TimescaleDB
- 1. Download the installation file.
- 2. Stop the PostgreSQL (Windows/PostgreSQL17: net stop postgresql-x64-17).
- 3. Install the TimescaleDB
- Postgresql.conf (Windows/PostgreSQL17: C:\Program Files\PostgreSQL\17\data)
- 4. Start PostgreSQL (Windows/PostgreSQL17: net start postgresql-x64-17).
- The TimescaleDB has been successfully installed
Optimizing the PostgreSQL configuration
There are various ways to optimize the PostgreSQL database for use with TimescaleDB. You can find a detailed overview on the TimescaleDB page. Disable "synchronous_commit" to reduce the write operations on the hard disk.
Notice | |
Loss of data Disabling the "synchronous_commit" function can lead to data loss within the database. This must be observed in conjunction with Audit Trail. |
Disabling the “synchronous_commit” function (pgAdmin is an additional program. Alternatively, the command display can also be used)
- 1. Open pgAdmin.
- 2. Select or create the database in which the historical data are to be saved.
- 3. Open PSQL under "Tools/PSQL Tool".
- 4. To disable, enter the following command.
alter system set synchronous_commit = 'off';- 5. Reload the database configuration with the following command.
SELECT pg_reload_conf();- 6. Open the Query Tool window under "Tools/Query Tool"
- 7. Check the configuration using the SQL command.
- The "synchronous_commit" entry should now be set to "off". The functionality is disabled.
select * from pg_settings