Quick start

Creating a PLC project

1. Create a new PLC project in VS or TcXaeShell.
2. Add a new PLC project.
3. Create a new variable in the MAIN function block.
4. Create a new function block for the machine.
5. Declare the following variables including attributes in the main and machine function block.

PROGRAM MAIN
VAR
    {attribute 'TcHmiSystemEng.Parameter.Name' := 'Machine'}
    _fbMachine               : FB_Machine;
END_VAR

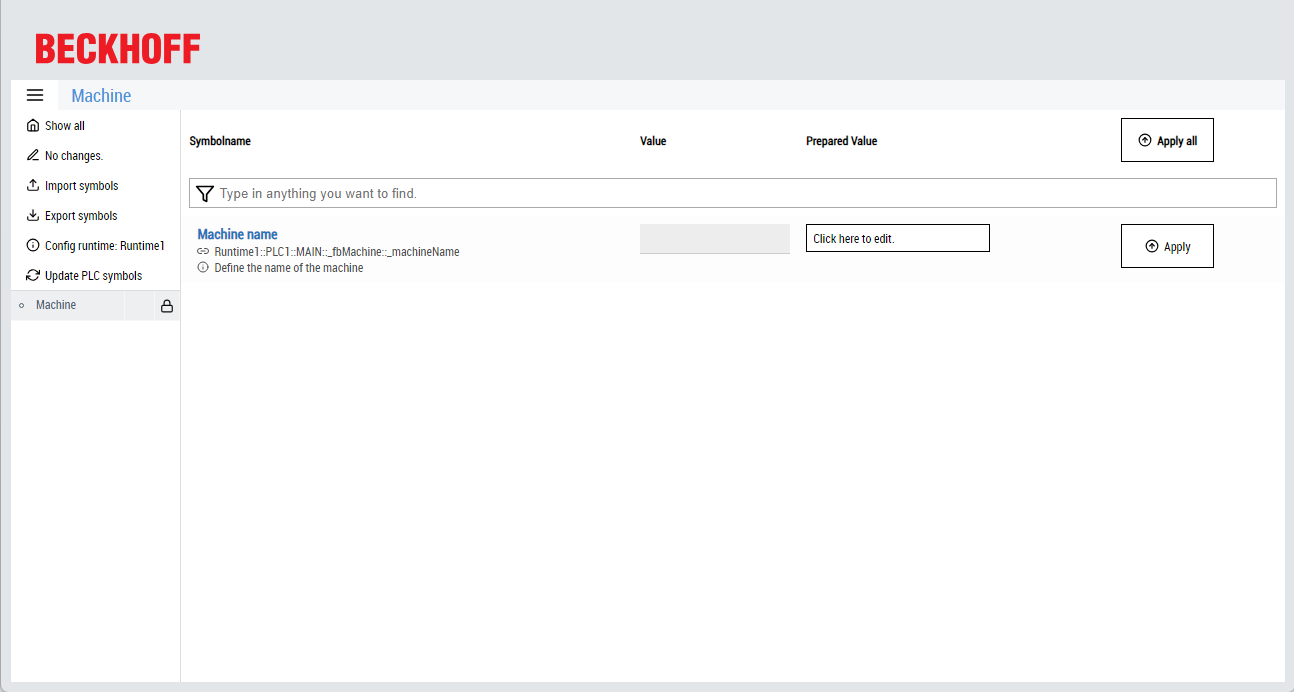
FUNCTION_BLOCK FB_Machine
VAR
    {attribute 'TcHmiSystemEng.Parameter.Name' := 'Machine name'}
    {attribute 'TcHmiSystemEng.Parameter.Info' := 'Define the name of the machine'}
    _machineName             : STRING;
END_VAR
6. Activate your PLC project.
You have completed the configuration of the PLC so far.

Creating a new HMI project

1. Create a new TwinCAT HMI project
2. Install the following NuGet packages Beckhoff.TwinCAT.HMI.SystemEngineering and Beckhoff.TwinCAT.HMI.SystemEngineeringUtils.
If the packages are not available, install the corresponding TcPkg packages to obtain the NuGet packages (TwinCAT.HMI.SystemEngineering and TwinCAT.HMI.SystemEngineeringUtils).
3. Add the Parameters and Functions control to the corresponding View or Content. (The default configuration of the control accesses the default configuration of the extension directly).
You have now completed the configuration of the HMI project.

Installing a package with TcPkg

1. Close all Visual Studio instances.
2. Start the command line or PowerShell with administrator rights.
3. Use the command "tcpkg install <package name>" to install the latest version of the package.
The newly installed function is now available to you.

Installation of a NuGet package

1. Create or open an existing HMI project.
2. Right-click on the References folder.
3. Select Manage NuGet packages.
A new window opens with the Package Manager.
4. Select Beckhoff Offline Packages (1.14) as the package source if the corresponding TcPkg has been installed or nuget.org.
5. Switch to the Browse tab.
You will receive an overview of the available packages.
6. Select the required package.
An overview opens on the right side.
7. Select the version you want to install and install it.
The package is now available to you.

Configuring the ADS extension

1. Open the Server configuration page.
2. Select the ADS tab.
3. Establish a connection to the PLC created in advance.
You have now established an ADS connection to the PLC.

Configuring the SystemEngineering extension

Quick start 1:
1. Open the Server configuration page.
2. Select the TcHmiSystemEngineering tab.
3. Click on Runtimes
You will receive an overview of the runtimes created. The default is Runtime1. The name of this matches the default value of the control.
4. Under ADS runtime, set the connection to your PLC that you have created in the ADS extension. (Default: PLC1)
5. Enter the value MAIN as the entry path.
6. Now activate the runtime by setting the value to TRUE.
As a result of the configuration, the extension now has access to the data within the PLC.

Show result

Quick start 2:
1. Start the LiveView
2. Click on Update PLC symbols to start the automatic search.
Once the search process is complete, the structure defined in the PLC is displayed.
Quick start 3: