Quickstart
Configuration of the Simulink® model
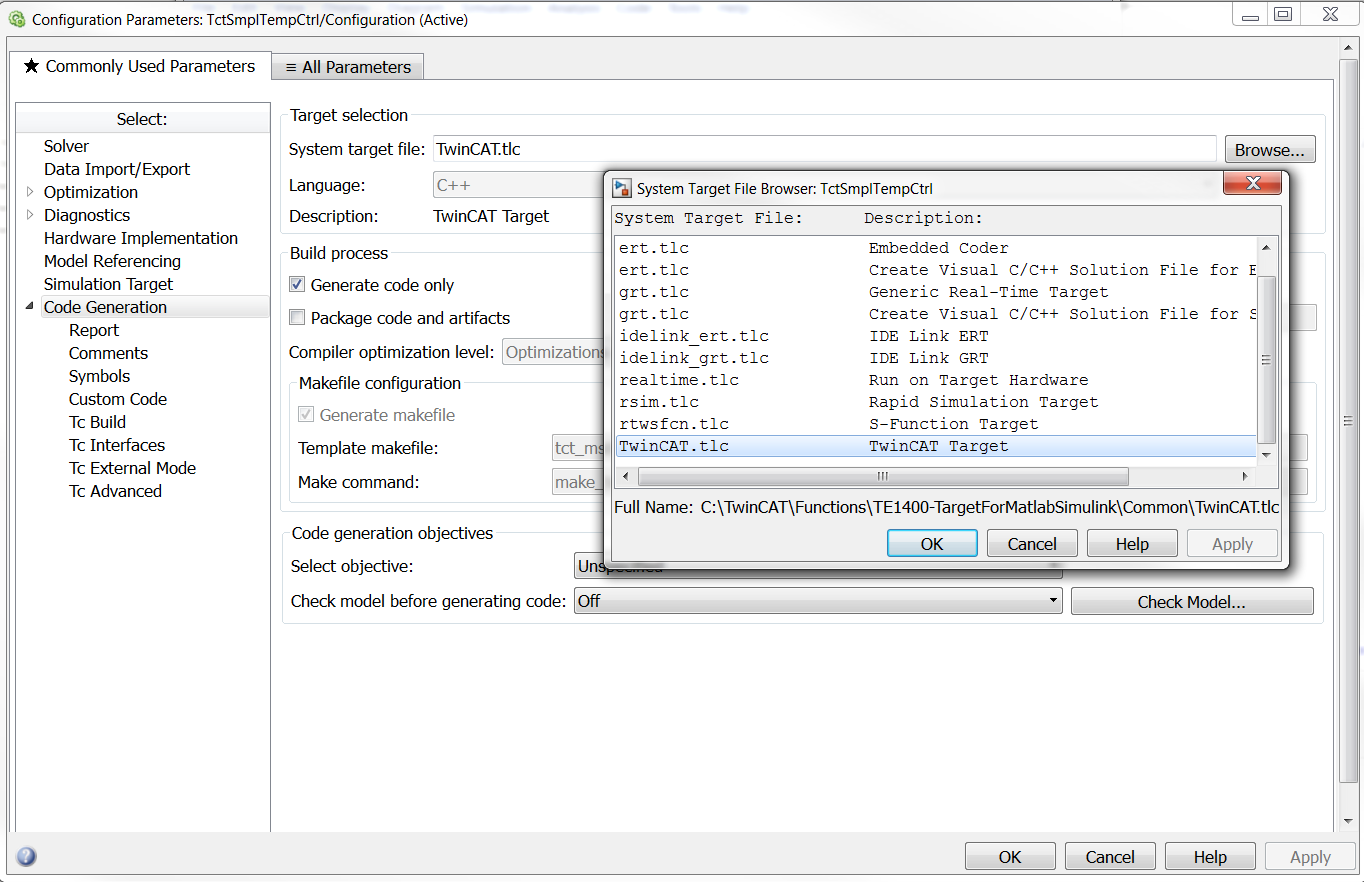
The coder settings can be accessed via the Model Explorer in the View menu of the Simulink environment, via Code Generation (previously Real-Time Workshop) > Options in the Tools menu, or via the Configuration Parameters dialog. In the tree view, select Configuration -> Code Generation. Then, open the General tab and select TwinCAT.tlc as "System target file". Alternatively, use the Browse button to open a selection window and select TwinCAT Target as target system.
In addition, a fixed-step solver must be configured in the solver settings, to ensure real-time capability of the Simulink model.
Generating a TcCOM module from Simulink
Generation of the C++ code or the TcCOM module can be started with the Build button (or Generate code) in the lower section of the window for the code generator options. If the option Publish module is activated under TC Build (default setting), the build process for generating executable files starts immediately after the C++ code has been generated, and a TcCOM module is created. Otherwise, the module generator stops after the C++ code and the project file for Visual Studio™ has been generated. For further information please refer to Publish Module.
Integration of the module in TwinCAT 3
After module export with "Publish"
If the option Publish Module was enabled before the module was generated, the module will already be available in compiled form. A TwinCAT Module Class (TMC file) was created during this process and can be instantiated directly in the project. A TwinCAT Module Instance (TMI) is referred to as TcCOM object or module instance below.
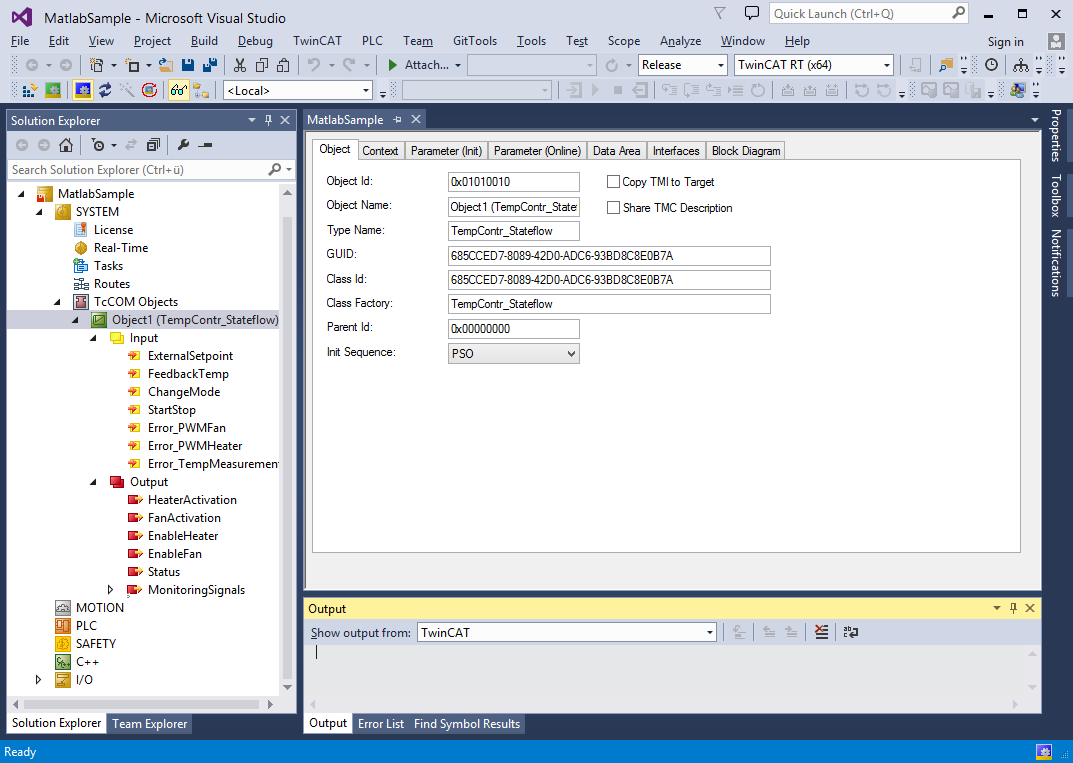
Instances of the generated module can be integrated in a TwinCAT3 project any number of times. TcCOM objects are usually appended to the node TcCOM Objects via the Add New Item context menu. A selection list of the modules that are available on the system can be obtained via this option. The modules generated by Simulink can be found under TE1400 Module Vendor > Generated Modules.
Compiling the code without "Publish"
If the option Publish Module was disabled prior to the module generation, the C/C++ code pertaining to the module still has to be compiled, before it can be executed.
The C++ project can be inserted into the TwinCAT project via Add Existing Item in the context menu of the C++ node. The C++ project file is located in the Build directory "<MODELNAME>_tct" and has the name of the module with the file extension .vcxproj. The module can then be created in the TwinCAT development environment (XAE):
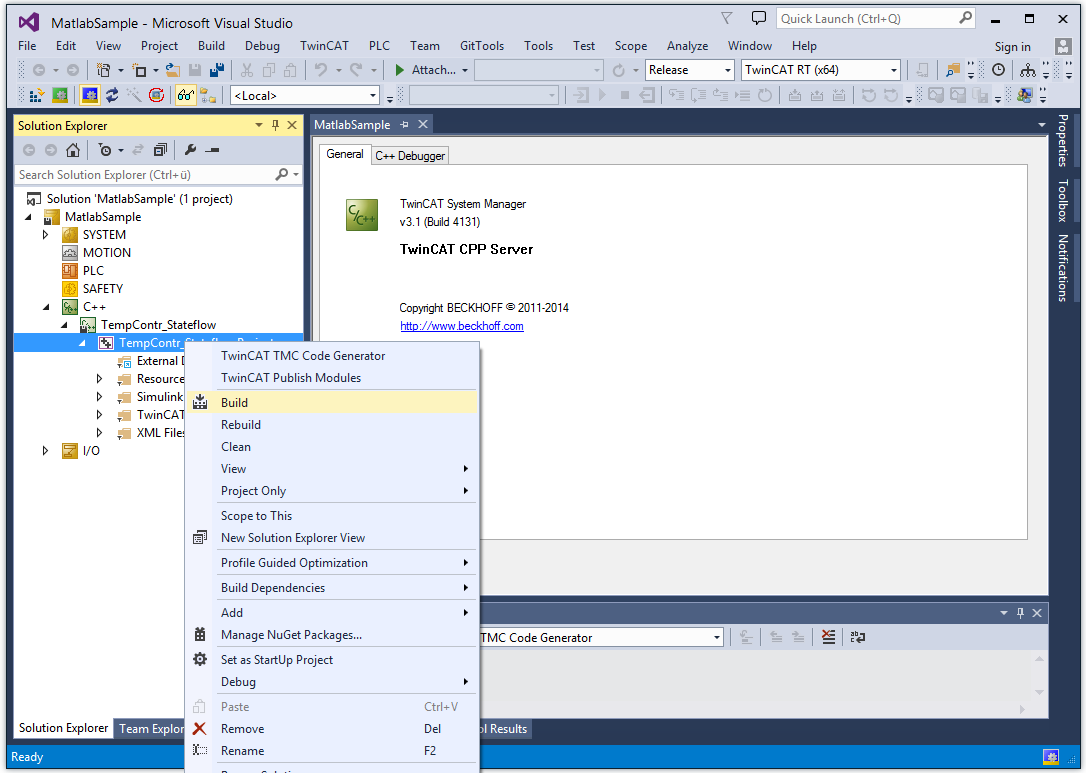
Multiple instances of the module can be created via the context menu of the parent node of the C++ project. These are listed under the project node. Further information about the build process of C++ projects in the TwinCAT development environment (XAE) and about the instantiation of modules created in this way can be found in section "Creating a TwinCAT3 C++ project".
Cyclic call by a real-time task
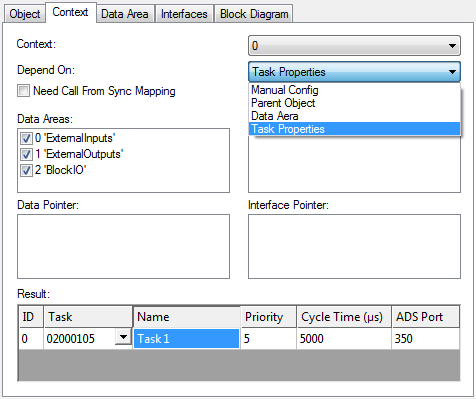
Under the Context tab of the module instance, you will find all the contexts of the module, which have to be assigned to a real-time task. If Depend on: Task Properties are assigned automatically to tasks for which the cycle time and the priority match the displayed values. If there are no matching tasks or if the setting Depend on: Manual Config was selected, tasks can be created under System Configuration -> Task Management. Further information on cyclic calling of module instances can be found in section "Cyclic Call".
Data exchange with other modules or fieldbus devices
The process images of the module inputs and outputs can be expanded below the module instance node in the TwinCAT development environment. Here you will find all ports that have been defined in the Simulink model with the aid of the function blocks In1 and Out1 (components of the standard Simulink library). All signals within this process images can be linked to signals of another process images via the Change Link context menu.