Manual comments
There are three ways to manually insert comments into the comment window.
1. In the comment window
Within the comment window, you can add a new comment at the highest project level using the plus symbol in the toolbar. Particularly suitable for making a quick note for a Scope recording, for example.
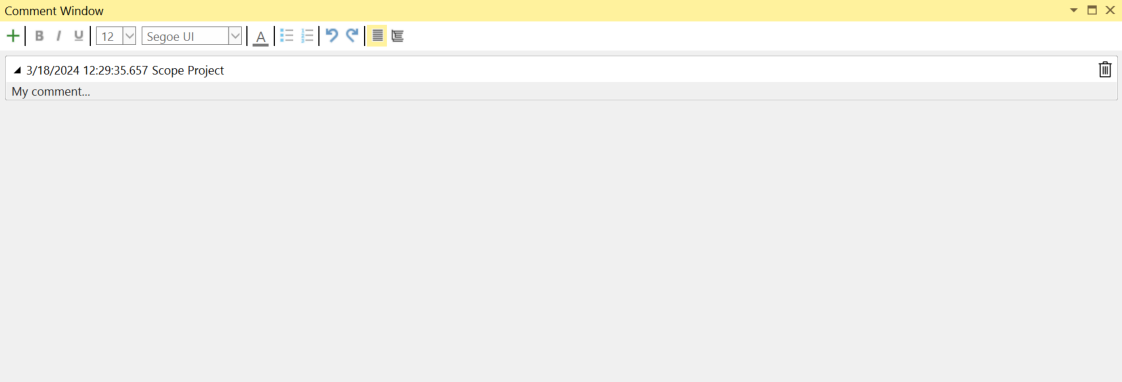
For the TwinCAT Scope, the highest project level is the Scope node. The comments inserted in this way have no direct relationship to a data point in the recording.
2. Via the context menu in the Solution Explorer
For the TwinCAT Scope, comments can be inserted at almost all hierarchical levels in the Solution Explorer. Examples are the Scope node, the charts, the axes, the channels or the acquisitions. To do this, go to the desired level in the project tree and right-click to open the context menu. There you can select the Add comment command.
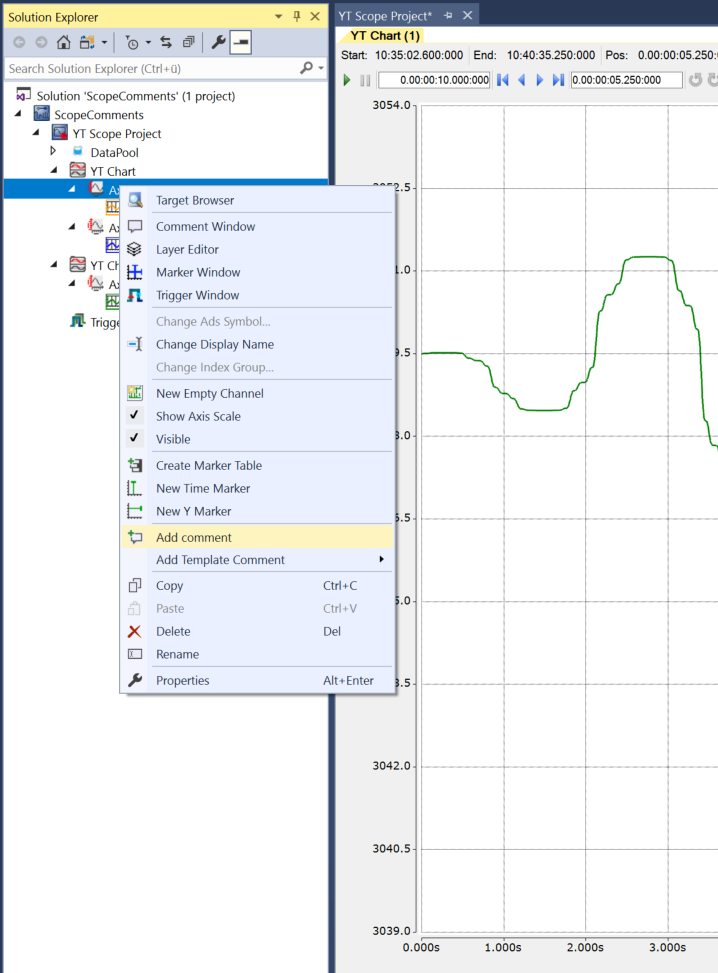
A new comment is then displayed in the comment window for the corresponding level, which you can fill in. This type of comment bears no relation to the actual signal curve in the chart.
3. Via the chart at the individual data points of the graphs
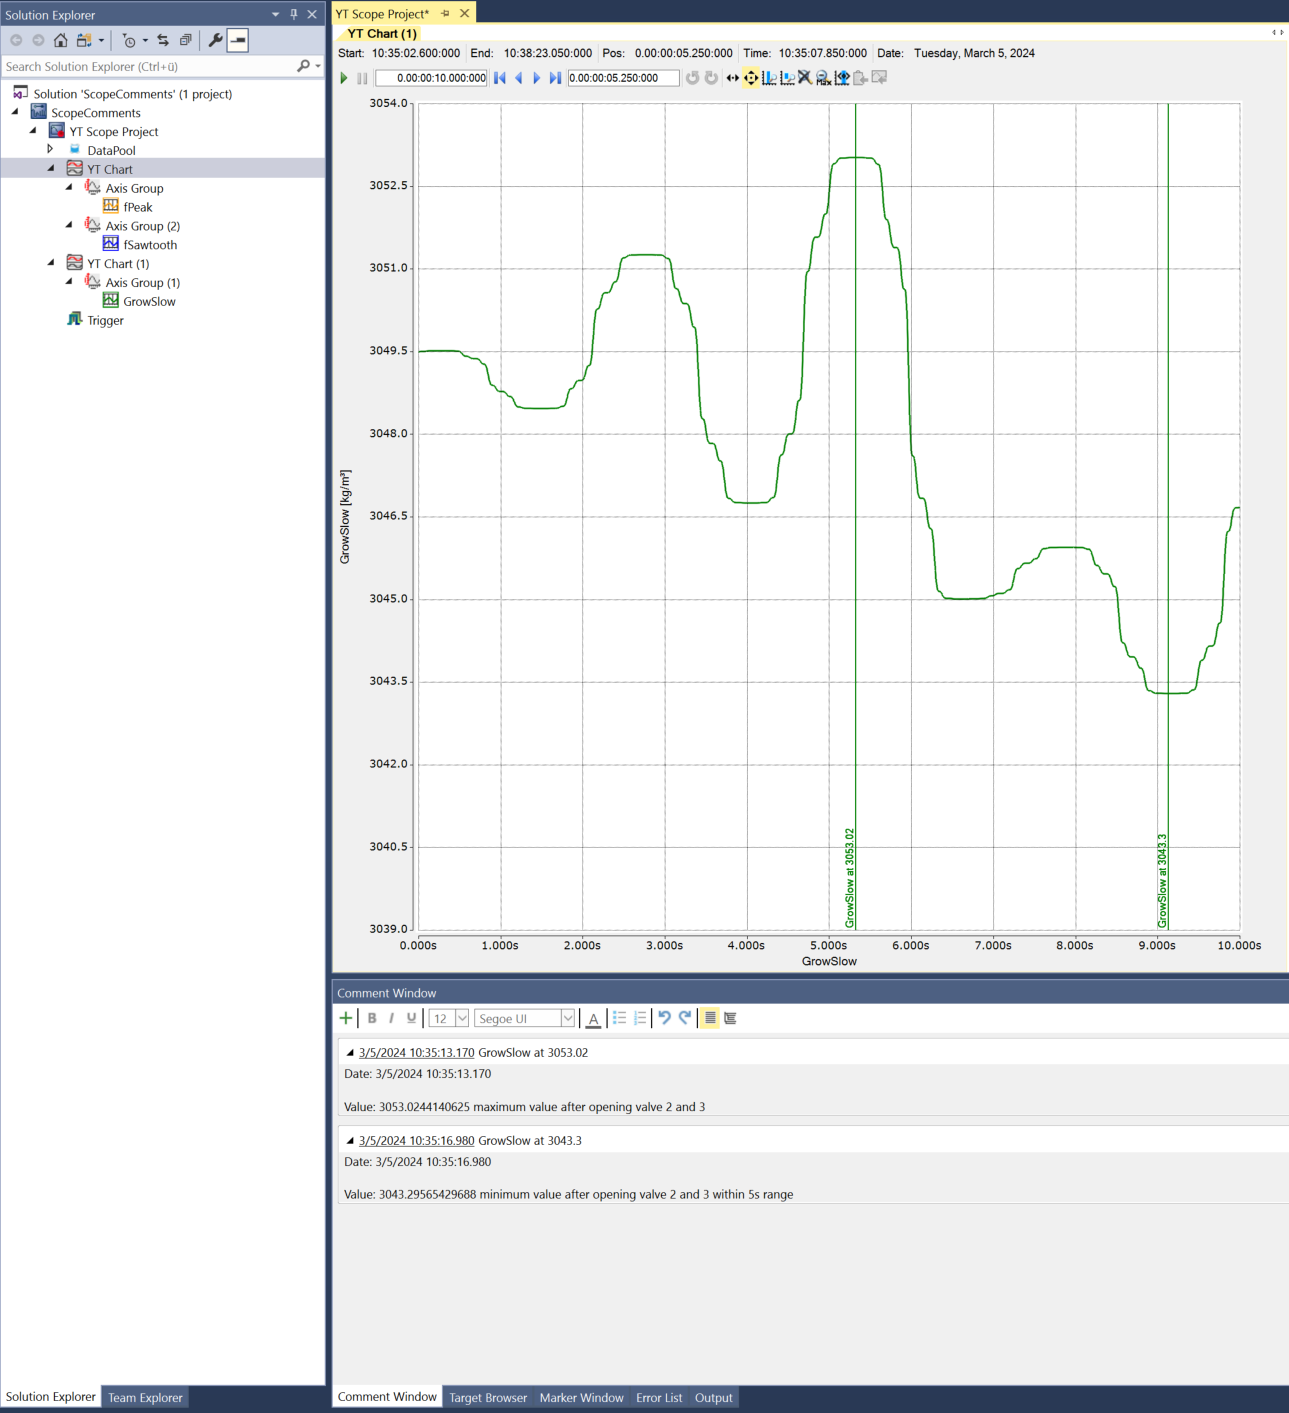
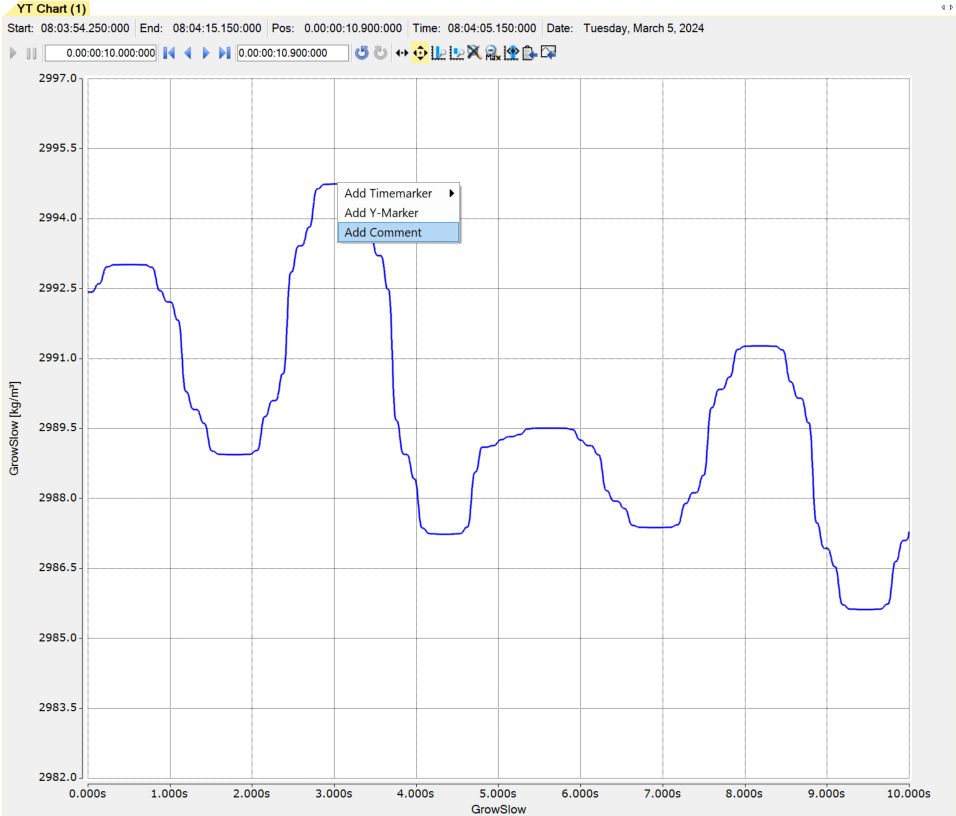
You can anchor comments directly to data points in the YT charts. Simply select the data point and right-click to open the context menu. Then select the Add Comment command. A corresponding comment is inserted in the comment window together with a timestamp.
This means that there is a direct relationship between the data point and a comment you have formulated at the corresponding point. The timestamp becomes a link that can be clicked to jump directly back to the position of the comment in the chart. The link is underlined, as shown in the following illustration.