Ghost mode
To use the Ghost mode, in the data area of a layer the switch must select the left Ghost mode.

The data output point can be set in the data area.
The following options can be selected to set the point in time.

Custom

If Custom is selected, a fixed timestamp can be entered for Timestamp.
Display Time Offset

This setting can be used to configure a dynamic time. The adjustable time is an offset which is added to the anchor position of the chart to calculate the time of the data to be repeated.
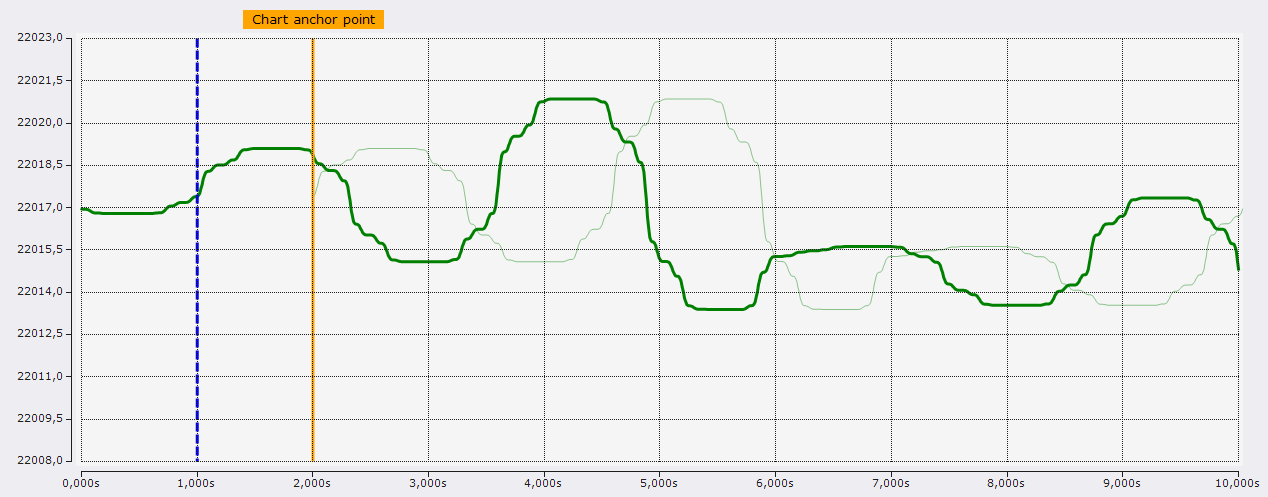
The screenshot shows a configuration where in the chart the orange marker was selected as anchor point and in the layer the Display Time Offset was set to -1 s. Thus, the data output point of the layer is one second before the anchor point. This location is indicated by the blue marker.
With a negative offset, data from the past can thus be displayed in the display of more recent data. The opposite can be achieved with a positive offset.
Duration

The Duration setting is another dynamic time configuration. With this configuration, the point in time is determined anew every x time units. X is the time that can be configured in the window. The recording start time forms the first point in time. From then on, the associated timestamp is always the recording start time plus a multiple of the Duration setting. During recording, the timestamp jumps by one duration every x time units and after recording, the timestamp is at the last possible time.
Charts
When linking to a chart, the linked timestamp is always linked to the current position of the selected chart.
Time marker
If a timestamp is linked to a time marker, the timestamp is always set to the time of the marker.
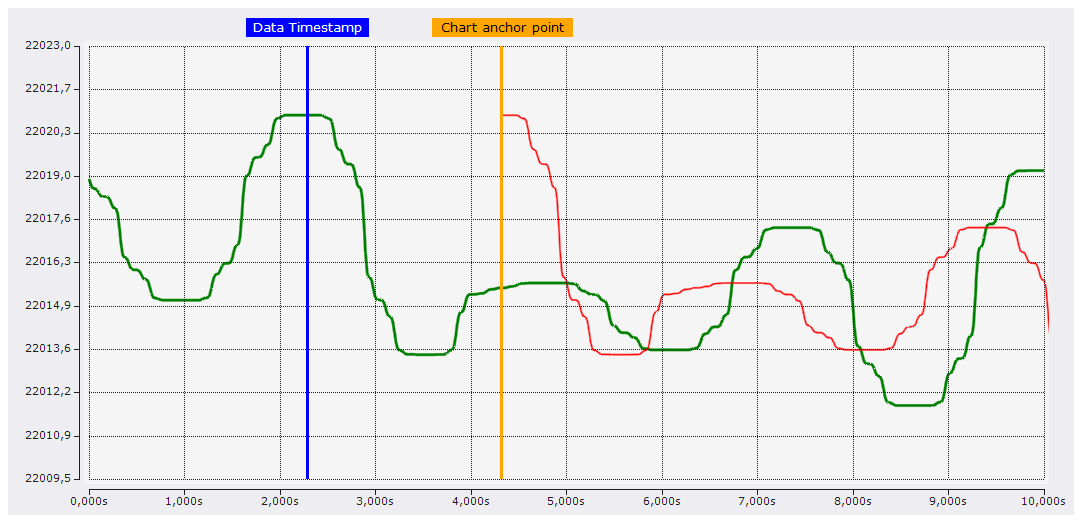
In the configuration shown in the screenshot, the anchor point is connected to the orange marker and the layer is connected to the blue marker. With this configuration option, the connected timestamps can be easily and accurately set to the appropriate time.
 | If a marker is set to the correct position, it is recommended to lock the marker (set the marker's lock property to true) so that it is not accidentally moved on the chart. |
Trigger Group

With the selection of a trigger group, the timestamp is also updated dynamically again. With this configuration, the associated timestamp is always set by the trigger events that occurred in this trigger group. With the adjustable number you can still set which trigger event should be used. Here, the count is always from new to old. If the counter is set to 0, the timestamp always represents the time of the latest trigger event. If the trigger is set to 1, always the penultimate, etc.
Trigger Release Info
For Trigger Release Info, a trigger event can be explicitly selected to set the associated timestamp to the time of the event.