KIN_TYP_61
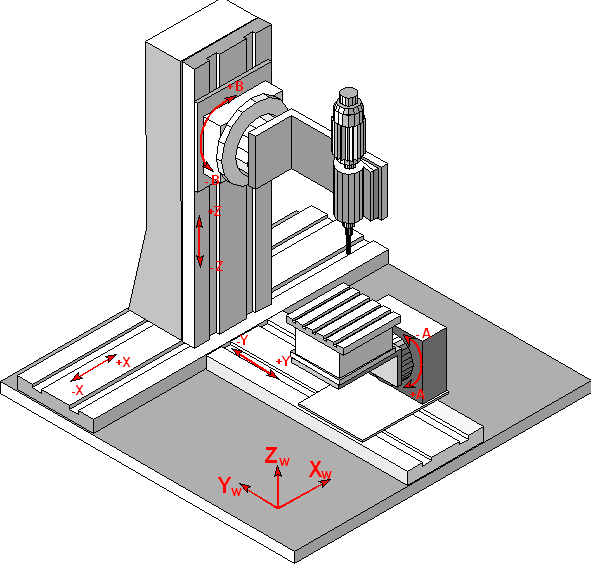
The kinematic structure of this machine consists of one translatory and one rotary axis in workpiece and two translatory axes and one rotary axis in tool.
Axis configuration in NC channel | ||
Axis designation | X, Y, Z, A, B | |
Axis index | 0, 1, 2, 3, 4 | |
Kinematic structure | ||
| Tool axes | Workpiece axes |
NC axes | Y, Z, B | X, A |


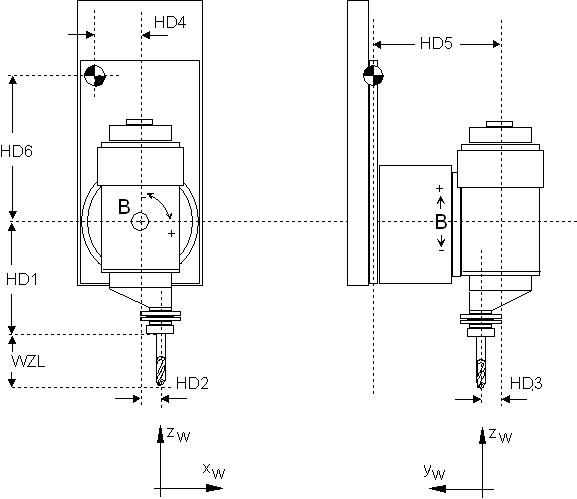
Figure 2-63: Offsets of tool head


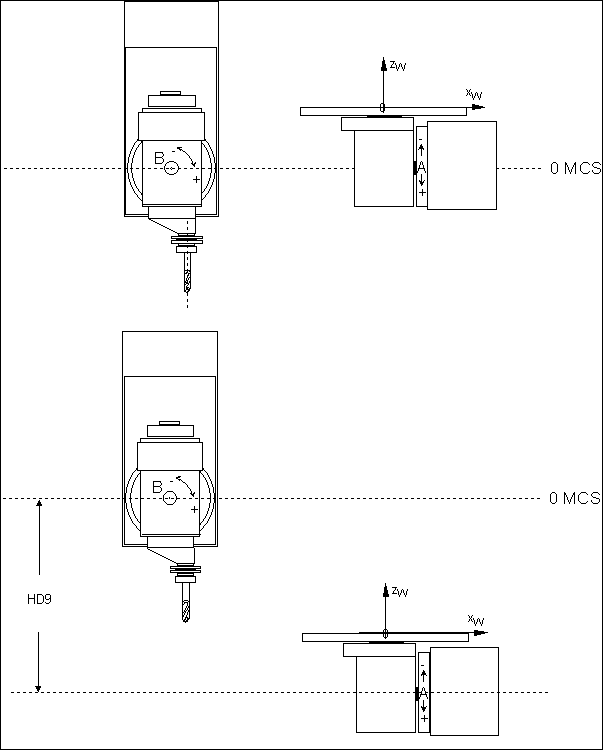
In ideal case there exists one intersection point of the rotary axis A in workpiece and the rotary axis B in tool in zero position of kinematic structure. In this case the machine axis positions of tool slider are zero. This position normally cannot be reached with an real machine structure. The necessary offset to zero position of tool slider to this position can be set with parameters HD7, HD8, HD9.
Offset data of kinematic:
HD-Offset | param[i] | Description |
|---|---|---|
HD1 | 0 | Z-offset tool rotation point B-axis to tool holder fix point |
HD2 | 1 | X- offset tool rotation point B-axis to tool holder fix point |
HD3 | 2 | Y- offset tool rotation point B-axis to tool holder fix point |
HD4 | 3 | X-offset rotation point B-axis to tool slide reference point |
HD5 | 4 | Y-offset rotation point B-axis to tool slide reference point |
HD6 | 5 | Z-offset rotation point B-axis to tool slide reference point |
HD7 | 6 | X-offset to machine-zero point |
HD8 | 7 | Y-offset to machine-zero point |
HD9 | 8 | Z-offset to machine-zero point |
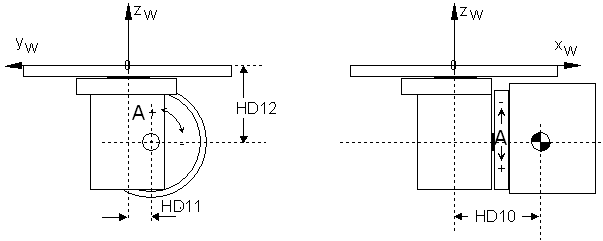
HD10 | 9 | X-offset A-axis to zero point WCS |
HD11 | 10 | Y-offset A-axis to zero point WCS |
HD12 | 11 | Z-offset A-axis to zero point WCS |
HD13 | 12 | Rotary Offset A-axis |
HD14 | 13 | Rotary Offset B-axis |
HD15 | 14 | Rotation direction flag A-axis |
HD16 | 15 | Rotation direction flag B-axis |