KIN_TYP_28
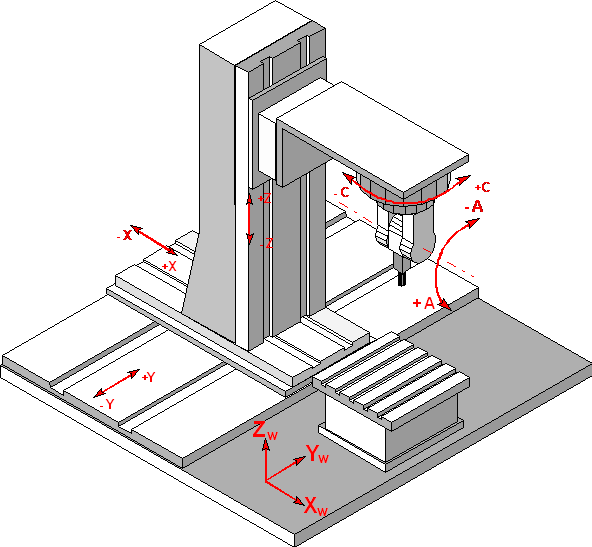
The kinematic structure consists of three translatory NC axes and two rotary NC axes in the tool.The physical angle positions of tool head C, A are realized with two gear linked axes.
Axis configuration in NC channel | ||
Axis designation | X, Y, Z, C (C1), A(C2) | |
Axis index | 0, 1, 2, 3, 4 | |
Kinematic structure | ||
| Tool axes | Workpiece axes |
NC axes | X, Y, Z, C (C1), A (C2) | - |


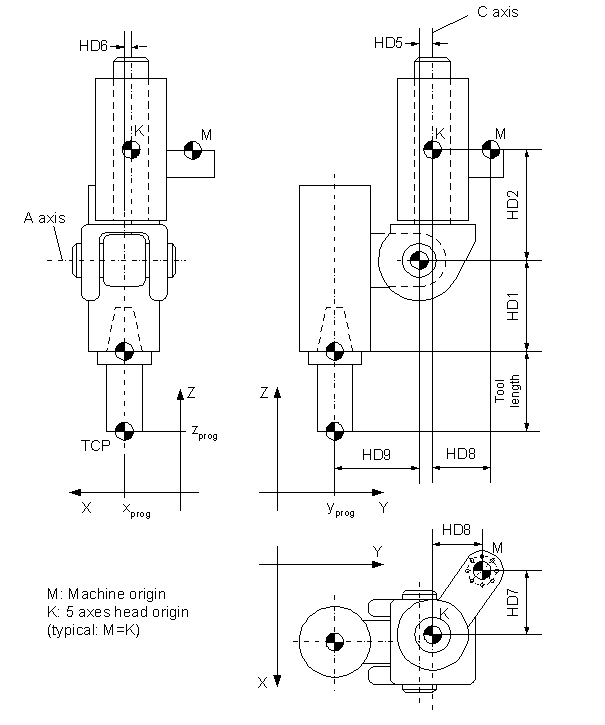
Offset data of the kinematic structure:
HD offset | param[i] | Description |
|---|---|---|
HD1 | 0 | Z Axis offset from tool holding device to rotation point of A axis (auxiliary) |
HD2 | 1 | Z axis offset rotation point of A axis to tool reference point |
HD3 | 2 | Rotation offset of A axis |
HD4 | 3 | Rotation offset of C axis |
HD5 | 4 | Y axis offset of rotation point C axis |
HD6 | 5 | X axis offset of rotation point C axis |
HD7 | 6 | Static tool offset in X |
HD8 | 7 | Static tool offset in Y |
HD9 | 8 | Y offset milling tool axis to rotation point of A-axis |
HD10 | 9 | n. u. |
HD11 | 10 | Zero point offse of CA gear link |
HD12 | 11 | Gear link factor numerator |
HD13 | 12 | Gear link factor denominator |
HD14 | 13 | sign rotary axis C |
HD15 | 14 | Sign rotary axis A |
The gear link between C and A axis is absolute and is done as shown in the following equations:

The rotary axes of the tool head has to be adjusted as linear axis or rotary axis with sufficient large modulo range. The soft limit monitoring in channel is working on output position of transformation (drive position) depending on limits in machine data parameters.