Example: PLC automapping
In a BACnet environment, data are represented via objects and their properties. This applies to memory states (variables) and PLC signals that are meant to be visible in BACnet. Essentially this means that all states of the PLC runtime which are meant to be visible in BACnet must be mapped via BACnet objects. The automapping option minimizes the complexity of linking between BACnet objects and SPS signals. The procedure is described below by means of screenshots. For further information please refer to section "PLC automapping".
 The example plcautomapping_example.zip can be downloaded from here.
- Creating BACnet adapters and servers (see: "Example: Create BACnet adapters and servers")
- Create a PLC project with the following block instances
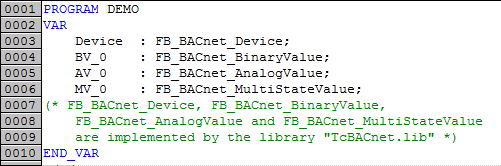
- The aim is to create the PLC instances of the BACnet blocks as BACnet objects in the System Manager configuration, pre-configure the process data and properties and link the process data between the PLC and the objects. The required process data definitions (AT%I* / AT%Q*) are already included in the library blocks of the PLC library. Initialisation of the object properties is described below.
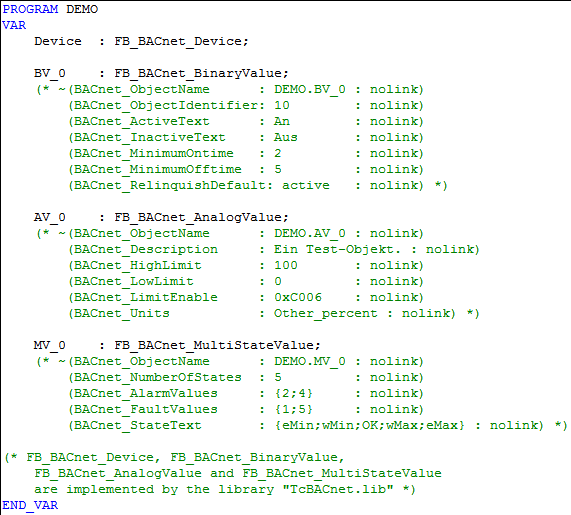
- Add automapping comments to the PLC instances and call up the block instances in the PLC program
- Note:
- - The PLC program "DEMO" is called from program "MAIN". The program "MAIN" is entered as a task in the task configuration
- - The test program contains the library "TcBACnet.lib" as reference
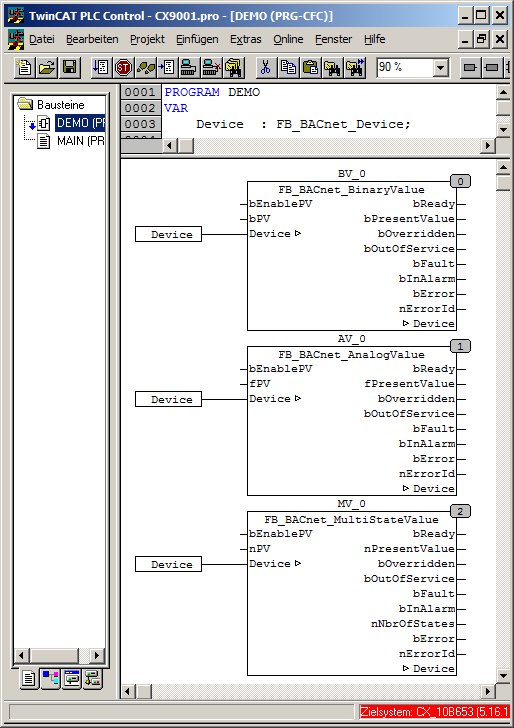
- Compile the PLC project (CTRL+F8)
- Add the PLC project to the hardware configuration
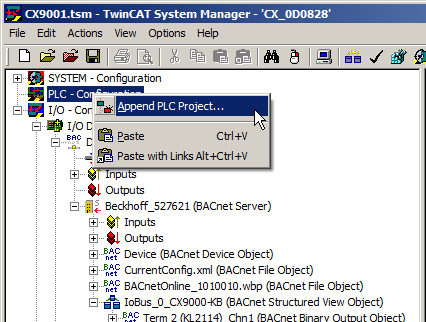
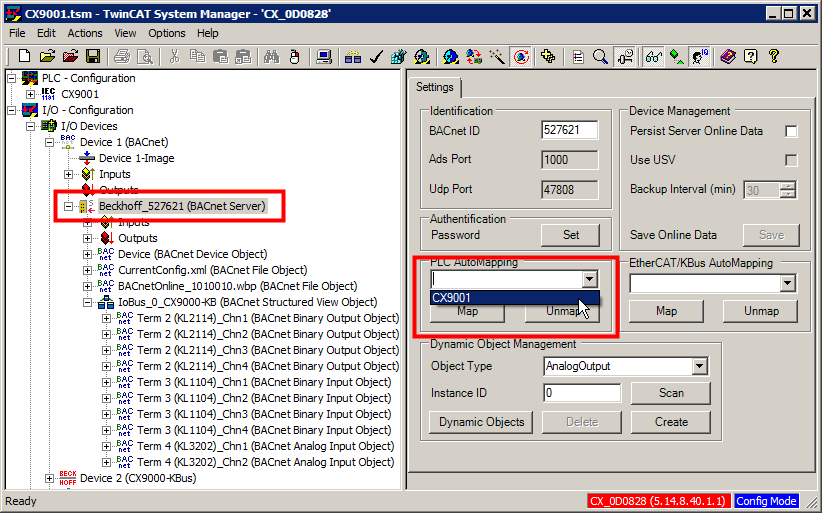
- In the Settings tab of the BACnet server select the PLC configuration and execute automapping by pressing the "Map" button
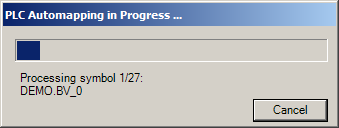
- Wait until the mapping is complete (dialog with progress bar appears)
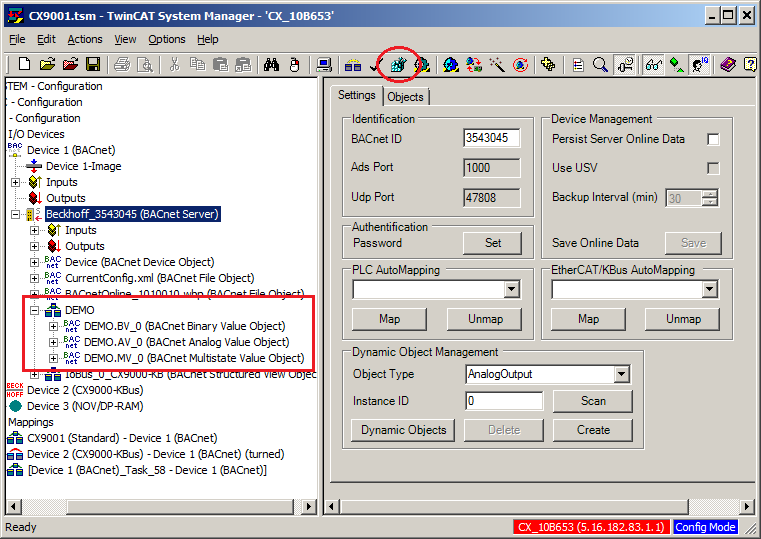
- The links have now been created. Finally, activate the configuration by pressing the button "Activate Configuration" button in the toolbar
- Log into the PLC (F11) and load the program (then start the PLC project with F5, if required)
