Configuration of a pointer instrument
The following section explains the configuration of a pointer instrument, based on an example. This example is applicable for all available pointer instruments.
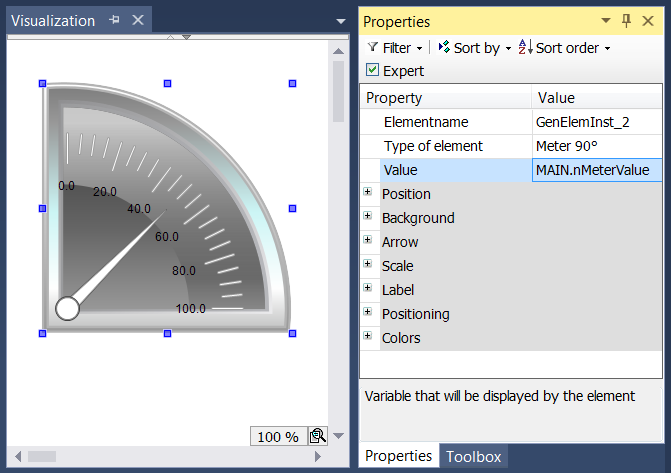
The input variable to be linked – in the example a variable with the name "nMeterValue" – should be specified under "Value" in the element properties for the pointer instrument element. The  button is available after clicking in the input field. It can be used to search for the input variable within the project. Be sure to specify the input variable with its full path in the project tree.
The orientation and size of the scale display and the color and appearance of the arrow can be specified in the Arrow section of the element properties.

For the element with the name Pointer instrument the "Pointer start" and "Pointer end" can be set. They indicate the angle (in degrees) between the left or right edge of the scale and the horizontal line. This angle is oriented mathematically, i.e. anticlockwise, so that the value in the field "Pointer start" must always be greater than the value of "Pointer end". The pair formed by the start and end value is periodic with 360 degrees.
In the Scale section the value range for the scale (main scale and sub scale) can be specified.
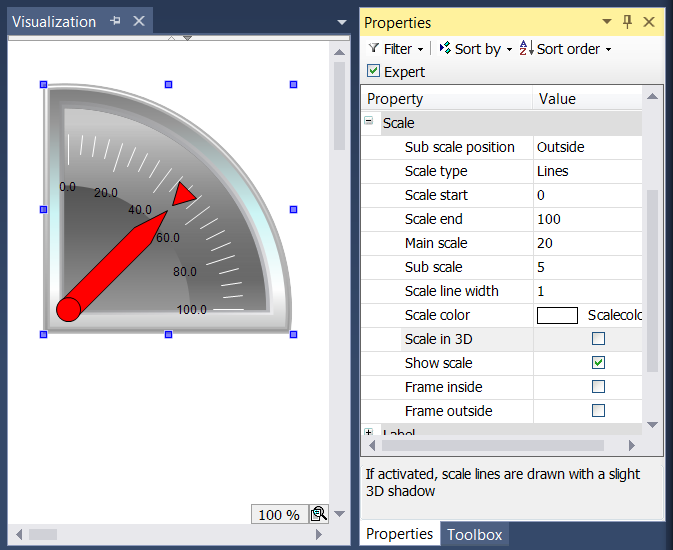
The start value for the scale is shown at the left edge of the scale. It must therefore be smaller than the end value for the scale, which is shown at the right edge of the scale. In contrast to the main scale, the fine scale (sub scale) can be omitted by setting the distance value to 0. In this case no sub scale marks would be shown. Since the checkboxes "Frame inside" and "Frame outside" were unticked in the example, the inner and outer arc of the scale are hidden.
Once the scale has been specified, the scale labels can be formatted in the "Label" section.
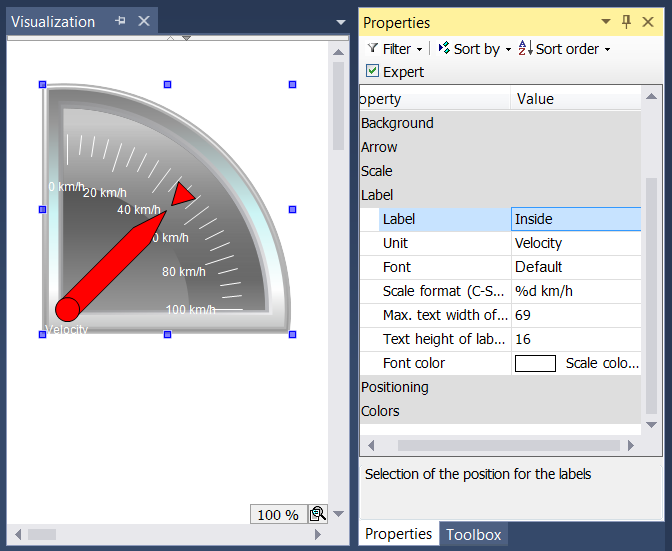
By changing the label from "Outside" to "Inside", the scale marks are moved to the inside of the scale. The entry in the field Unit appears below the base of the arrow. Once a suitable font and font color has been selected, the formatting of the scale marks can be adjusted. The numerical value of the scale must be formatted based on the syntax of the C programming language. Use "%d" for integer and "%.Xf" for floating-point number, whereby "X" should be replaced by the required number of decimal places. The values in the following two input fields are entered according to the settings made previously in this section. The values only have to be changed, if the automatic adjustment does not lead to the required result.
Finally, in the Colors section certain areas of the scale can be colored by creating color areas using the  button. The color areas are numbered in ascending order. Each color area is assigned its own input fields within the element properties.
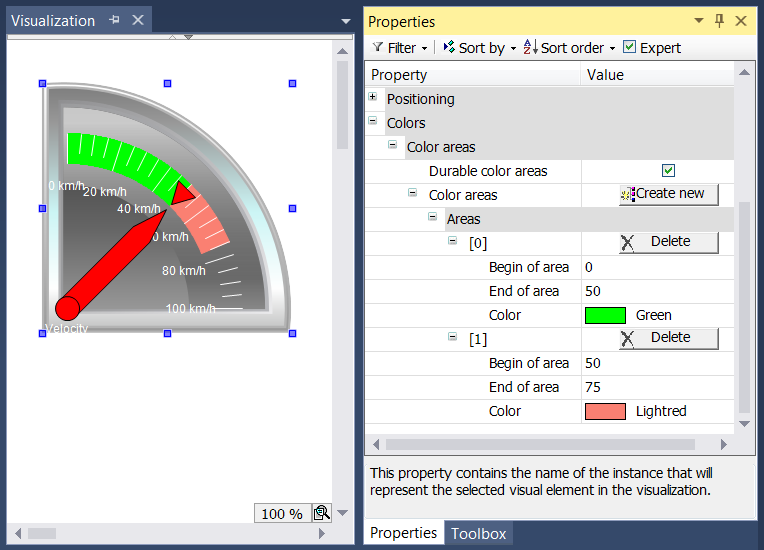
The fields "Begin of area" and "End of area" are available for specifying the subsection of the scale. The color can be selected from pull-down menu and deleted again with the  button.
The effect of the checkbox "Durable color areas" is only apparent at runtime. In first case the checkbox is ticked, in the second case it is not ticked.
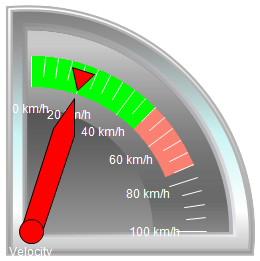
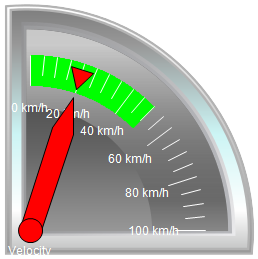
While the lower pointer instrument only shows the color area containing the arrow, the upper element shows all color areas that were created, since the checkbox "Durable color areas" was ticked.