Self-Signed Certificates (SSC)
When setting up the connection, Self-Signed Certificates require the checking of the communication device, as no trust basis automatically exists.
This check is made possible in TwinCAT by the fingerprint of the opposite system.
Displaying the SSC fingerprint on a system
The fingerprint of your own system is displayed in the About TwinCAT dialog:
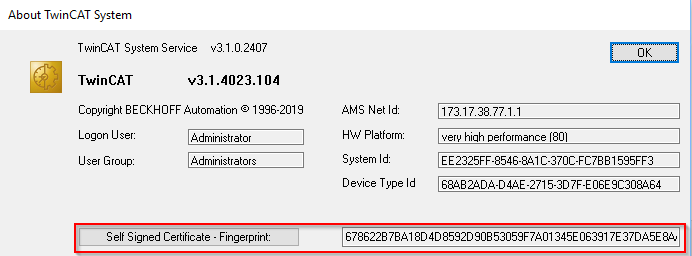
The button Self Signed Certificate - Fingerprint: copies the fingerprint listed on the right to the clipboard.
This dialog does not exist for CE systems. The fingerprint can be displayed here in the file \Hard Disk\TwinCAT\3.1\Target\TcSelfSigned.xml.
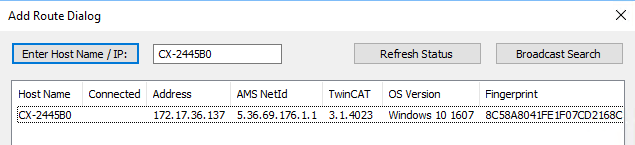
Establishment of the connection
The fingerprint is displayed purely for information and cryptographically unsecured following the discovery:
The final checking of the fingerprint takes place when setting up the route:
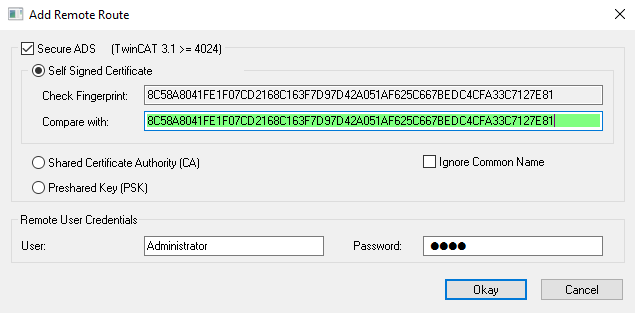
The Compare with field can be used, for example, with copy & paste for checking: If the same fingerprint is entered there the field appears green, otherwise it is red.
Thus, an RDP connection, for example, can be used to copy the fingerprint of a system to the clipboard via the Self Signed Certificate - Fingerprint button and to enter it here.
So that the target system will accept the route establishment, a system login with corresponding administrator rights that is valid there is used.
These login data are already transmitted in encrypted form.
With CE systems the host name is always entered with TwinCAT 3.1 4024.5, even if IP address was selected when creating the route. Therefore, if a network without a functioning host name lookup is to be used, the host name must be changed manually by the IP address in the file \Hard Disk\TwinCAT\3.1\Target\StaticRoutes.xml.